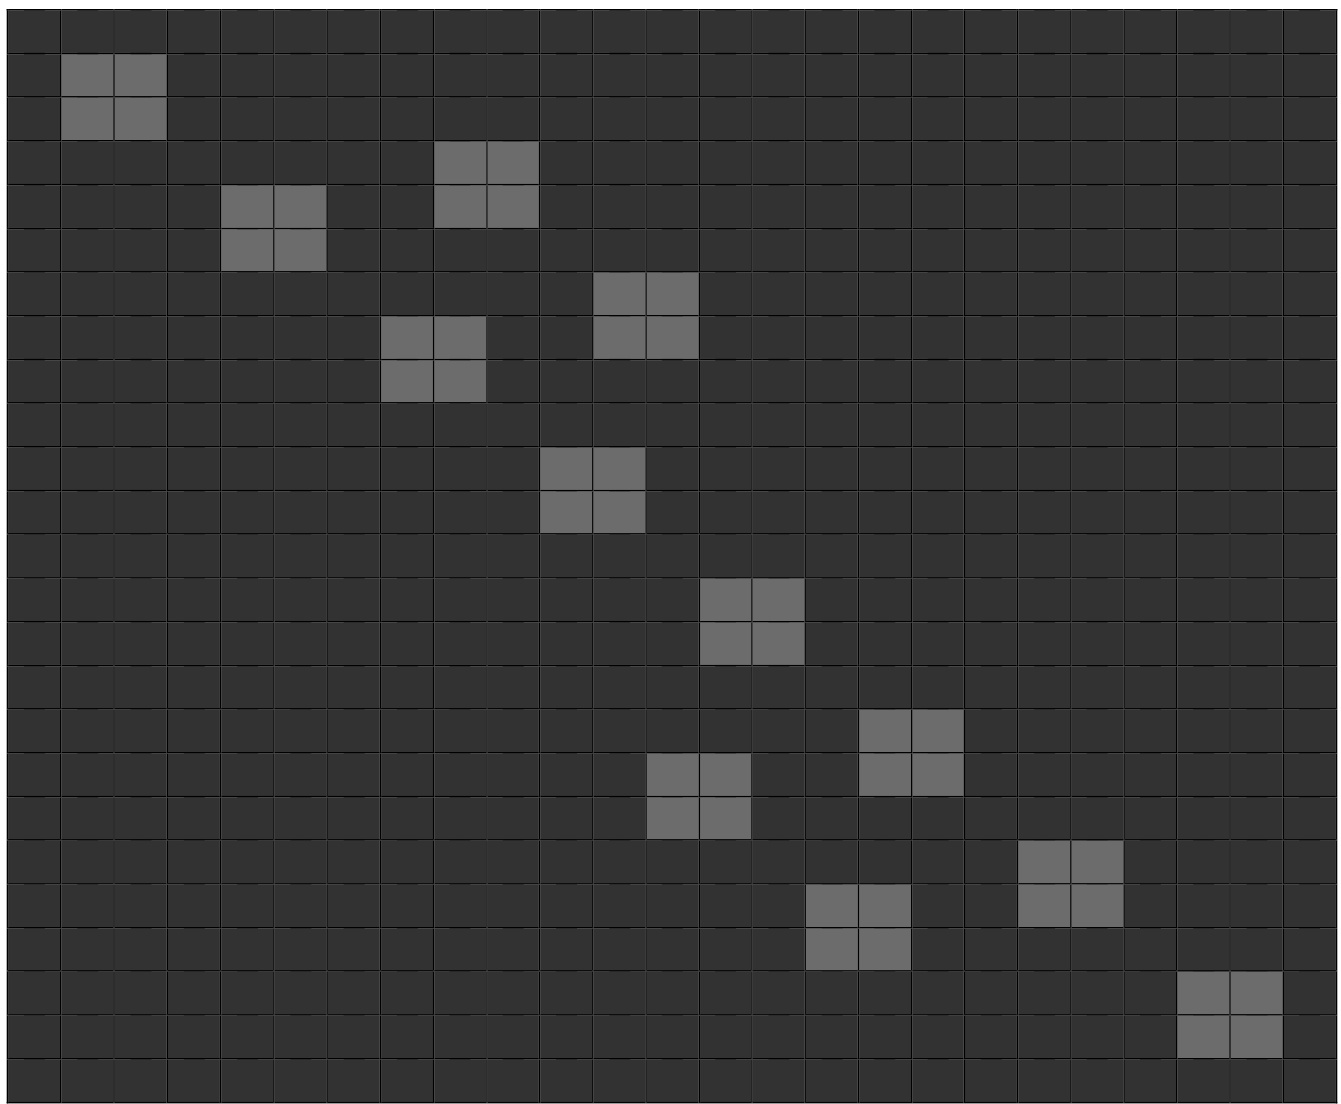
Right Glove Left Glove
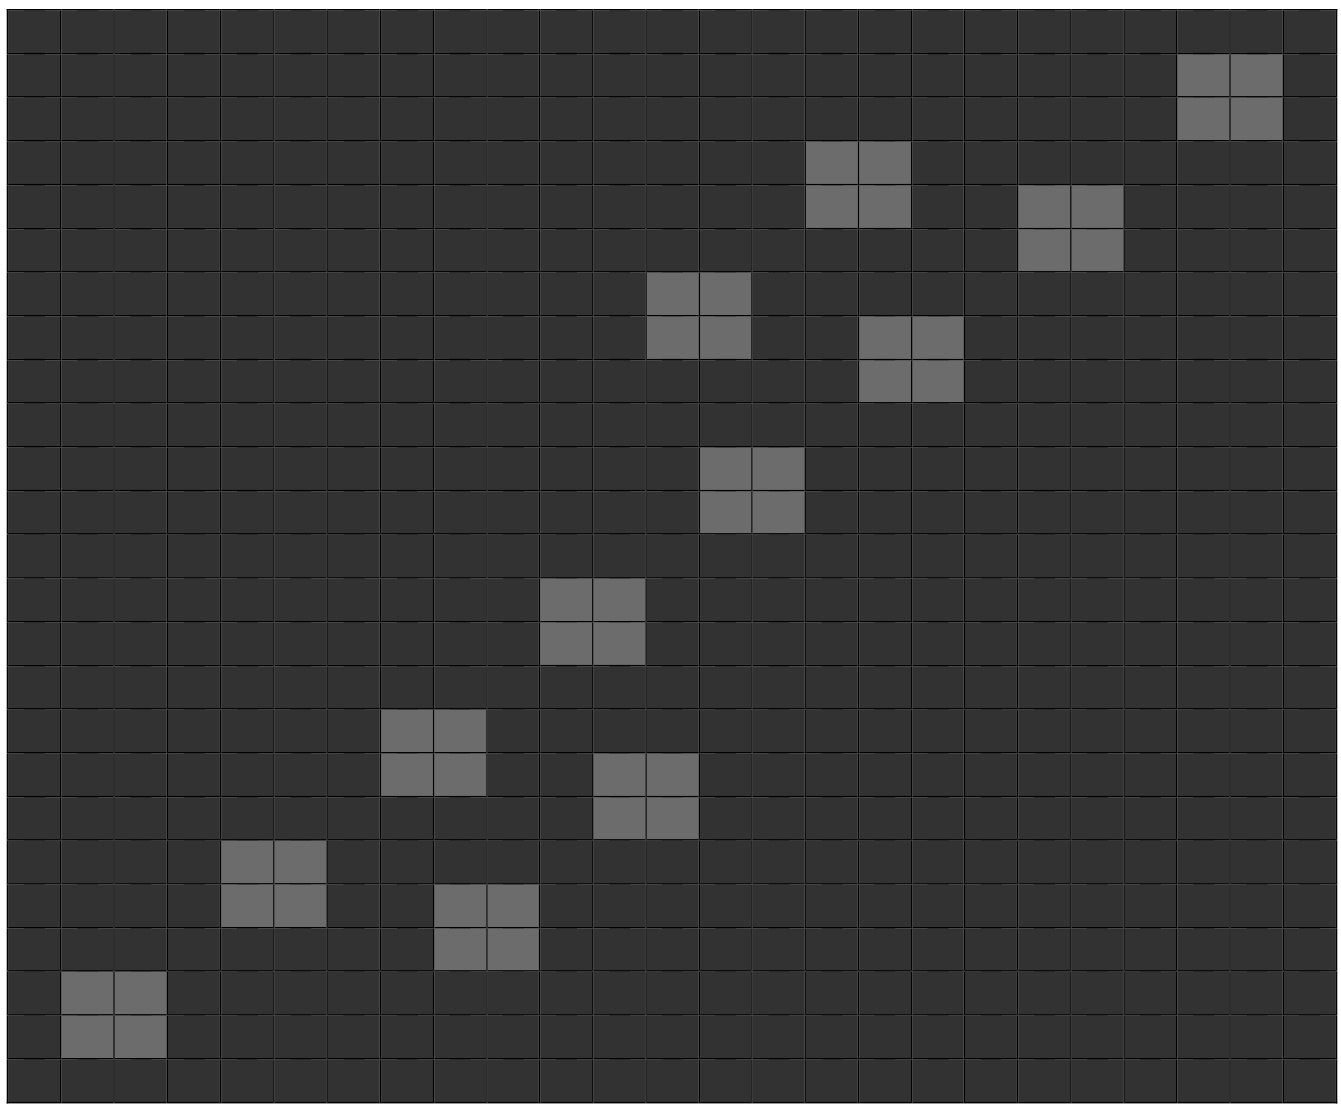
Materials Needed: $5.0\;\mathrm{mm}$ crochet hook (h) 1 skein of Caron Simply Soft in Black 1 skein of Caron Simply Soft in Grey Heather Tapestry needle Directions: This is a basic template for gloves reminiscent of the studded ones worn by Michael Jackson in his “Bad" music video. It's more of a method than a step-by-step instruction but I will do my best to be clear. I intend to work it in tapestry crochet but it can be worked in any of the techniques for changing colors in either knitting orcrochet. 1. Work the chart as shown for both left and right hands. This should work out, as is, as a size small..possibly an extra small. 2. Extra rows should be added in black at either side of the initial square as needed. Keep in mind, if you add a row on one side, you will need to add a row on the other side to keep it balanced. 3. Fold both squares the same direction and crochet up the side to “"close the glove." You will work 6 SC through both sides, leave 9 SC unworked so that you have a 9 stitch long opening for the thumb and work 10 SC through both sides to complete the seam of the glove. 4. I would recommend actually finishing the thumbs of the glove to make a completed thumb because that will look more like the gloves in the video. Directions for the thumb (do this for both gloves): 1. Starting at the top of the opening to the thumb, Join the black yarn where the two sides (of the opening) meet. SC in that stitch, SC down the side for 9 stitches, SC at the bottom of the opening to the thumb at the point where the two sides meet, and SC up the other side of the opening for 9 stitches. (for a total of 20 sC), do not join but continue working in a circle. 2. SC all the way around (20 sts) 3. SC in the next 8 stitches, 2SCtog, 2SCtog, SC in the next 8 stitches (18sts) 4. SC in the next 7 stitches, 2SCtog, 2SCtog, SC in the next 7 stitches (16sts) 5. SC in the next 6 stitches, 2SCtog, 2SCtog, SC in the next 6 stitches (14sts) 6. SC in the next 5 stitches, 2SCtog, 2SCtog, SC in the next 5 stitches (12sts) 7. Depending on how big your thumb is, you will either work the same pattern again to drop down to 10 stitches around or you will continue in rounds for 12 stitches around 8. Do rounds of either 10 or 12 stitches until the thumb is about a centimeter shorter than your thumb. 9. 2SCtog, 2SCtog, 2SCtog, 2SCtog, 2SCtog, (and once more if you have a 12 stitch diameter thumb), cut the yarn with several inches of tail 10. Use a tapestry needle to sew up the end by running the tail through the remaining stitches and pulltight or continue to 2SCtog around until the end closes and tie off. This pattern is copyright June 27, 2009 by Nichole M. Vervill. This pattern may not be sold. The finished product from this pattern may be sold as long as I am credited for the pattern. The pattern may be used as long as I am credited for the pattern.


