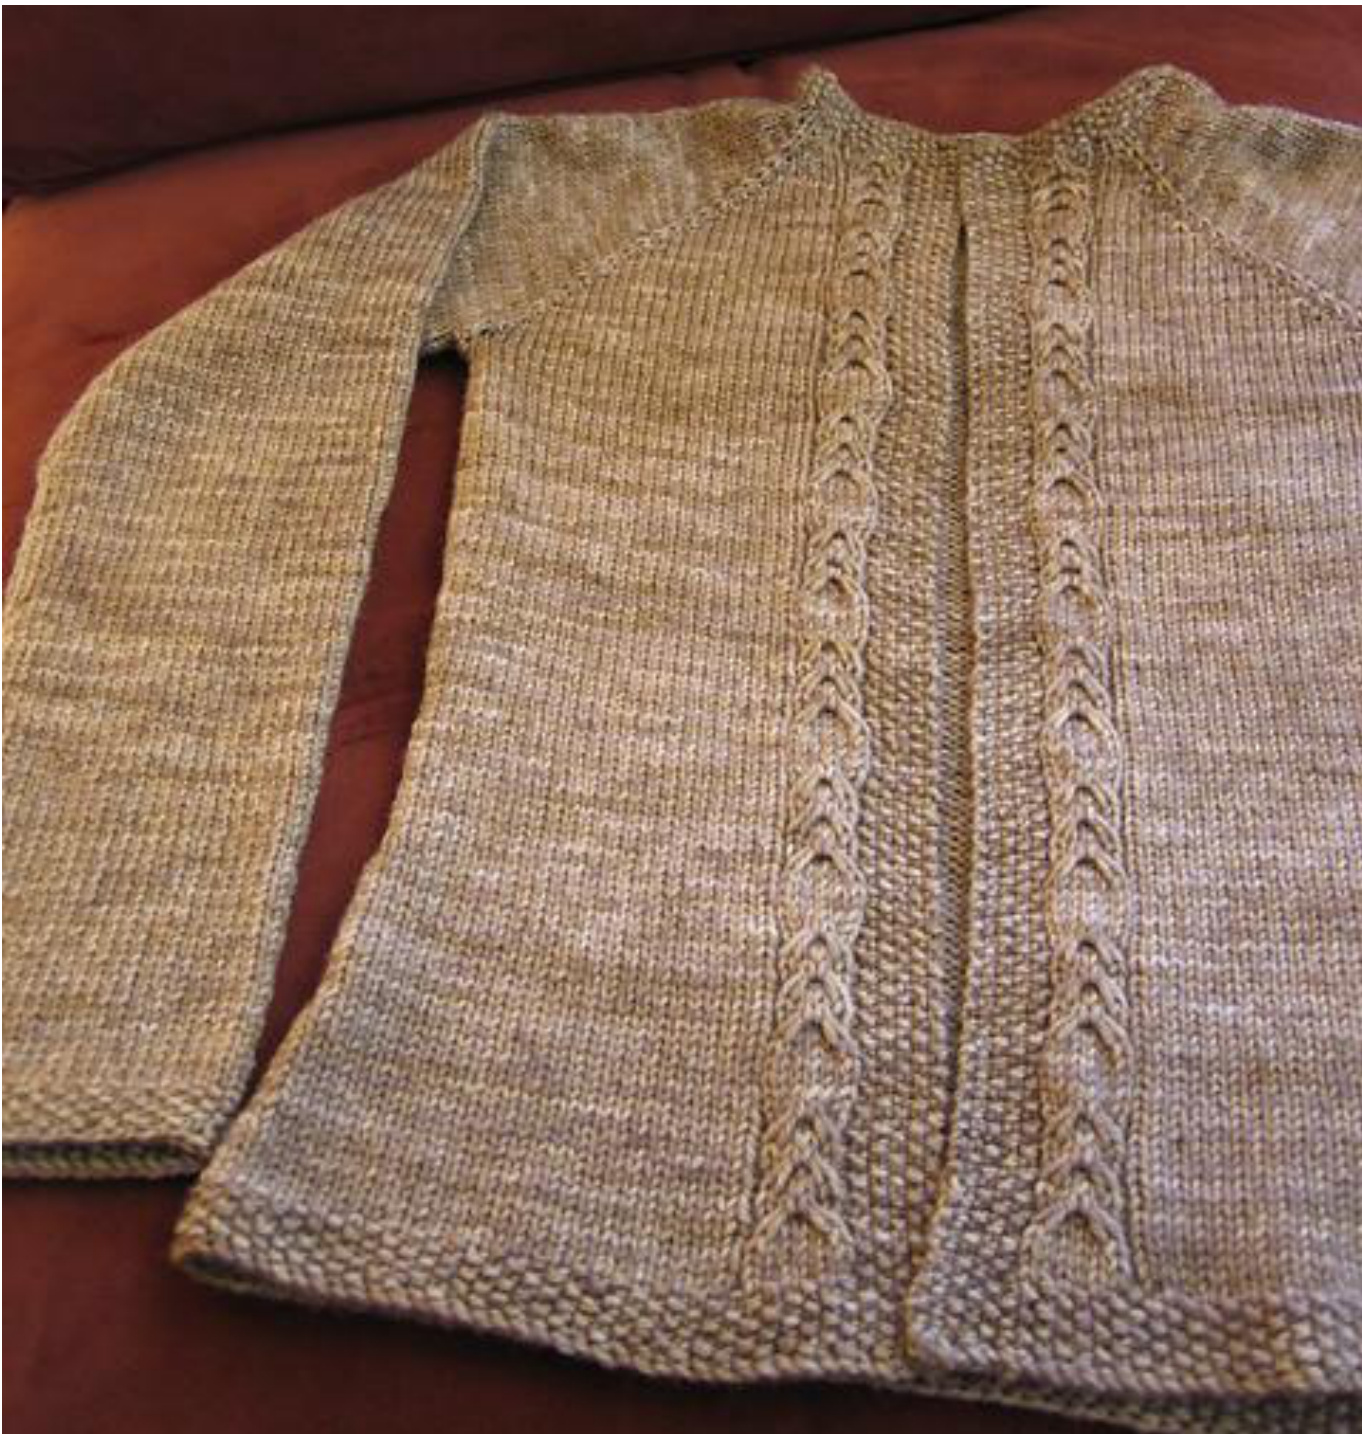
By: Kate Hiester (Ravelry name: wirledpeas \* wirledpeas@gmail.com) This simple, top-down sweater was inspired by The Plucky Knitter's beautiful yarn. Semi-solid worsted looks wonderful on a canvas of plain stockinette, but the cable and seed stitch keep you interested. No seams, no button holes, nothing extra means that when you weave in ends, you are done! I have also included some notes about points where you can customize the cardigan to fit you best. Sizing & Fit Bust: 30 (32, 34, 36)[38, 40, 42, 44]{46, 48, 50, 52} The sweater is designed to have zero to slightly negative ease, with body-skimming waist and arm shaping. When in doubt, I recommend using a larger size. Yarn The Plucky Knitter: Superwash Merino Worsted. 4 (4, 5, 5)[5, 6, 6, 6]{7, 7, 8, 8} skeins -Or Approximately 795 (860, 925, 975)[1035, 1120, 1200, 1290]{1375, 1475, 1575, 1685} yards of worsted weightyarn. Gauge 4.75 sts/inch; 7.25 rows/inch in garment (which is slightly looser than in swatch) Equipment: Size 7 circular needle or size needed to obtain gauge 4 stitch markers Wasteyarn Darning needle for weaving in ends
STITCH ABBREVIATIONS/OTHER DIRECTIONS
k-knit p-purl sl - slip stitch purlwise sl2wyib - slip 2 with yarn in back: holding yarn to back, slip 2 stitches purlwise sl2wyif - slip 2 with yarn in front: holding yarn to front, slip 2 stitches purlwise kfb - knit front & back (aka bar increase): knit the stitch normally, but to not remove from left needle; knit into back of same stitch, then remove from left needle (increases 1 stitch) m1R - make 1 right: insert left needle under yarn between last worked stitch and next stitch from back to front; knit into front of this loop (increases 1 stitch that leans right) m1L - make 1 left: insert left needle under yarn between last worked stitch and next stitch from front to back; knit into back of this loop (increases 1 stitch that leans left Seed stitch (even # of sts) - Row 1: k1, p1 to end; Row 2: p1, k1 to end (knit the purls and purl the knits) Work sts - continue same patterns (seed stitch, cable, and/or stockinette) as above
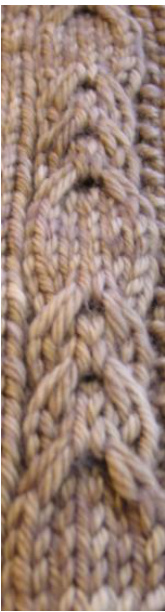
CABLE PATTERN - 16 roWs, 8 stitches
The written pattern describes how to knit this cable without a cable needle. The instructions for the chart describeitwith a cableneedle. Row 1 - WS: K1, P6, K1 Row 2 - RS: P1, K2, SI2wyib, K2, P1 Row 3 - WS: K1, P2, SI2wyif, P2, K1 Row 4 - Rs: P1, Sl 2, drop next st to front, return 2 slipped sts to left needle, pick up dropped stitch, K3, drop next st to front, slip next 2 sts, pick up dropped stitch, return 3 sts to left needle, k3, p1. Essentially, you are moving the two elongated stitches from the center to the outside of the cable. Repeat Rows 1-4 three times. Row 13 - WS: K1, P6, K1 Row 14 - RS: P1, K6, P1 Row 15 - WS: K1, P6, K1 Row 16 - RS: P1, K6, P1
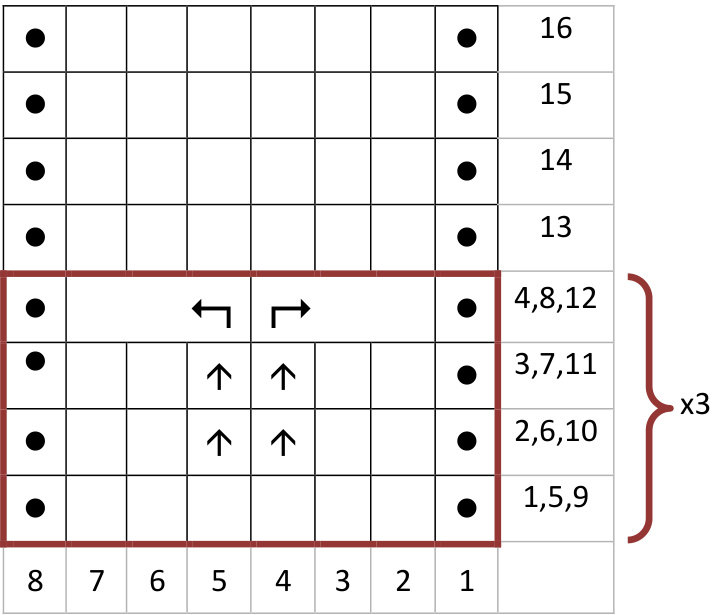
O- purl on RS, k on WS ↑ - slip stitch, with yarn held to WS - slip two sts to cable needle and hold to back, k1 (slipped st), k2 from cable needle - slip 1 st (slipped st) to cable needle and hold to front, k2, k1 from cable needle
SWEATER PATTERN
Cast 0n 84 (84, 88, 92)[88, 92, 96, 96]{100, 100, 104, 108} stitches, Work 6 rows in seed stitch Next Row: (RS) Work 5 sts in seed stitch, p1, k6, p1, k3 (3, 4, 5)[5, 6, 7, 7]8, 8, 9, 10), pm, k10 (10, 10, 10)[8, 8,8, 8]{8, 8,8, 8}, pm, k32 (32, 34, 36)[36, 38, 40, 40]{42, 42, 44, 46}, pm, k10 (10, 10, 10)[8, 8, 8, 8]{8, 8, 8, 8}, pm, k3 (3, 4, 5)[5, 6, 7, 7]{8, 8, 9, 10}, p1, k6, p1, work 5 sts in seed stitch. Wrong Side Row: Work 5 sts in seed stitch, work Cable Pattern, purl to 13 stitches before end, work Cable Pattern, 5 sts in seed stitch. Slip markers as you come to them and continue working. Right Side Row: Work 5 sts in seed stitch, work Cable Pattern, [k to 1 st before marker, kfb, slip marker, kfb] x4, work Cable Pattern, work 5 sts in seed stitch Repeat the 2 rows of raglan increases 19 (21, 22, 24)[26, 27, 29, 31]{33, 35, 37, 39} more times. Work one more wrong side row. 244 (260, 272, 292)[304, 316, 336, 352]{372, 388, 408, 428}. I recommend slipping stitches onto waste yarn and trying on the yoke to be sure that the markers meet under your arms. If they do not, continue the raglan increases until they do!
Dividing Row (RS)
Work to 1st marker, remove marker, move all sleeve stitches to waste yarn, CO 1 st, place marker, CO1 st, kto 3"d marker, remove marker, move allsleeve stitches to waste yarn, CO 1, place marker, CO 1st, work to end of row. The two remaining markers should now be centered where each front joined the back, directly under the armpits.
Continue Body
Continue working body in stockinette, with for 13 stitch border on each front portion (5 sts seed + 8 sts cable) for about 4 inches or to bottom edge of bra band. Slip markers as you come to them. Decrease Row (Rs): Work to 3 sts before marker, ssk, k1, slip marker, k2tog, work to three sts before marker, ssk, k1, slip marker, k2tog, work to end of row. Continue pattern straight for 2 inches, then work second Decrease Row. Continue pattern straight for 3 inches. Increase Row (RS): Work to 1 st before marker, m1R, k1, slip marker, m1L, continue work to 1 st before marker, m1R, k1, slip marker, m1L, work to end of row Continue pattern straight for 2 inches, then work second increase row. \*\*If you have a longer torso, you may want to space these decreases farther apart. Measure from your bra band to your natural waist (about in line with your belly button), and note 1/3 of this number (X) and the number minus 1 (Y). X is the number of inches below the bra-band decrease to work the second decrease. Yis the number of inches after the second decrease to work the first increase. Work the second increaseX inches after the first. Work pattern straight until front is 21.5 (21.75, 22, 22.25)[22.5, 22.75, 23, 23.25]{23.5, 23.75, 24, 24.25} inches long from cast on. \*\*Again, you can keep working to ad length. Iaimed for just past my hip bone, to where I could end the cable easily (rows 1, 5, 9, or 13-16). The completed sweater hits at just about my hip-hinge point. Work 6 rows of seed stitch. Bind off normally, but somewhat loosely.
Sleeves
Slip sleeve stitches from waste yarn onto needle, picking up and knitting 2 CO sts and placing marker at beginning of round (in underarm). Knit in the round for 4 (4, 4, 4)[4, 4, 4, 4.5]{4.5, 4.5, 4.5, 4.5} inches Sleeve decrease round: Knit to 3 stitches before marker, ssk, k1, k2tog. Knit for 2 (2, 2, 2)[2.5, 2.5, 2.5, 2.5]{2.5, 2.5, 2.5, 2.5} inches. Repeat sleeve decrease round: Knit to 3 stitches before marker, ssk, k1, k2tog. Knit for 2 (2, 2, 2)[2, 2.5, 2.5, 2.5]{2.5, 2.5, 2.5, 2.5} inches. Repeat sleeve decrease round: Knit to 3 stitches before marker, ssk, k1, k2tog. At this point, the length should reachto about your elbow. From the elbow, work 4 (5, 6, 6)[7, 6, 8, 9]{11, 12, 13, 14} sleeve decrease rounds every 2.25(1.75, 1.5, 1.5)[1.25, 1.5, 1.25, 1]{0.75, 0.75, 0.75, 0.75} inches. 38 (40, 40, 44)[44, 48, 48, 50]{50, 54, 54, 56} stitches. Knit straight until sleeve reaches just past wrist bone (0-1 inches). Knit 6 rows in seed stitch. Bind off normally, but somewhat loosely. Weave in ends and enjoy!
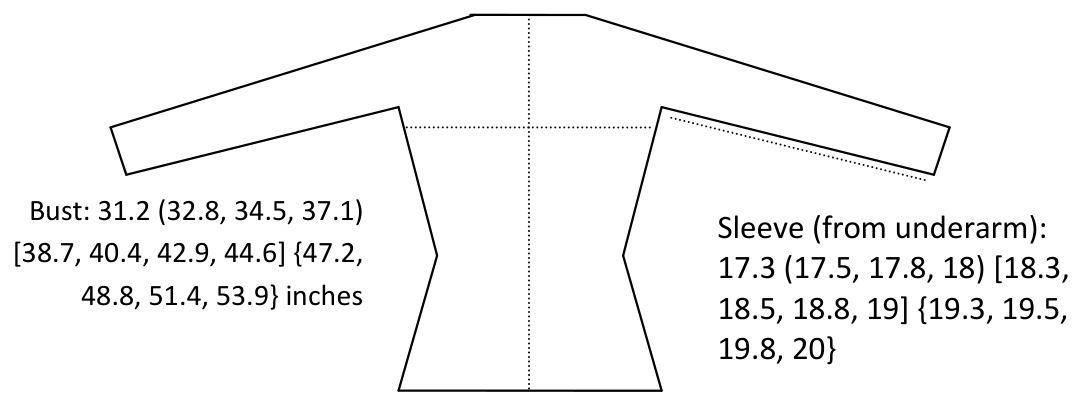
Length: 22.5(22.75, 23, 23.25 )[23.5, 23.75, 24, 24.25] {24.5, 24.75, 25, 25.25} inches