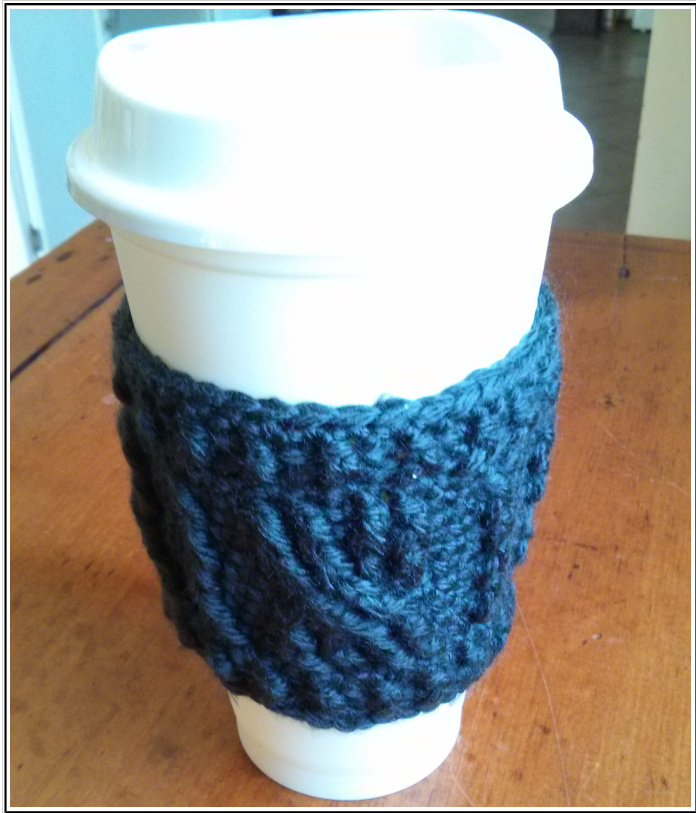
Chunky Cabled Coffee Cup Cardigar
..Hehe, say that 5 times fast!
Skill Level: Intermediate -> This is only because of the post-stitches, this is a very basic cable pattern with pictures to help explainthestitches.
Abbreviations used:
Materials:
ch - Chain sl - Slip Stitch sC - Single Crochet bpdc - Back Post Double Crochet fpdc - Front Post Double Crochet fptc - Front Post Triple (Treble) Crochet St - Stitch sts - Stitches - Worsted Weight Yarn - H Hook (5.00 mm) - G Hook (4.50 mm) \* Optional, se note.
Notes:
- Always skip the sc directly behind the fpdc when moving to the next st. - Place your frst sc of each round in the same st where your join/ch 1 is. Otherwise your work may begin to roam. - \* Optional, complete the ribbed edging (rounds 1&2, 12&13) with a smaller hook for a more snug ft.
To beqin:
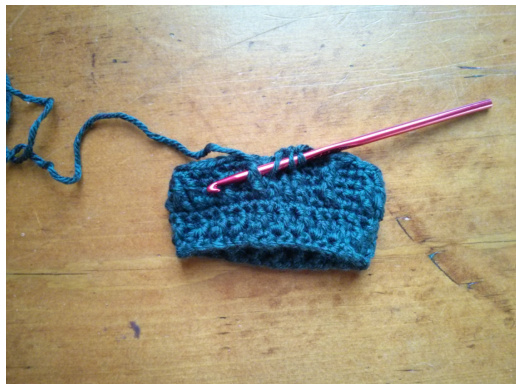
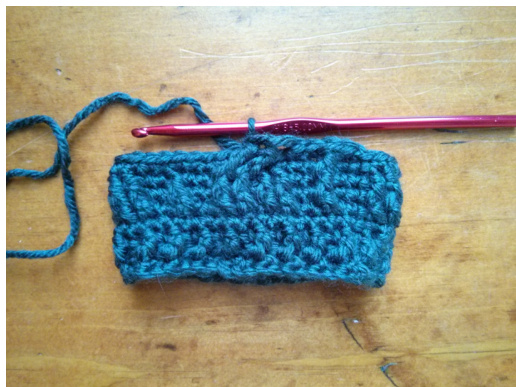
- ch 40, Taking care not to twist the foundation chain, join to beginning with a slip stitch and chain 1 Round 1: sc in back bump of each ch (40 sts now and throughout), join with sl to first sc, ch 1 Round 2: beginning in front of ch 2, \*fpdc in first sc of previous round, bpdc in next sc of previous round\* repeat 20 times, join with sl to first sc, ch 1 Round 3: sc in each st around, join with sl to first sc, ch 1 Round 4: \* sc in next 2 sts, fp dc around next st, sc in next 2 sts, fpdc around next 2 sts, sc, fpdc around next 2 sts\* repeat 3 more times, join with sl to first sc, ch 1 Round 5: sc in each st around, join with sl to first sc, ch 1 Round 6: \* sc in next 2 sts, fpdc around next fpdc, sc in next 2 sts, fpdc around next 2 fpdc, sc in next st, fpdc around next 2 fpdc \*, repeat 3 more times, join with sl to first sc, ch 1 Round 7: sc in each st around, join with sl to first sc, ch 1 Round 8: (Cable row) \* sc in next 2 sts, fpdc around next fpdc, sc in next 2 sts, skip 3 sts, fptc in next 2 fpdc, working behind sts just made place sc in skipped sc, working in front of sts again, fptc around 2 skipped fpdc\* , repeat 3 more times, join with sl st to first sc, ch 1. Round 9: sc in each st around, join with sl to first sc, ch 1 Round 10: \* sc in next 2 sts, fpdc around next fpdc, sc in next 2 sts, fpdc around next 2 fptc, sc in next st, fpdc around next 2 fptc \*, repeat 3 more times, join with sl to first sc, ch 1 Round 11: sc in each st around, join with sl to frst sc, ch 1 Round 12: beginning in front of ch 2, \*fpdc in first sc of previous round, bpdc in next sc of previous round\* repeat 20 times, join with sl to first sc, ch 1 Round 13: sc in each st around, join with sl to first sc, fasten off and weave in ends. Here's some close-up images of the cable row stitches:
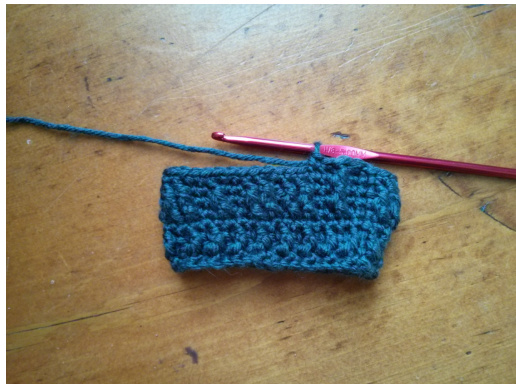
I: "sc in next 2 sts, fpdc around next fpdc, sc in next 2 sts." (Completed)
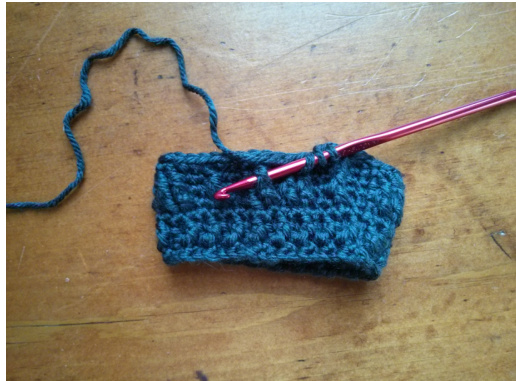
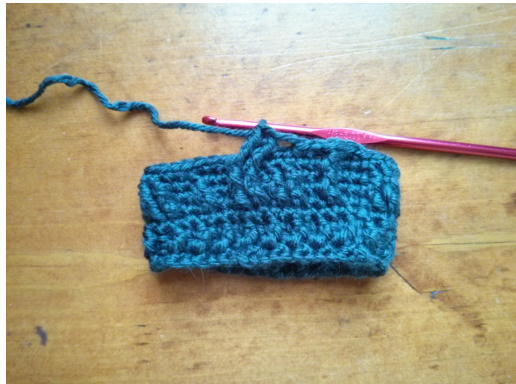
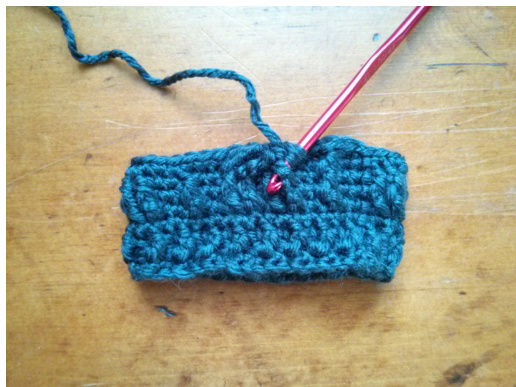
2: "Skip 3 sts"
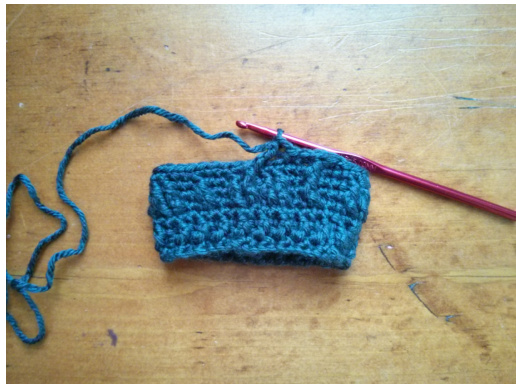
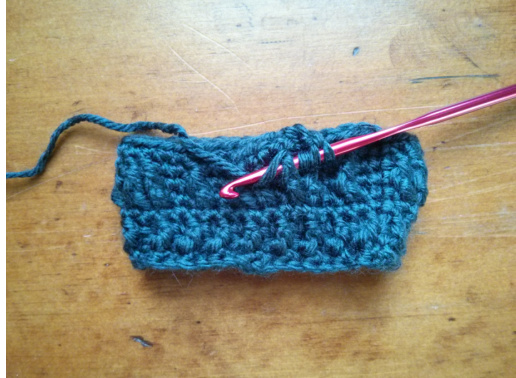
3: "fptc around next 2 fpdc" (In progress, 1st fptc completed)
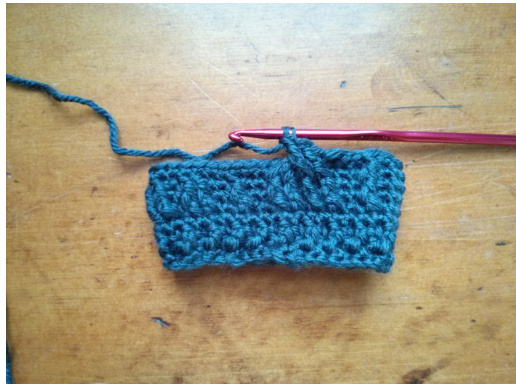
4: "fptc around next 2 fpdc" (2nd fptc in progress)
5: "fptc around next 2 fpdc" (2nd fptc completed)
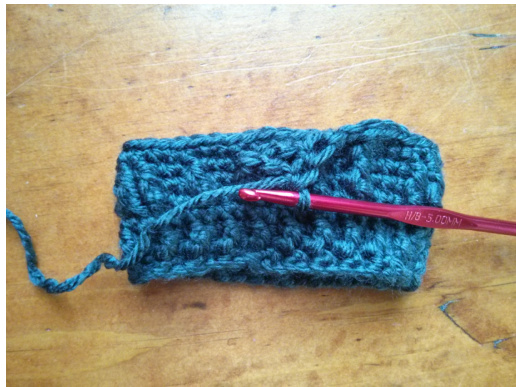
6: "working behind sts just made" (You can pull the stitches forward to see the previous row which now rests behind.)
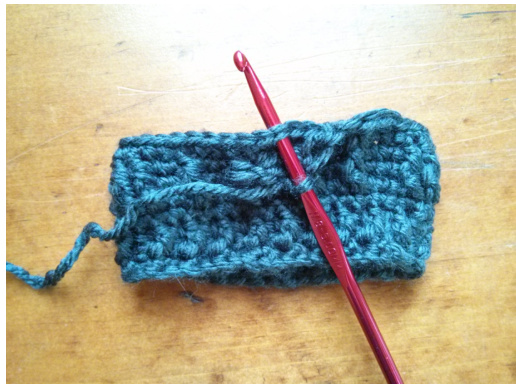
7: "place sc in skipped sc" (In progress, skipped sc is the 3rd st that was skipped at the beginning of cable)
8: "working behind sts just made place sc in skipped sc," (Completed)
orking in front of sts again, fptc around 2 skipped fpdc" (In progress, 1st fpt
king in front of sts again, fptc around 2 skipped fpdc" (In progress, 2nd fptc
"working in front of sts again, fptc around 2 skipped fpdc" (2 fptc completec

12: Cable stitches completed. I hope that helps explain the positioning of the stitches. It willook a bit messy once you've completed the cable row, but the next round of sc will help align everything to where it should be. And for the finished product:

Chunky Cabled Coffee Cup Cardigan by Jennette S. Reid is licensed under a Creative Commons Attribution-NoDerivs 3.0 Unported License. Based on a work at http://jennetters.livejournal.com/1063711.html.


