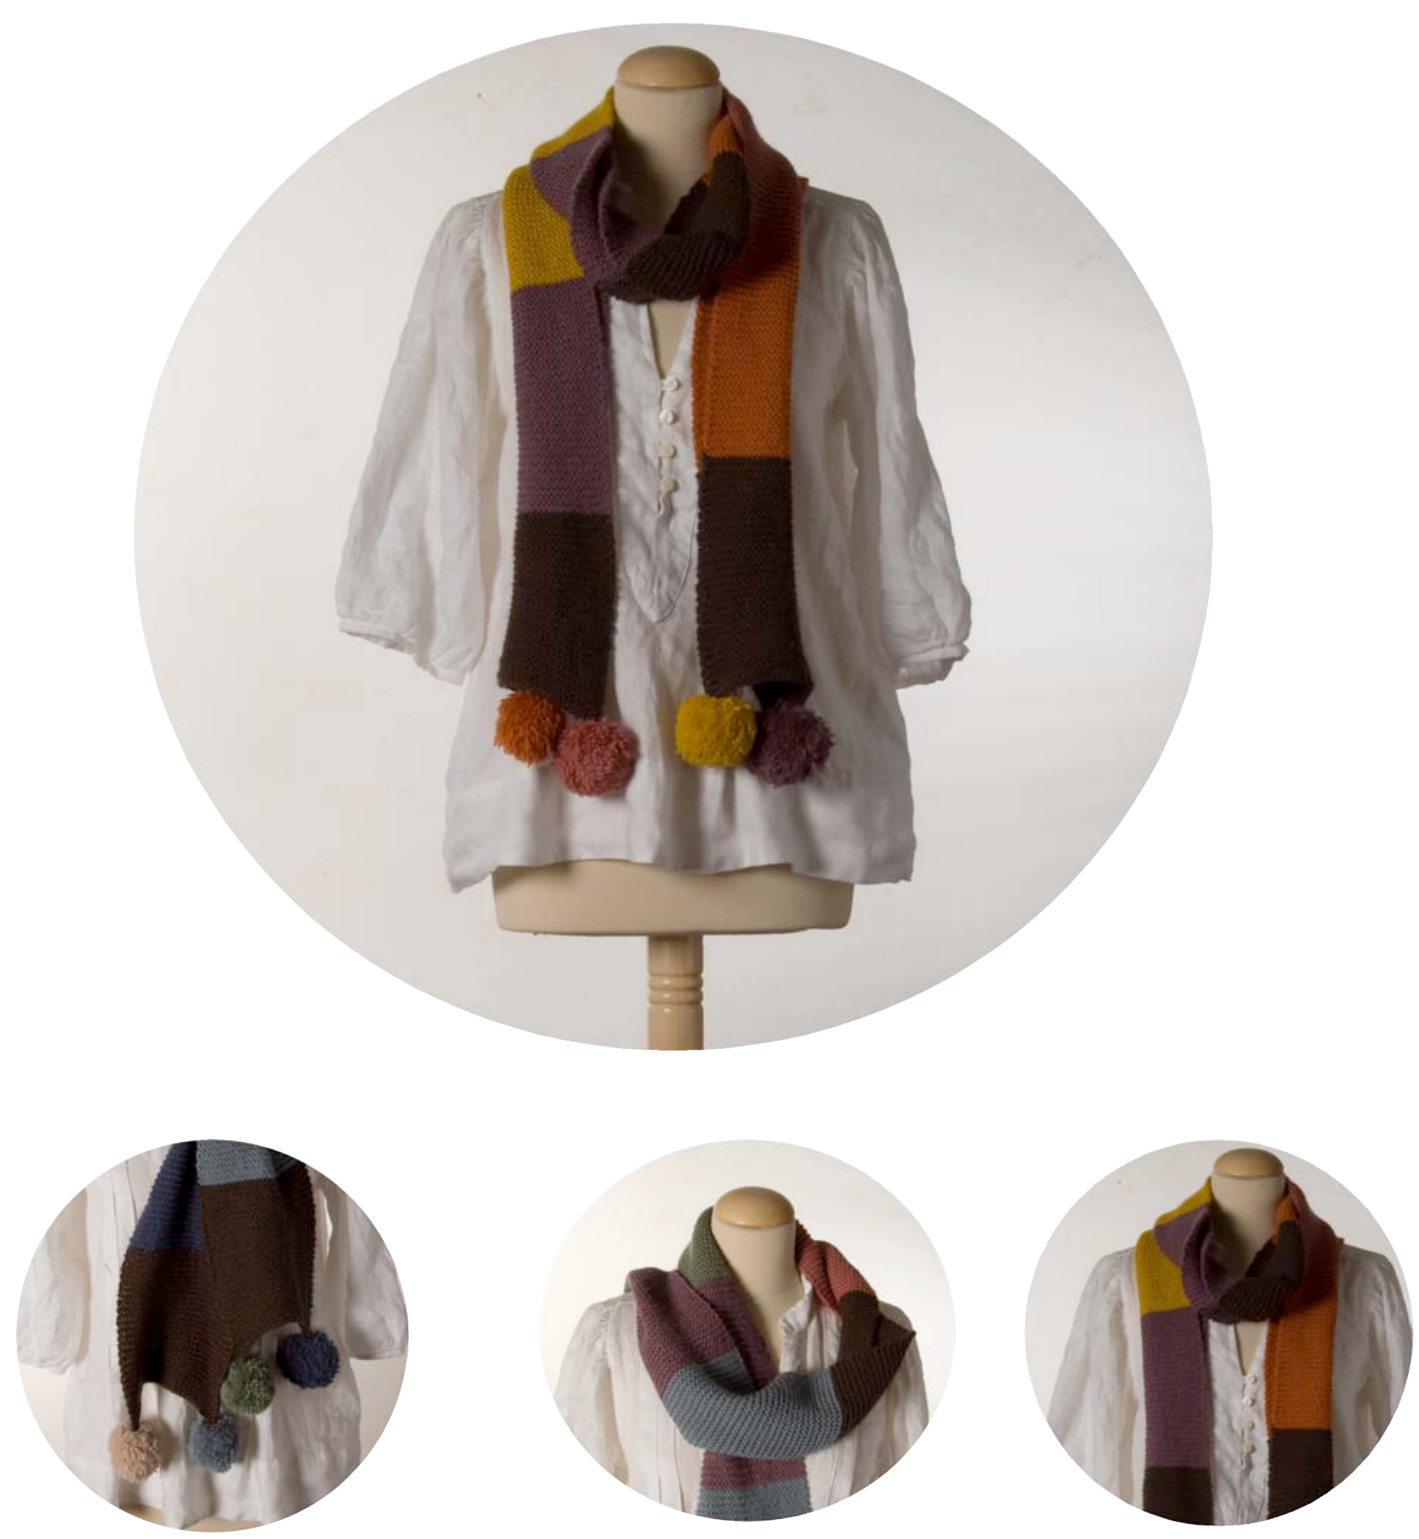
Looooooong and colorful scarf to keep you warm on the dullest days of winter. Worked in garter stitch and perked up by four pompoms. Named after my perky sister, Coco, who drew that little birdie on the corner. STITCH GUIDE garter stitch Knit all rows
INSTRUCTIONS
SCARF Cast on 35 stitches with color A. Work 18 cm / 7 in in garter stitch. Next row change to color B. Work 18 cm / 7 in in garter stitch. Next row change to color C. Work 18 cm / 7 in in garter stitch. Next row change to color D. Work 18 cm / 7 in in garter stitch. Next row change to color E. Work 18 cm / 7 in in garter stitch. Next row change to color A. Work 18 cm / 7 in in garter stitch. Next row change to color B. Work 18 cm / 7 in in garter stitch. Next row change to color C. Work 18 cm / 7 in in garter stitch. Next row change to color D. Work 18 cm / 7 in in garter stitch. Next row change to color E. Work 18 cm / 7 in in garter stitch. Next row change to color A. Work 18 cm / 7 in in garter stitch. Next row bind off al stitches.
POMPOMS
With the drawings as a guide, make 1I pompom in each of the following colors : B, C, D and E.
FINISHING
Weave in all ends. Sew 1 pompom to each corner of the scarf
HOW TO MAKE A POMPOM
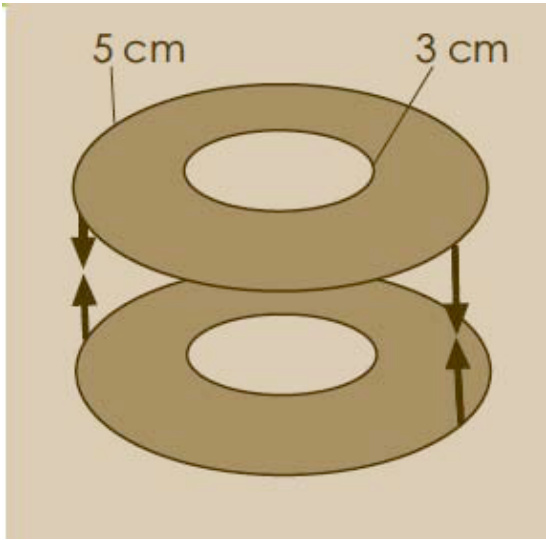
1 Cut two cardboad circles $5\mathsf{\,c m}\,/\,2$ in diameter. With a hole in the middle of $3\,{\mathsf{c m}}\,7/\,2\,^{1}/_{4}$ in diameter.

2 With a small ballof yarn, wrap the two circles together repeatedly.
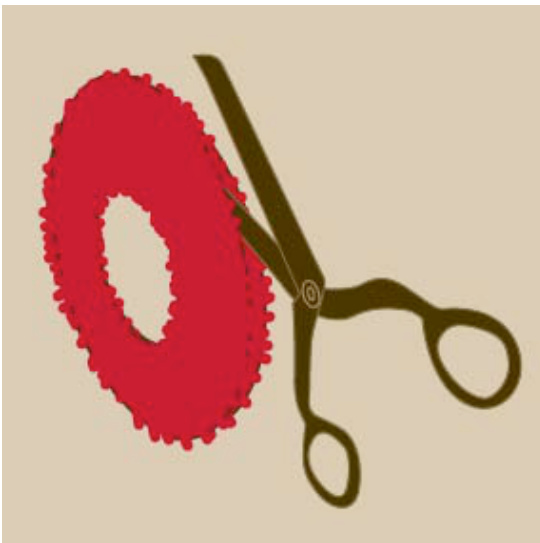
3 Cut between the two cardboard circles.
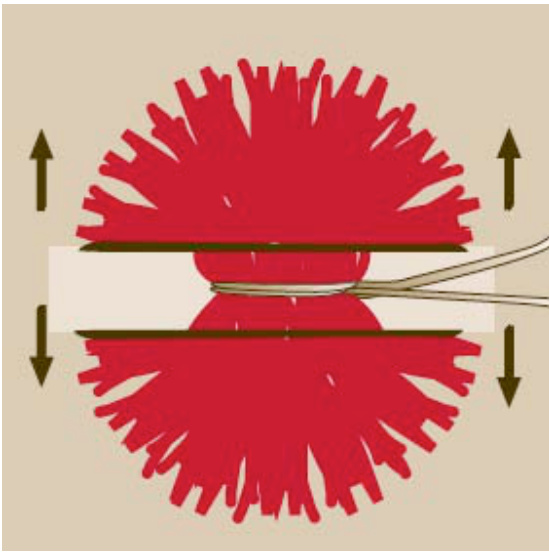
4 Separate the circles and tie the yarn together. Remove the circles.
$\circledcirc$ Lia Knits 2006
This pattern is property of Lia Knits and may be printed for personal, non-commercial use only. You may not resell copies of this pattern nor the finished items made using it.


