FARTHING PATTERNS
1 / 12th scale Ladies Camisole Top (c.1922) To FIT A 51/2-INCH/ 14 CM TALL DOLLS HOUSE DOLL
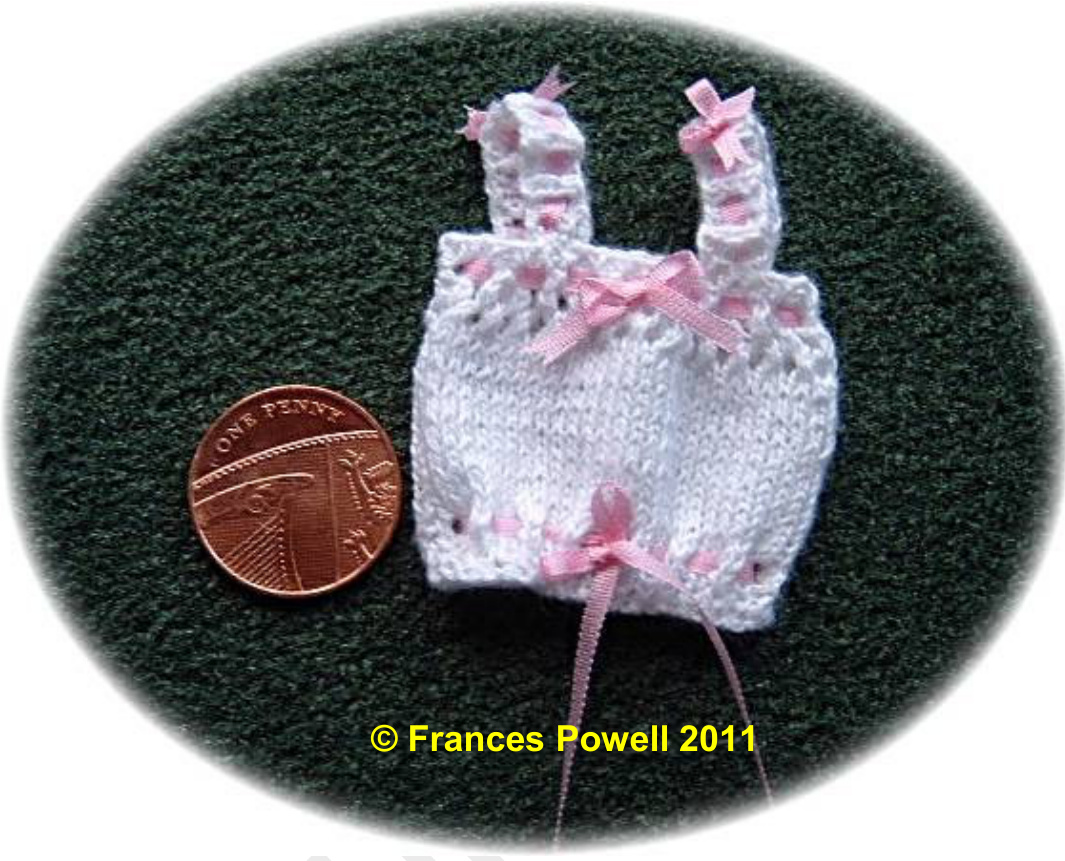
Materials required: one pair size 18 (1.25 mm/US size 4/0) knitting needles, 25 metres 1-ply cotton, 1 metre of 2 mm wide silk ribbon for trimming.
Approximate finished size:
11/2-inches/4 cm at widest point by 2-inches/5 cm tall Gauge - Gauge is not important as dolls house dolls (like humans) vary greatly in size and proportions Abbreviations: st - stitch; k - knit; p - purl; () - repeat instructions between brackets as detailed in text; p2tog - purl next two stitches together to form one stitch; k2tog - knit next two stitches together to form one stitch; yrn - place yarn round needle to form a stitch; sst - stocking (stockinette) stitch: one row knit, one row purl.
Historical note:
The camisole top at this time consisted of a tube of fabric or knitting, which was shaped and held to the figure by tying ribbons. The garment may appear overly large, flat and shapeless until the ribbons are tied. By the 1930's camisole tops had a much more figure hugging shape. The brassiere (bra) did not come into common use until the early 1930's and these camisole tops were worn for modesty as well as warmth, especially as frocks and blouses were now being made of finer silks and lawn materials. Ribbons tied at the shoulders allowed the straps to be tightened so the camisole stayed in place. Back and Front (make 2 alike) Cast on 30 sts. Rows 1-3: (k 1, p 1) to end. Row 4 (make eyelets for ribbon): p 1, (yrn, p2tog) to last st, p 1. Rows 5-20: sst Row 21: k 1, (k2tog, yrn) to last st, k 1. Row 22: p Row 23: k 1, (yrn, k2tog) to last st, k 1. Row 24: p Row 25 (eyelets for ribbon): k 1, (k2tog, yrn) to last st, k 1. Row 26: (k 1, p 1) to end. Cast off in pattern. Shoulder straps (make 2 alike) Cast on 24 sts. Row 1: (k 1, p 1) to end. Row 2 (eyelets for ribbon): k 1, (k2tog, yrn) to last st, k 1. Row 3: (k 1, p 1) to end. Cast off in pattern.
To make up
1.With right sides together sew up side seams. 2. Sew shoulder straps to top of camisole, these should be positioned midway between the side seams and the centre front/back. 3. Make sure the camisole is inside out. Cut a 4-inch/10 cm piece of ribbon, (making sure you sew to the wrong side of work) sew the ribbon to the join of the shoulder strap. 4. Repeat step 3 on other end of shoulder strap (there is now a piece of ribbon sewn to each end of the strap) 5. Thread the ribbon through a needle and carefully thread in and out the eyelets so the ribbons meet at the top of the shoulder, making sure the ribbon lies flat. 6.Turn right side out. Pull the ribons up slightly and tie in a bow. Do not trim ends yet. 7. Repeat steps 3 to 6 on the other shoulder strap. 8. When you are happy that both shoulder straps are the same length and bows are level, cut ribbon close to bow. If you are fiting the camisole on a doll, this may be left until the ribbons are all threaded through the camisole. 9.Cut an 8-inch/20 cm length of ribbon and making sure you are working on the right side of camisole carefully thread the ribbon through the eyelet holes made on row 25. Start at the centre front and work round the camisole top making sure the ribbon lies flat. Do not tie in a bow yet. 10. Repeat step 9 but work around eyelet holes made on row 4. 11. Tie bow in upper ine of ribbon, so the camisole is gently gathered but not tight. This upper part should be wider than the waist on the finished camisole. Tie bow and trim ends. If fitting on a dollit may be easier to complete this part before tying shoulder strap ribbons. Il up ribbons at waist and tie, but leave a longer tail' on the ribbon as shown in photo


