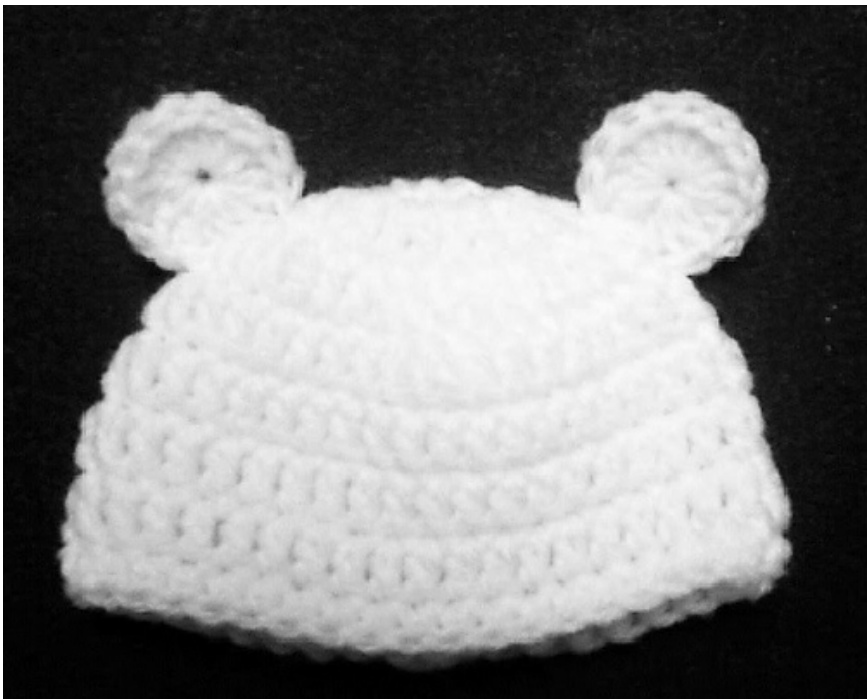
Blythe Bear Hat Crochet Pattern
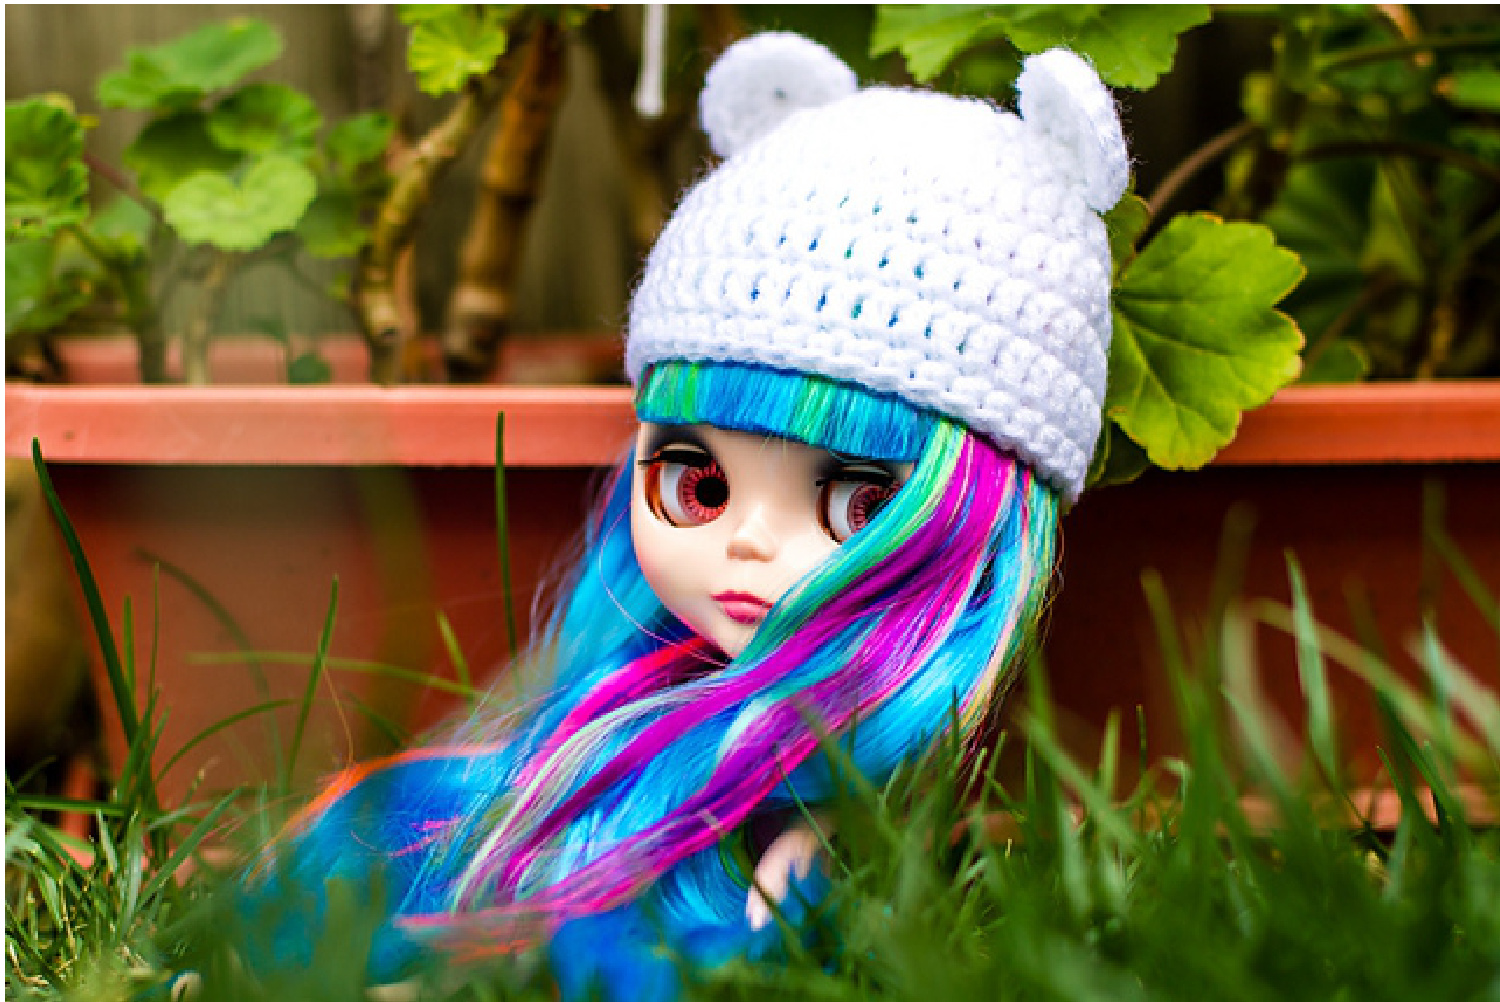
This is a basic double crochet beanie pattern. You can make any kind of ears you'd like! :)
Materials:
. Worsted weight yarn (I used Red Heart Super Savers)
Tools:
E/3.5mm hook or size to obtain gauge
Gauge:
3.5 stitches and 2 rows per 1" (2.5cm)
Hat Height:
3.5 inches (9cm)
Abbreviations:
Ch - Chain Dc - Double crochet 2 dc - 2 double crochet increase Sc - Single crochet 2 sc - 2 single crochet increase St(s) - Stitch(es) R# - Round #
Magic Ring:
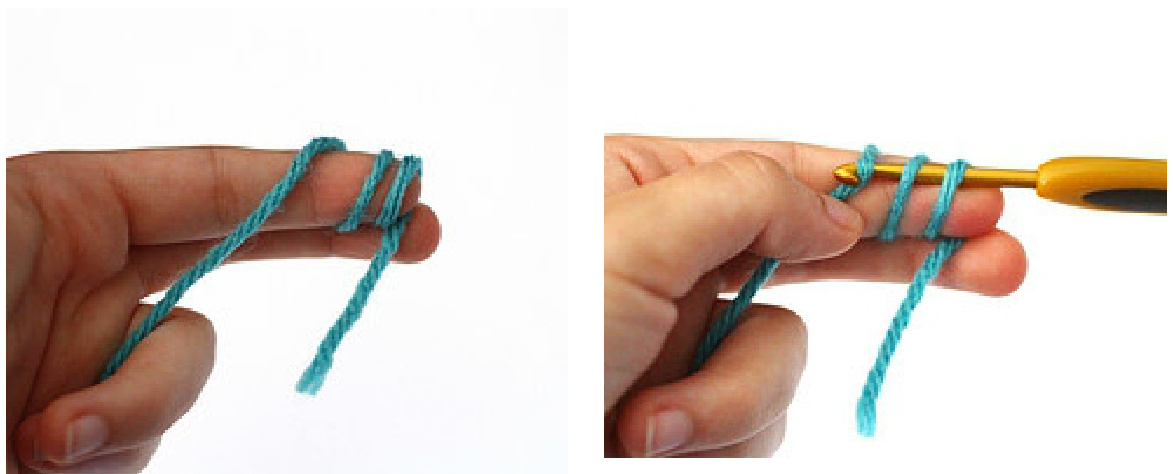
A few inches from the end of the yarn, wrap two loops over your finger. While the loops still on your finger, insert the hook from right to left into the loops and pull the working yarnthrough.

Carefully take the loops off your fingers and chain one. This doesn't count as the first stitch.
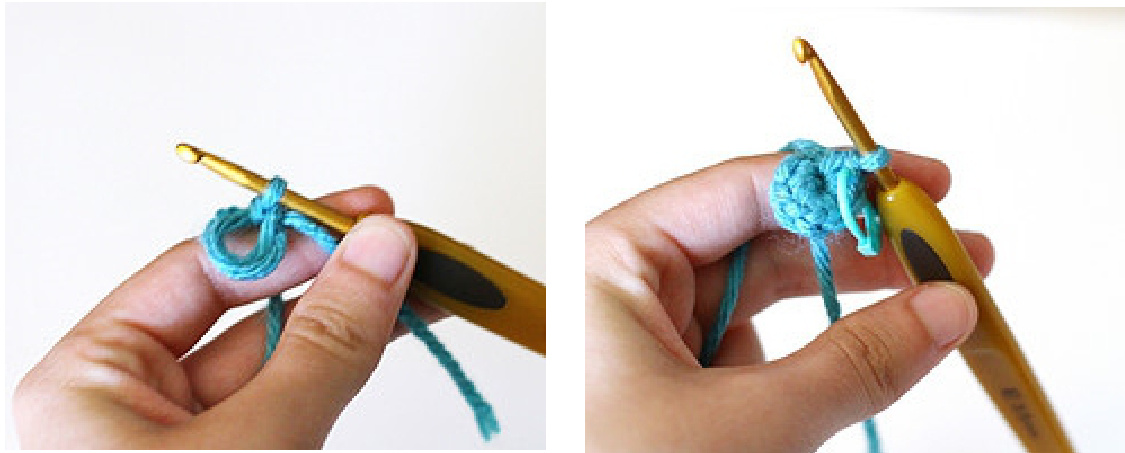
Insert the hook into the two loops again and pull up a loop. Yarn over and draw through both loops. This counts as the first single crochet stitch. Continue for the rest of the stitches. Then pull the yarn tail to close the hole.
Pattern:
· The beginning ch counts as a stitch. When working increases at the beginning of the round, dc in same st as the join. When working even rounds, don't crochet in the same st as the join. Skip it and crochet the next st. · Join rounds with a sl st to the first stitch (the beginning ch).
Hat:
R1: Ch 2, 11 dc into ring. Join to ch 2. (12 sts) R2: Ch 2, dc in same st as join. 2 dc in every st. Join to ch 2. (24 R3: Ch 2, dc in same st as join. Dc in next st. \*2 dc in st, dc in next st\* to end. Join to ch 2. (36 sts) R4: Ch 2, dc in same st as join. Dc in next 8 sts. \*2 dc in st, dc in next 8 sts\* to end. Join to ch 2. (40 sts) R5-7: Ch 2, dc in every st. Join to ch 2. (40 sts, 3 rounds) R8: Ch 1, sc in every st. Join to ch 1. (40 sts) Fasten off and weave in the end.
Ears (Make 2):
R1: Ch 2, 14 dc into ring. Join to ch 2. (15 sts) Fasten off and leave tail for sewing. Sew the ears on R3 of the hat. @ Adorably Kawaii. Pattern is for personal use only. Please don't redistribute/resell the pattern in any way or form. If you post the finished items you make online, my only request is that say something like "Pattern designed by Adorably Kawaii - www.adorablykawaii.com"


