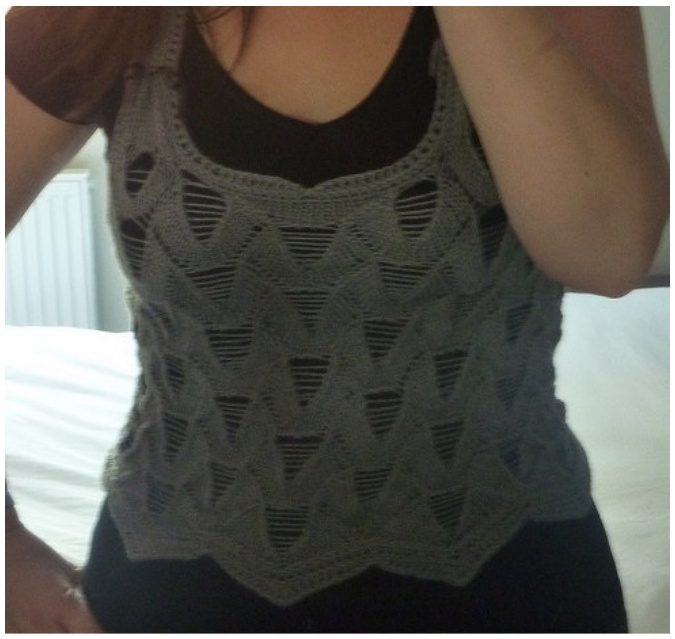
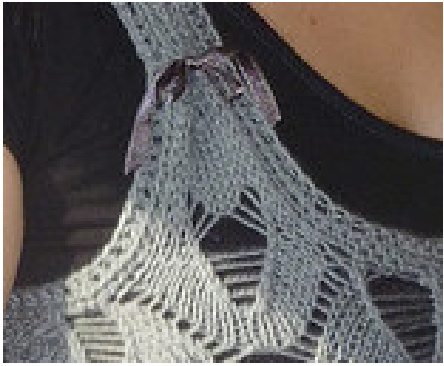
GABRIELLE VEST
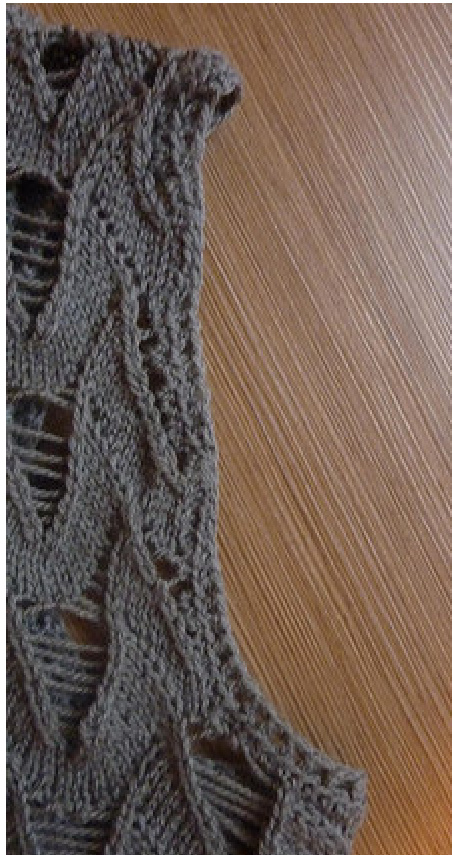
This vest is knitted in the round, beginning with the bottom part. The stitch pattern is really stretchy, so no need of shaping. Try on as you go to determine where you want the armholes/the neck to begin. Don't hesitate to modify it for a better fit. The V-shape at the bottom comes naturally. You only have to make a crochet edging to prevent it from curling. Same thing for neck. Upside the armholes, the back is knitted flat. Because the flat part gives a "zigzag" edge, it needs some crochet shaping to make it straight. Maybe you will like it "zigzaggy" and leave it that way! You only have to sew the back with the straps for a few inches on each shoulder! SIZES : S (M, L, XL) Bust size $34^{\prime\prime}\ (38^{\prime\prime},\ 42^{\prime\prime})$ $46^{\prime\prime}$ ). Shown in size M
REQUIREMENTS:
Fingering yarn $(\mathtt{g a u g e}:10\,\mathtt{c m}/4^{\prime\prime}:20$ st in stitch pattern $=1$ repeat) Quantity : $\mathsf{150}\,\mathsf{g}$ $(150\,\mathrm{g},200\,\mathrm{g},250\,\mathrm{g})$ (Yarn used in model : Phil luxe from Phildar) $\mathsf{a}\,5\;\mathsf{m m}$ (nr 8) circular needle $5\:\mathsf{m m}$ (nr 8) straight needles
CAST ON :
Cast on 140 (160, 180, 200) st. using a $5\;\mathsf{m m}$ (nr 8) circular needle (long tail cast on). Join. Be careful not to twist.
STICTH PATTERN:
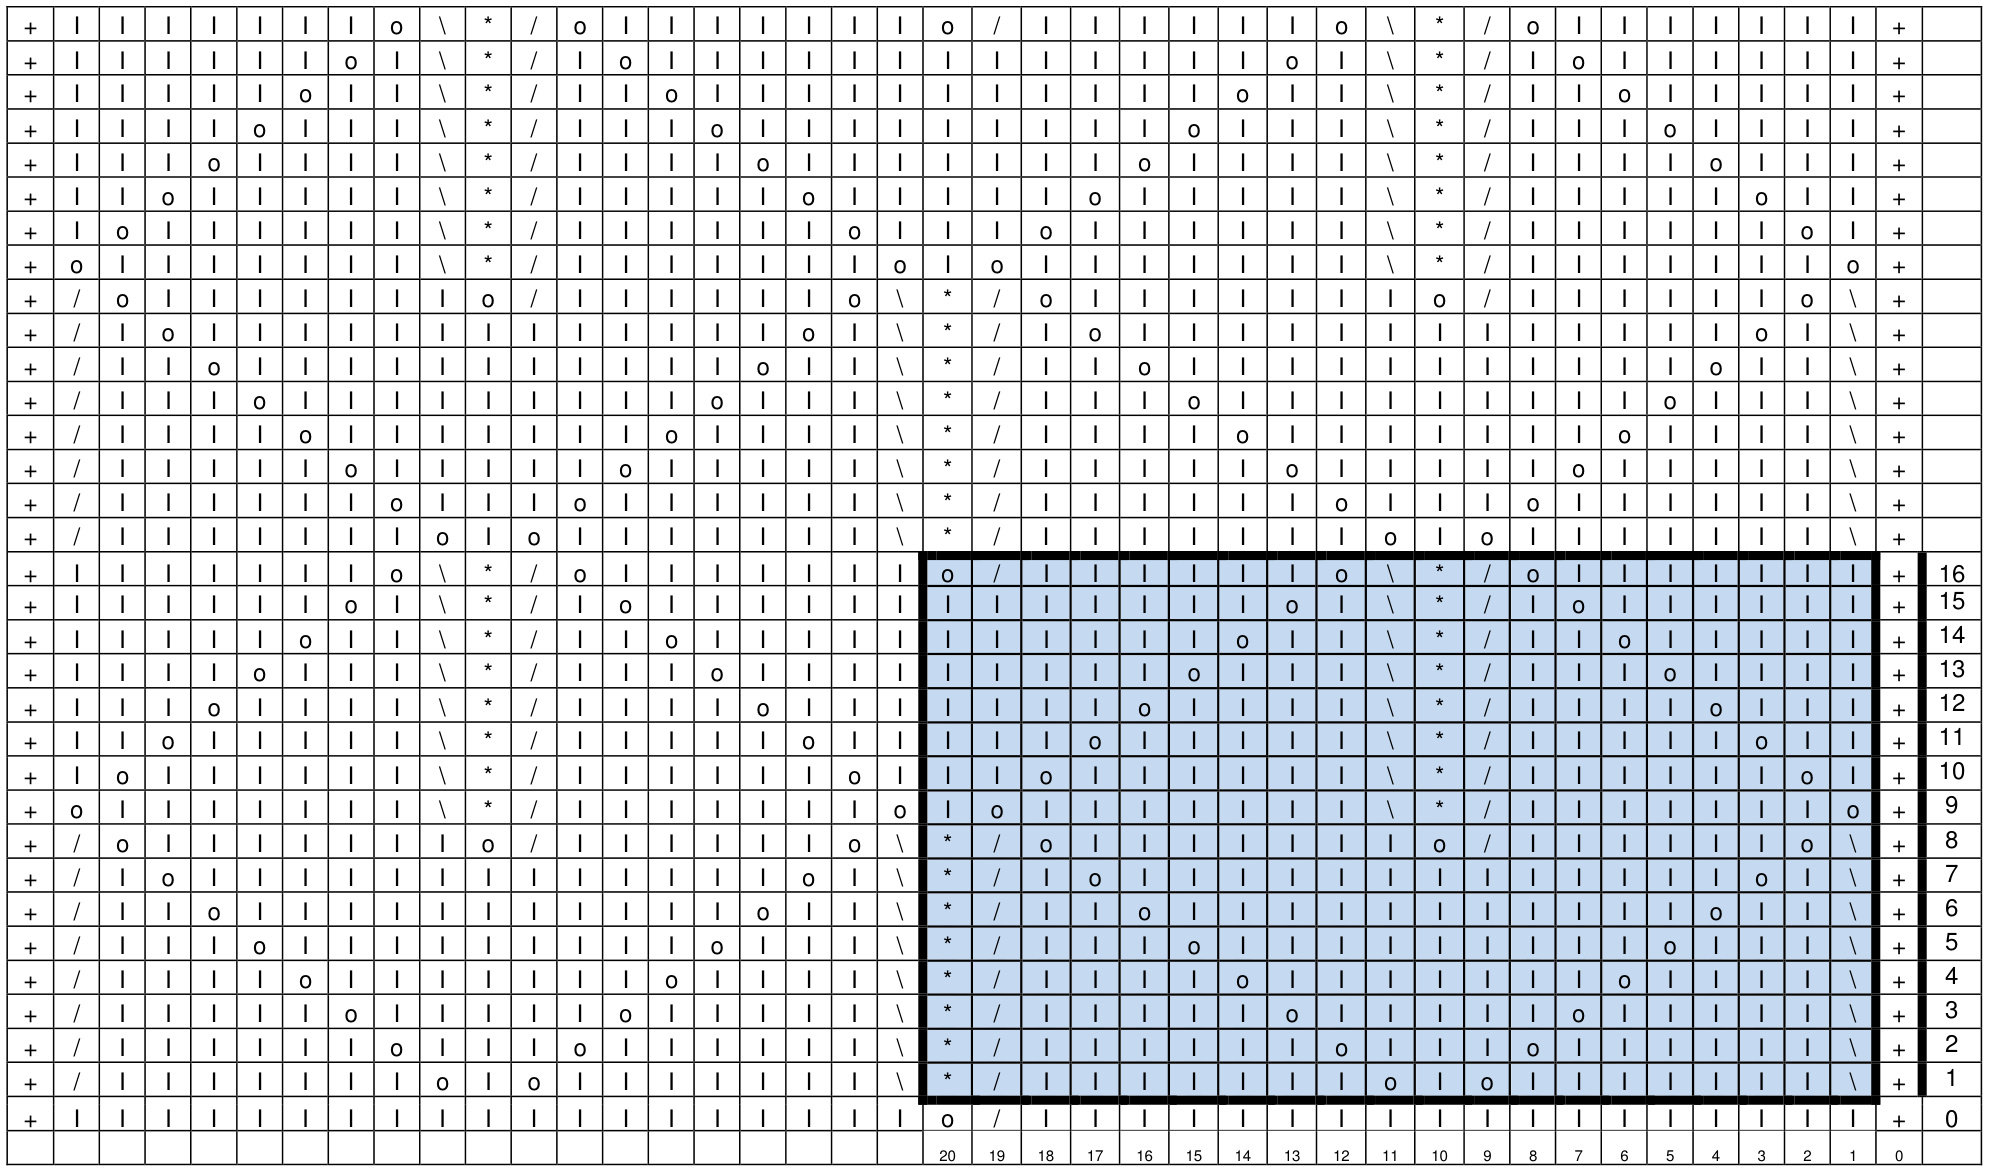
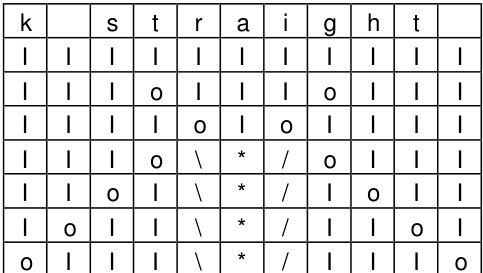
Repeat: in blue in chart (20st / 16 rows) +: selvage st 1: k on RS, p on Ws 0: Yarn over / : K2tog on RS, p2tog on WS 1: On RS: slip 1 knitwise, k1, pass slipstitch over k1; on WS : slip 2 st knitwise, put them back knitwise on left needle; purl these 2 st together through back loops. \* Yarn over, let fall yo from previous row
BODY : Begin st pattern in round. You will have 7 (8, 9, 10) motives.
BINDING OFF :
After 5 (5, 6, 7) repeats in height, try on to determine if it's the right place to begin armholes and the neck. If not, knit 0,5 or 1 motif more.
Stitches will be divided as follow :
S: 2 motives for back, 1 for armhole, 1 for strap, 1 for neck, 1 for strap, 1 for armhole. M: 3 motives for back, 1 for armhole, 1 for strap, 1 for neck, 1 for strap, 1 for armhole. L: 3 motives for back, 1 for armhole, 1 for strap, 2 for neck, 1 for strap, 1 for armhole. XL: 4 motives for back, 1 for armhole, 1 for strap, 2 for neck, 1 for strap, 1 for armhole. Armholes binding off :
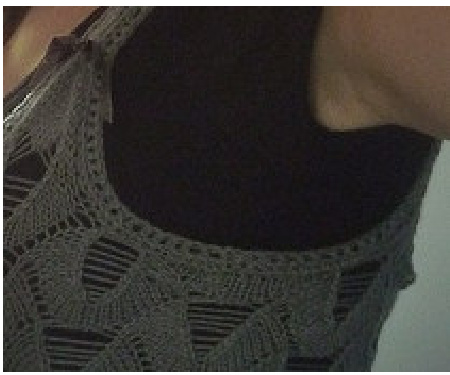
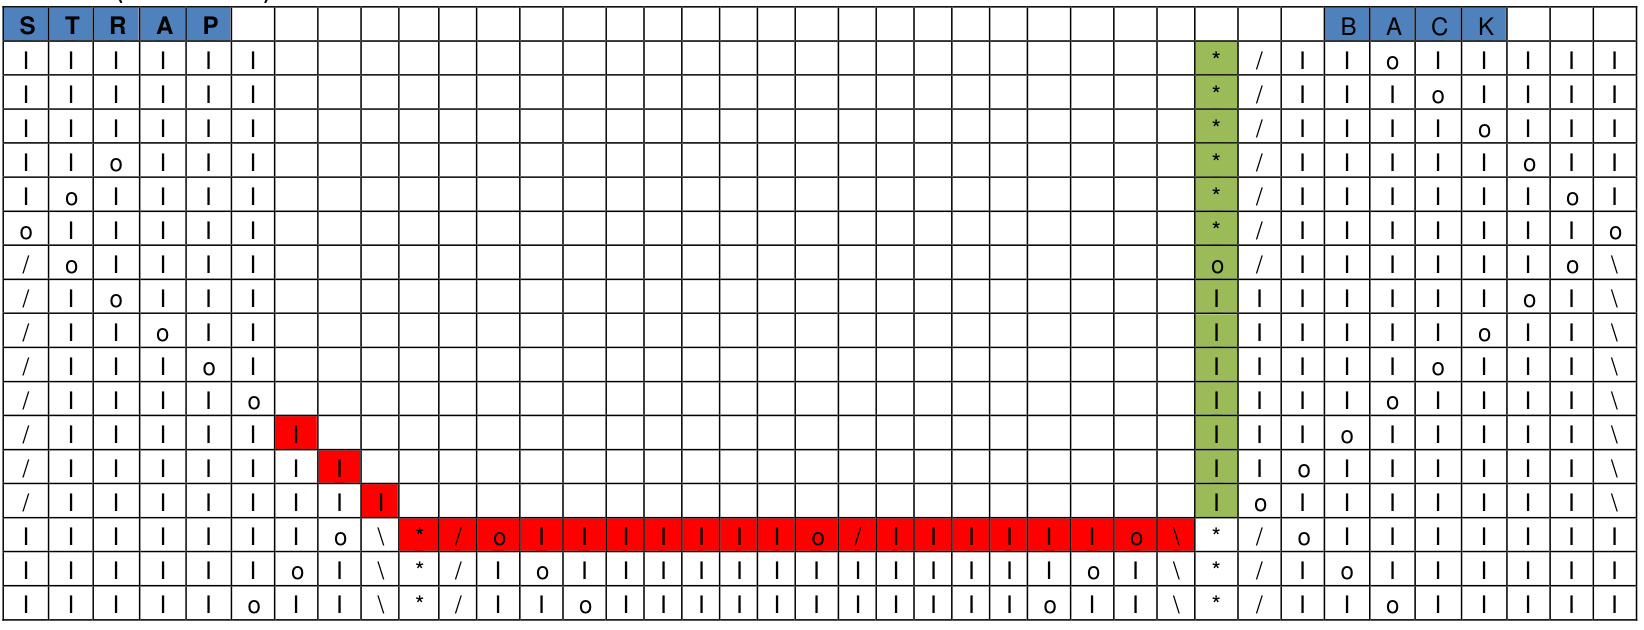
Bind off as show in red in chart 1. (picture : size M) From the second row of decreases, use this method to obtain a natural curve : Leave last st. from row on left needle. Turn (1st. on right needle). Slip $1^{\mathrm{st}}$ . from left needle (2 st. on right needle). Pass $1^{\mathrm{st}}$ st. over $2^{\mathsf{n d}}$ st. Decrease more st. if required. Leave "back" st on a st holder. They will be knitted flat after.
Neck binding off:
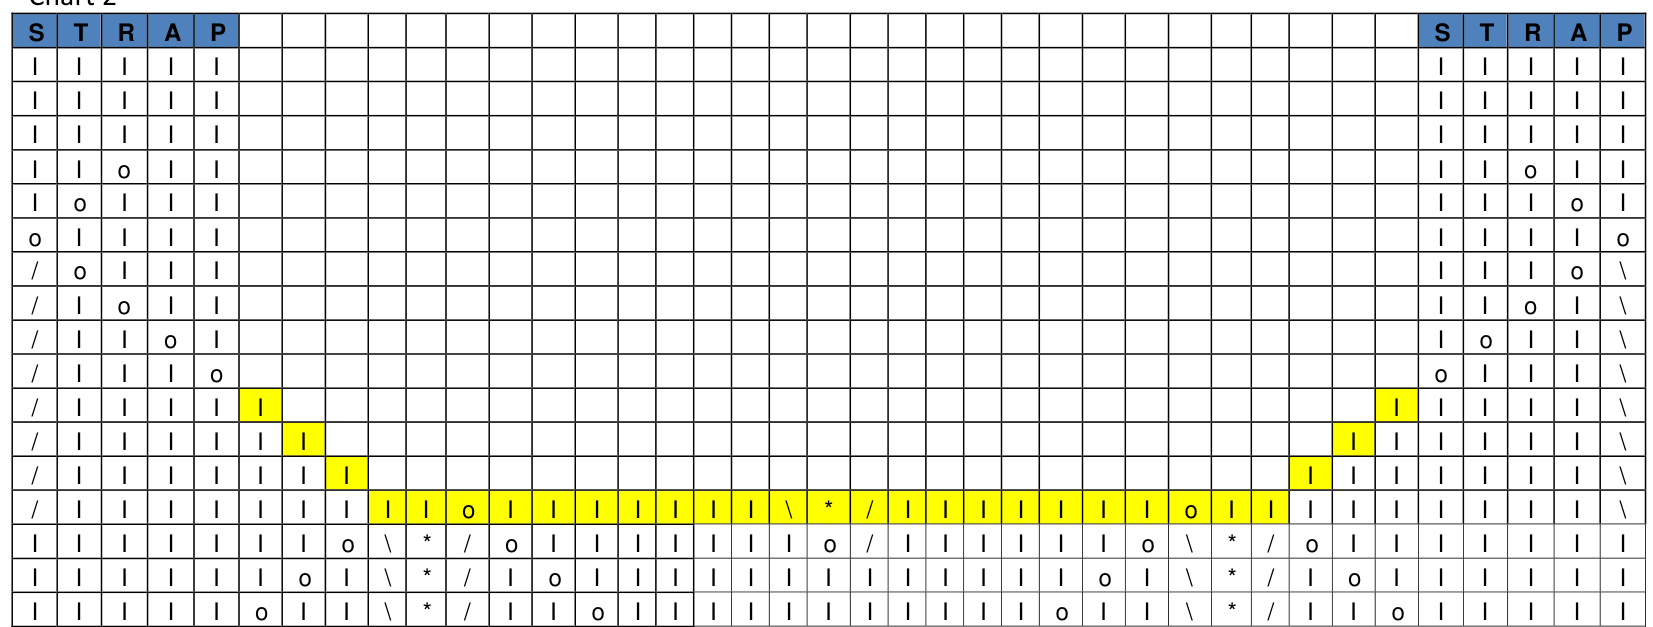
At the same time, bind off as show in yellow in chart 2.
BACK:
Continue stitch pattern back and forth, on a straight needle $(5\,\mathsf{m m}\,/\,\mathsf{n r}\,8)$ The initial \* in st pattern must only be knitted for the inner half, as shown in chart 1 in green. Knit 3 (3, 4, 4) motives more in height. Try on to decide where to stop.
STRAPS:
Continue in st pattern as show in chart.
After 1" (2,5 cm) knitting straight, knit as follow : RS : k5, p1, k5; WS : p5, k1, p5. $3,5^{\prime\prime}{-}8,5$ cm (4"-10 cm; $4,5^{\prime\prime}$ 11,5 cm; $5^{\prime\prime}-~12,5~\mathsf{c m})$ after first central purl, M1 on neck side (at $1^{\mathrm{st}}$ from neck side, through back loop). (Try on to be sure) 4 rows further, M1 2 rows further, M1 2 rows further, M1 1 row further, M1 1 row more, then bind off. Knit second strap.
FINISHING:
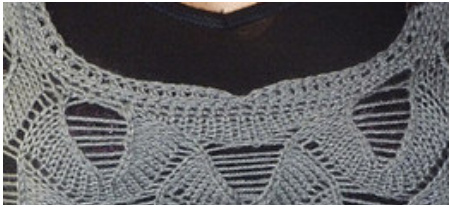
Sewing : Sew the back with the straps on each shoulder. Bottom hem : The V-shape at the bottom comes naturally. You only have to make a crochet edging to prevent it from curling.
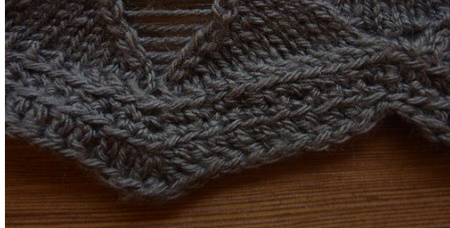
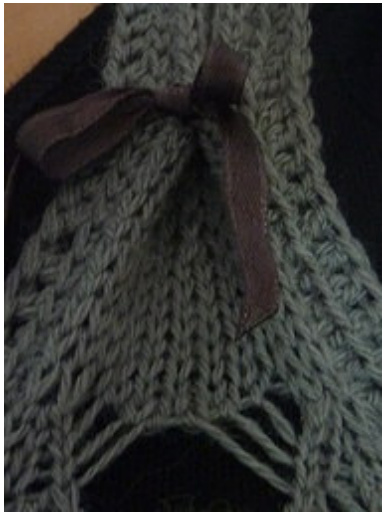
$\mathbf{1^{st}}$ row : dc (double crochet) all along, putting hook only into back loop (under only one thread and not under complete $1^{\mathrm{st}}$ of knitting - the purpose is to leave the other thread of $1^{\mathfrak{s t}}$ knitting row apparent, and obtain an horizontal bar visible underneath the crochet stitch on RS). Inner tips (3 central stitches) : do not crochet previous st, dc central st, do not crochet next st. Outer tips (central st) : make 3 dc in same st. Try on after $1^{\mathrm{st}}$ row to check if you've not crocheted too tight. $2^{n d}$ row : tc (treble crochet), putting hook only into back loop. Inner tips (7 central stitches) : tc, dc, sc, sl st (putting hook far in previous row, to accentuate the curve), sc, dc, tc. Outer tips (central st) : make 3 tc in same st. Neck : Begin behind the head. Do not crochet in each st. but in every 2 st in the decrease curves. $\mathbf{1^{st}}$ row : sc(single crochet) all along,putting hook only into back loop (under only one thread and not under complete binding off edge - the purpose is to leave the other thread binding off edge apparent, and obtain an horizontal bar visible underneath the crochet stitch on RS). Center of neck (3 central stitches): sc, sl st (putting hook far in previous row, to accentuate the curve), sc. Try on after $1^{\mathfrak{s t}}$ row to check if you've not crocheted too tight. $2^{n d}$ row : dc (double crochet), putting hook only into back loop. Center of neck (5 central stitches) : dc, sc, sl st (putting hook far in previous row, to accentuate the curve), sc, dc. Armholes : Frontside : same as neck. Do not crochet in each st. but in every 2 st in the decrease curves. Backside : Because the back part gives a “zigzag" edge, it needs some crochet shaping to make it straight: $1^{\mathfrak{s t}}$ row : sc all along. $2^{\mathsf{n d}}$ row : choose between tc, dc, hdc, sc and slip st. to compensate for zigzag and obtain a straight edge. Straps : 1" (2,5 cm) after 1st central purl (or at your favorite height), put ribbon on RS: Take a ${10}^{\prime\prime}$ $.25\;\mathsf{c m})$ ribbon. Burn the ends with a lighter. Put ribbon under left selvage st (which is $1^{\mathfrak{s t}}$ st. of crocheted edging). Do the same on right side. Pull and make a bow tie. Weave in all ends. Wash and block.