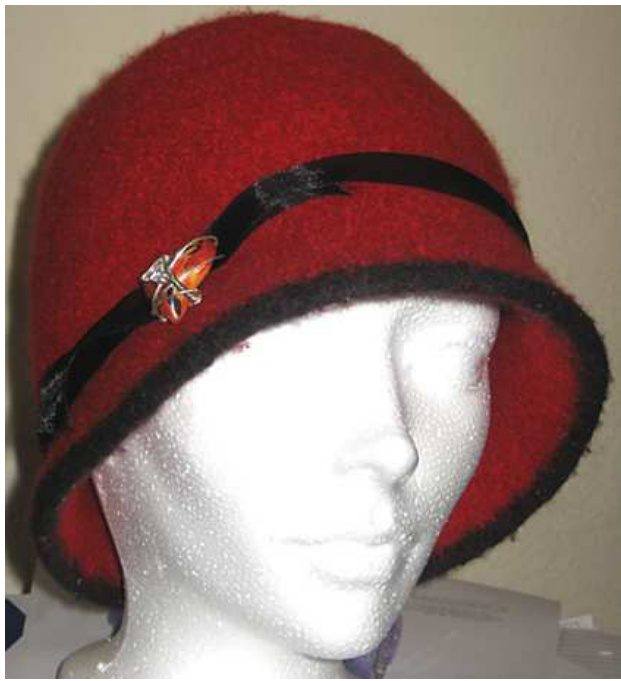
Felted Cloche Hat By SilverRowan
I couldn't find any designs for a felted cloche when I first started out crocheting, and so designed this one. Please note that there are a lot of stitches, and I am looking to redesign this hat with doubled up yarn and a larger hook to reduce the time it takes to complete. This design also has no difference between the front and back of the hat, for it to be comfortably wearable the back of the hat needs to be flipped up. Size: Variable, mine is about 23inches Stitches used: slst (slip stitch), sc (single crochet) sc2in1 (increase by crocheting two single crochets into one stitch). US terminology
Supplies: This pattern uses about a ball and a half of Patons Wool ("medium" weight (#4), $100\mathrm{g}/3.5\mathrm{oz}$ ? $204\mathrm{m}/223$ yds per ball). I do recommend a contrasting color, especially if you have some feltable scraps hanging out in your stash. The example only has two rows of contrast used. Use a medium large hook, I used an $\mathrm{H}(5\mathrm{mm})$ but recommend larger, and a substantially larger hook, I used a J, but I recommend you go up at LEAST $2\mathrm{mm}$ One stitch marker to indicate the beginning of a new row is necessary, I also recommend more for marking where you should increase; otherwise it's a lot of counting. A ribbon the length of your head, and some sort of decoration are nice, but not neccessary Gauge: Make a large sc gauge for the pattern, either record the width and height of the swatch, or tie markers around a set number of stitches. Throw this is the wash until it's as felted as you want, record the change in size as pre-shrinking size/shrunk size (ex. if it was originally 4cm and shrunk to 3cm, record as 4/3) for both height and width
Instructions
This hat is crochet in continuous rounds, instructions are for a duplicate of the pictured hat, italicized comments are possible alterations Top: Chain 3, slst to form a ring, (or st in loop) don't draw too tight or this area won't felt. row 1: sc 6 in ring (6) row 2: sc2in1 around (12) row 3: sc2in1, sc, around (18) row 4: sc2in1, 2 sc, around (24) row 5: sc2in1, 3 sc, around (30) row 6: sc2in1, 4 sc, around (36) row 7: sc2in1, 5 sc, around (42) row 8: sc2in1, 6 sc, around (48) row 9: sc2in1, 7 sc, around (54) row 10: sc2in1, 8 sc, around (60) row 11: sc2in1, 9 sc, around (66) row 12: sc2in1, 10 sc, around (72) row 13: sc2in1, 11 sc, around (78) row 14: sc2in1, 12 sc, around (84) row 15: sc2in1, $^{13}\,\mathrm{sc}$ , around (90) row 16: sc2in1, 14 sc, around (96) row 17: sc2in1, 15 sc, around (102) row 18: sc2in1, 16 sc, around (108) (the final width of your hat should be $18^{*}$ after felting/pre-felting, so for me, $18^{*}3/4=13.5\mathrm{cm}$ .1 have a 58cm(23inch) head... yes it fit, but I might make this about 2 rows bigger in the future) To make the top of the head wider, add more rows here, in the pattern above. Sides: you want approximately 11cm AFTER felting: sc around for 11cm\*swatch ratio(before/after) - my swatch shrink ratio was 4/3 s0 $11\!\times\!4/3\!=\!15\mathrm{cm}$ (108) (if I do another one I'm going to experiment by making this one or two centimetres shorter, and lengthening the brim by the same amount) Brim row 1: front loops only: 5 sc, sc2in1, around (126) Brim: change to larger hook: sc even around for 5cmxshrink ratio. slst to first sc of row, and fasten off. felt until correct size Stitch ribhon and orm ament in nlace ahove hrim creace Felting: there are really good instructions on the internet, and a few groups here on Ravelry dedicated to felting, so I'm going to provide a quick description of washing machine felting only. FELTING CAN BE UNPREDICTABLE, your hat might shrink differently than your smaller swatch. Things won't necessarily shrink the same way between two different tries, even if you've kept everything you can think of the same! To felt in your washing machine, run a small load on the hottest setting possible. Some people recommend throwing in jeans, or tennis balls, or shoes to help provide more agitation. Just don't throw in anything that will pill or produce lint or you will be picking it off forever. (Ask me how I know...). Put your hat in a pillowcase with one end tied shut or a lingerie bag to protect your washing machine, the yarn WILL shed fragments that can get stuck in and damage the machine. This also makes it pretty easy to fish the hat out of REALLY hot water. If the water doesn't seem very hot you can increase the temperature by pouring boiling water in the washer (yes it SEEMS obvious, but still). Felting tends to work better in top loading washing machines than front loaders, for various reasons, especially the ability to stop the machine at any time, however felting can still be done in front loaders, but I'm not the person to ask for help there! Check on your hat frequently, I recommend 5 minute intervals at first and obsessively when it gets close, but that might just be me, but still, don't let it go too long without checking, once the felting starts to happen it tends to go fast! If you find your hat has shrunk to the right size in one dimension but not the other, felting will shrink IN THE DIRECTION IT IS RUBBED, so you can manually fine tune the shrinkage. Please only use this pattern for personal use; do not make items to sell with this pattern. Thank you


