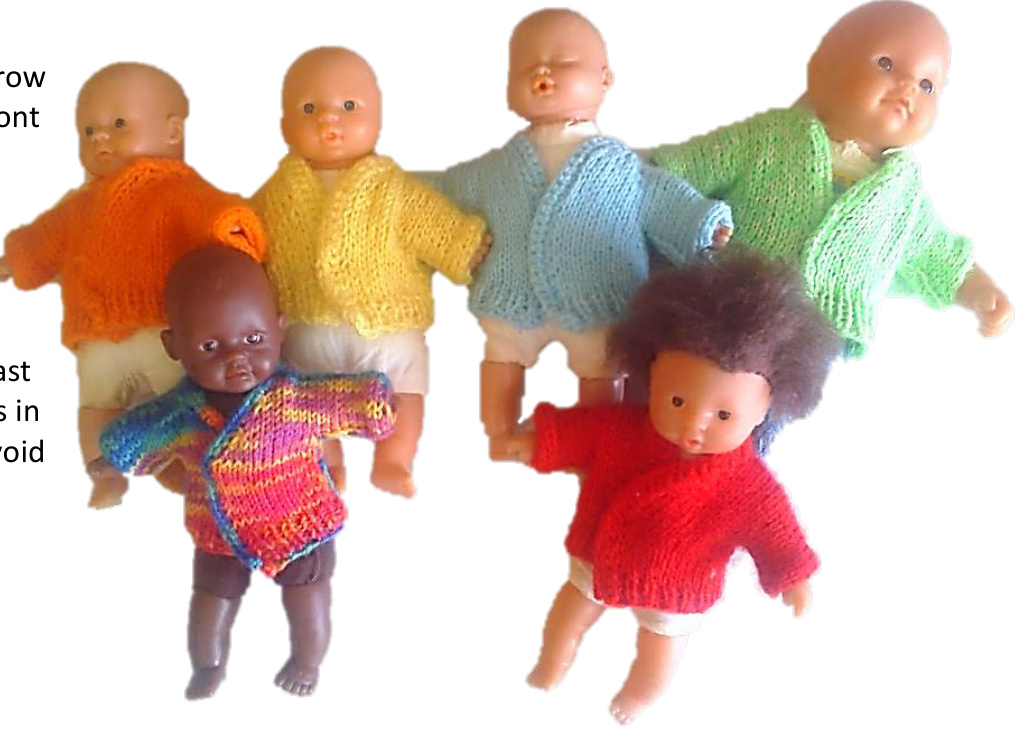
Quick & easy Mini-Doll-Clothing
My dolls are:
From Head to toe ca. 17 cm / 7 " Head circumference 13 cm / 5" From wrist to wrist along the back ca. 10 cm/4" For bigger dolls or other yarn adjust measurement: Circumference for jacket and sleeping bag - take doll circumference + 2 cm / 1" Yarn: fingering yarn with approximately 320m per 100g Needles: 3 mm Gouge: stockinette stitch 30 st = 10 cm / 4" Pattern: Stockinette stitch: knit all rows - all back rows pearl or if working in rounds - knit every row Ribbing: knit 2 st - pearl 2 st - in back rows like stitches show Smal ribbing: knit 1 st - pearl 1 st - in back rows like they show
Possible Variation:
Use color changing yarn Use 2 different yarns at once If working for bigger dolls - you can knit in pattern - according to your ability or desire.

Jacket
The jacket is worked from the back bottom upwards and down the front in 2 parts - that means all in one piece. The sleeves are knitted flat together with the body. Afterwards the sides have to be sewn together. on without closings/zipper because little children can't deal with it. If You like - add son The jacket has a circumference of 15 cm / 6" - that means 2 cm / 1" more than the dolls body circumference. CO: 22 stitches 4 rows smal ribbing ( kn 1 p 1) Go on with stockinette stitch: 10 rows stockinette stitch At the beginning of the next row cast on additional 6 to 8 stitches for the sleeve - work row At the other end cast on additional 6-8 stitches for the second sleeve - work row 10 rows over all ( sleeve - back - sleeve ) Start the next row. Cast off the 10 stitches in for the neck. Work the rest of the row.
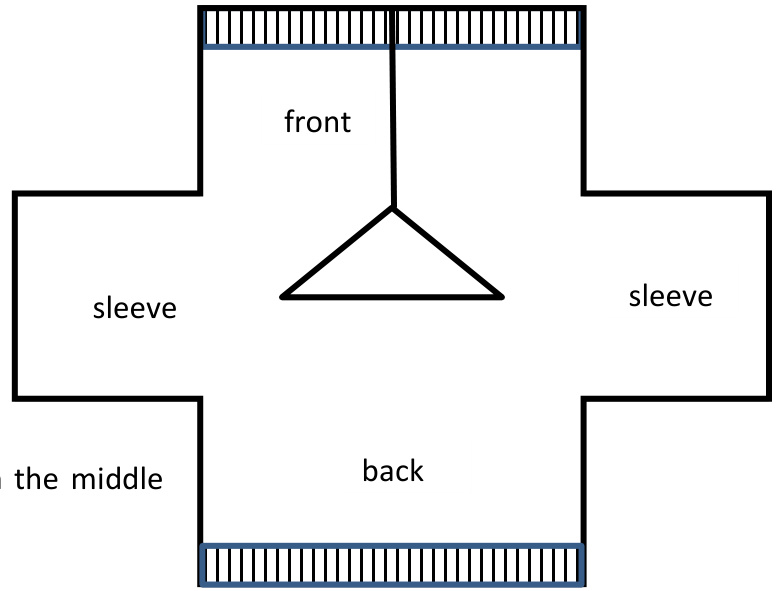
From here you work in 2 pieces:
· 2 rows along the sleeve until the neck. - (shoulder rows) 10 rows increasing - in every second row knit front and back of the last stitch at the neck or simply cast on an additional stitch. Cast off the additional 6-8 sleeve stitches Work the now 11 stitches for 10 rows. 4 rows small ribbing Cast off Join the yarn at the remaining part and word the other front in the same way only inverted. Sew the bottom side of the sleeves and the side of the body If desired you can crochet 1 row single crochets along the front and neck line. Because the sleeves were worked completely in stockinette stitch they may roll in at the ends. If you like, you can work the last two stitches at the sleeves ends in garter stitch - that should avoid the rolling in.
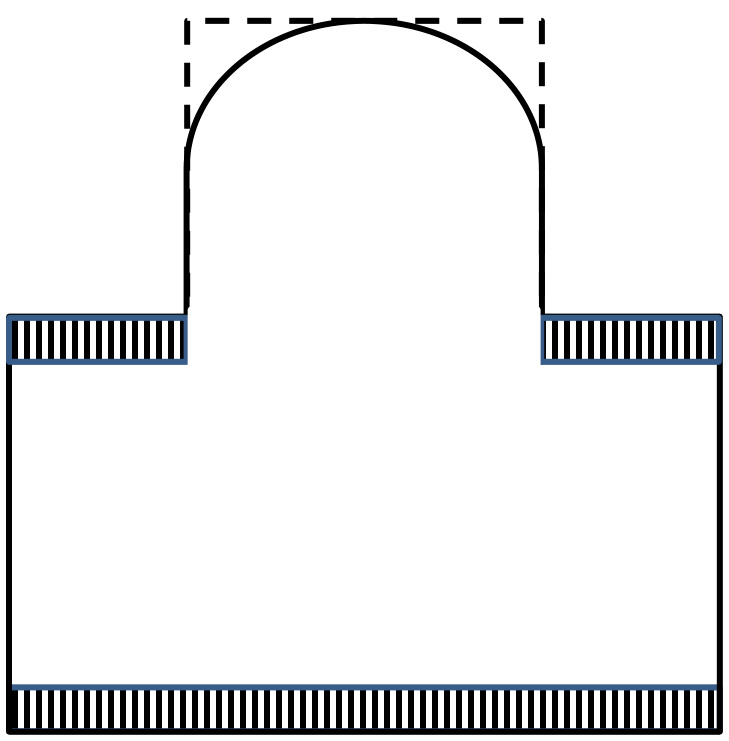
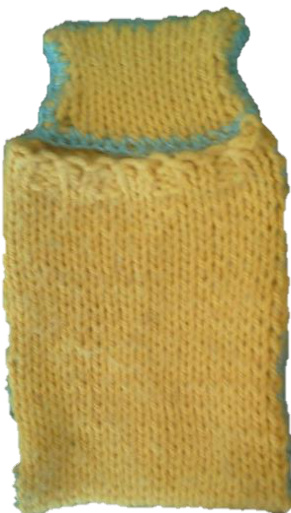
Sleeping Bag
The sleeping Bag is worked bottom up. For the head part there are several different versions possible-described belowin the head part section. CO: 40 stitches or doll circumference + 2 cm / 1"
Bag part:
4 rows ribbing ca. 30 rows stockinette stitch until desired length - ca. 12 cm / 5" 4 rows in stockinette stitch but only at the front part(s)to avoid rolling up: 10 st ribbing - 20 st stockinette - 10 stribbing Cast off the 20 stitches at the front (cast off 10 st - work the rest of the row - wend - cast off 10 st)
:ively the sleeping bag can be knitted in the round - then you have to sew only the bottol Or you put the seam to one side - but then the other side has no seam. I decided to put it in the front as a decorativeelement.
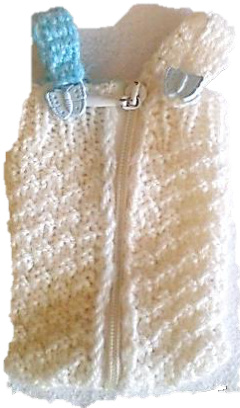
Head part:
The head part is worked only along the backwards center stitches - if you work one. You have to work ca. 15 rows or until the desired length. There are several Versions possible: A- Sleeping bag with straps Work only the bag part. Then cast off. Work two straps and sew them on.
B- Simply Straight:
This is the very easiest model for bloody beginner - or if in a hurry. There is no decreasing but simply work straight up until the desired length is reached (approx. 5 cm / 2"). Then cast off.
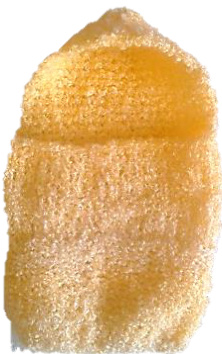
CStraight with ,Pillow"
This Version is basically worked like Version B - straight up but in double length. Then turn the half of the head part down and sew the borders. Eventually you want to add some filling material inside the “pillow".
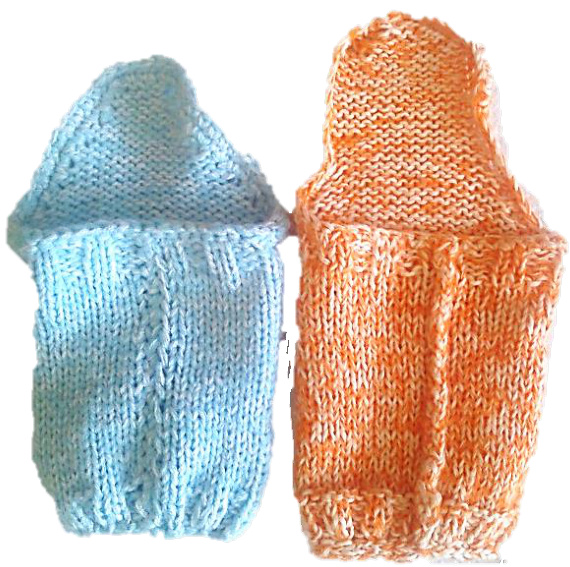
D- With Hood
Like Version B - but a little bit longer to reach the top of the head - for my little dolls it is approx. 7 cm / 3". Then fold the upper rim in half and sew it together as a hood. If possible don't cast of but use the Kitchener stitch to avoid a visible seam.
E- Rounded
For this Version you have to decrease your stitches to form the round. Then cast off the remaining 5-8 stitches. Here are as well two ways for decreasing possible: Version 1: In every row simply cast off 1 st at the beginning of the row. So you get an alternating decrease at the left and right side. lf you want the head part a bit longer - work a row without decrease ever 3rd row. In every second row work: the slip the 2nd st, knit/purl the 3rd st like it show, pass the knit/purl stitch over the slip stitch. The both next to last simply knit/purl together. If you want a longer head part word a normal row every 3rd row.
Version 2:
Finishing
If you worked the bag part in rounds - there is no finishing! Fold both of the ,wings" to the front and sew or crochet them together. Alternatively you can add a zipper. Depending on how you put the front together it looks different (the seam can be flat or bulky..). If you like/are able to you can crochet along the head part for decorating purposes or to cover asymmetries in decreasing. You may decorate the sleeping bag like your heart desires.


