Nordic Hat
Materials
Yarn - Worsted/light worsted weight yarn - about 90g for the main colour (MC) and 40g for the contrasting colour or colours (CC). Needles - Circular needles (or DPN's) in 3.5mm (US4) for inside lining and 3.75mm (US5) for hat. I used a long cable and used the magic loop technique. Gauge - About 6 stitches per inch.
Size
Average adult (56cm or 22")
Abbreviations
MC-MainColour CC -ContrastingColour K2tog - knit two stitches together (right leaning decrease) SSK - Slip, Slip, Knit - slip one stitch knit wise, slip second stitch knit wise, insert left needle into the front of those two stitches and knit them together (left leaning decrease)
Pattern
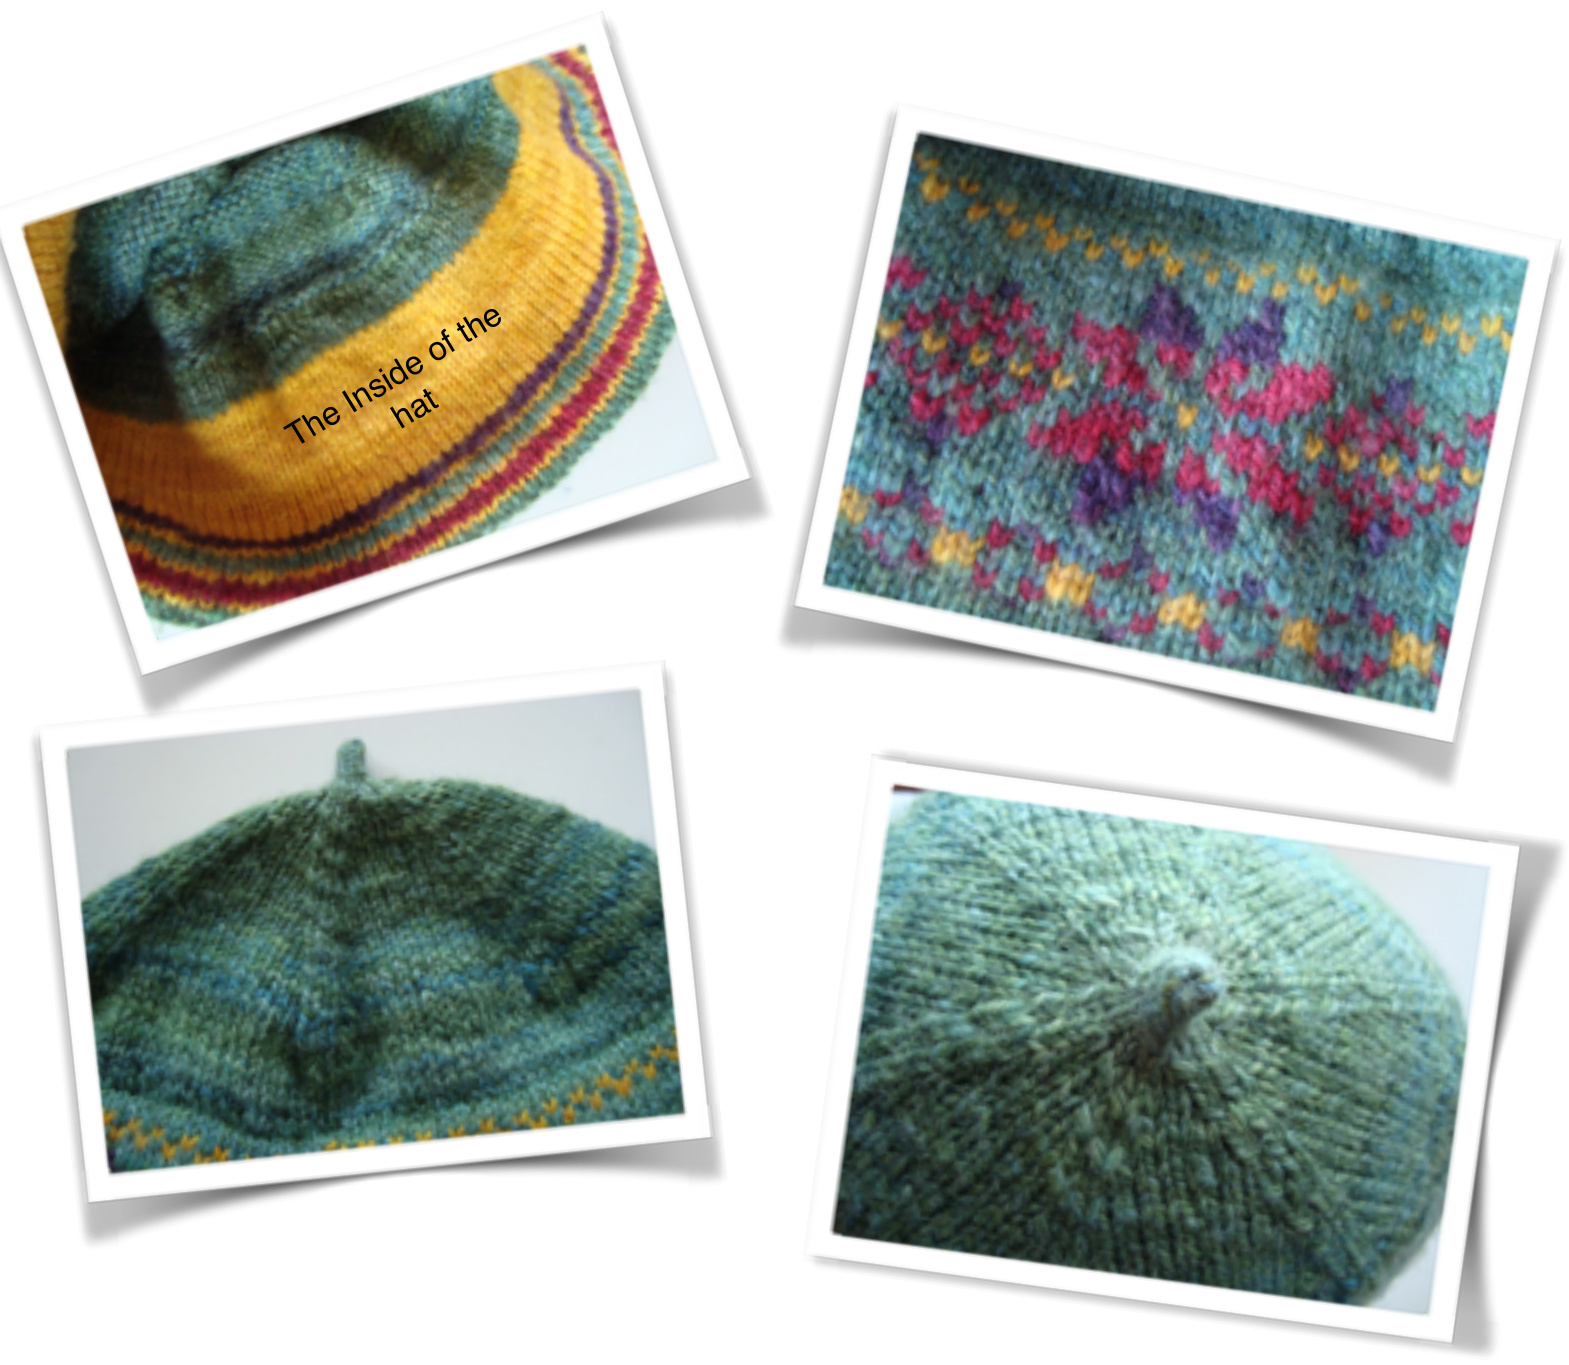
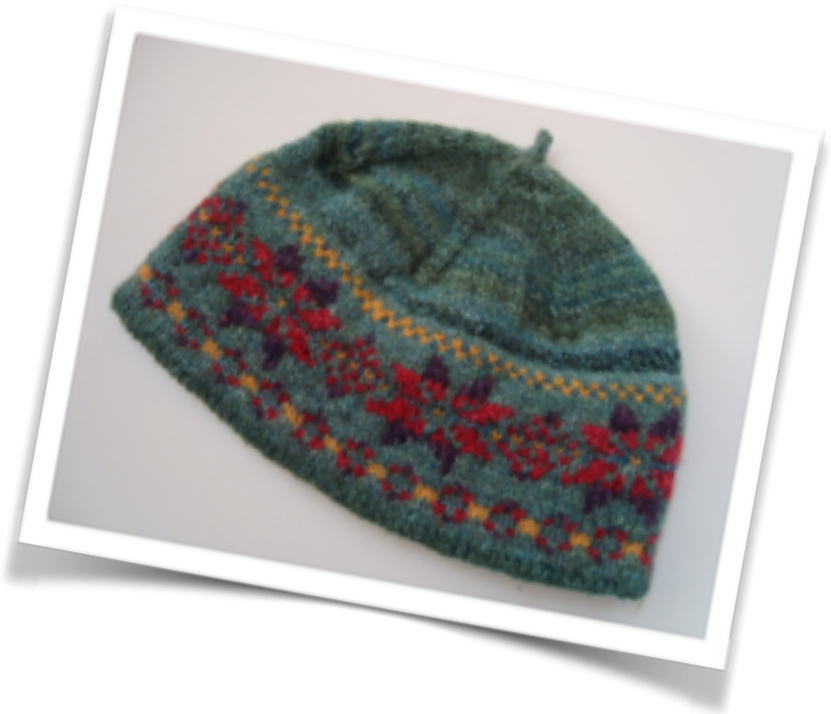
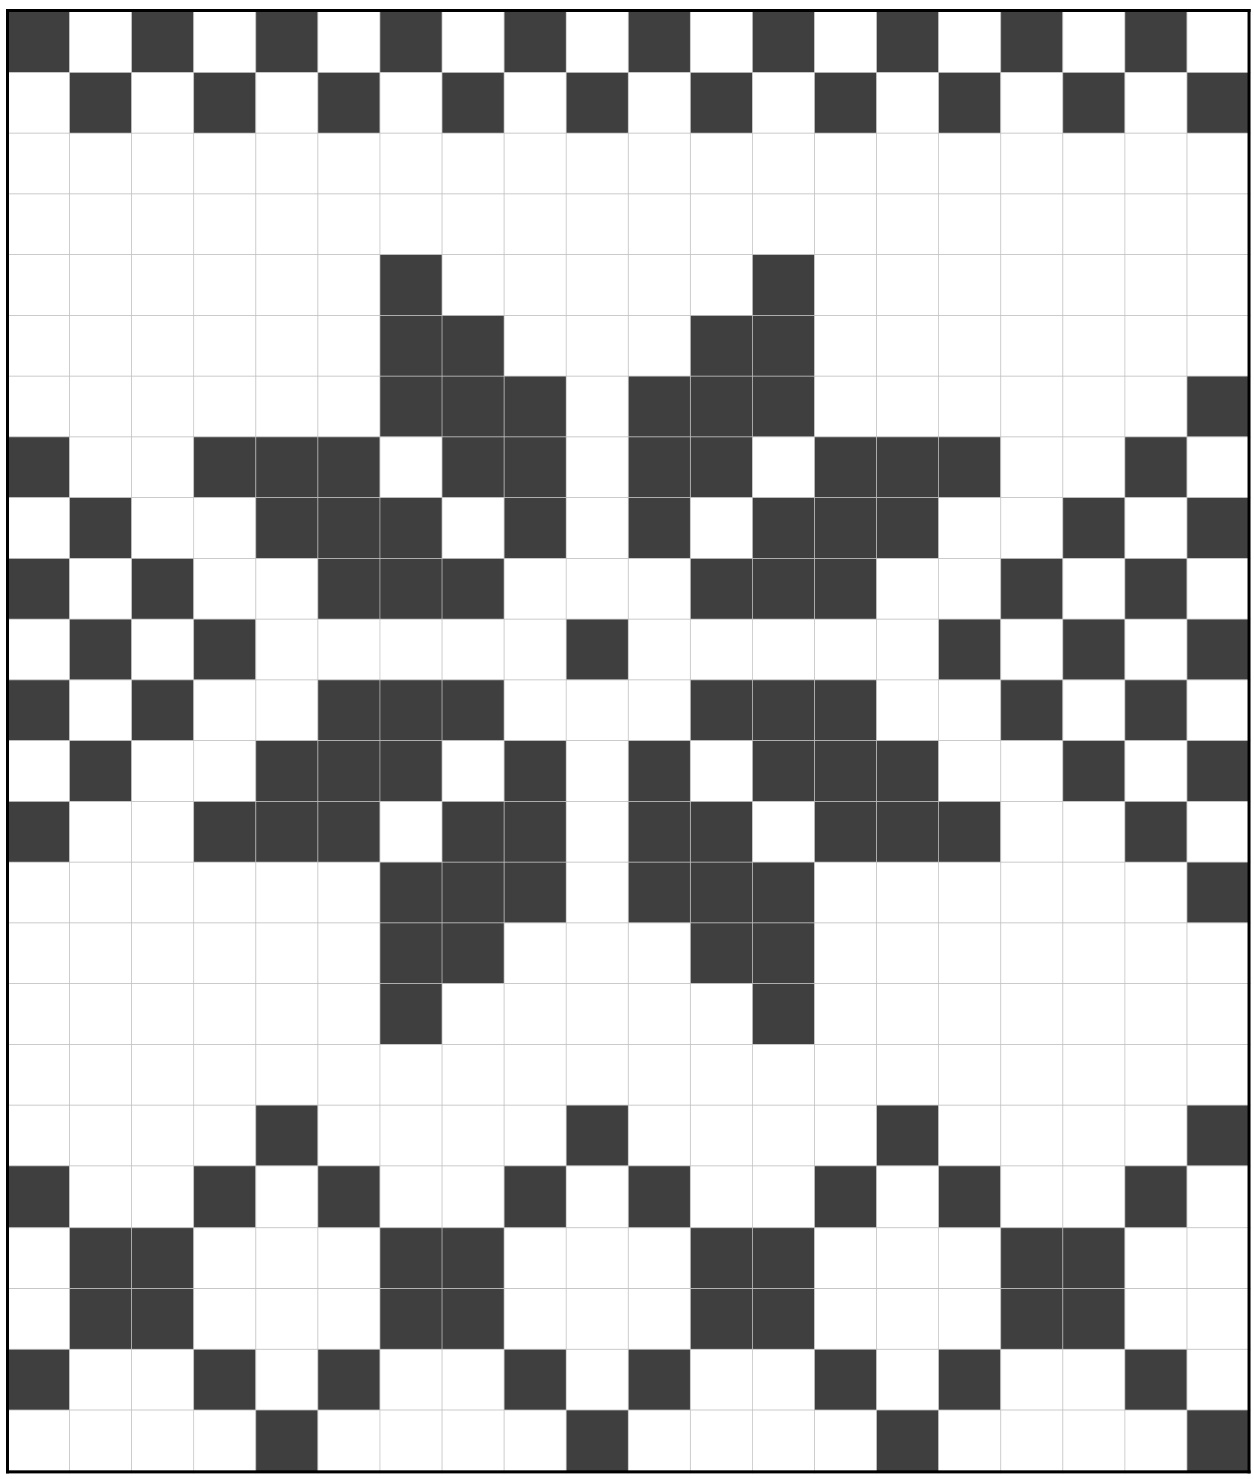
Using 3.5mm needle, with a provisional cast on and MC, cast on 120 stitches. I used interchangeable knitting needles and used a spare cable to cast on the stitches over. Join the stitches in the round, and knit in the round for about 9cm (\~3.5"). Purl one round and switch to 3.75mm needles - the purl round creates a neat fold for the hat. I used all the colours for the inside of the hat, but the top and bottom rounds are knit with the MC. Knit 3 rounds and start pattern on chart for 24 rounds. There will be 6 repeats of the pattern over the 120 stitches. I chose to use three different CC's, but only knit with the MC and one CC in each round, to simplify the stranding. I left the floats long in the back (l didn't anchor them) because I knew they would be covered by the lining.
When the charted pattern is completed, knit for one or two more rounds (enough to have a double layer to cover ears for warmth). Make sure that the lining and the outside of the hat are the same length, and that the lining covers all the floats to keep the inside of the hat neat - you might need to knit a few extra rounds on the lining for it to be long enough. Join the two layers together by knitting the next round with one stitch from the lining and one stitch of the outside together at the same time. Knit until the hat measures about 11cm (4.5") or desired length. Ready to start the decreases for the top of the hat. Place markers every 20 stitches. Decrease round - \*K2tog, knit until 2 stitches before marker, SSK\* repeat 6 times. Work a decrease round every third round. This type of decreases creates a “star" pattern on the top of the hat, if you reverse the order of the two decreases the look will be less obvious. Or you could do one double decrease at each marker. When there are 12 stitches remaining \*K2tog\* 6 times, there will be 6 stitches left. You can either knit a few more rounds to create the little point like I did, or cut the yarn and thread the end through all the stitches and pull to close. This hat could be modified in many ways to make it your own!