This neat little purse, uses a small amount of yarn, in fact I designed it to use up the remnants from the On Target Bag, I designed. The purse can be used like a traditional coin purse or for your notions, when you are out and about. My purse already holds my stitch markers, as the purse remains upright when the zip is open, making it easy to pick out a marker when knitting.
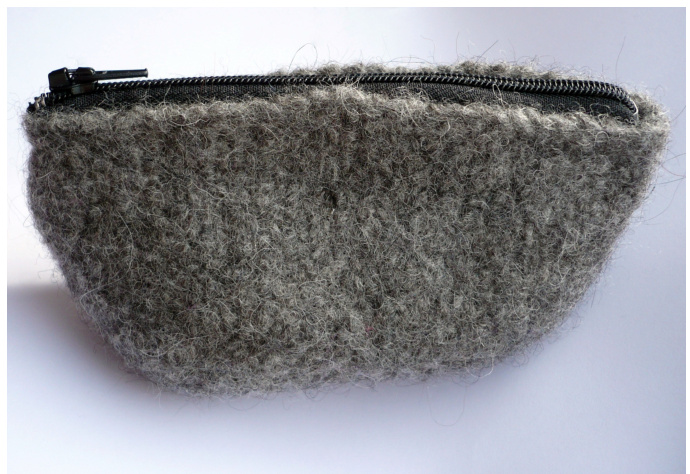
Illustration 1: Felted Coin Purse Cast on 20 stitches in the felt-able yarn, you have chosen for the purse. Knit 15 rows, to make a rectangle of garter stitch Pick up and knit 7 stitches along the short edge Pick up and knit 20 stitches along the long edge Pick up and knit 7 stitches along the remaining short edge. There will now be 54 stitches on the circular needle, joined in the round. You will need to use the magic loop method of knitting with circular needles. If you are unfamiliar with this technique, search on the internet and read one of many excellent tutorials. I recommend, in particular the video on www.knittinghelp.com, under Advanced Techniques. Place a marker and knit 1 round \*Slip marker and knit\*\*, repeat from \* to \*\* until the stocking stitch you have knit measures $10~\mathsf{c m}_{\phantom{.}}$ , from the edge of the garter stitch. Leaving a long tail, cut the yarn and join the acrylic yarn. Knit 3 rounds in the new yarn and then cast off. Sew in the tail of your original yarn before trimming the end. You don't need to worry about how neat your ends are on the acrylic yarn. The project is then ready for felting. As this is a small project, I recommend waiting until you have something larger to felt at the same time, or you can try throwing it in with a normal wash. (I would only recommend adding it to a normal wash if you are absolutely suRE that the dye in the yarn will not run. With the Sirdar Eco Wool DK, the wool is undyed so this will be safe to wash
Felted Coin or Notions Purse by CraftyCripple
with normal clothes.) I felt using a front loader washing machine. This makes felting more tricky than a top loader, but it is still fairly straight forward. These instructions assume you also have a front loading machine. Place the purse inside a pillow case, or zipped laundry bag, this will prevent fluff from clogging your machine. Add a small amount of soap along with something to agitate the bag and start the felting process. I usually use a pair of old jeans and an old bath towel. If something is stubborn I add a pair of flip flops! If you are placing your purse in with a normal wash you won't need to add anything to the wash and you should ignore the following instructions, and hopto $\Delta$ Set the washing machine to $40^{\circ}\subset$ and hold the rinse cycle. If you can work out how to do it on your machine, try to set it so the spin cycle doesn't happen and then start your felting. After around 20-30 minutes you may want to check the appearance of your felt. If you want to actually feel the texture, you will have to set the machine to drain. You will then have to start the wash cycle again. Keep checking the bag until you have achieved the look you want and then drain the machine. As you held the rinse cycle, you will need to rinse the purse in clean water. You do not need to rub, or swish the item around. Rinse until the water remains clear, then squeeze the water out of the purse by layering it in an old towel and rolling it up. You can then apply pressure to the roll so the water is absorbed into the towel, without creasing the felted item. Illustration 2: Drying The Purse $\Delta$ You now need to stuff the purse to make sure it dries in the correct shape. Leaving the acrylic yarn intact, fold up a plastic carrier bag to approximate the shape of the finished purse. Stuff it inside and using safety pins through the acrylic yarn on either side of the purse, hold the top closed, to make the required shape. (Illustration 2)
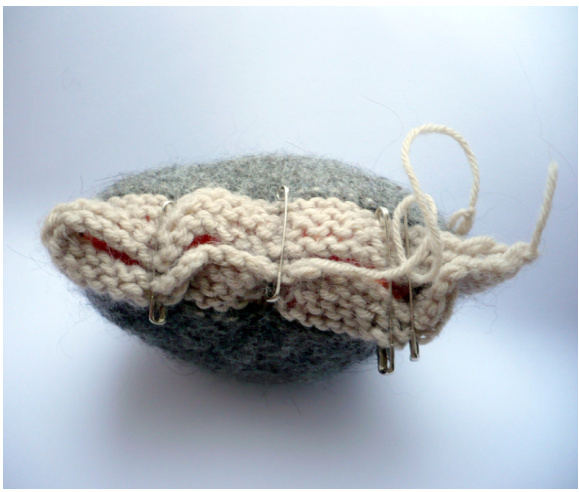
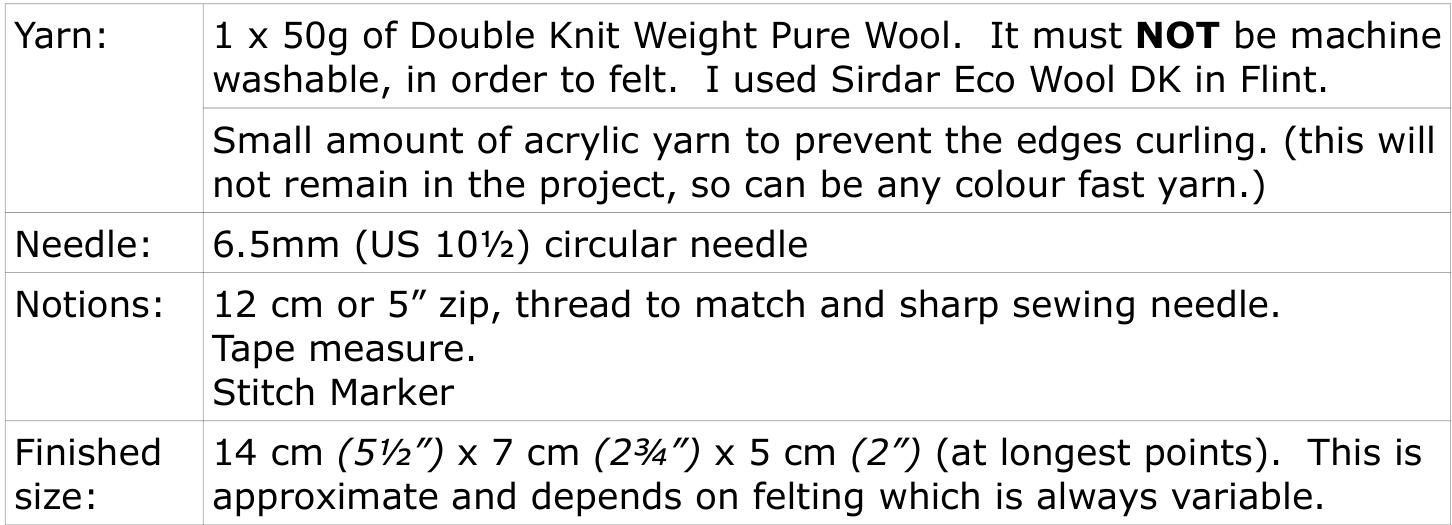
Once the purse is dry, you can remove the safety pins, the carrier bag and cut and remove the acrylic yarn. Now you have your dry felted purse, get ready to add the zip. You should have a nice crisp outer rim on your dry purse. Turn the purse inside out and line up the right side of the closed zip along one of the outside edges, of the opening. The top and bottom of the zip should be aligned with the outer ends of the opening, so the zip runs the length of the purse. Pin only one side of the zip to the purse edge.
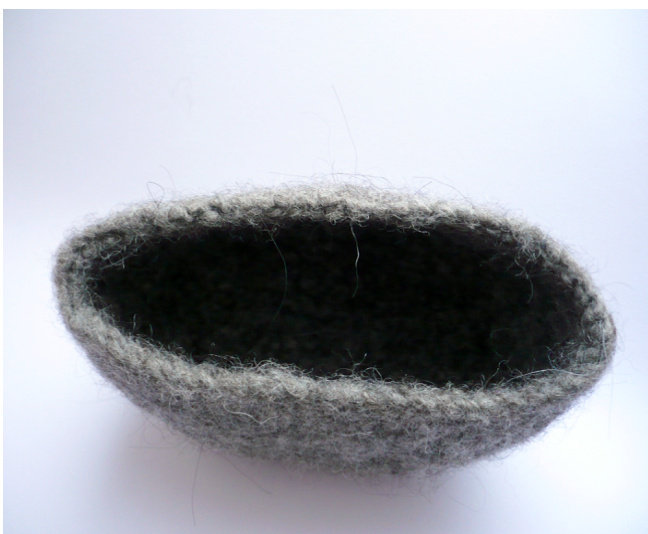
Illustration 3: Dried Purse, Once Acrylic Yarn is Removed Using a sewing thread that matches the zip as closely as possible, secure it with a couple of backstitches to the zip and then back stitch the zip to the purse, along the pinned line. Try to avoid pushing the needle completely through the felt, so the stitches don't show on the right side of the purse. Ensure that your stitches extend beyond the top and bottom of the zip teeth, but not past the end of the edge of the purse, to which it is being sewn. Secure with a couple of back stitches and then cut the thread.
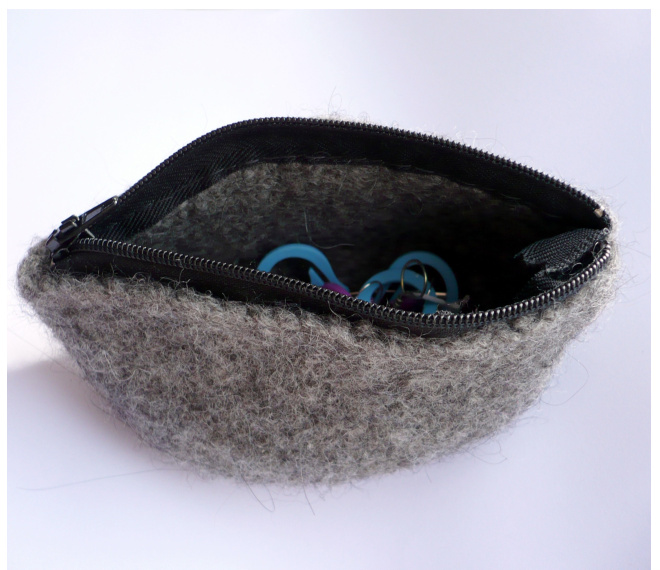
Illustration 4: Purse, Filled with Stitch Markers Next, open the zip, so that you can manipulate it along the opposite side of the purse. Pin and sew the other side of the zip in the same way as the first one. when you are finished, the back of the zip will be facing you and the purse will be inside out. With the zip open turn the purse the right way and the zip should close easily and smoothly. If it doesn't, you may need to cut out the zip and move it around a little, before trying again. I hope that you enjoy making your new purse, and that you get as much use out of yours, as I get out of mine. If you have any problems with the pattern or have any queries, please contact me via email at mail@craftycripple.com or via my website, www.craftycripple.com.


