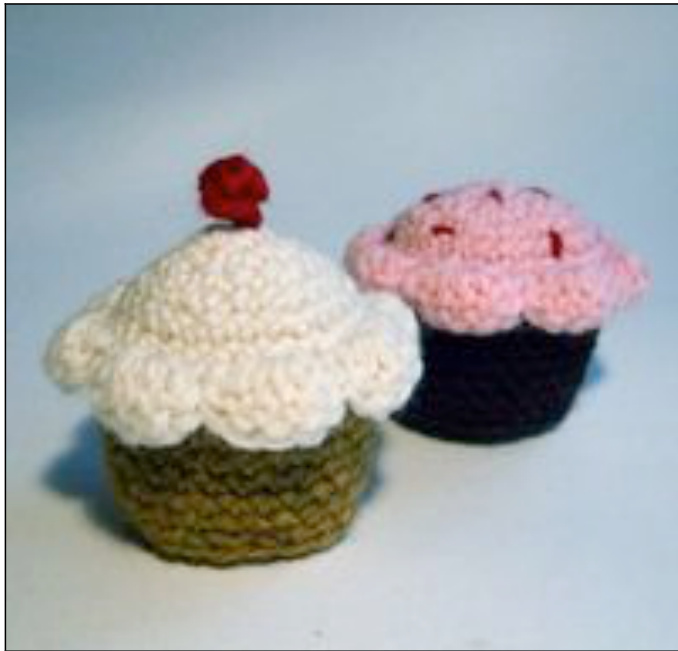
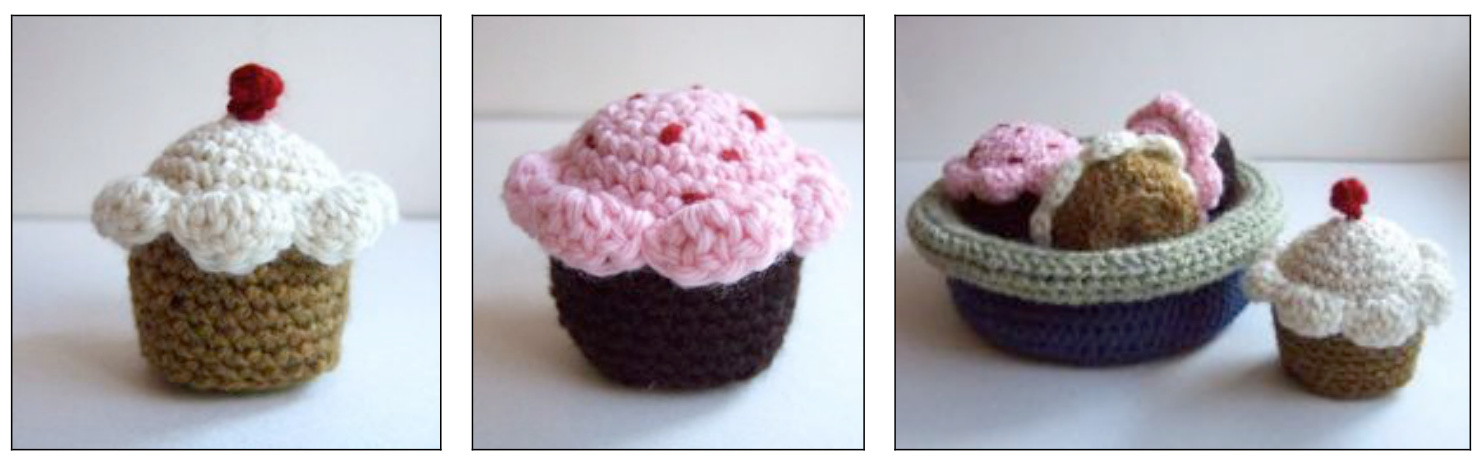
cupcakes, of course! crochet pattern
play with string
Required supplies
· $4\,\mathsf{m m}$ (G) crochet hook · worsted weight yarn (such as Cascade 220) in two colours: approximately 10 yards (9.2 metres) of icing colour (pink, cream, etc.) per cupcake approximately 13 yards (12 metres) of cake colour (lemon, chocolate) per cupcake · small amounts of yarn (worsted weight or lighter) for decorating top of cupcakes - approximately $^{24"}$ (60 cm) per cupcake · yarn needle · scissors · stuffing (such as wool batting, polyester fibrefill scrap yarn, scrap fabric, cotton balls) · one stitch marker
Gauge
There's no required gauge for this project, but you should use whatever crochet hook works comfortably with your yarn and creates a fairly dense fabric - ideally, the stuffing will not show through. The finished cupcake will be about $2.75^{\circ}$ (7 cm) in diameter and $z^{\ast}$ (5 cm) tall. Abbreviations (North American terms are used throughout) st $=$ stitch sts $=$ stitches ch $=$ chain SC $=$ single crochet $\mathbf{d}\mathbf{c}=$ double crochet $\mathsf{s l}=$ slip sc 2 tog $=$ single crochet 2 together (decrease) $\mathbf{yo}=$ put yarn over the hook () $=$ repeat directions that appear in parentheses repeat () around $=$ repeat directions in parentheses until the round is completed Round 1. Using icing colour (pink, white, whatever you prefer), make an adjustable ring and sc 7 in a round. Tighten the loop so there's no hole in the centre. Mark the end of your round with a stitch marker. If you are not familiar with the adjustable ring method, please visit my web site fora tutorial. (Site address is at the top of this pattern. Go to the web site and click on TUTORIALS.) Round 2. Sc twice in each st. There are now 14 sts in the round. Round 3. (Sc twice in first st, sc 1.) Repeat( )around. There are now 21 sts in the round. Round 4. (Sc twice in first st, sc 2.) Repeat ( )around. There are now 28 sts in the round. Round 5. Sc around.
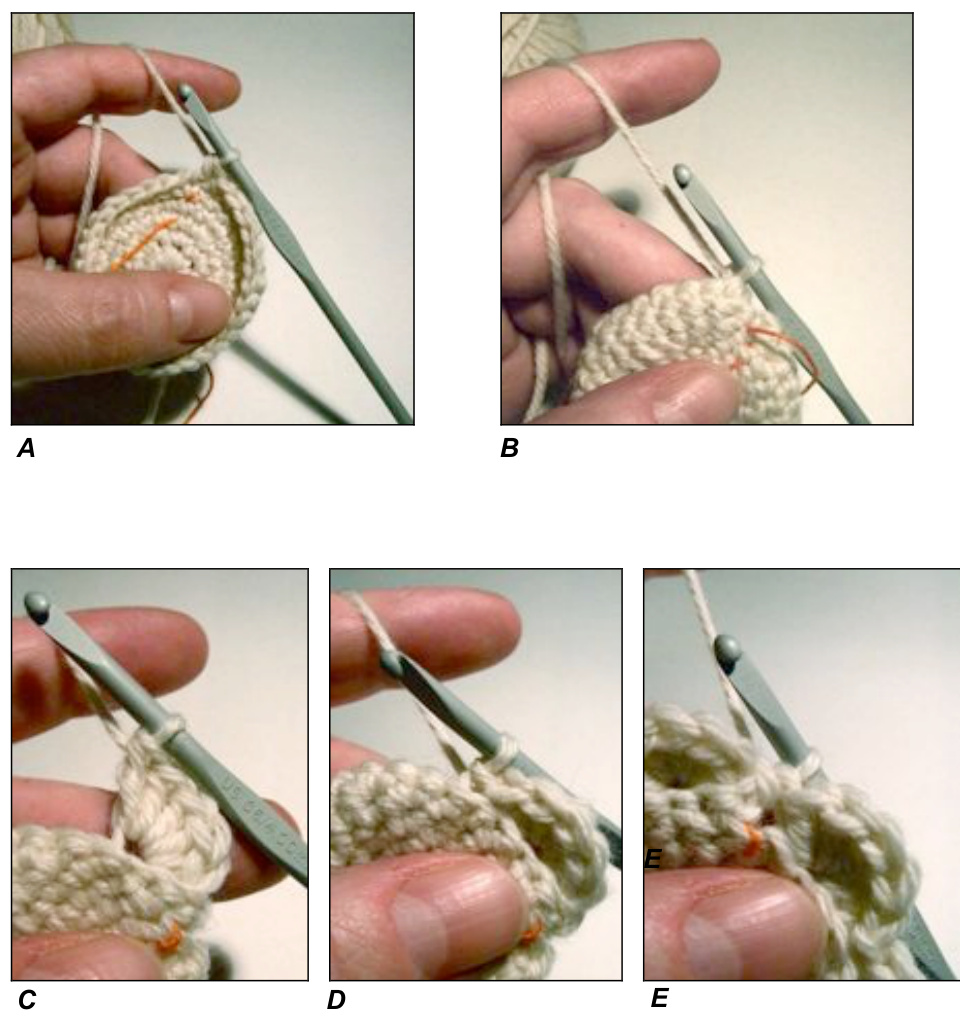
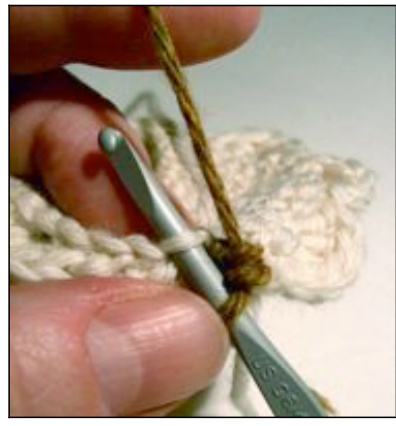
Now turn the work. [Picture B.] You'll do the next round working in the opposite direction, crocheting into the back loop only. Before the work is turned, this loop appeared to be the front loop. [Picture A.J Once it has been turned, it becomes the back loop. [Picture B.] Cut the yarn leaving a tailof about $6"$ $15\,\mathsf{c m})$ . Loosen the loop on the hook enough to draw the yarn end through, and gentlypulit snugUsing theyarn needle, draw theyarn end throughanearby stitch soit hangs on the underside of the icing section. There's no need to trim it; it wil become part of the stuffing. Now is the time to sew any decorations to the top of the cupcake. Option 1: Using the yarn needle and a $^{24"}$ $\left[60\;\mathsf{c m}\right]$ length of red yarn (or whatever colour you prefer), sew little dots on the top of the cupcake. Be sure to secure your yarn on the underside of the icing section so the decorations don't come ioose later. Again, don't worry about trimming the yarn ends; just leave them hanging on the underside of the icing piece. Option 2: Ifyou want to make a cherry to decorate the top of the cupcake, use the red yarn to work one bobble.
Make a bobble
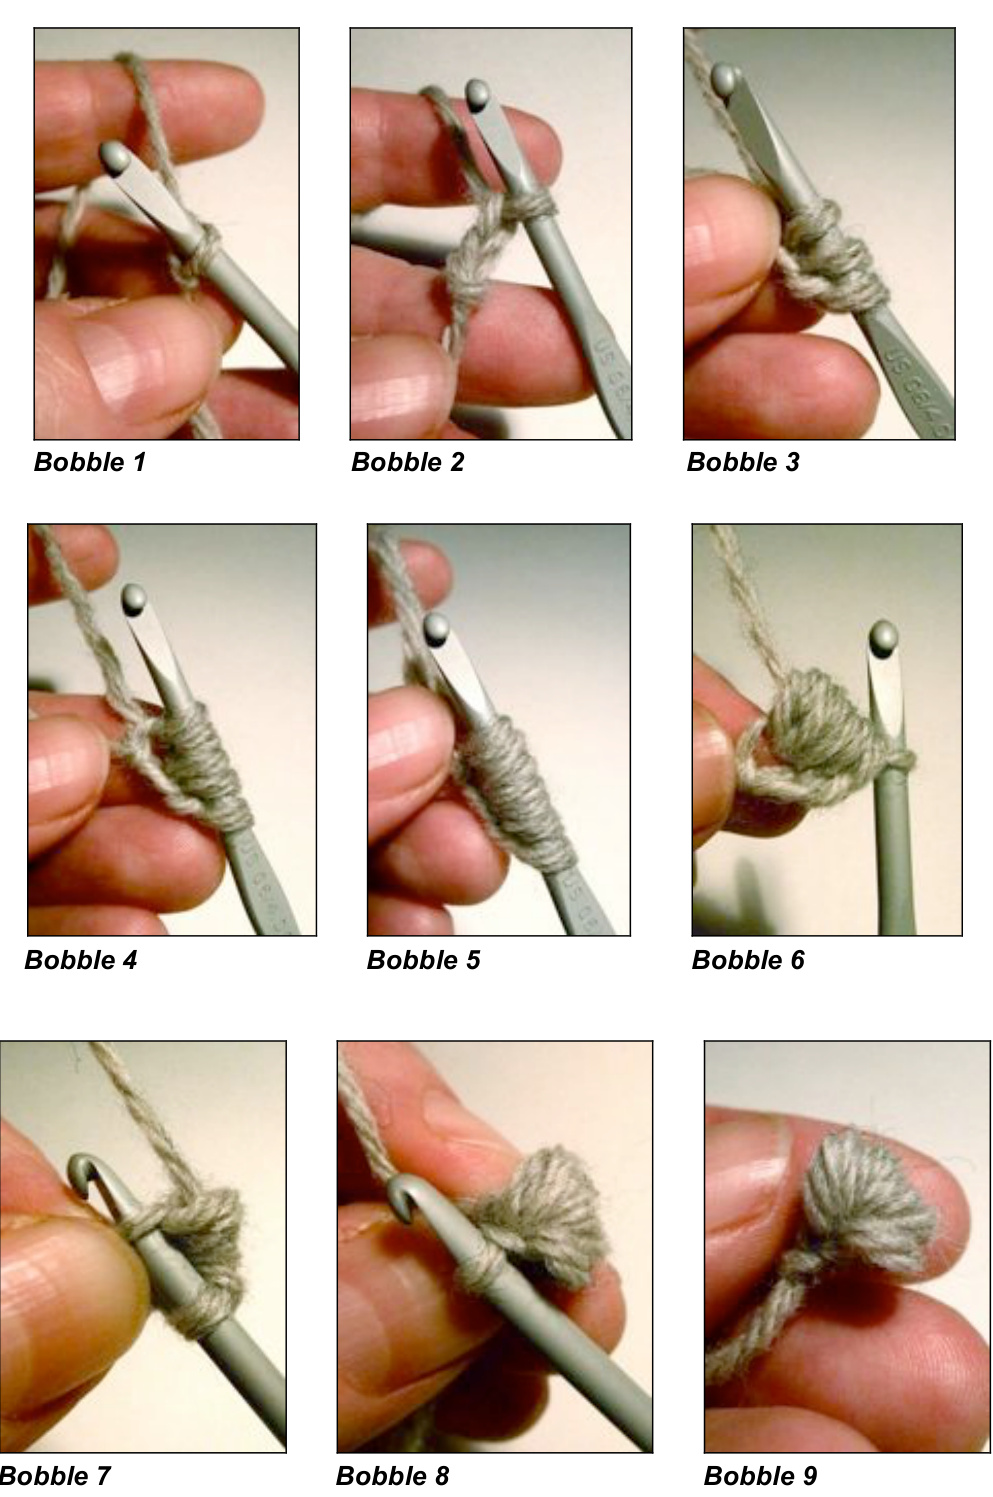
1. Put a loop on the hook [Bobble 1] and ch 2. [Bobble 2.] 2. Yo, insert hook in second ch from hook, draw up a loop. There are now 3 loops on the hook. [Bobble 3.] So far, this is just like the beginning of a dc stitch. 3. Yo,insert hook in same st, draw up a loop. There are now 5 loops on the hook. [Bobble 4.] 4. Yo, insert hook in same st, draw up a loop. There are now 7 loops on the hook. [Bobble 5.] 5. Draw up a loop and pulli through all loops on the hook. [Bobble 6.] 6. Insert hook in same st [Bobble 7]and sl [Bobble 8] then tie off. Here is your bobble. [Bobble 9.] 7. Use the yarn needle to sew the yarn ends to the centre top of the cupcake.
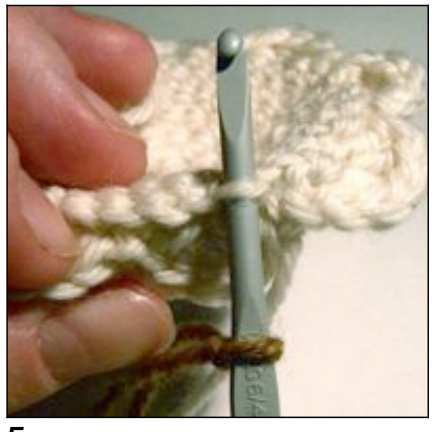
Turn the work back to the original orientation. Now put a loop of the cake-coloured yarn (brown, if you like) onto your hook. Do the next round working into the remaining (back) loop from round 6, which will be sitting behind the scallops you made in round 7. [See pictures F and G.] It doesn't matter at which stitch you start; just mark the end of your round so you can keep track of it.
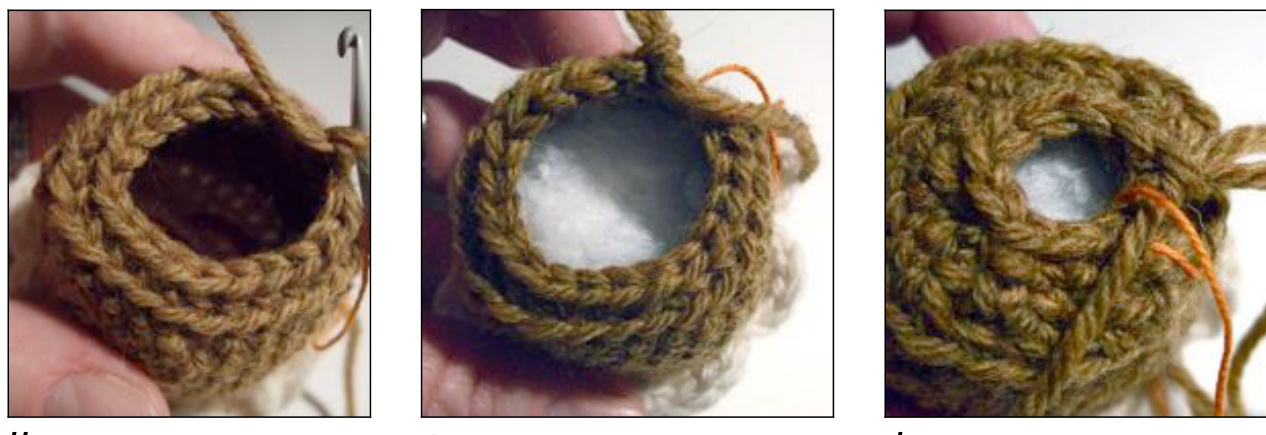
G Round 8. Sc around. Round 9. Sc 8, sc 2 tog, sc 22. There are now 31 sts in the round. Round 10. Sc 14, sc 2 tog, sc 15. There are now 30 sts in the round. Round 11. Sc 20, sc 2 tog, sc 8. There are now 29 sts in the round. Round 12. Sc 2 tog, sc 27. There are now 28 sts in the round. Round 13. Sc 7, sc 2 tog, sc 19. There are now 27 sts in the round Round 14. Sc 18, sc 2 tog, sc 7. There are now 26 sts in the round Round 15. Sc 12, sc 2 tog, sc 12. There are now 25 sts in the round. Round 16. On this round, crochet into the back loop only of each stitch. (Sc 3, sc 2 tog.) Repeat ( ) around. There are now 20 sts in the round. [See picture H.] Start stuffing the cupcake. Don't flli right to the brim, or the stuffing may get in the way of your crochet hook as you continue to work. [See picture l.] Round 17. (Skip 1, sc 3.) Repeat ( ) around. There are now 15 sts in the round. Round 18. (Skip 1, sc 2.) Repeat( )around. There are now 10 sts in the round. [See picture J.]
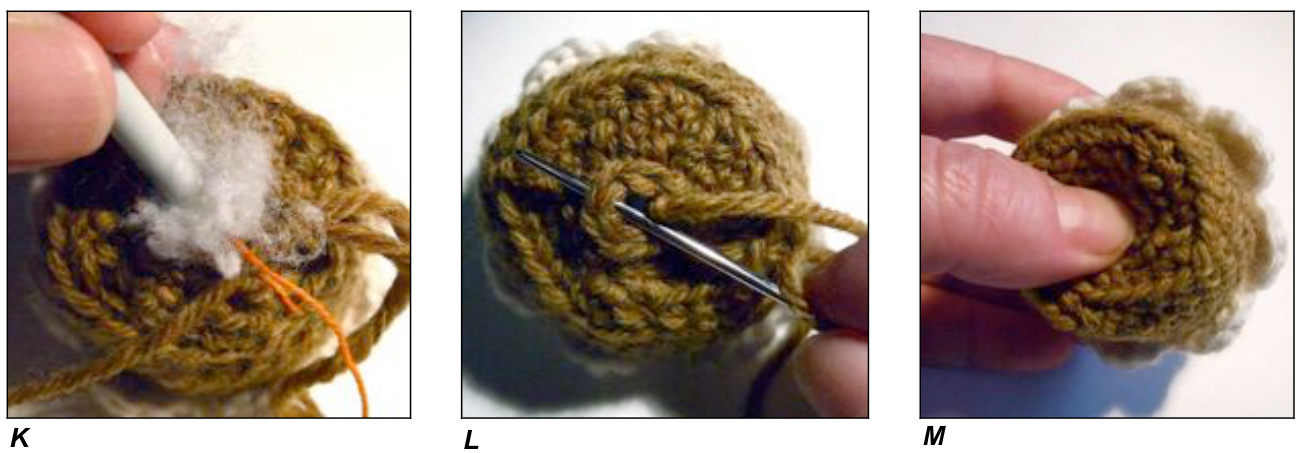
Add more stuffing before the space is too tightto fit any in. You might need to use the end of your hook to help poke the bits of stuffing in to the opening which is now very narrow. [See picture K.] Don't stuff completely fullleave enough give to squish the cupcake a bit. Round 19. (Sl 1, skip 1) repeat around. There are now 5 sts in the round. Tie off the yarn, leaving a tailo about $12"$ $30\;\mathsf{c m})$ .Sew any remaining gap by running the yarn back and forth a couple of times across the stitches of the final round. [See picture L.jWeave in the yarn end and trim neatly. If the cupcake doesn't sit evenly on a flat surface, push the centre bottom in with your thumb. [See picture M.]
Pattern and images $\circledcirc$ Tricia M. Ward. I hope you enjoy making these items for yourself or as gifts, but ask you to please refrain from selling them, and from copying or distributing this pattern.


