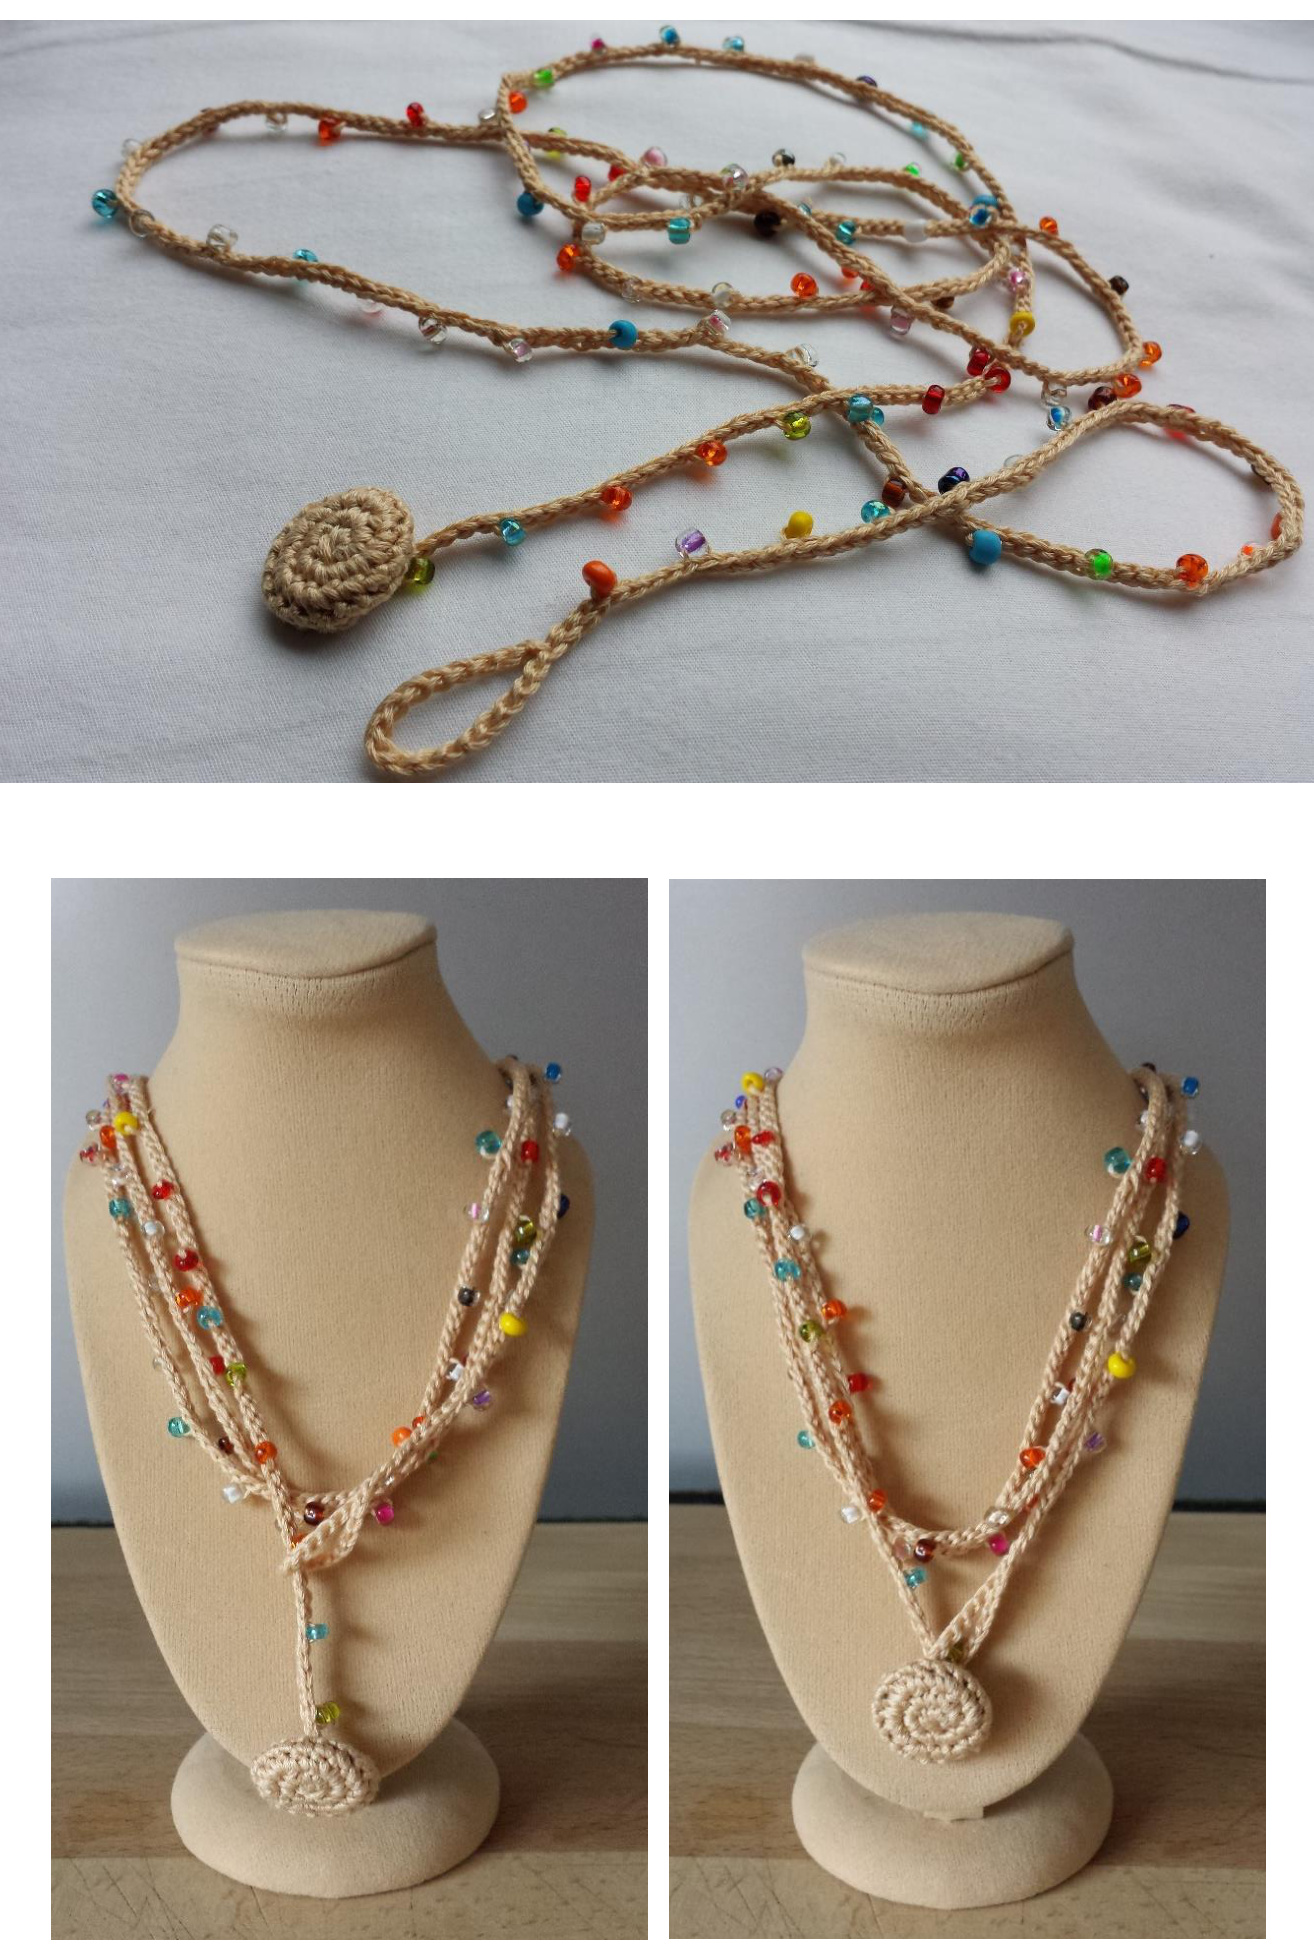
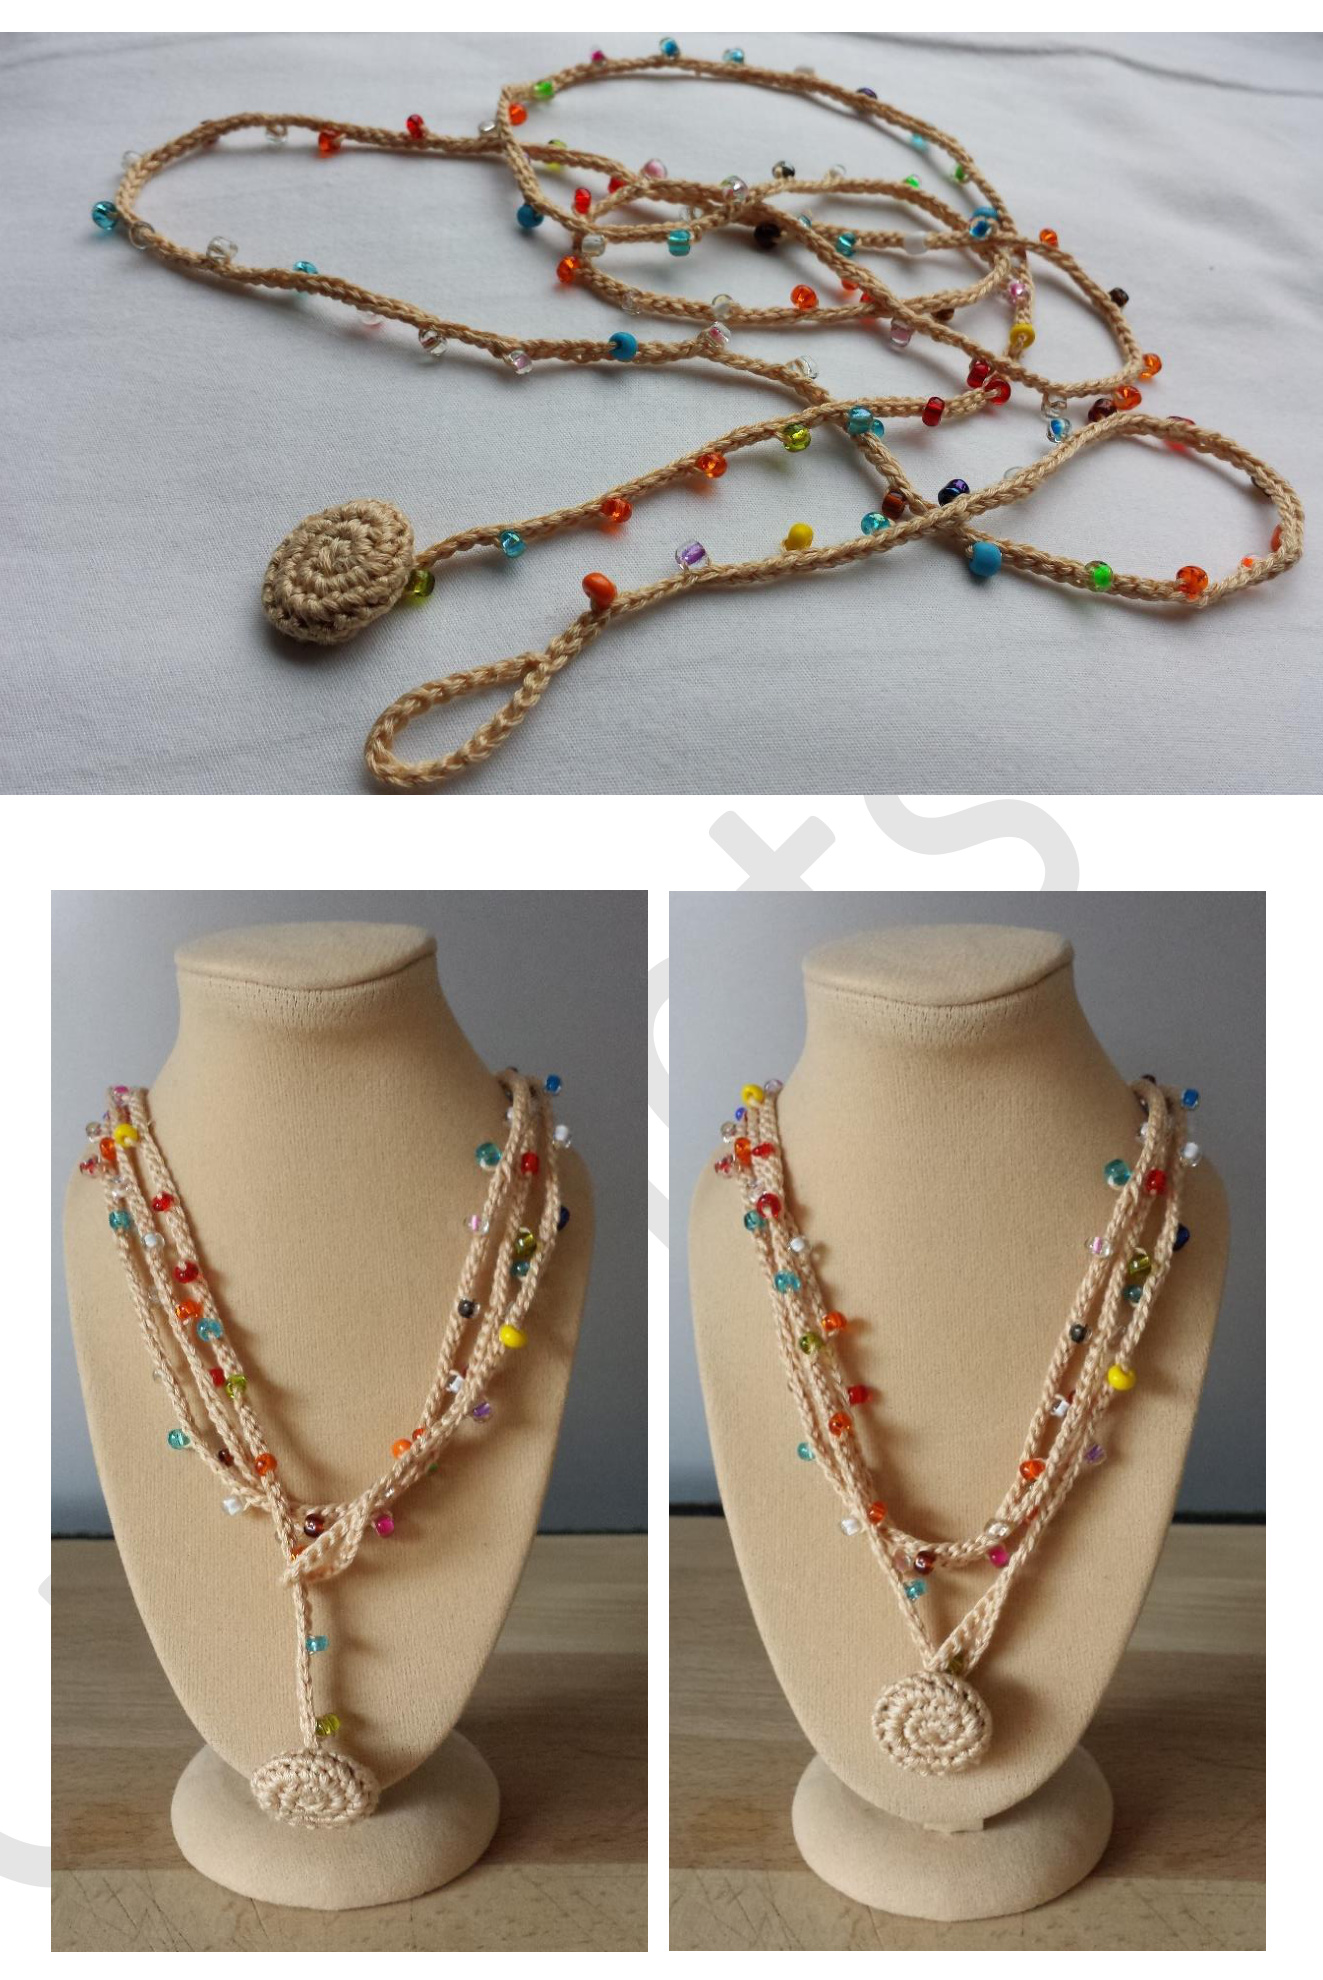
bracelet / pecklace with beads
What you need :
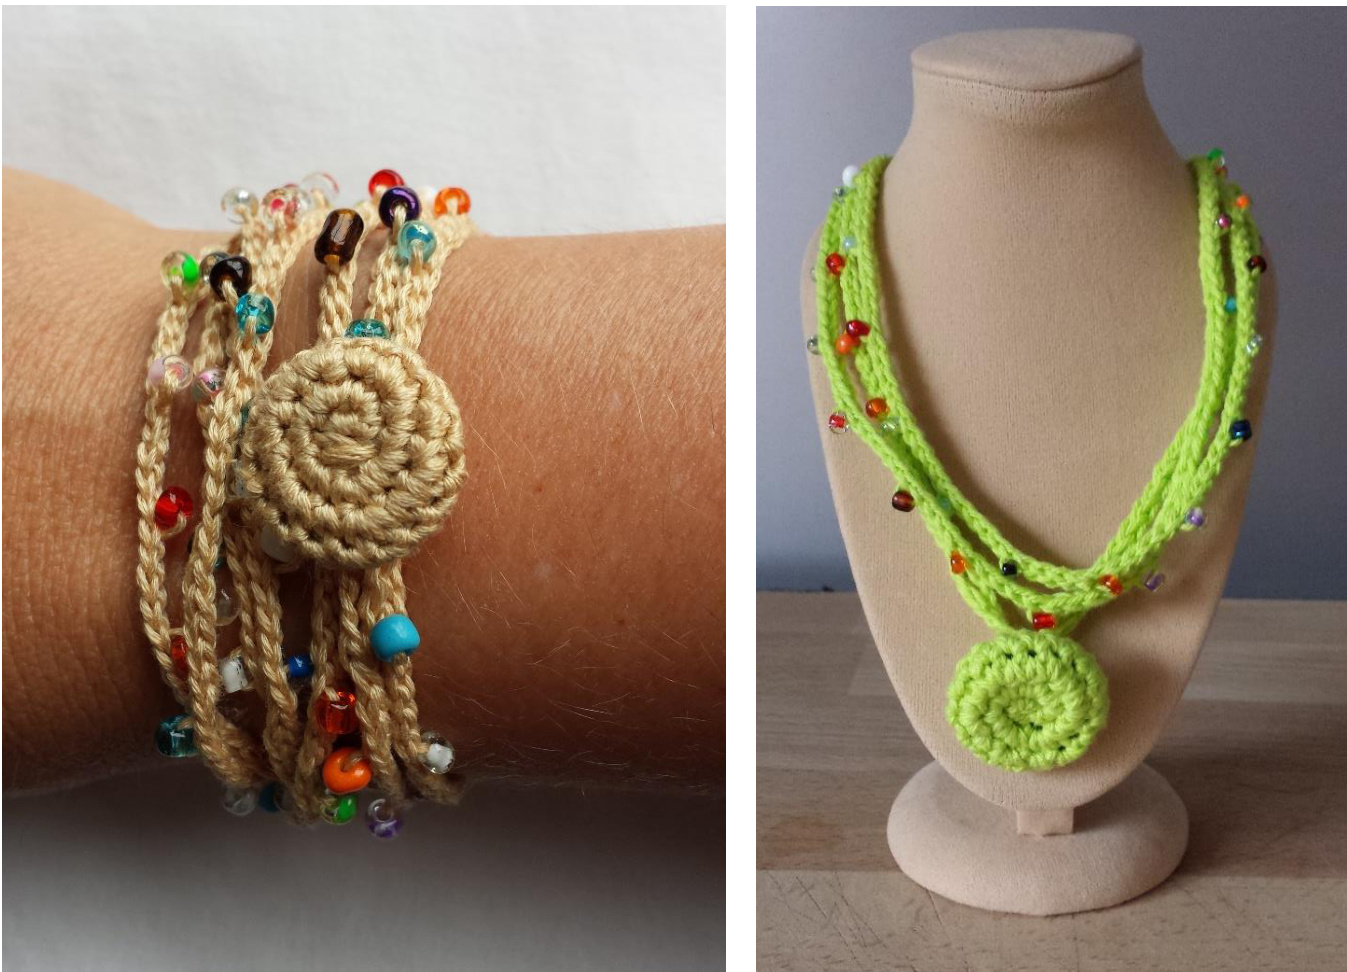
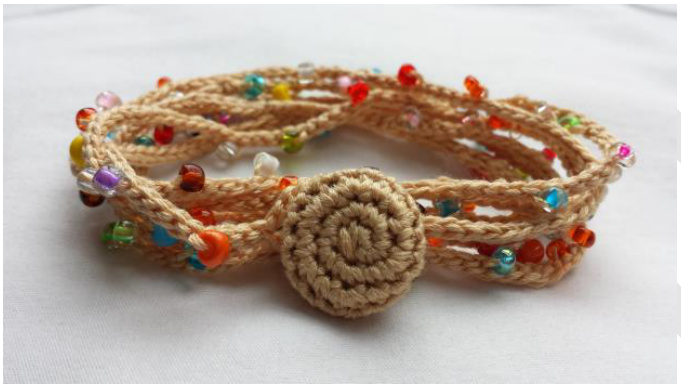
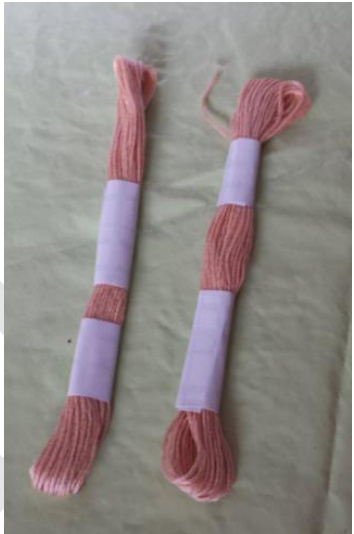
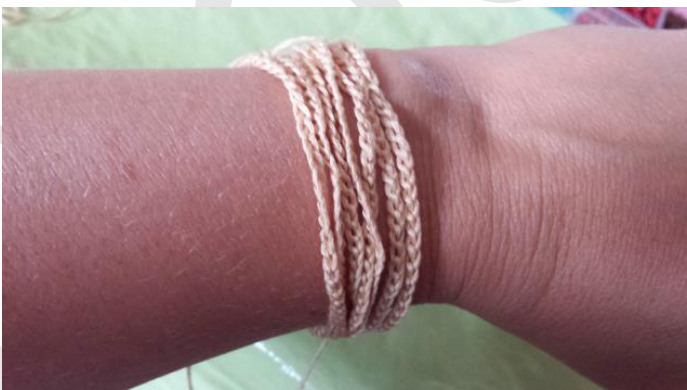
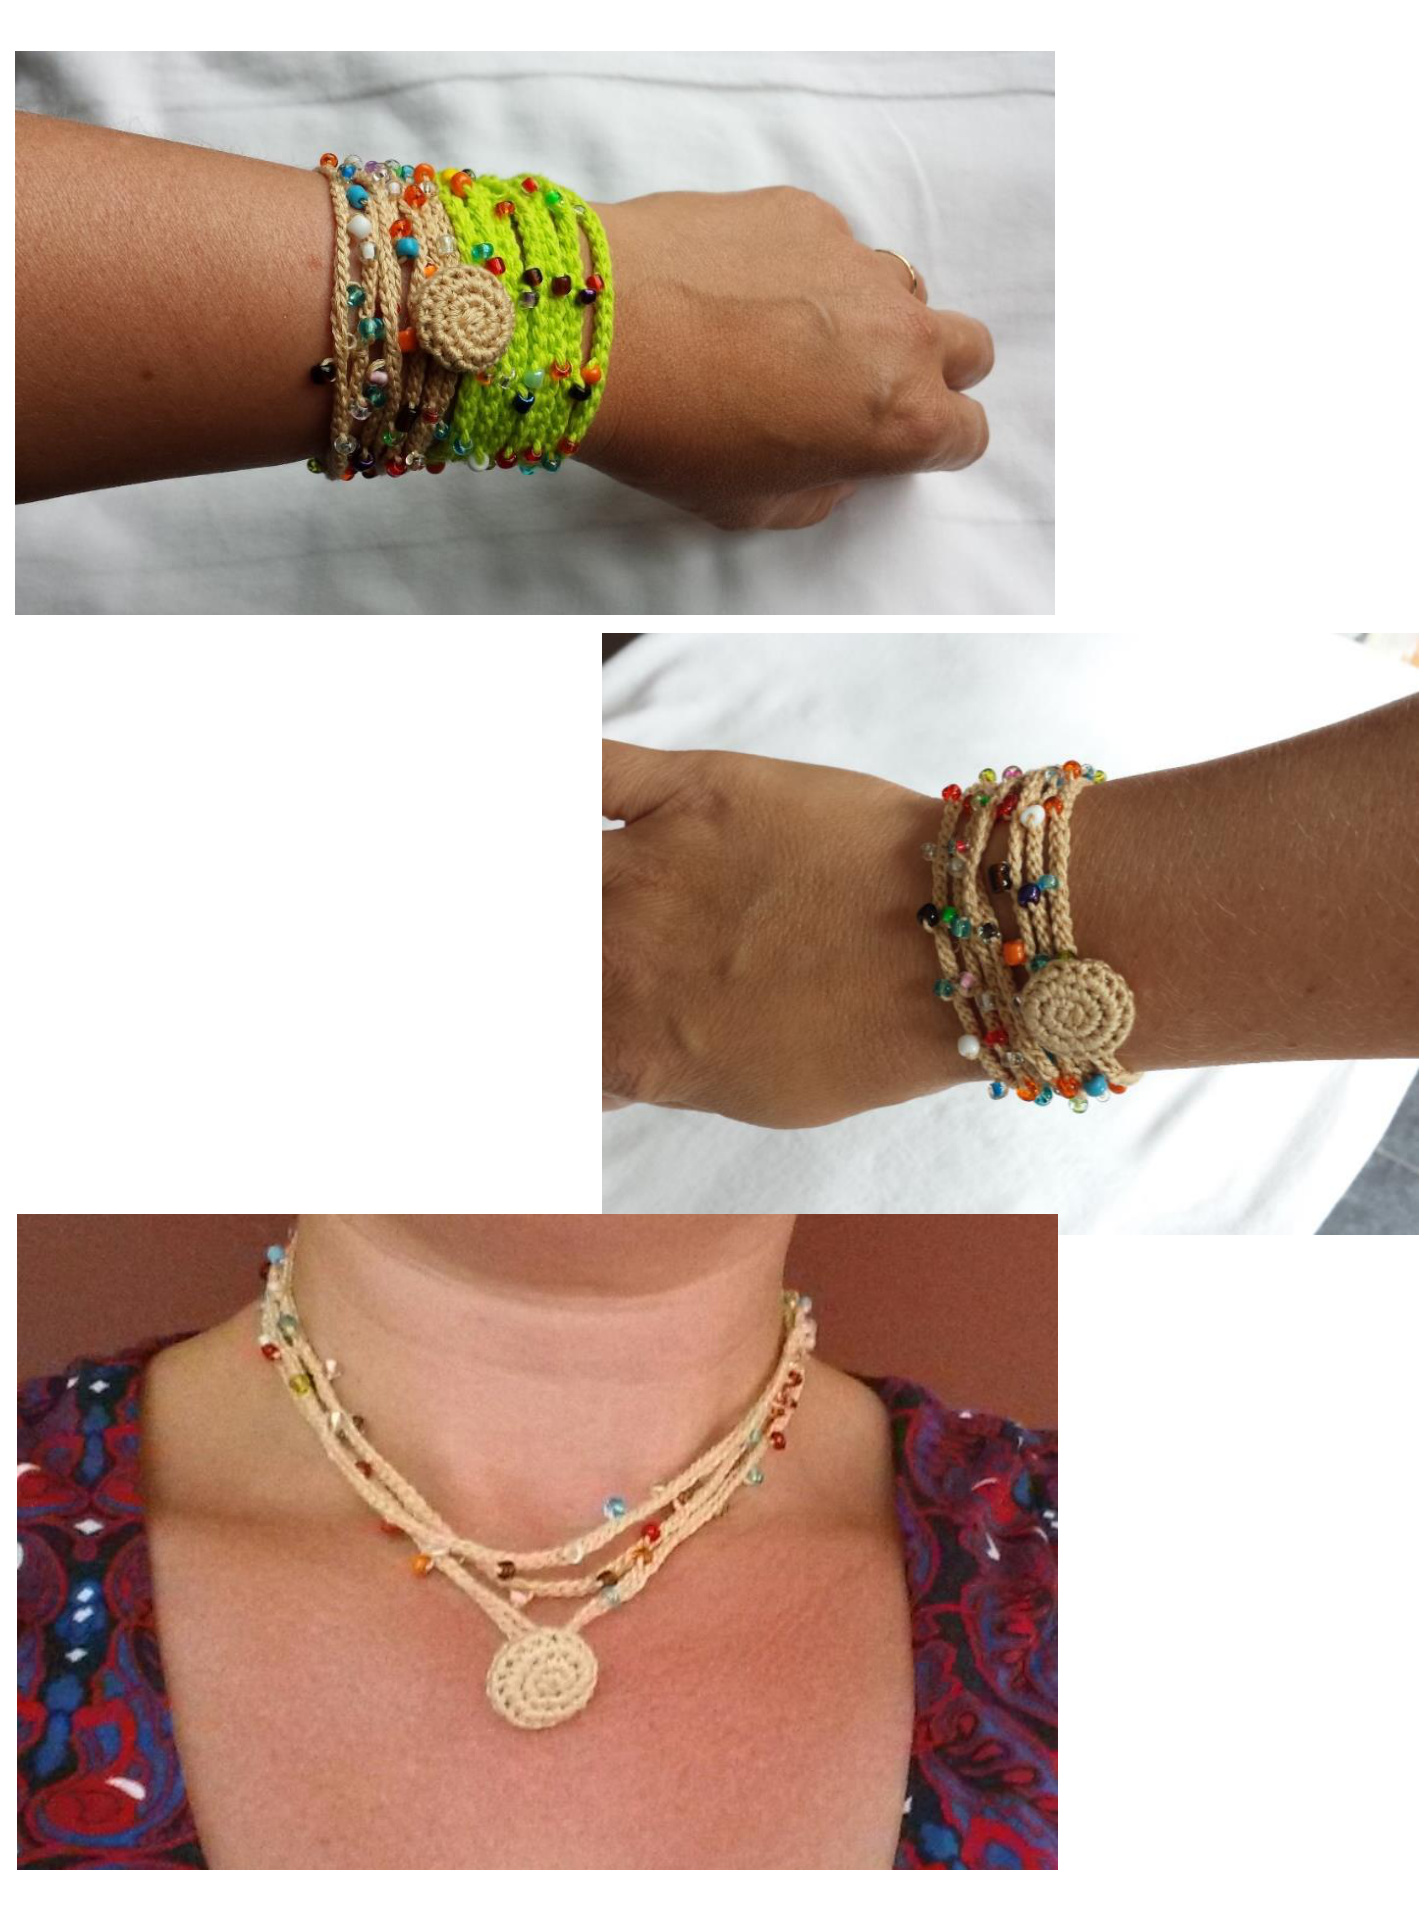
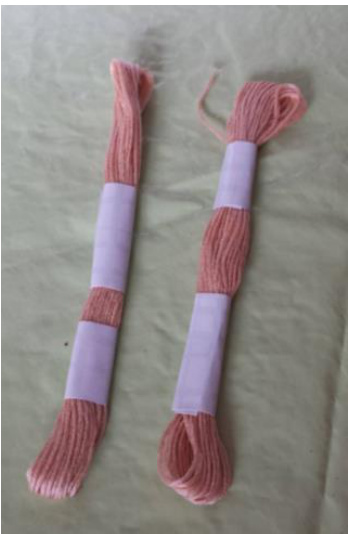
n : you can choose : you can either use thicker or thinner cotton. You can see the result in these pictures : 0 the lightbrown I made with embroidery cotton and hook size 2.
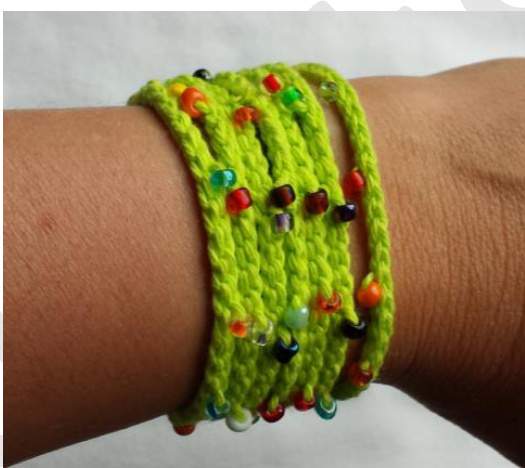
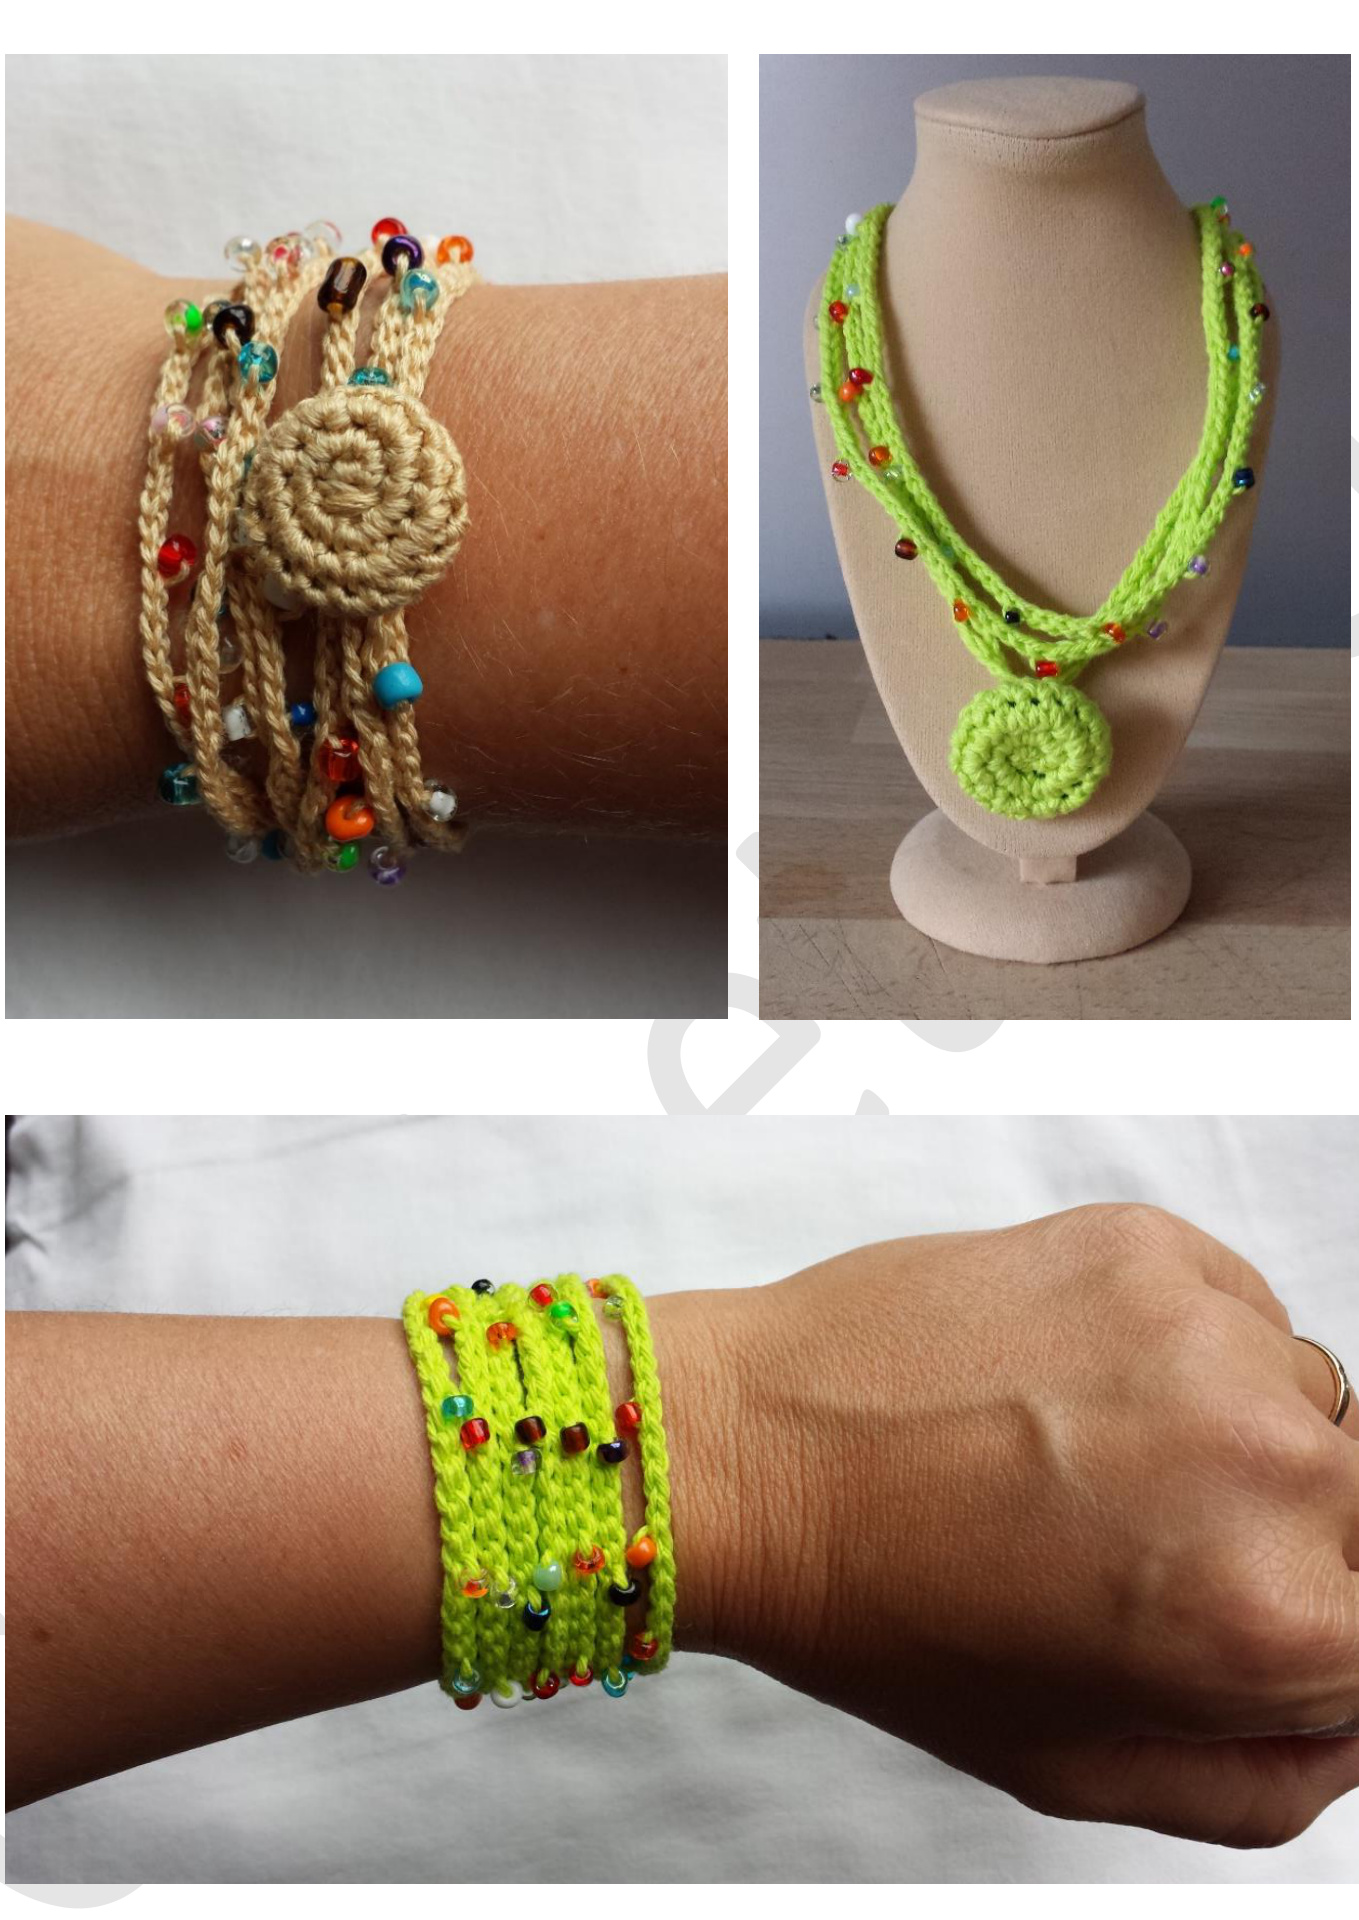
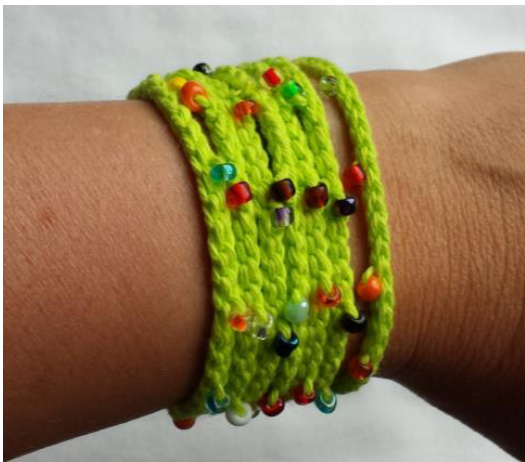
the limegreen I made with catania and hook size 3.

scissors tapestry neelde button beads, pearls
Abbreviations :
ch = chain sl st = slip stitch sc = single crochet sc2tog = single crochet next 2 stitches together
Tips :
First read the whole pattern. If you can not (yet) manage a magic circle, you can do : 2 ch - 6 sc in the second chain from the hook. Watch a few videos on my blog : http://crochets4u.blogspot.be/
Pattern :
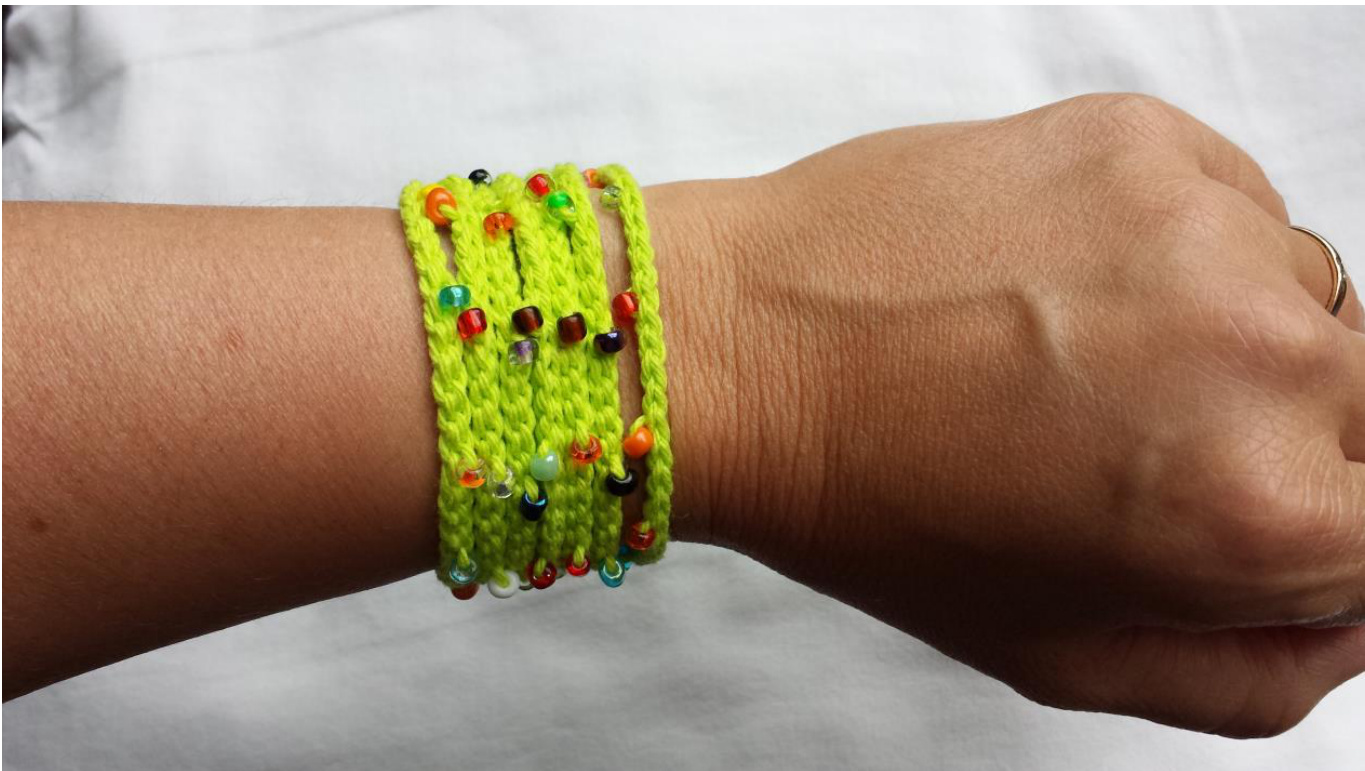
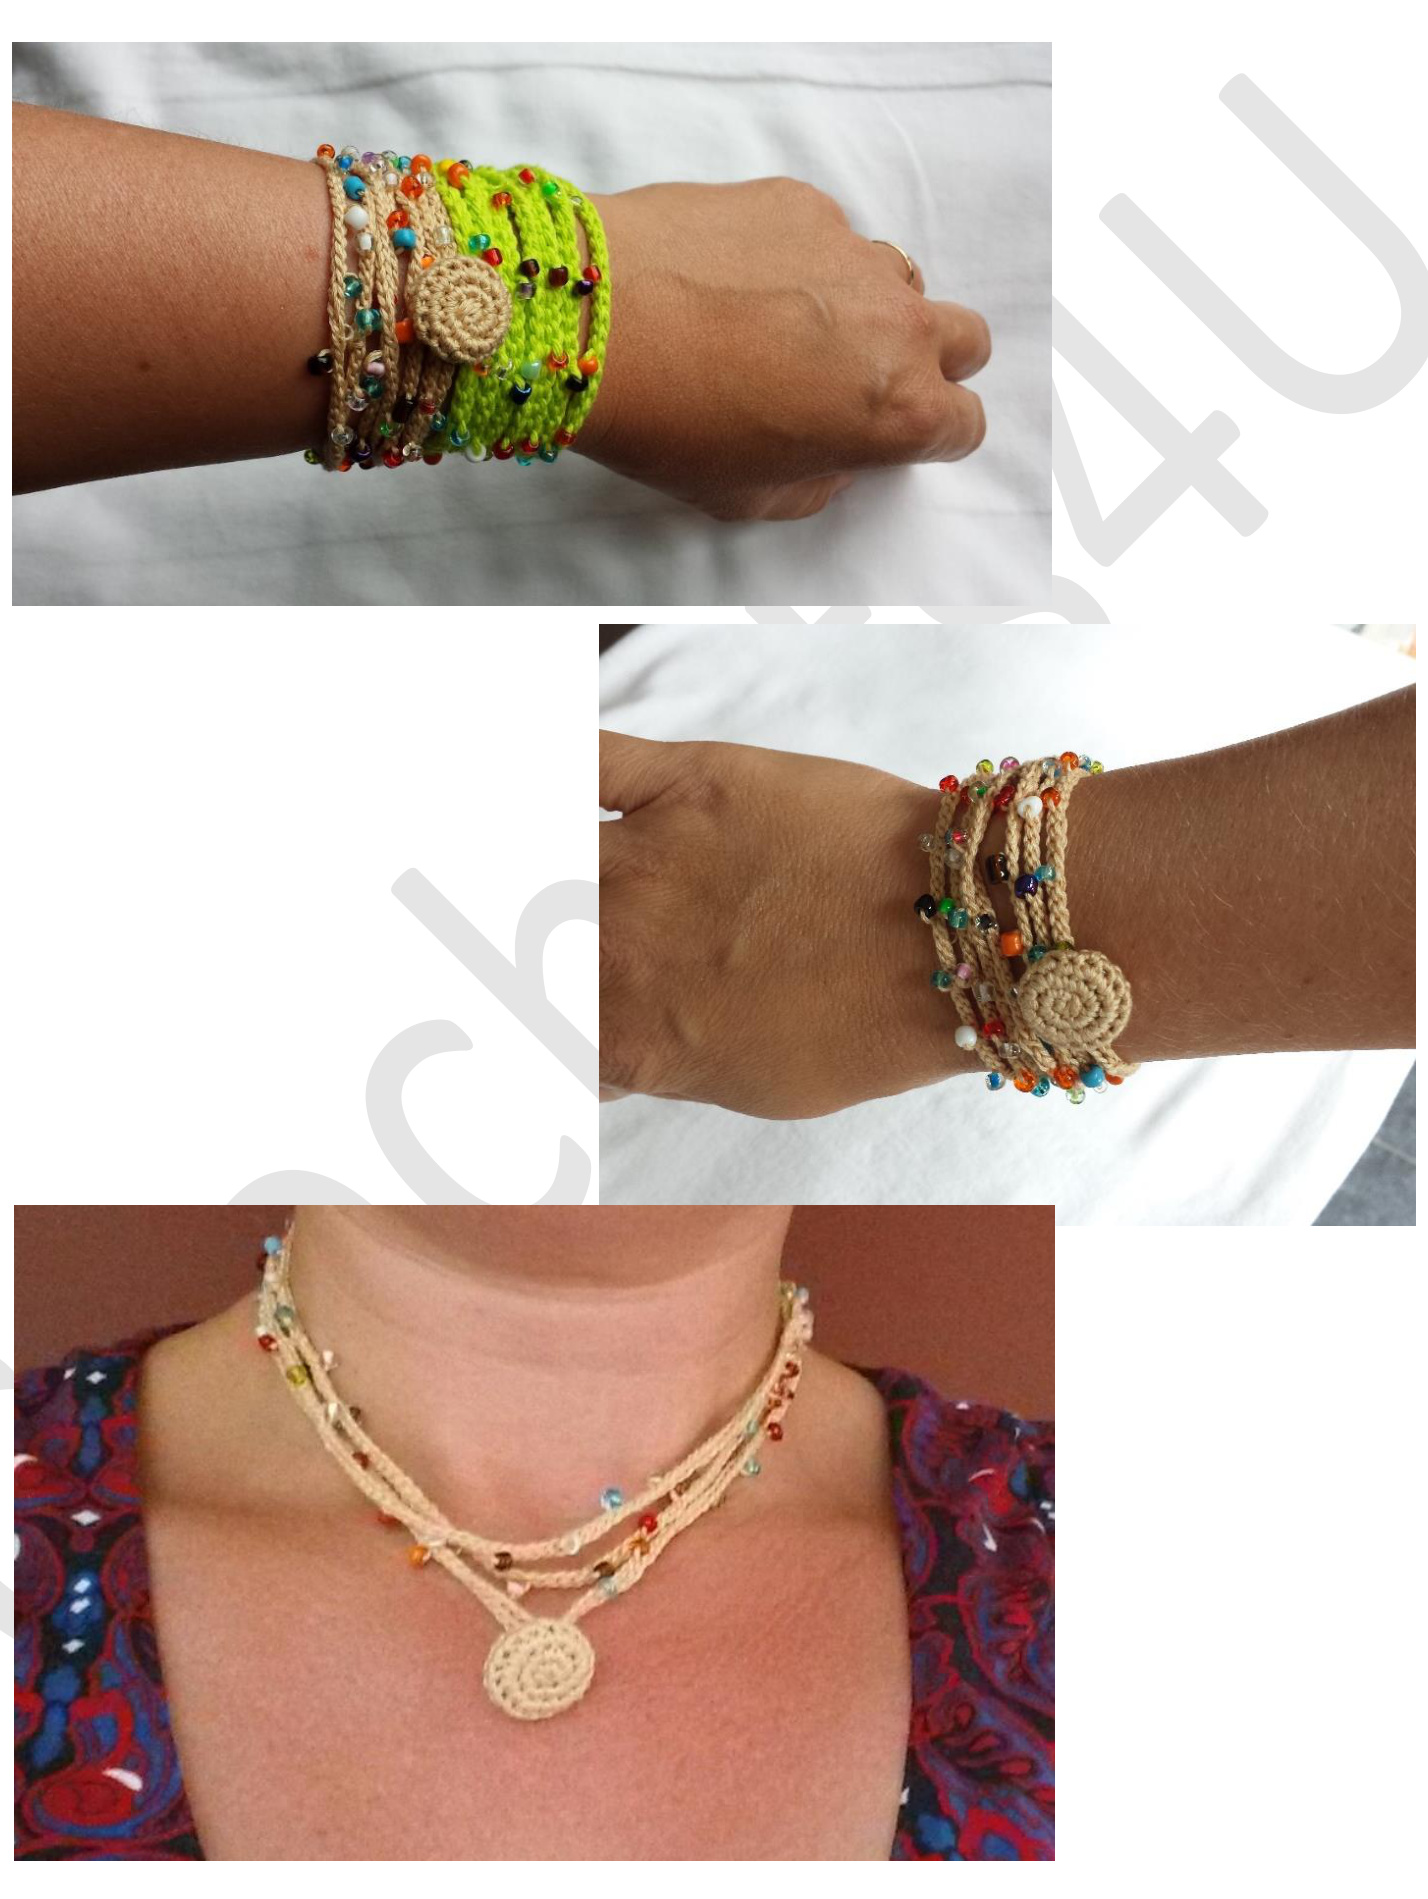
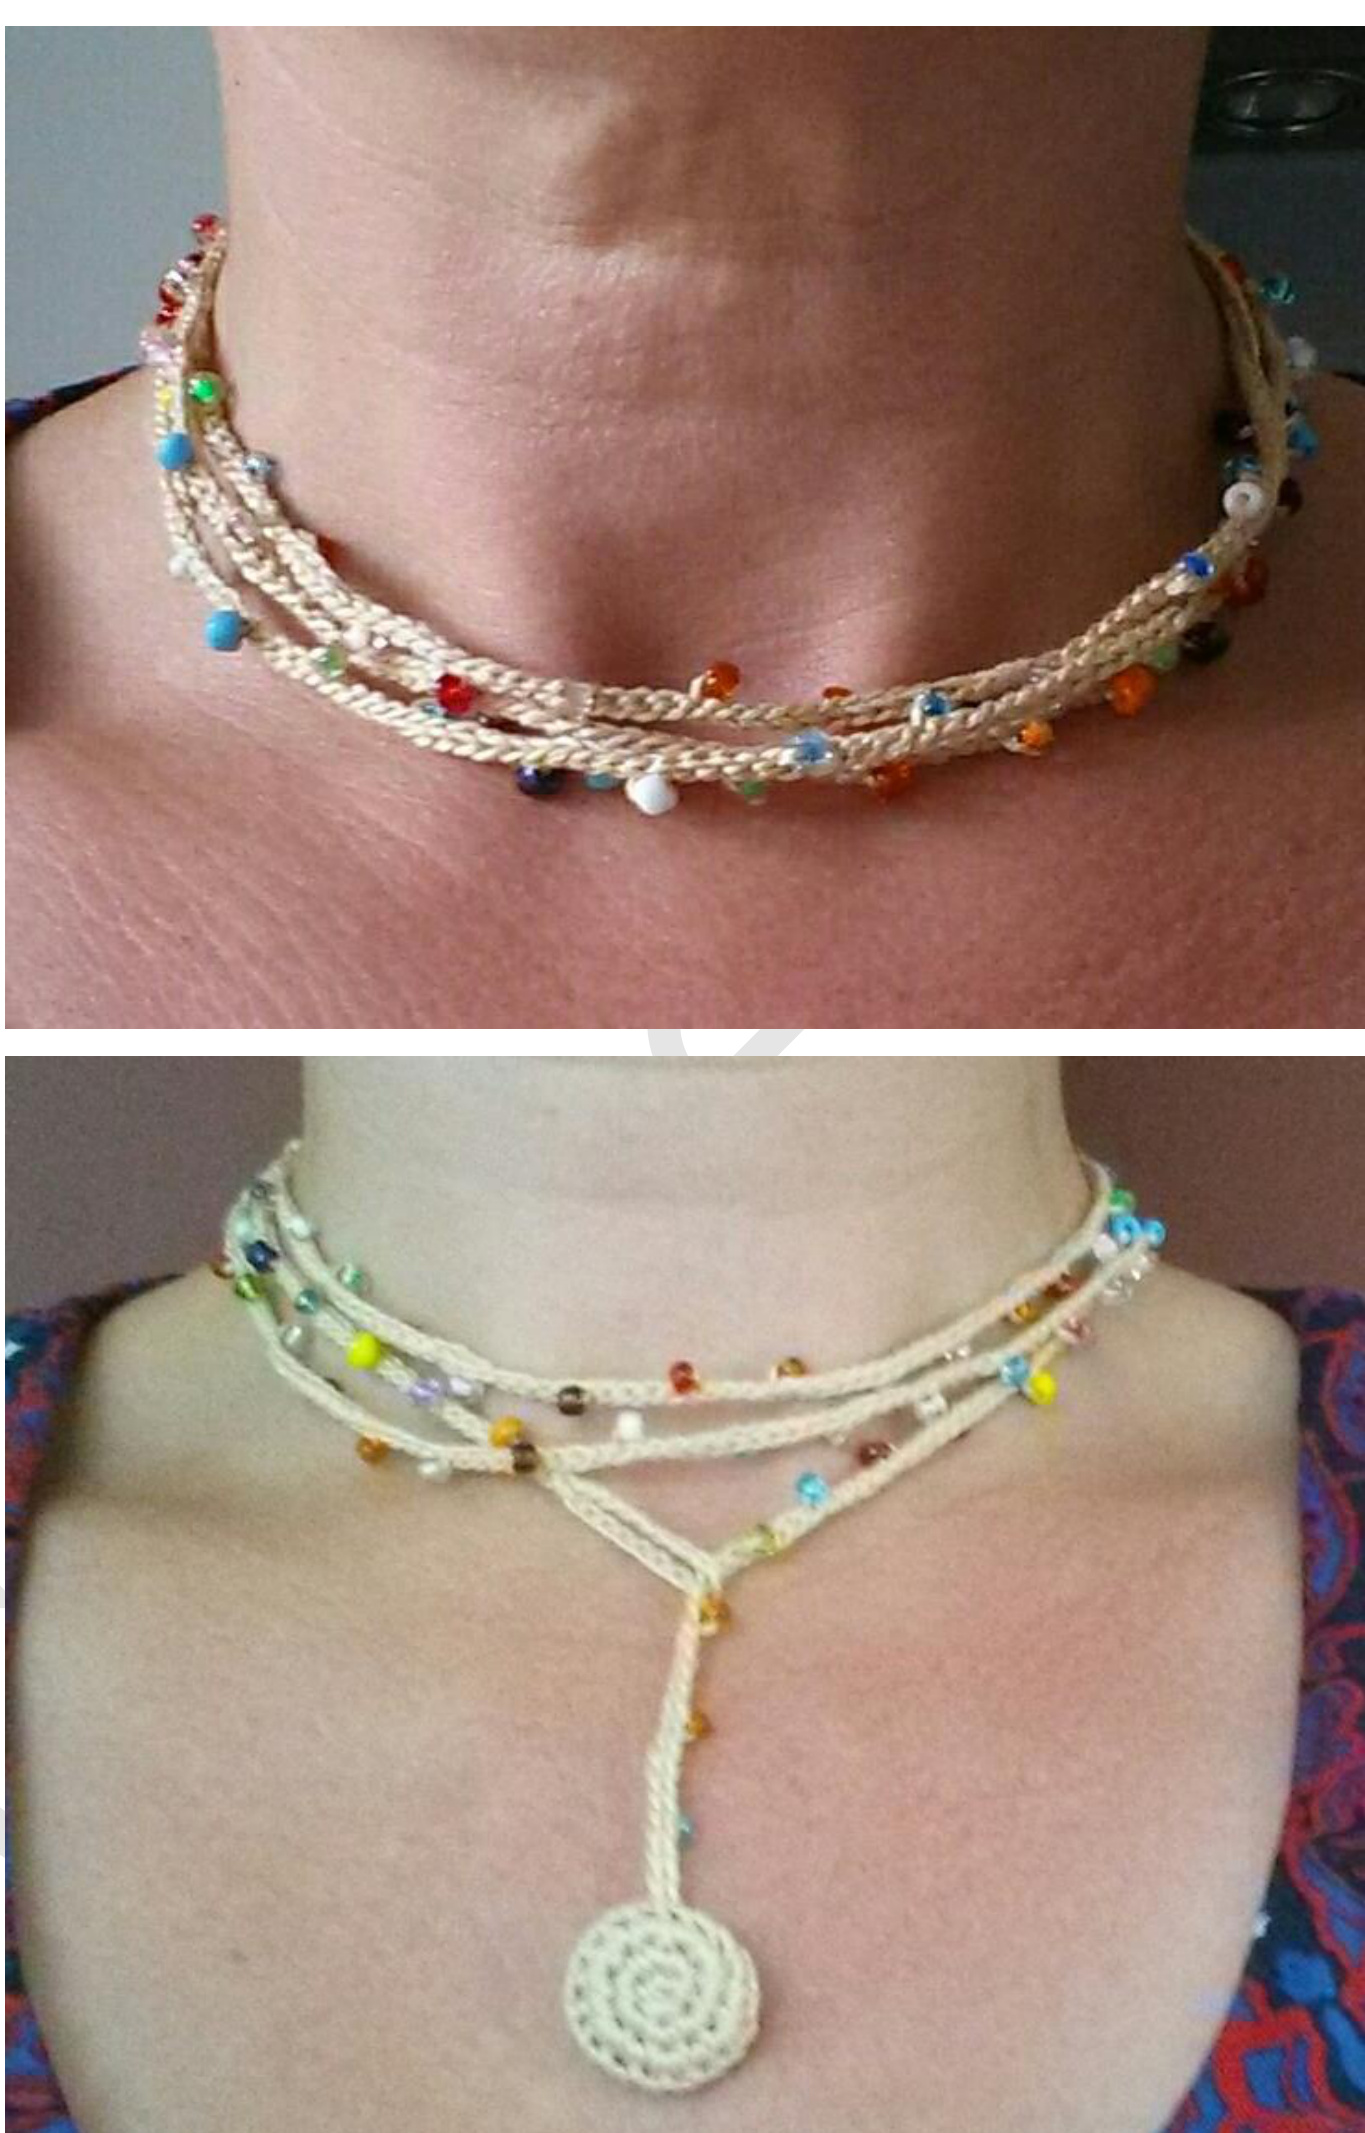
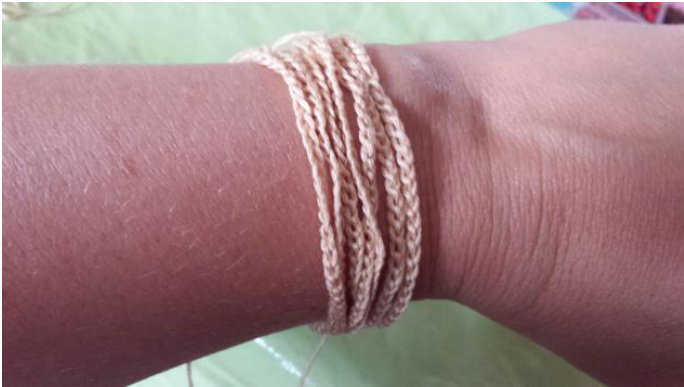
You can decide for yourself how long you want the bracelet / necklace to be. I made mine so I could wrap them 7 times around my wrist. You can choose to make it longer or shorter.
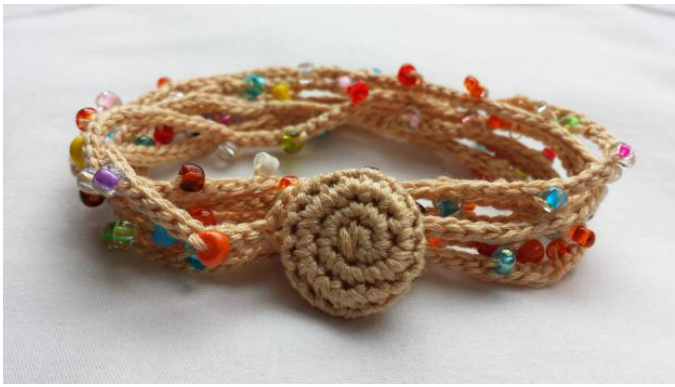
button :
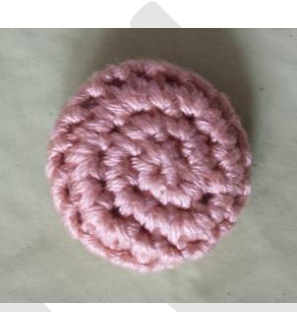
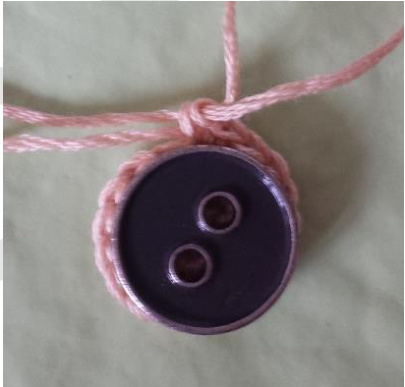
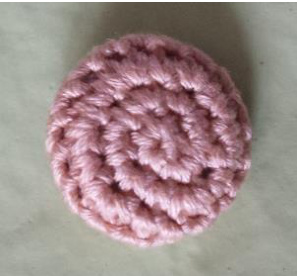
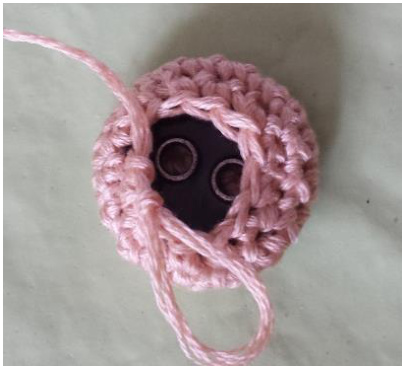
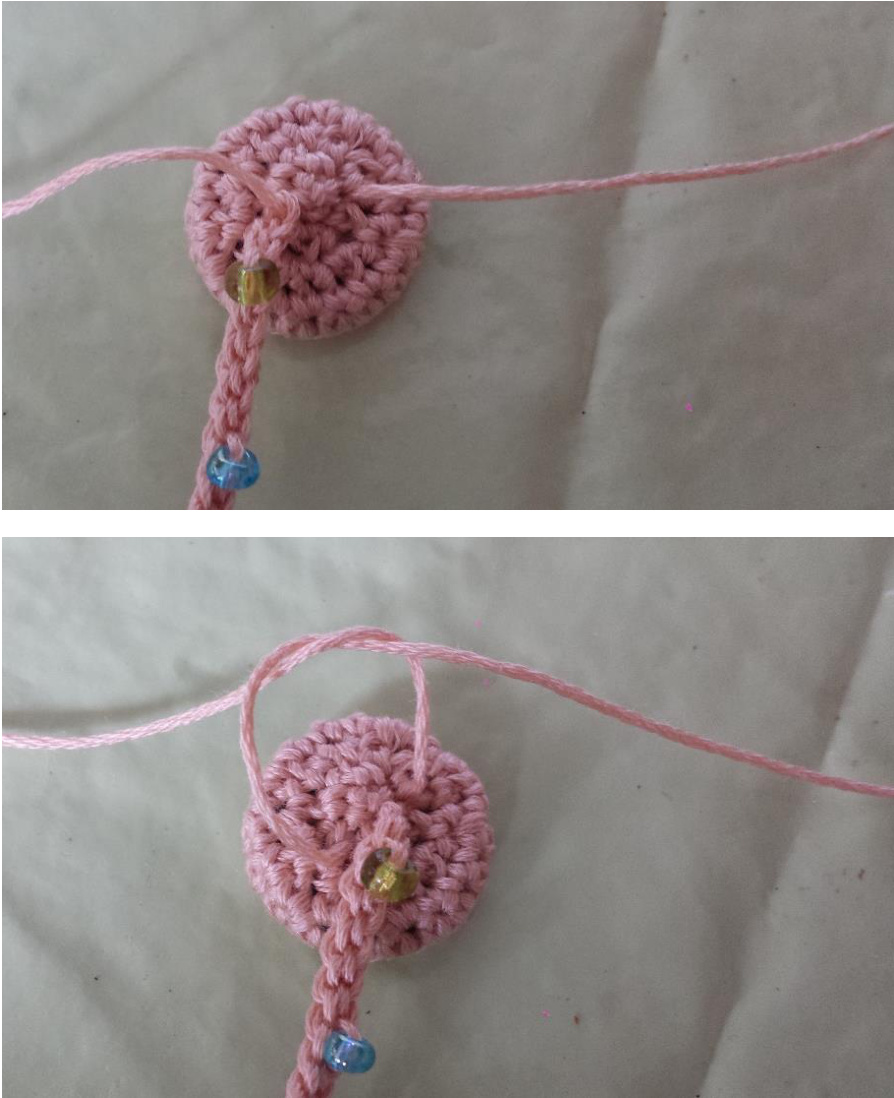
For the button there are 2 options : you can either use a nice button or you can crochet around an existing button : 1. 6 sc in magic circle 2. 2 sc in each sc (12 sc) 3. \*1 sc - 2 sc in next sc\* 6x (18 sc) The circle should match the button exactly. If it doesn't, have a look at the bottom of this page. 4. 18 sc 5. 18 sc 6. \* 1 sc- sc2tog \* 6x(12 sc) Put the button inside 7. with the button insde : \*sc2tog\* 6 x Cast off Your button doesn't match the circle ? Read this : If you button is larger, then increase an extra row. In row 4 you crochet : \*2 sc - 2 sc in next sc\* 6x (24 sc) Row 5 and 6 : 24 sc Row 7 : \* 2 sc - sc2tog \* 6 x(18 v) Continue as in example.
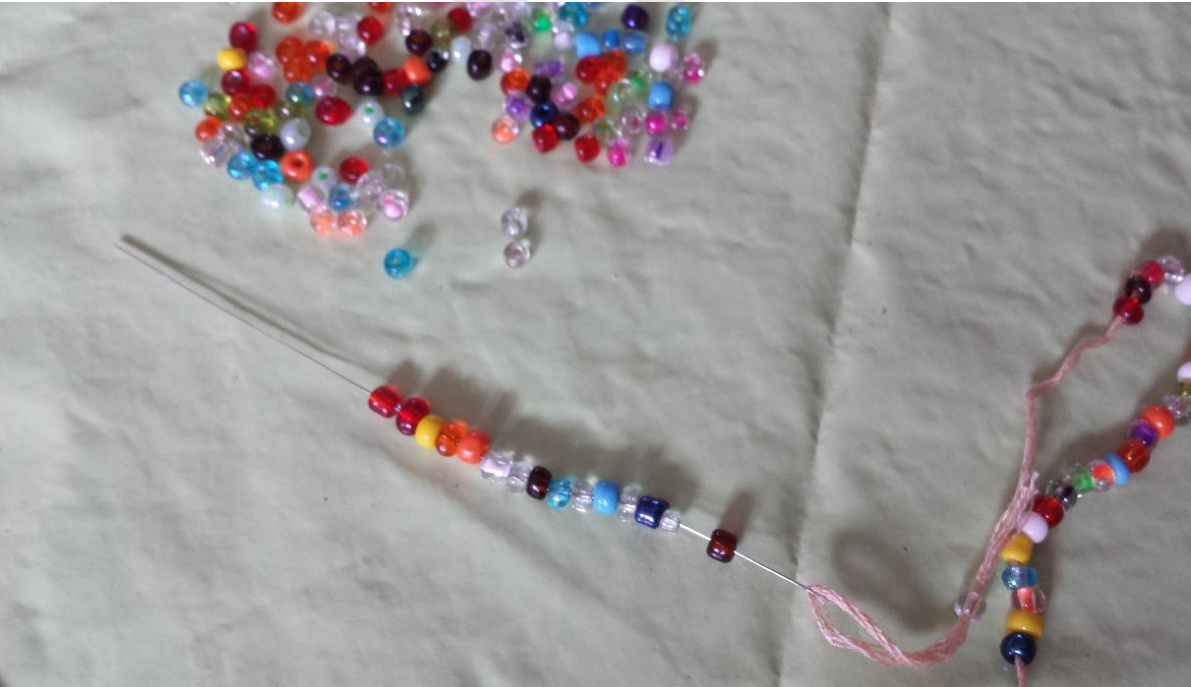
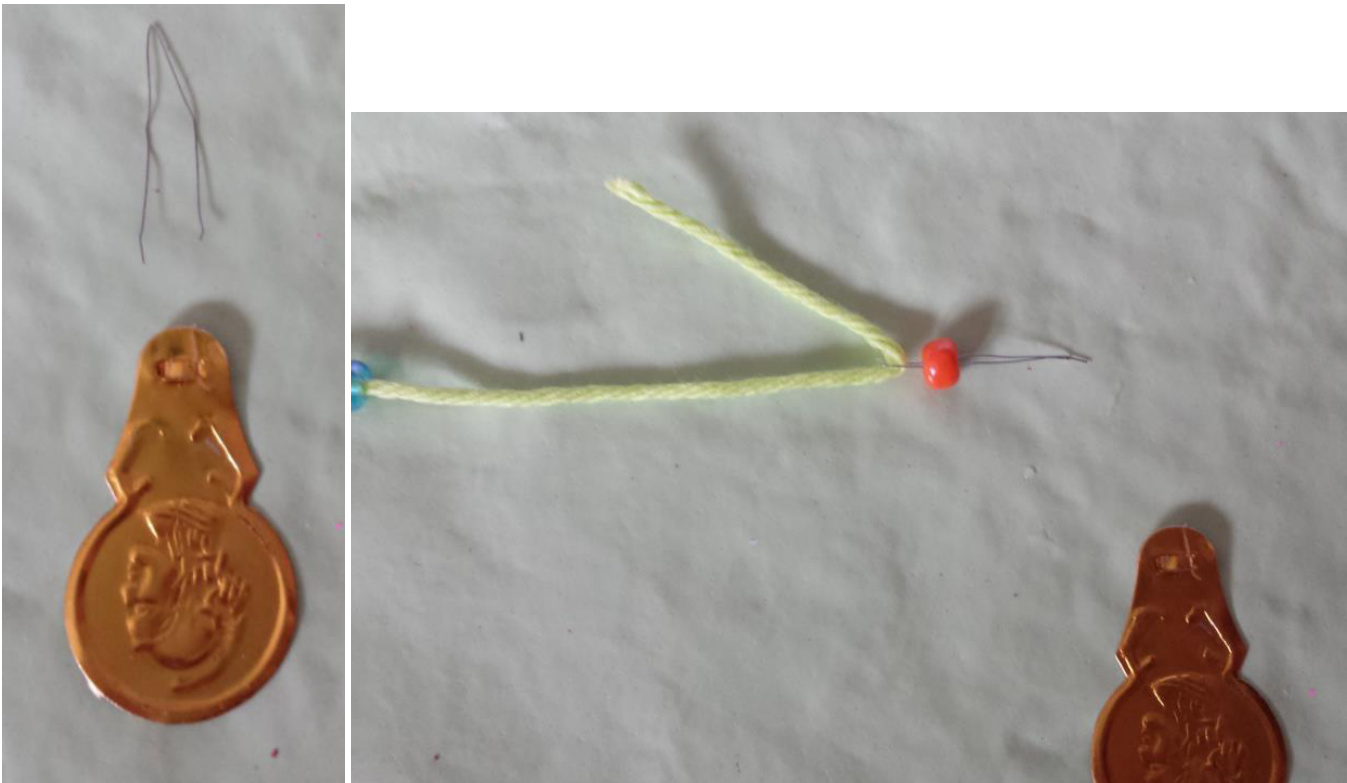
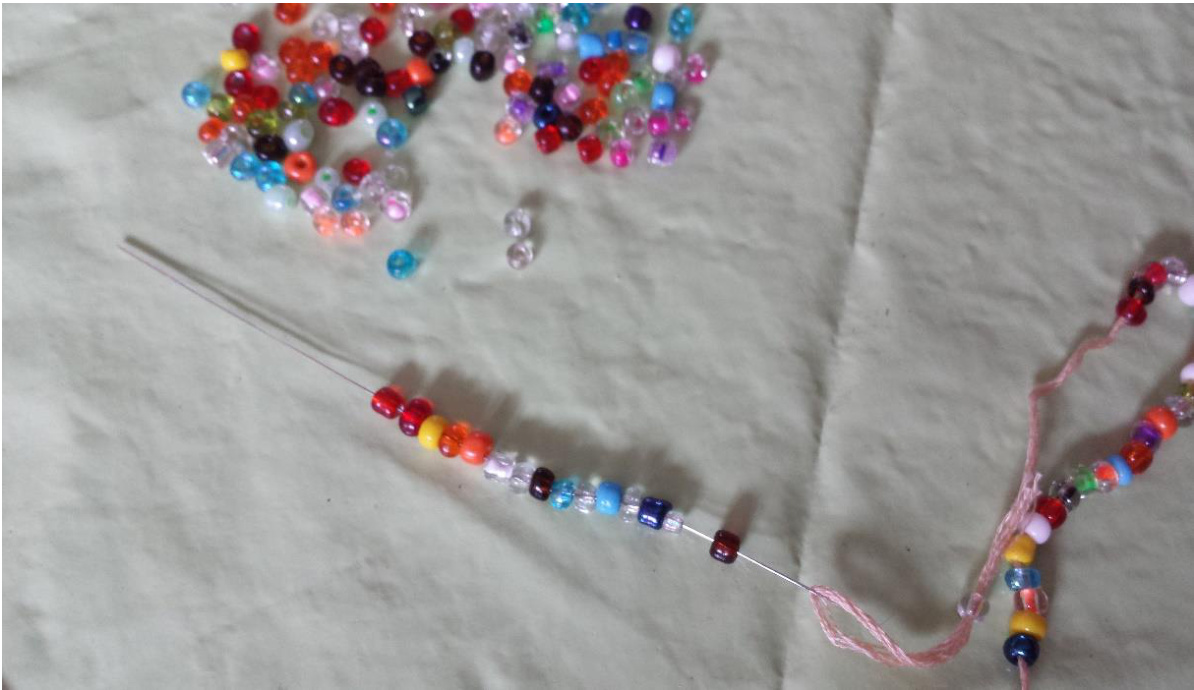
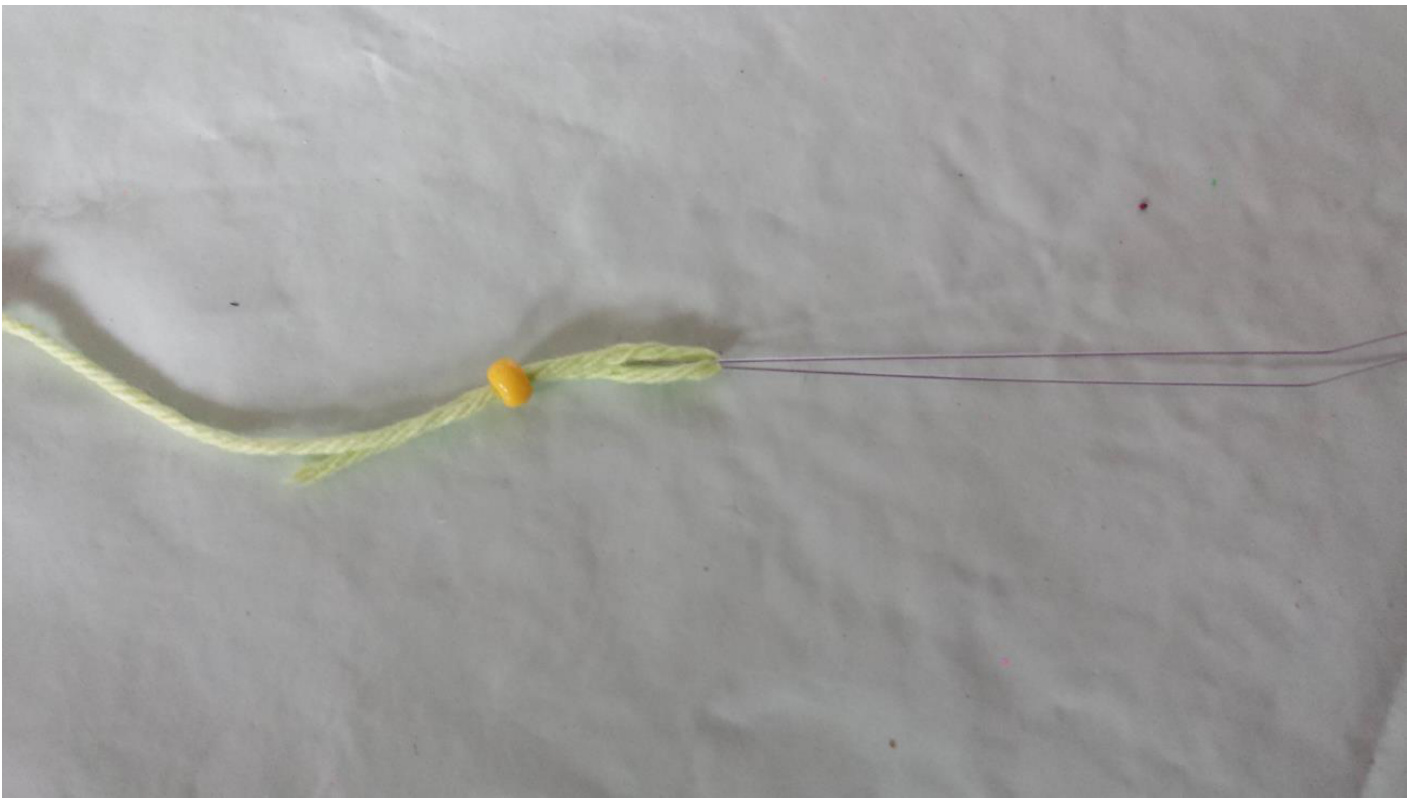
String the beads on the thread. This can be done in several ways: you could use a very thin needle. If you haven't got one, you can use a threader. You need to take it apart though, as in the picture below. Then you can use the "needle" to string the beads on the thread, as in the right hand side picture.

There are also special threaders. As in this picture (mine is a bit bent, my fault) :
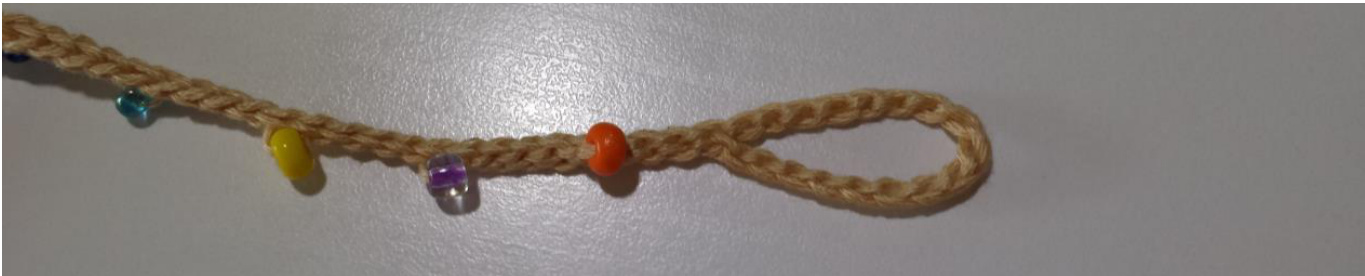
Make sure you string enough beads ! You'd better string 10 too many, than 1 too less. For the lightbrown bracelet with embroidery cotton, hook size 2 (can be wrapped around my wrist 7 times), I used 89 pearls. For the lemongreen bracelet with Catania, hook size 3 (can be wrapped around my wrist 7 times), I used62pearls.
Making the bracelet :
When casting on, make sure you leave +/- 20 cm, you will need this later on to sew on the button. Chain until you are satisfied with the length. Try it on.
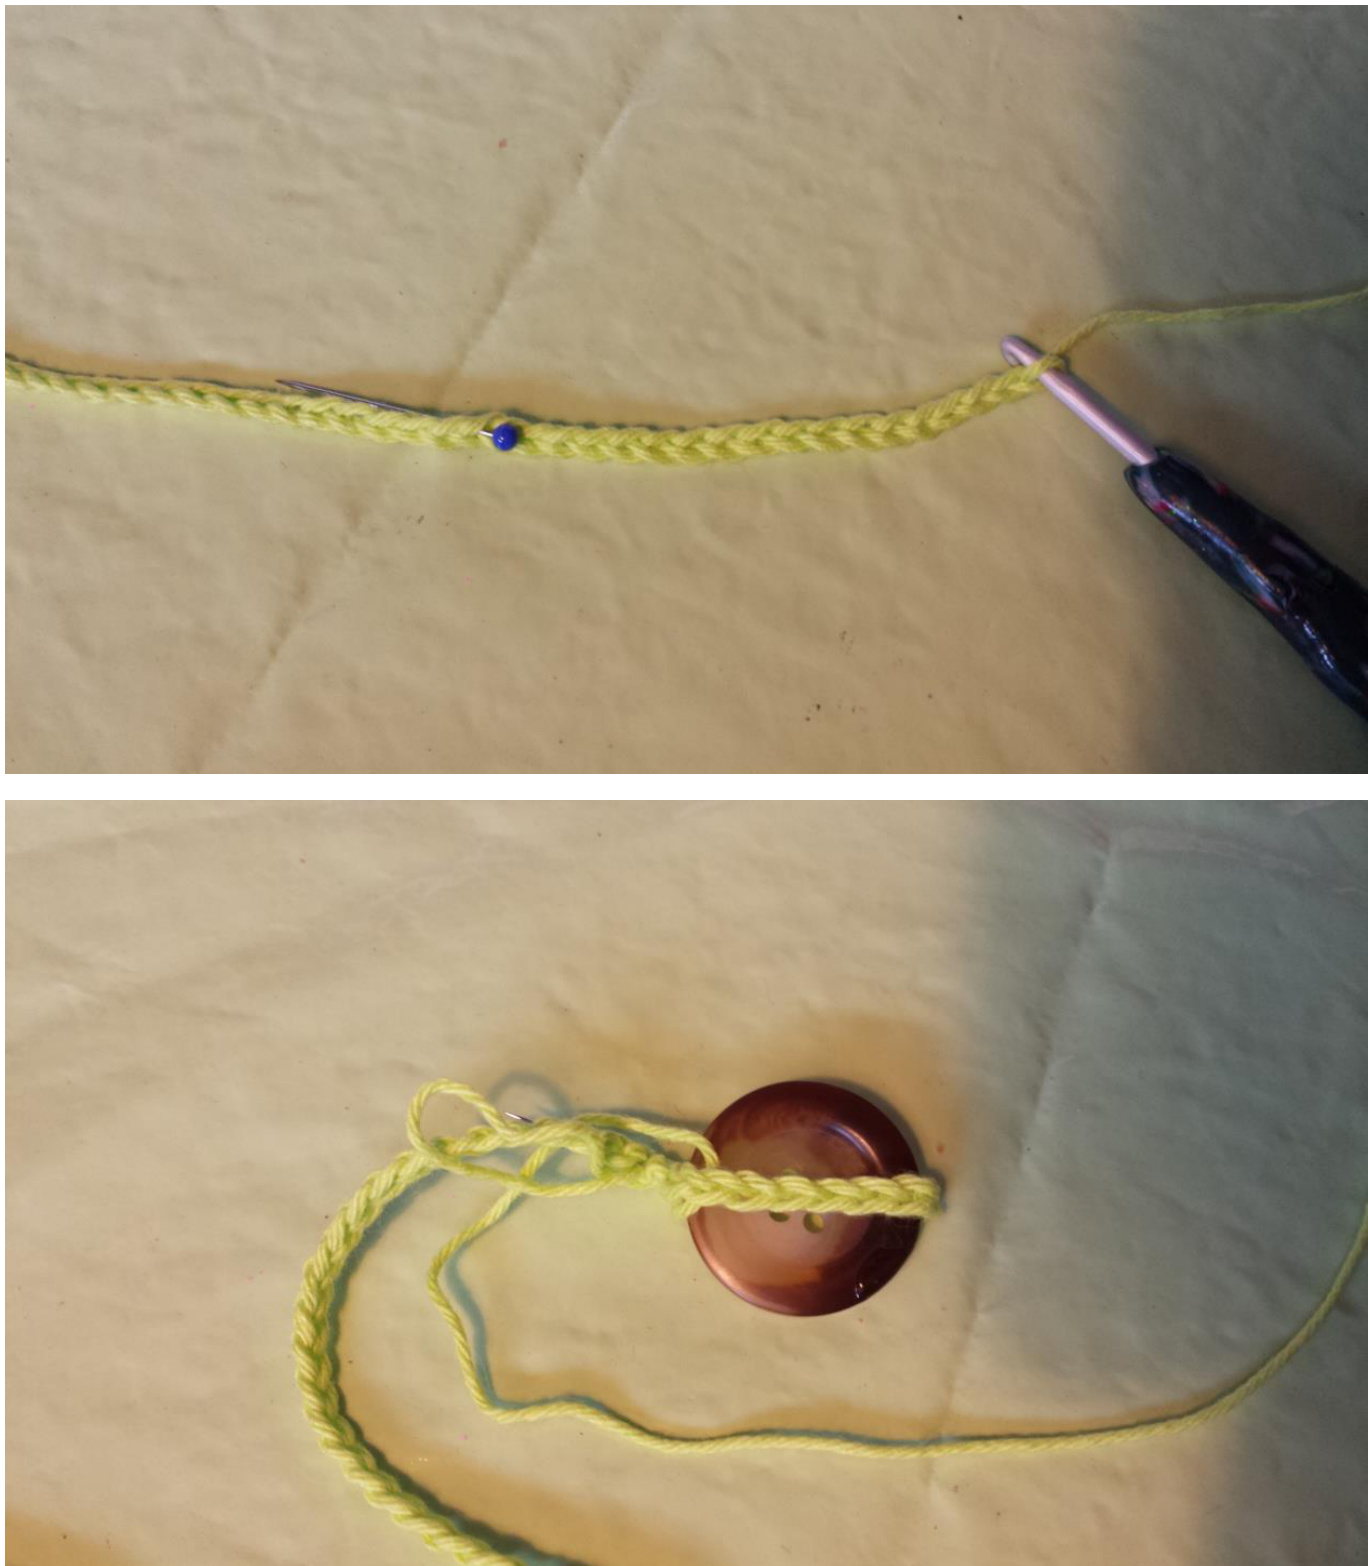
When you are satisfied with the length, mark this stitch (in the picture below I used a blue pin) Then crochet a few more chains. As many as you need to pass the button through :

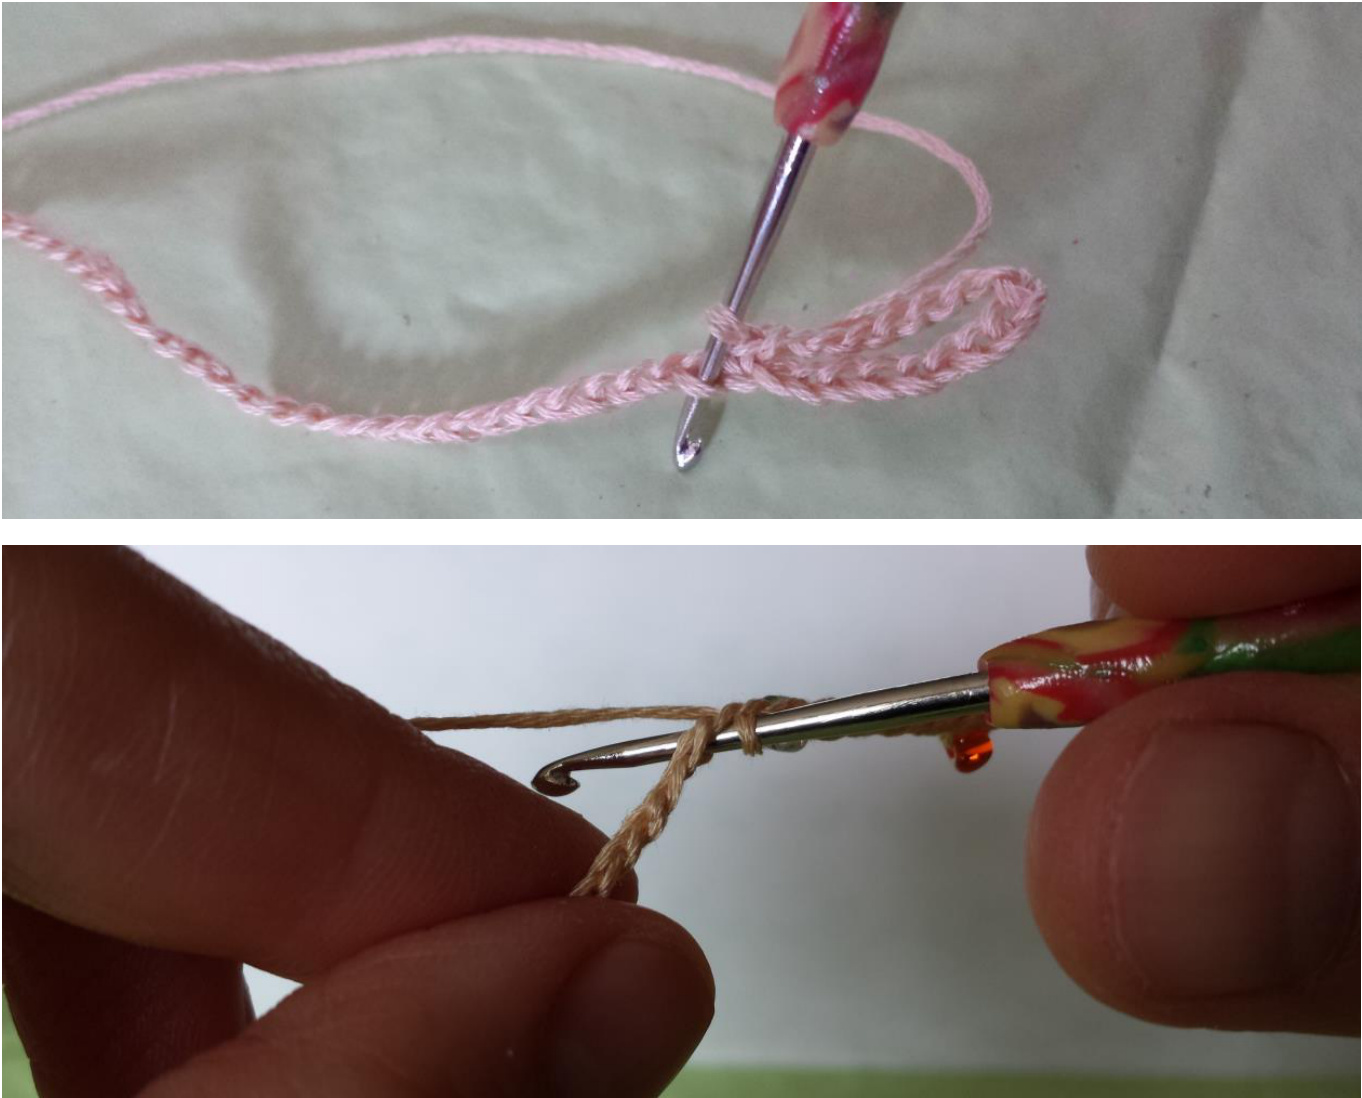
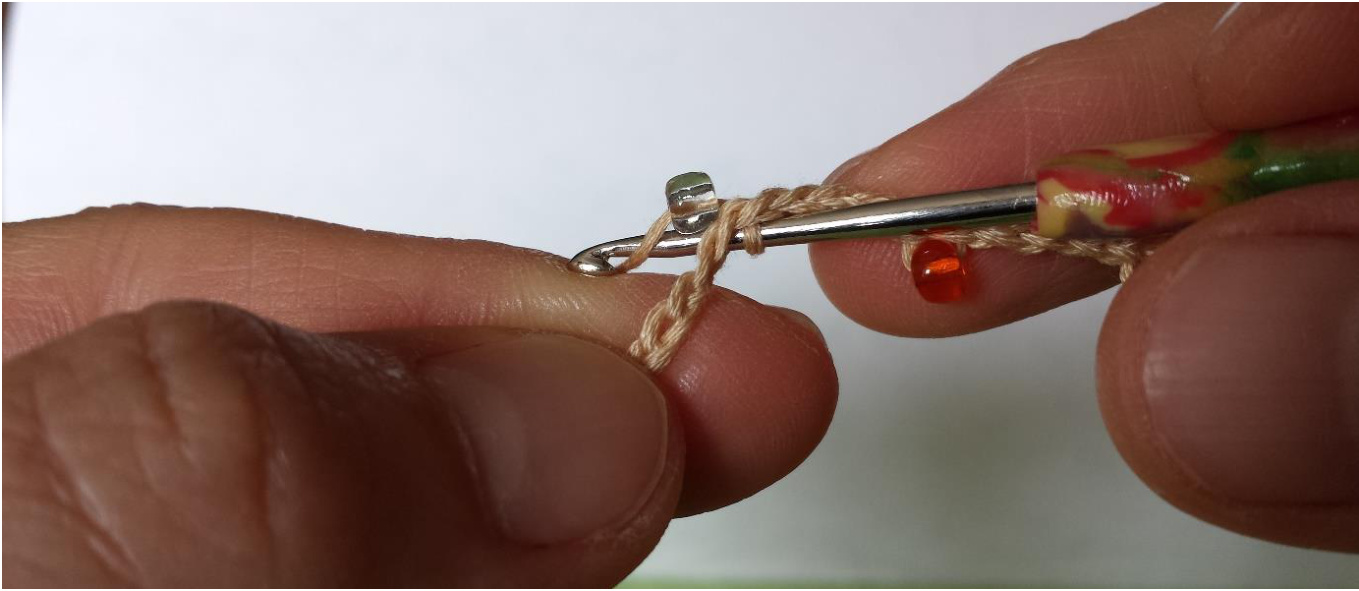
Now turn, begin in the marked stitch. Do sl st but put you crochet hook through the bottom of the stitch. This means there are 2 threads on top of needle and 1 thread on the bottom of the needle :

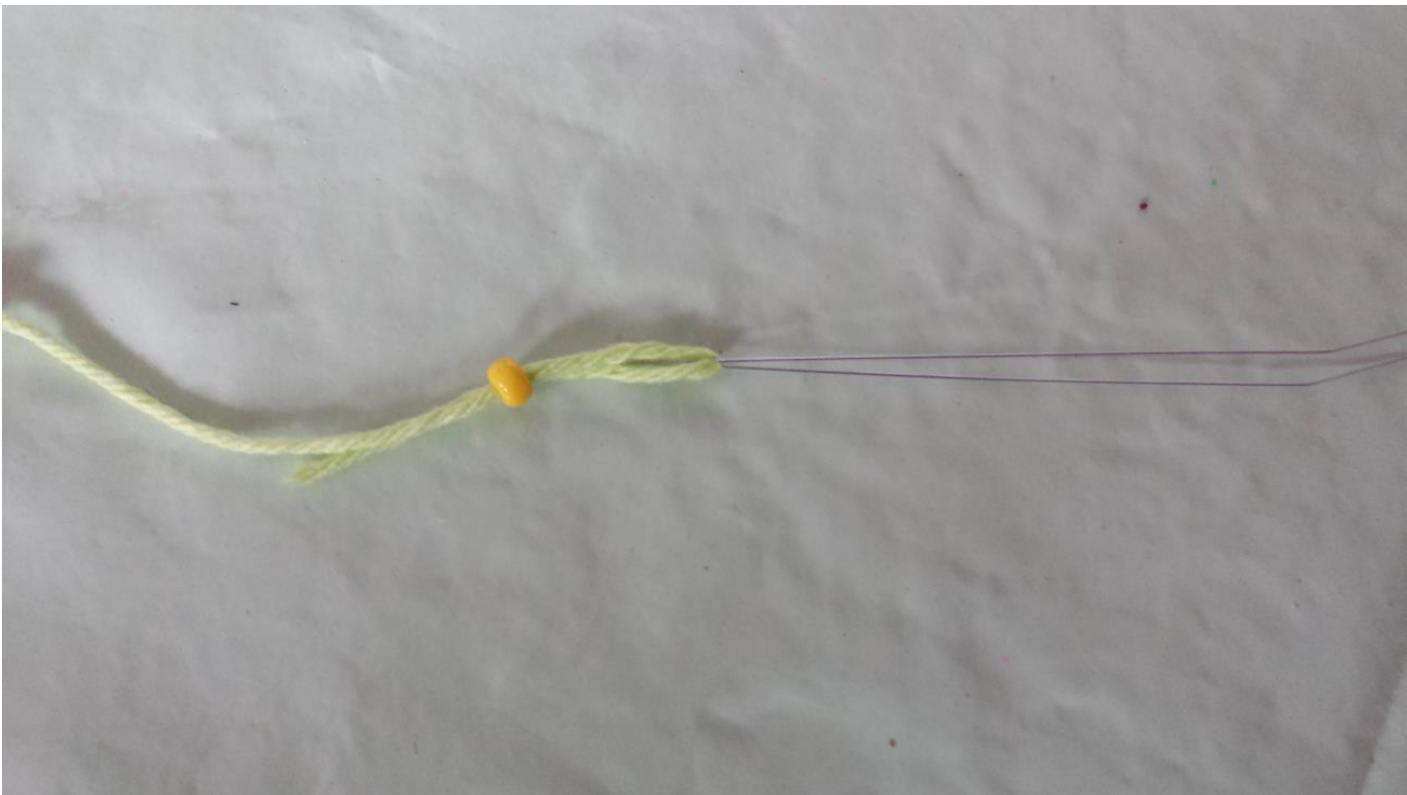
When you crochet a pearl, slide it up to the chain and do sl st as before :


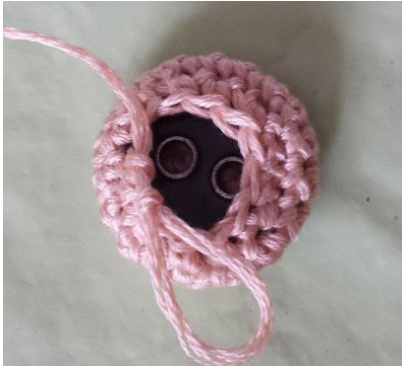
Crochet as follows : \*4 sl st - 1 sl st with pearl\* repeat untilthe end. Cast off with a long thread, to sew on the button. When sewing on the button, you can use the buttonholes : a needle, put the thread through a buttonhole and return through the other buttonhole Tie a knot.

Repeat this 3 times, weave in both ends in the button. Ik stopte veel tijd in het ontwikkelen van dit patroon. Ik heb er helemaal geen problemen mee dat je verkoopt wat je maakt met dit patroon. Echter, wat niet kan is dit patroon publiceren, verkopen of doorgeven. Bij vragen of opmerkingen : crochets4u@telenet.be Veel succes !
Armband / ketting met parels
Nodig :
oen : je hebt hier eigenlijk zelf de keuze : ofwel kies je iets dikker katoen, ofwel ie dunner. Het resultaat van de twee zie je in mijn foto's : de lichtbruine haakte ik met borduurgaren en haaknaald nr. 2 de limoengroene haakte ik met catania katoen en haaknaald nr. 3

schaar dikke naald knoop parels
Afkortingen :
hv = halve vaste I=losse
Tips :
Als de magische cirkel je (nog) niet lukt, kan je de opzet ook anders uitvoeren : haak 2 1, haak 6 v in de laatste I. Kleur wisselen : bekijk mijin filmpje : http://youtu.be/t7Qe5oDaPrY Onzichtbaar minderen : bekijk mijn filmpje : http://youtu.be/78EGXJDM2X4 Eerste stokje van toer : bekijk mijn filmpje : http://youtu.be/DpkNWJMJVLQ Via mijn blog kan je alle filmpje bekijken : http://crochets4u.blogspot.be/
Patroon :
Je bepaalt zelf hoe lang je de armband / ketting wil. In mijn voorbeelden kunnen de armbanden 7 keer rond mijn pols worden gewikkeld. Je kan kiezen voor een kortere of langere armband.
Knoop :
Ook voor de knoop heb je de keuze : ofwel gebruik je een leuke knoop ofwel omhaak je een knoop op deze manier : 1. 6 v in magische cirkel 2. 2 v in elke v (12 v) 3. \*1 v-2v in volgende v\* 6x (18 v) De knoop moet er perfect op passen : Indien dat niet zo is, kijk dan even onder aan deze blz. 4. 18v 5. 18 v 6. \* 1 v - 2 v samen haken\* 6 x (12 v) knoop in omhulsel leggen 7. met de knoop erin : \*2 v samen haken\* 6 x afhechten

Past je knoop er niet in ? Lees dan even dit : Als je knoop groter is, dan haak je nog een toer meerderingen extra. In toer 4 haakje dan : \*2v-2v in volgende v\* 6x (24 v) Daarna haak je 2 toeren (toer 5 en 6) 24 v. Bij het minderen moet je dan : \* 2 v - 2 v samen haken\* 6 x (18 v) haken en zo kan je dan verder. Rijg de parels op je katoen. Dit kan op verschillende manieren : je kan hiervoor bijvoorbeeld een heel dunne naald gebruiken. Heb je dat niet, dan kan je een draaddoorhaler gebruiken. Je moet het hiervoor echter wel uit elkaar halen, zoals op de foto. Daarna gebruik je het "naaldje" om de parels te rijgen, zoals op de rechtse foto.
Er bestaan echter ook speciale parelrijgers. Zoals op deze foto (de mijne is ondertussen en beetje geplooid) :
Zorg ervoor dat je genoeg parels rijgt ! Beter 10 parels teveel, dan 1 te weinig. Voor de lichtbruine armband met borduurgaren, haaknaald nr. 2 (kan 7 keer rond mijn pols), gebruikte ik 89 parels. Voor de limoengroene armband met Catania, haaknaald nr. 3 (kan ook 7 keer rond mijn pols), gebruikte ik 62 parels.
De armband haken :
Bij het opzetten houd je een stuk katoen over van +/- 20 cm, dit zal later nodig zijn om de knoop aan te naaien. Haak een ketting van lossen, tot je tevreden bent met de lengte. Pas hiervoor rond je pols.
Wanneer je tevreden bent met de lengte van je armband, markeer je deze plaats. Daarna haak je nog enkele lossen. Zoveel als nodig om je knoop door te passen :
Nu gaan we "terugkeren" op deze ketting van lossen. Om terug te keren gebruik je halve vasten.
Je steekt je haaknaald echter telkens in de onderkant van de steek !!
Dat betekent dat er dus 2 draden op je naald liggen en 1 draad aan de onderkant van de naald :
Wanneer je een parel moet meehaken, schuif je die gewoon volledig tegen je werk en je haakt zoals hierboven.
Maak een lus met een halve vaste in de steek die je daarnet markeerde. Dit wordt de lus om de knoop door te steken.
Haak als volgt : \*4 hv - 1 hv met parel\* herhalen tot het einde. Op het einde hecht je af met een lange draad, om de knoop aan te naaien. Om de knoop aan te naaien, kan je de knoopsgaten gebruiken : Met een naald kan je nu de knoop aannaaien. Steek de naald met lange draad door een knoopsgat en keer terug door het andere knoopsgat. Leg een knoop met het andere draadje.
Herhaal dit 3 x, daarna werk je beide draadjes weg in je knoop . Ik stopte veel tijd in het ontwikkelen van dit patroon. Ik heb er helemaal geen problemen mee dat je verkoopt wat je maakt met dit patroon. Echter, wat niet kan is dit patroon publiceren, verkopen of doorgeven. Bij vragen of opmerkingen : crochets4u@telenet.be
Veel succes !