Clover Slouch
Annis Cordy
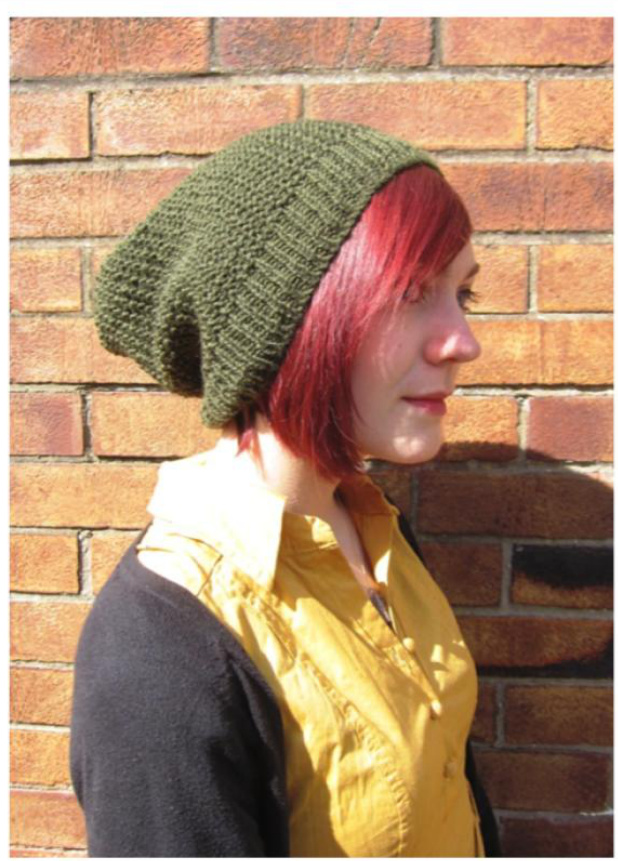
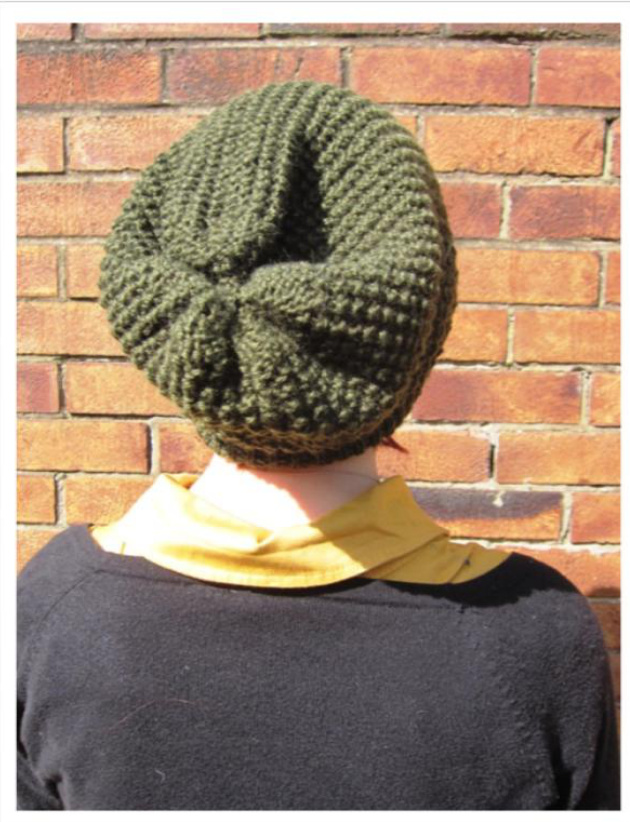
You've finished your first scarf, know your knit stitches from your purl bumps and fancy something a bit more adventurous. Or you might be an experienced knitter in the market for an easy-to-memorise pattern to bring along to knitting group. The Clover Slouch is an attractive unisex hat worked in a textured rib, with a sharp decrease scheme and just the right amount of slouch. With options for knitting flat or in the round, the Clover Beanie can be your winter staple no matter what your level of expertise.
GAUGE:
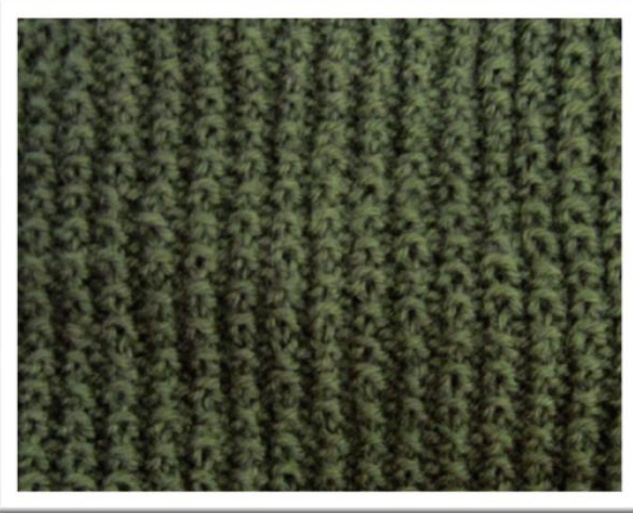
24 sts and 28 rows = 4in/10cm over clover rib on 4.5mm needles
SIZE:
Length: 27.5cm from brim to crown. Hat will comfortably accommodate head sizes between 50 and 6o cm. The pattern repeat is very short, so size can easily be modified by casting on more or fewer stitches in multiples of 2.
YARN:
West Yorkshire Spinners Blue Faced Leicester DK Solid (50g/112m): 2 balls ‘Avocado'
NEEDLES:
For seamless version:
40cm 4mm circular needle 40cm 4.5mm circular needle Set of 4 or 5 4.5mm dpns
For knitted-flat version:
4mm straight knitting needles 4.5mm straight knitting needles
NOTIONS:
Stitch marker (for seamless version) Tapestry needle
INSTRUCTIONS FORSEAMLESS VERSION:
Using 4mm circular, cast on 108 sts. Place marker for end of round and join, taking care not to twist. BRIM: Work 1x1 rib as follows: (k1, p1), repeat to end of round. Continue working in 1x1 rib until piece measures 2in from cast on edge BODY: Switch to 4.5mm circular and begin working clover stitch as follows: ROUND 1: (k1, p1), rep to end ROUND 2: p to end Continue working these two rounds until piece measures 11in from cast on edge. Begin working crown decreases as follows: ROUND 1: (p2tog, p2) to end ROUND 2: p to end ROUND 3: (p2tog, p2) to end ROUND 5: p2tog to last st, k1 Repeat rounds 4 and 5 once more. Break yarn, leaving a 12" tail, and draw through remaining 15sts using tapestry needle. Pull tight to close hole and stitch to secure. Weave in ends and block.
INSTRUCTIONS FOR KNITTED-FLAT VERSION:
Using 4mm needles, cast on 110 sts. BRIM: Work 1x1 rib as follows: (k1, p1), repeat to end. Continue working in 1x1 rib until piece measures 2in from cast on edge. BODY: Switch to 4.5mm needles and begin working clover stitch as follows: Row 1: (k1, p1), rep to end Row 2: k to end Continue working these two rows until piece measures 11in from cast on edge. Begin working crown decreases as follows: ROW 1: (p2tog, p2) to end Row 2: p to end ROw 3: (p2tog, p2) to end Row 4: p to end Row 5: p2tog to last st, k1 Repeat rounds 4 and 5 once more. Break yarn, leaving a 2o" tail, and draw through remaining 15sts using tapestry needle. Pull tight, then use tail to sew edges together from the top down using mattress stitch. Weave in ends and block.
Designed by Annis Cordy, 2014 http://lakeandtreeandme.blogspot.co.uk annisface@gmail.com This knitting pattern and all associated charts and photographs are the intellectual property of the author. Do not sell, transmit, publish or pass on this publication (in printed or electronic form) without the permission of the author.


