Archimedes by Matt Babcock
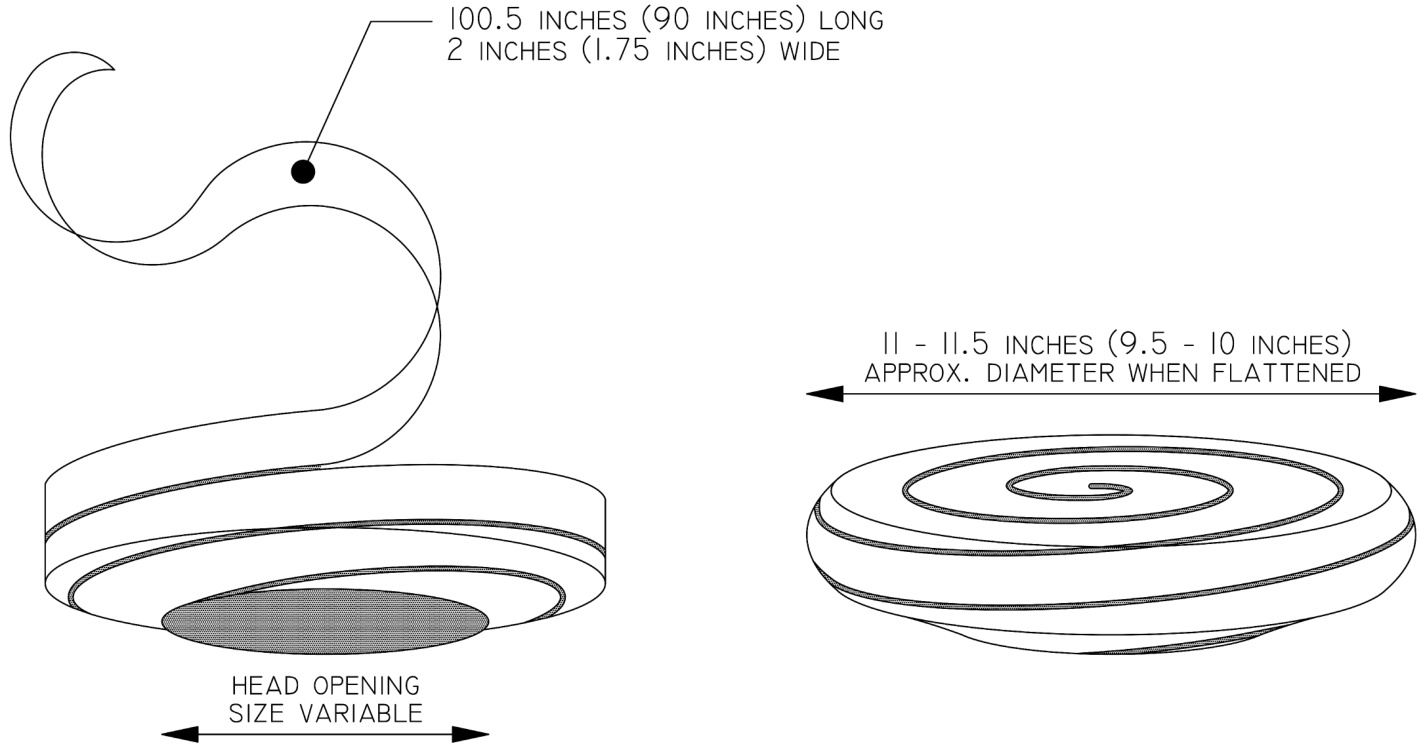
This hat is knit as a long skinny strip that is distinctly non-hatlike. Short rows give the strip curvature so it can be coiled into a three-dimensional spiral without wrinkles or tucks. When you join the selvages together with a single spiraled seam -- eureka! You end up with a marvelous beret, to the delight of your admirers and the chagrin of everyone who refused to believe that you were making a hat. The design of the hat is based on a geometrical figure called an Archimedean spherical spiral. The hat and the spiral are named for the Greek scientist/mathematician/inventor Archimedes, who described this type of spiral in the third century BCE. Scholars have reached no definite conclusions as to whether Archimedes was a knitter and what kinds of hats he preferred.
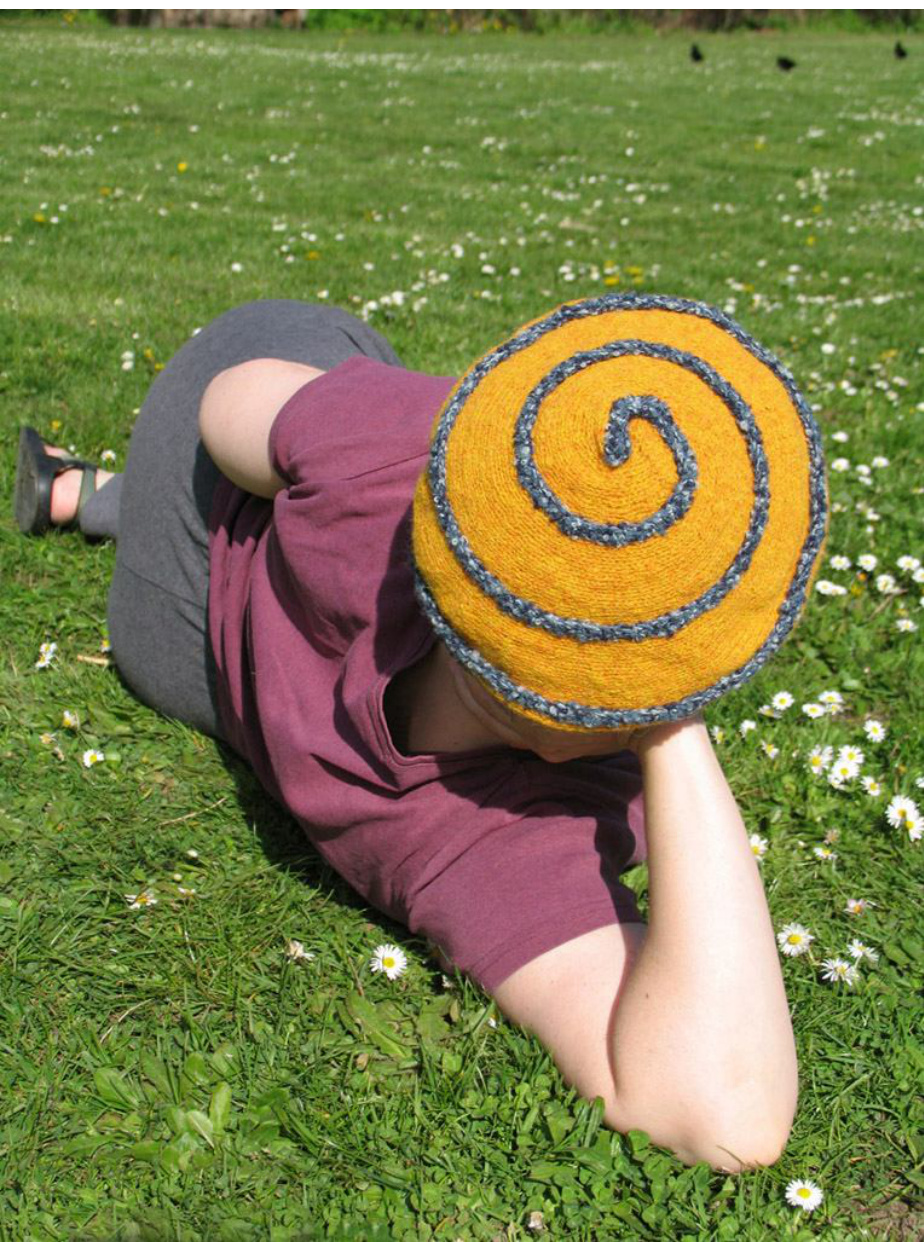
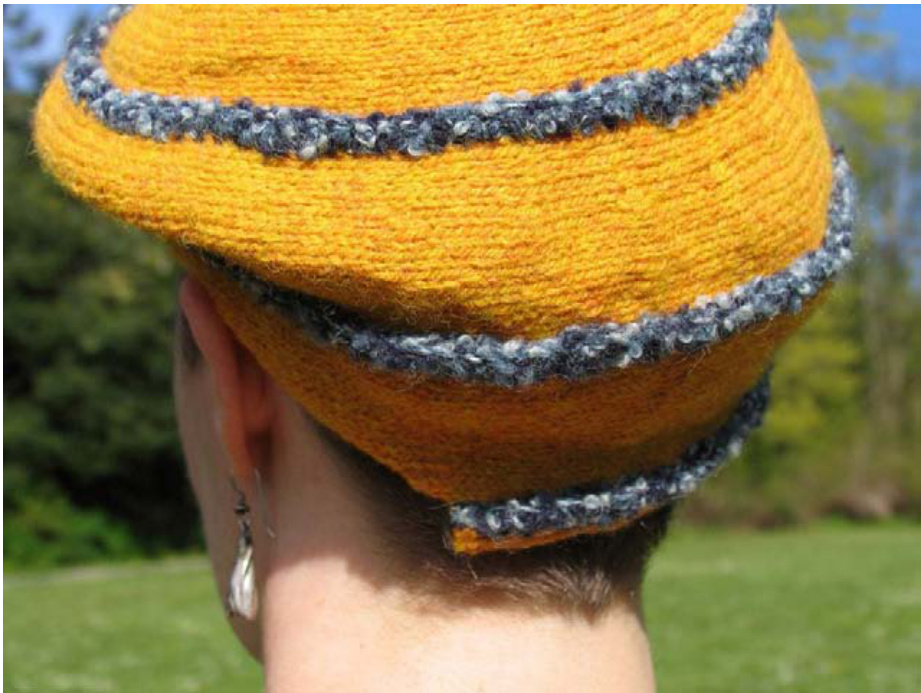
The pattern gives instructions for two sizes. The difference between the large and small sizes is in the overall diameter. Either size hat can be made to fit almost any head. The large hat is floppy and dramatic. The small hat is somewhat more demure. Have fun with your choice of yarn! The pattern is based entirely on the dimensions of the knitted fabric rather than on counting stitches or rows. Provided you meet some minimum requirements for gauge (see the "materials"" section of the pattern notes below) you can use anything you like. MC yarn with long color changes (as in the large hat pictured) provides contrast between adjacent portions of the spiral to emphasize the long knitted strip and the way it is coiled up. Relatively monochromatic MC yarn (as in the small hat pictured) emphasizes the spiral seam as the hat's main feature. Another possibility is the stash buster hat with stripes of varying length made of yarn left over from other projects.
SIZE
Variable to fit any head at least 17 inches in circumference
FINISHED MEASUREMENTS
Large hat: 11 - 11.5 inches diameter Small hat: 9.5 - 10 inches diameter
MATERIALS
Yarn for the large hat pictured: [MC] Noro Kureyon [ $100\%$ wool; 109 yd/100m per 50g skein]; color: 195; 2 skeins [seam] Idena Happy Multi $[100\%$ polyester; 98 yd/90m per 50g skein]; color: #76; about one third of 1 skein Yarn for the small hat pictured: [MC] Harrisville Designs New England Shetland $[100\%$ wool, 217 yd/198m per 100g skein]; color: #4 "Gold"; 1 skein [seam] Plymouth Yarn Alpaca Boucle $[90\%$ alpaca, $10\%$ nylon; 65 yd/59m per 50g skein]; color: #702; about one half of i skein If you plan to use different yarn (or yarns) for the MC: Woolor wool blend yarn is recommended sothe hat can be blocked toatam or beret shape. For the large hat, the pattern requires a minimum gauge of 4.5 st/1 inch. This generally corresponds to worsted weight or finer. For the small hat, the pattern requires a minimum gauge of 5.1 st/1 inch. This generally corresponds to DK weight or finer. The following chart gives estimated quantities for different kinds of yarn based on stitch gauge. The quantities in the chart are conservative but not extremely so.

Some yarns with long color changes (like the Noro in the large hat pictured) have occasional knots where the pattern of color changes is disrupted. Wind your yarn into balls before you start so you can check for knots and other surprises. You may want to buy an extra skein if you are concerned about managing the color changes. Needles for the large hat pictured: 1 set US #7/5.0mm needles 1 US #G-6/4.0mm crochet hook Needles for the small hat pictured: 1 set US #4/3.5mm needles 1 US #E-4/3.5mm crochet hook The type of needles (straight, double pointed, or circular) is up to you. The rows are so short that you can use whatever is most convenient. Notions for either hat: 1 tapestry needle 40 or more safety pins waste yarn or stitch markers
GAUGE
Stitch gauge for the large hat: At least $18\,\mathsf{s t s}=4$ inches in stockinette stitch Stitch gauge for the small hat: At least $20.5\;\mathrm{sts}=4$ inches in stockinette stitch Row gauge for either hat should be in the range of 1.2 to 1.6 times your stitch gauge. Most knitters' row gauges fallinto this range more or less automatically.
PATTERN NOTES
For a glossary of standard abbreviations try here.
Large/Small Hat dimensions
Where pattern dimensions differ for the large hat and small hat, the large hat dimension is given first, followed by the small hat dimension in parentheses. Where the same dimension is used for either hat, that dimension is given only once.
Basic Layout
Row 1 and all odd-numbered rows are RS rows. Row 2 and all even-numbered rows are WS rows. The entire length of the strip has selvages on both sides. Each selvage is one stitch wide and is knit in garter stitch. The pattern assumes you will be turning the work, and that it will be easiest to knit the selvage stitches on both RS and WS rows. If you decide to try knitting backwards instead of turning the work, you will probably find it easier to purl the selvage stitches on the RS rows so you can consistently knit backwards on the WS rows (unless you want to learn both knitting and purling backwards). Between the two selvages the hat is knit in stockinette stitch. If you are turning the work, knit on RS rows and purl on WS rows. If you are not turning the work, knit on RS rows and knit backwards on WS rows. The stockinette section of the strip begins as a single stitch, increases to 2 inches (1.75 inches) wide, remains 2 inches (1.75 inches) wide for most of its length, and then decreases again at the end. The pattern starts at what willbecome the brim of the hat and ends at the center of the crown.
Measuring Length
The pattern is divided into segments of varying length. Length is always measured down the center of the strip, midway between the selvages. Segments #1 through #8 must end with a WS row. If you're in the middle of a repeated set of instructions when you reach the desired length,just stop after the nearest WS row and move on to the next segment without finishing the repeat. See the pattern for additional notes regarding the measurement of segments #5 through #9.
Marking Segments
For measuring your progress on each segment it is helpful to mark the spot where one segment ends and the next begins. I used waste yarn for this purpose (see the photos below). Safety pins or other markers would do as well.
Wrap & Turn [W&T]
The techniques described here for W&T are the ones I have found to be least conspicuous in To wrap andturn ona RS row, knit to point specified in pattern and turn the work. Start the next rowwithaYo. To wrap and turn on a WS row, purl to point specified in pattern, slip next stitch purlwise with yarn in front,move yarnbetweenneedlestoack of work,ipthe same stitchbacktothefthad needle, bring yarn between needles to front of work, turn work to begin knitting in the other direction.
Working Wraps Together with Wrapped Stitches:
When working a stitch which has been wrapped on a previous row, work as follows: When working a RS row: Knit to the stitch before the YO. Knit the YO together with the following stitch. When working a WS row: Purl to wrapped stitch, insert tip of right needle from behind into the back loop of the wrap and place it on left needle, purl wrap and stitch together.
Short Rows for this Pattern
Two types of short rows are used frequently throughout the pattern: Short Row'A': work in St st (k on odd numbered rows, p on even numbered rows) to a point 0.5 inch past theselvage,W[if yourtitchgaugedoesot allwyou tland exactlyninch,r to the pattern tosee whether you round up to go a little past 0.5 inch or round down to stopa little short of 0.5 inch] Short Row'B': work in St st (k on odd numbered rows, p on even numbered rows) to a point 1.5 inches (1.25 inches) past the selvage, W&T [if your stitch gauge does not allow you to land exactly on 1.5 inches (1.25 inches), round down to stop a little short of 1.5 inches (1.25 inches)]
Single Crochet Seam
The seam is a decorative element in this pattern, so it is made on the RS. There is a good photo tutorial on the single crochet seam here. Hold the two sections of knit fabric you are joining with wrong sides facing. Insert crochet hook through oneloop of a selvage stitch onbothlayers of fabric, catch the seam yarn, and pulla loop through (you now have one loop on the hook). \*Insert crochet hook through the next selvage stitch on both layers, catch the seam yarn and pull a loop through (you now have two loops on the hook). Catch the seam yarn again and pull it through both loops of yarn on the hook (you now have one ioop on the hook). Repeat from \*. Enlarge the last loop of the seam and pass the ballof yarn through. Weave in ends. Because the sections of fabric you are joining are curved, you willfrequently come to places where you cannot match the stitches exactly on the two selvages. Never fear. Just find somewhere to push your crochet hook through both selvages so that your seam stitches are more or less consistent in length. Eyelash or boucle yarn will help hide inconsistencies in your seam. If your seam yarn is thinner than your MC yarn (as in the large hat pictured), aim for one single crochet per row of knitting. If your seam yarn is thicker than your MC yarn (as in the small hat pictured),it will probably work better to skip every other row of kniting and crochet once into each purl bump. Practice on a swatch and to determine what looks best for your combination of yarns.
PATTERN
Segment #1:
Segment length 10 inches (8 inches) CO 3 sts Over the length of this segment, increase the width between the selvages to1 inch (0.75 inch) Space the increases equally along this length and locate them along the edge of the stockinette where RS rows begin. If your stitch gauge does not allow your work to be exactly 1 inch (0.75 inch) wide, round up to go a little past 1 inch (0.75 inch). Refer to the "Basic Layout" section of the pattern notes for an explanation of how to knit the selvages.
End with a WS row
Mark the end of segment #1
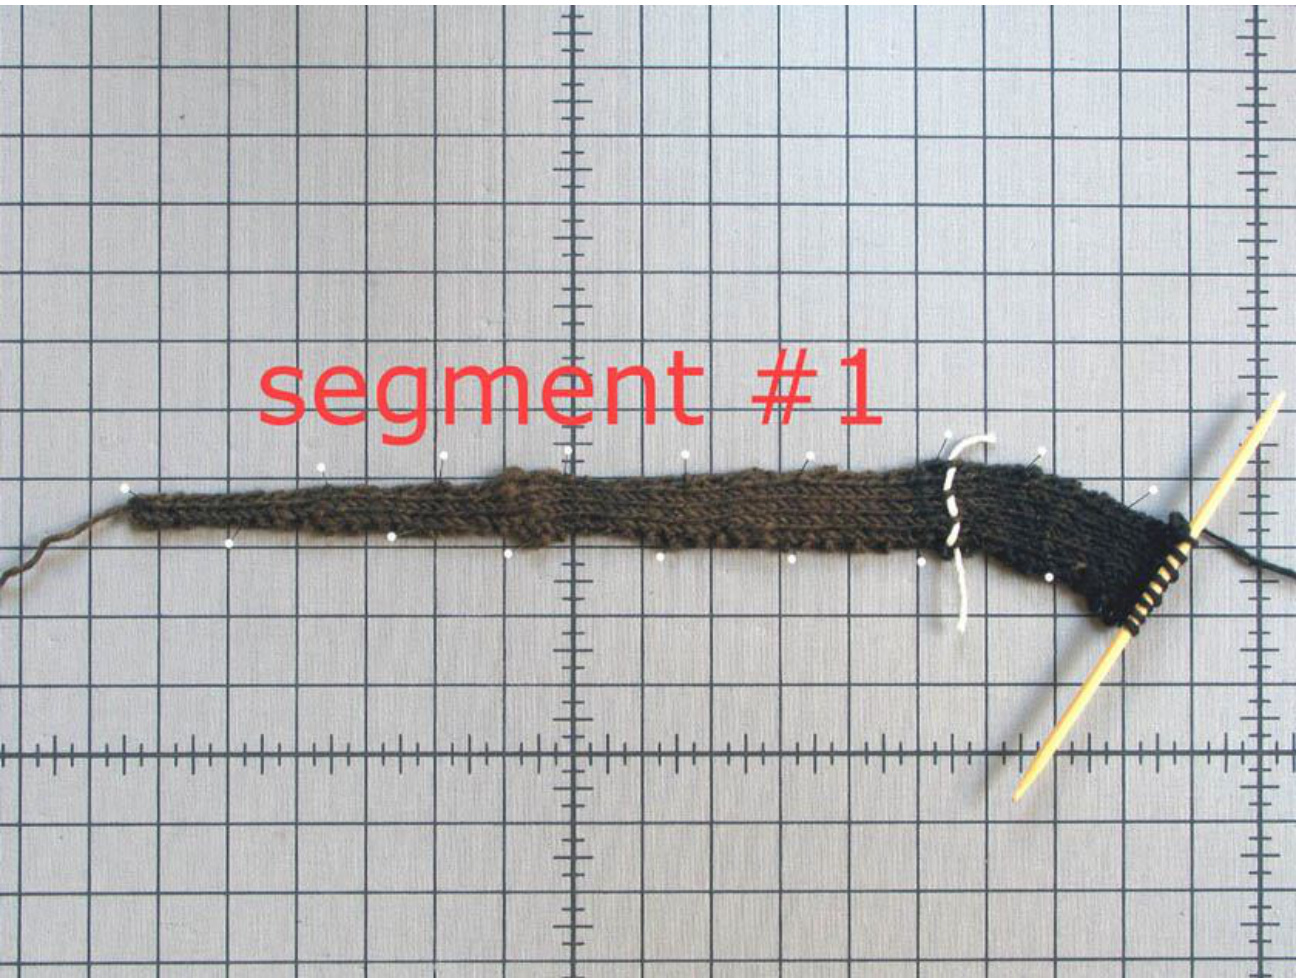
Segment #2:
Segment length 13 inches Over the length of this segment, increase the width between the selvages to 2 inches (1.75 inches) Space the increases equally along this length and locate them along the edge of the stockinette where RS rows begin. Rows 1, 3, 5, and 7: k all sts Rows 2, 4, and 6: k1, p to last st before selvage, k1 Row 8: k1, short row'A' per pattern notes, round down if required Rep rows 1 - 8 until segment length is reached, ending with a WS row Stop in the middle of a repeat if necessary Mark the end of segment #2
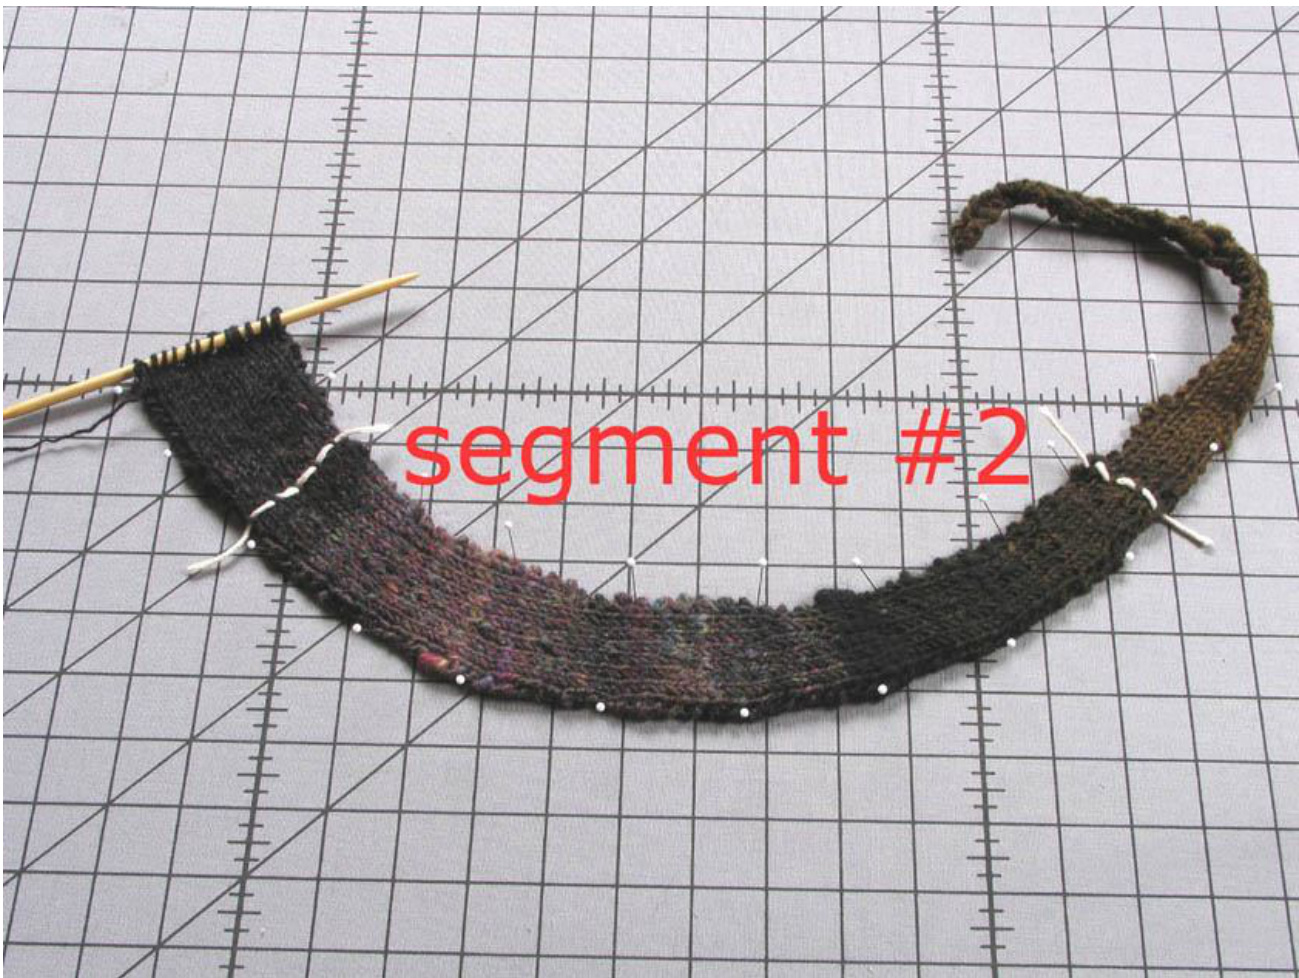
Segment #3:
Segment length 27 inches (24 inches) Rows 1, 3,5,7,and 9: kall sts Rows 2, 4, 6, and 8: k1, p to last st before selvage, k1 Row 10: k1, short row 'B' per pattern notes Rep rows 1 - 10 until segment length is reached, ending with a WS row Stop in the middle of a repeat if necessary Mark the end of segment #3
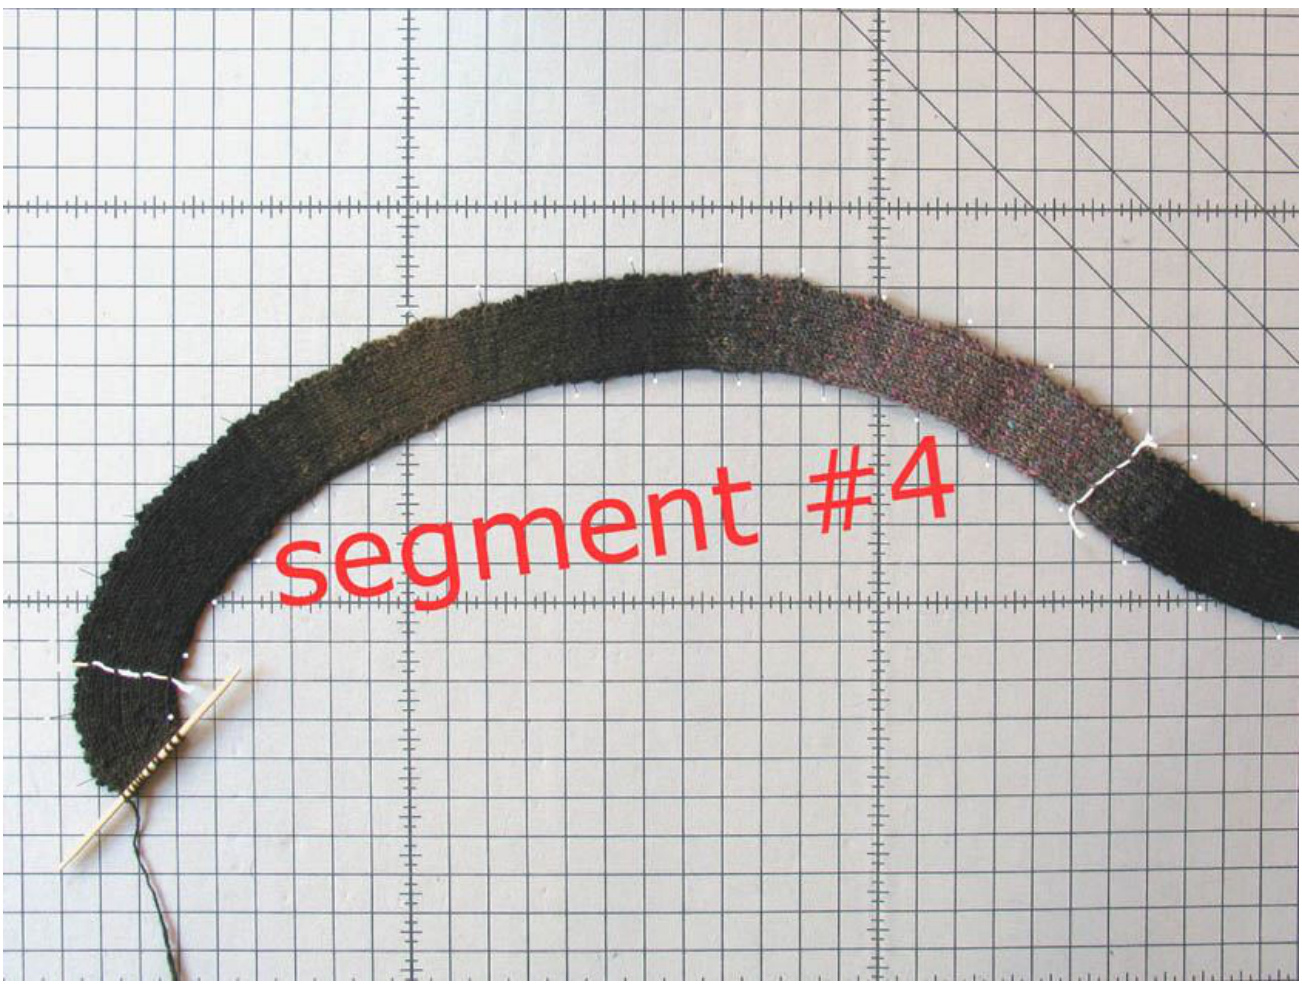
Segment #4:
Segment length 27 inches (24 inches) Segments #4 through #9 curve the opposite way from segments #2 and #3. Rows 1, 3, 5, and 7: kall sts Rows 2, 4, 6, and 8: k1, p to last st before selvage, k1 Row 9: short row'B' per pattern notes Row 10: p to last st before selvage, k1 Rep rows 1 - 10 until segment length is reached, ending with a WS row Stop in the middle of a repeat if necessary Mark the end of seament #4
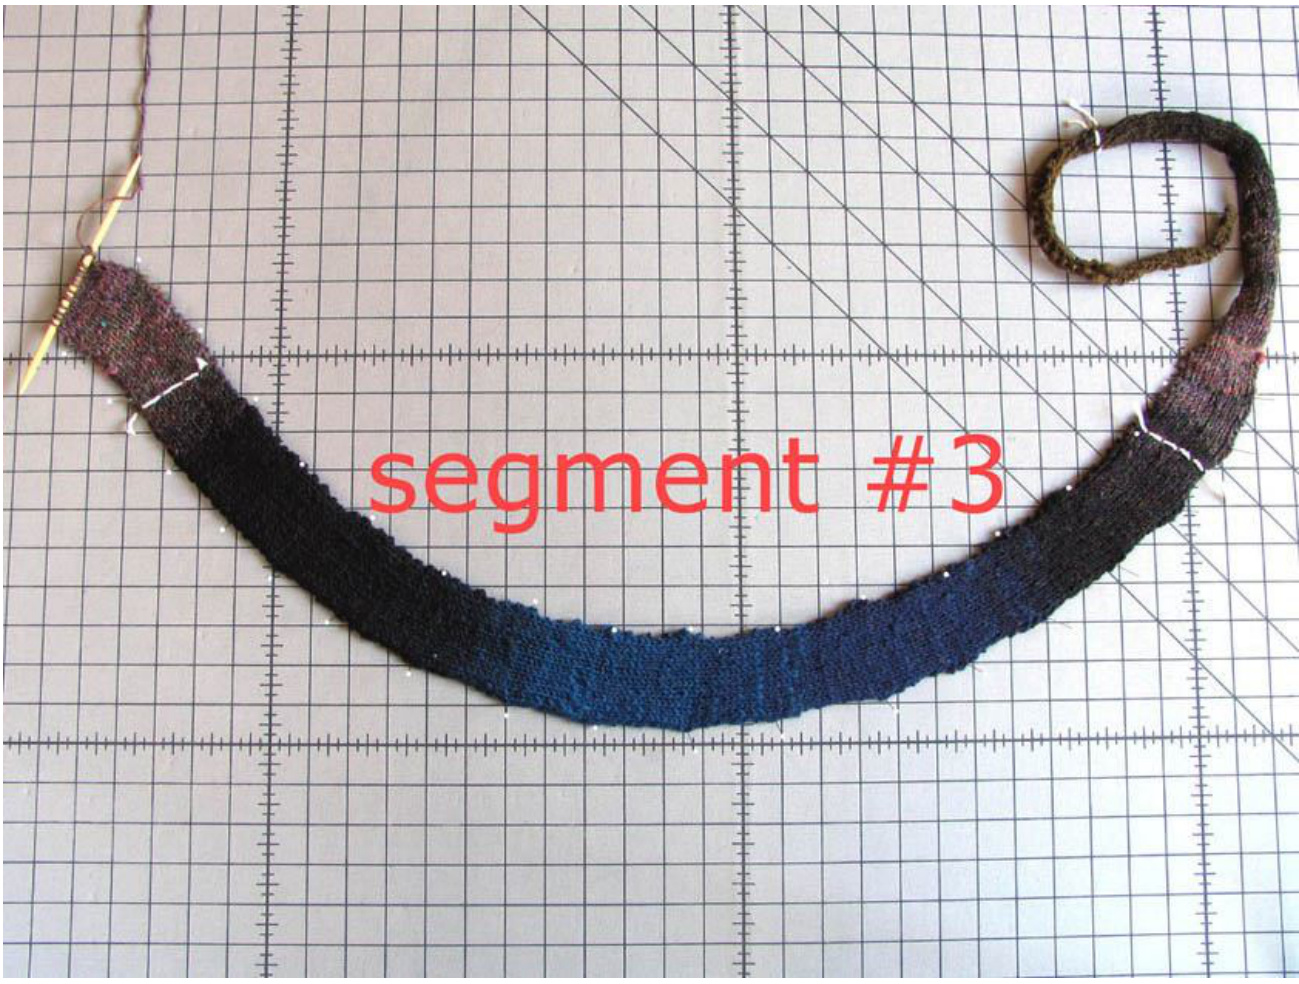
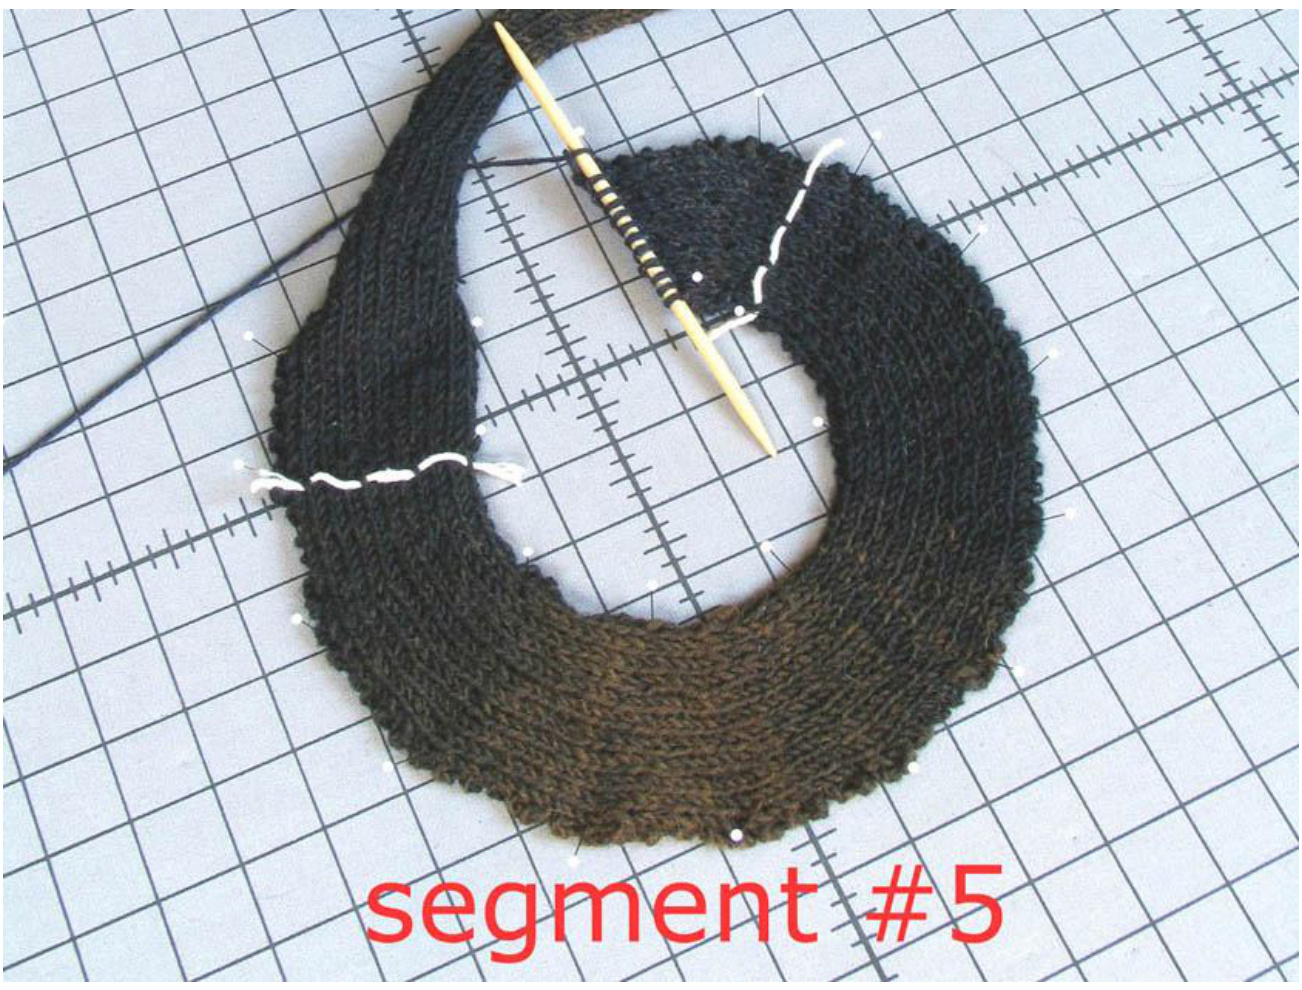
Segment #5:
Segment length 13 inches (12 inches) Due to the curvature of this segment, measure its length by counting rows and dividing by your row gauge. Count the rows down the center of the strip, midway between the selvages. This means rows 7 and 8 of each repeat are not counted. Rows 1, and3: kall sts Rows 2 and 4: k1, p to last st before selvage, k1 Row 5: short row 'B' per pattern notes Rows 6 and 8: p to last st before selvage, k1 Row 7: short row'A' per pattern notes, round up if required Rep rows 1 - 8 until segment length is reached, ending with a WS row Stop in the middle of a repeat if necessary Mark the end of segment #5
Segment #6:
Segment length 6 inches (5 inches) Measure length by counting the rows down the center of the strip. Rows 5 and 6 of each repeat are not counted. Row 1: k all sts Row 2: k1, p to last st before selvage, k1 Row 3: short row'B' per pattern notes Rows 4 and 6: p to last st before selvage, k1 Row 5: short row'A' per pattern notes, round up if required Rep rows 1 - 6 until segment length is reached, ending with a WS row Stop in the middle of a repeat if necessary Mark the end of segment #6
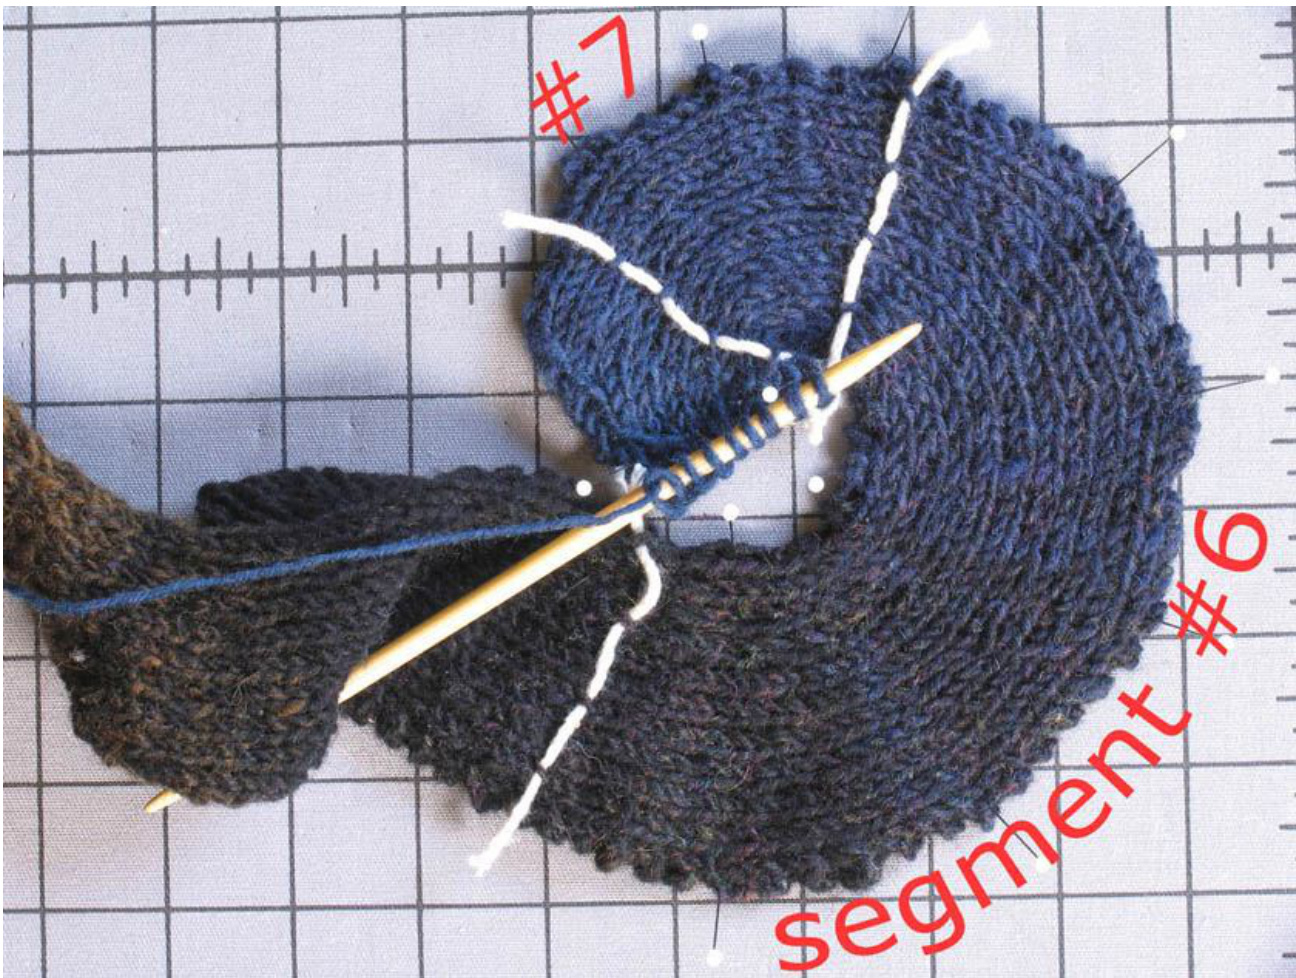
Segment #7:
Segment length 2 inches (1.75 inches) Measure length by counting the rows down the center of the strip. Rows 5, 6, 9, and 10 of each repeat are not counted. Row 1: kall sts Row 2: k1, p to last st before selvage, k1 Row 3: short row'B' per pattern notes Rows 4, 6, 8, and 10: p to last st before selvage, k1 Row5: short row'A' per pattern notes, round down if required Row 7: k to the st you wrapped in Row 3, k the st together with its wrap, W&T Row9: short row 'A' per pattern notes, round up if required Rep rows 1 - 10 until segment length is reached, ending with a WS row Stop in the middle of a repeat if necessary Mark the end of segment #7
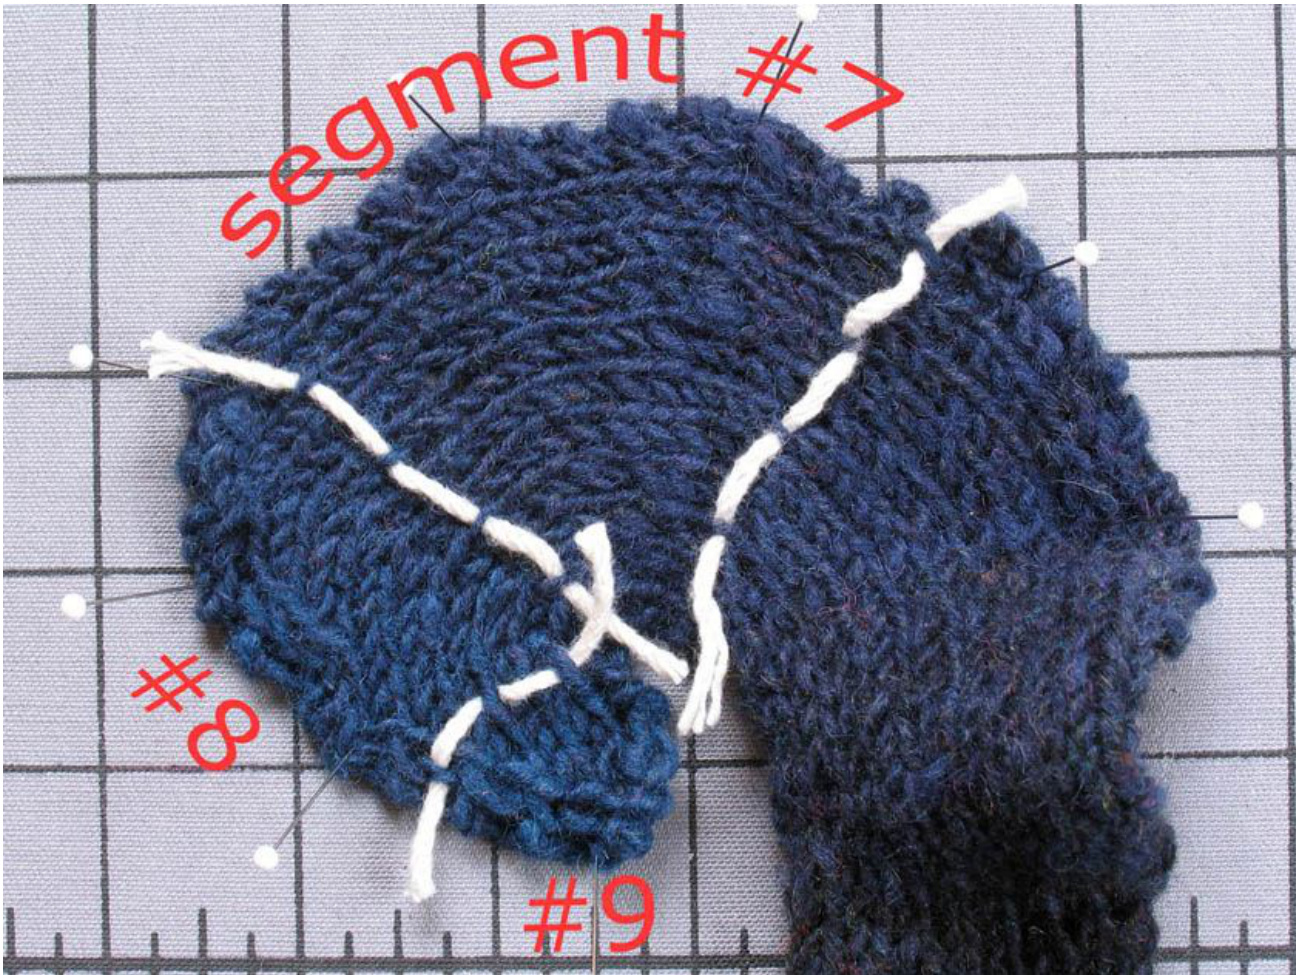
Segment #8:
Segment length approx. 2 inches (1.75 inches) Segment length is determined by following the pattern instructions below, not by countingrows. Row 1: K1, ssk, kto the st that was 0.5 inches past the selvage on the previous row, W&T [if your stitch gauge does not allow you to land exactly on 0.5 inches, round up to go a little past 0.5 inches] Rows 2, 4, 6, and 8: p to last st before selvage, k1 Row3: kl, ssk, kto the st you wrapped most recently, kthe st together with its wrap, W&T Row 5: kto the st you wrapped most recently, kthe st together with its wrap, W&T Row 7: k1, ssk, kto the st you wrapped most recently, kthe st together with its wrap, W&T Rep rows 3 -8 until you are wrapping the last st before the selvage, ending with a WS row Stop in the middle of a repeat if necessary
Segment #9:
Segment length approx. 0.5 inches Segment length is determined by following the pattern instructions below, not by counting rows. Rows 1 and 3: k1, ssk, kall rem sts Row2: k1, p to last st before selvage, k1 Row4: k1, p2tog, p to last st before selvage, k1 Rep rows 1 - 4 until the width between selvages is 0.5 inches [if your stitch gauge does not allow you to land exactly on 0.5 inches, round down so that the width is a little less than 0.5 inches] Stop in the middle of a repeat if necessary BO all sts Weave in ends Wear it as a boa or necktie (optional)

FINISHING
Pinning the Seam
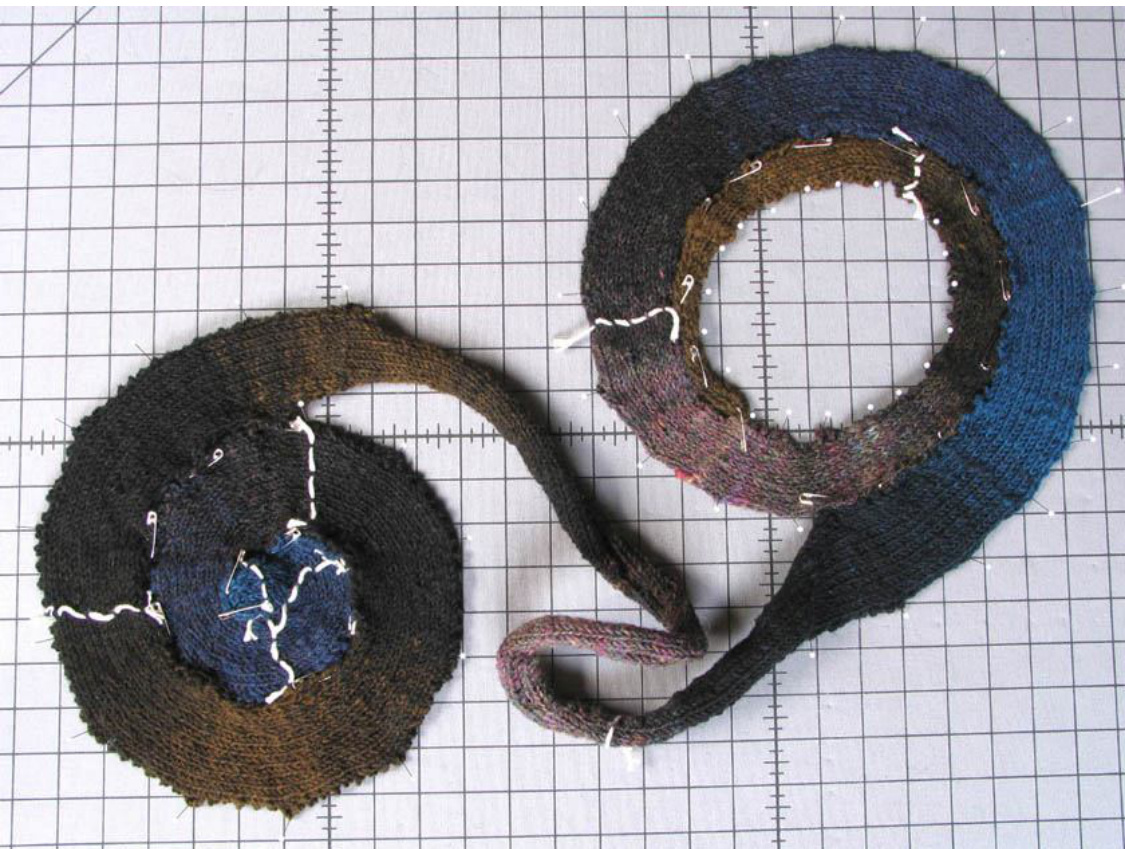
Starting at the brim end (segments #1 and #2), wrap the strip around the head where you want the brim to ride (typically above the ears and fairly high on the forehead). Pin it to fit snugly. Err on the side of making it too tight rather than too loose. It's much easier to enlarge the brim with blocking than it is to make the brim smaller. Start coiling the strip in the direction indicated by the curvature of the fabric. Work from the brim toward the top, using safety pins to hold the selvages together every 2 inches or so. Pin up 1-1.5 revolutions of the spiral. Now start pinning from the other end. Pin up about 2 revolutions working out from the center, stretching the convex edge a little if necessary to help the fabric lie flat (you want something like a disc, not a cone). Here is what the partially pinned hat looks like. The white-headed straight pins are only used to hold it flat for the photo. They are not necessary for pinning the seam.
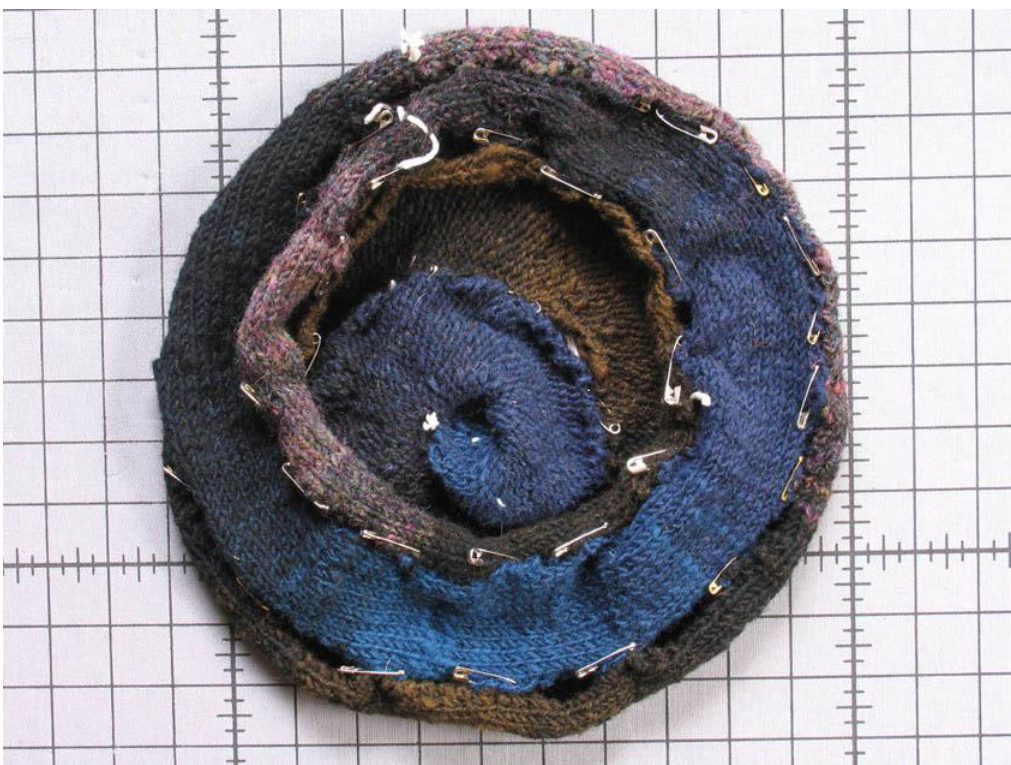
Continue working toward the middle, adding a few pins at a time to each end. If fortune smiles, you will end up with the same amount of fabric on both sides and no significant wrinkles or folds. If you get to the middle and you have a big wrinkle because the knit fabric on one side of the seam is longer than the other, do not despair. Working out from the wrinkle, unpin half a revolution or so in each direction and re-pin, distributing the extra fabric from the wrinkle over as wide an area as possible. Here is a photo of the hat all pinned up, looking at the brim.
Single Crochet Seam
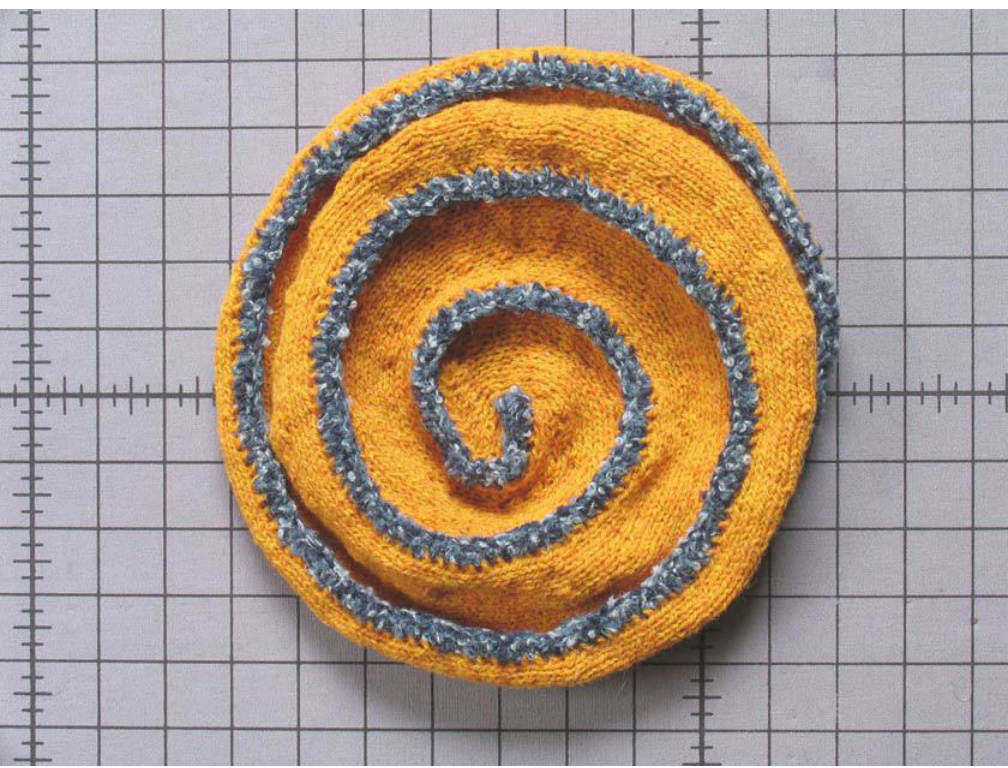
Refer to instructions in the pattern notes. Start at brim and crochet the full length of the seam, removing the pins as you go. Here is what the hat looks like with the seam complete, before blocking.
Blocking
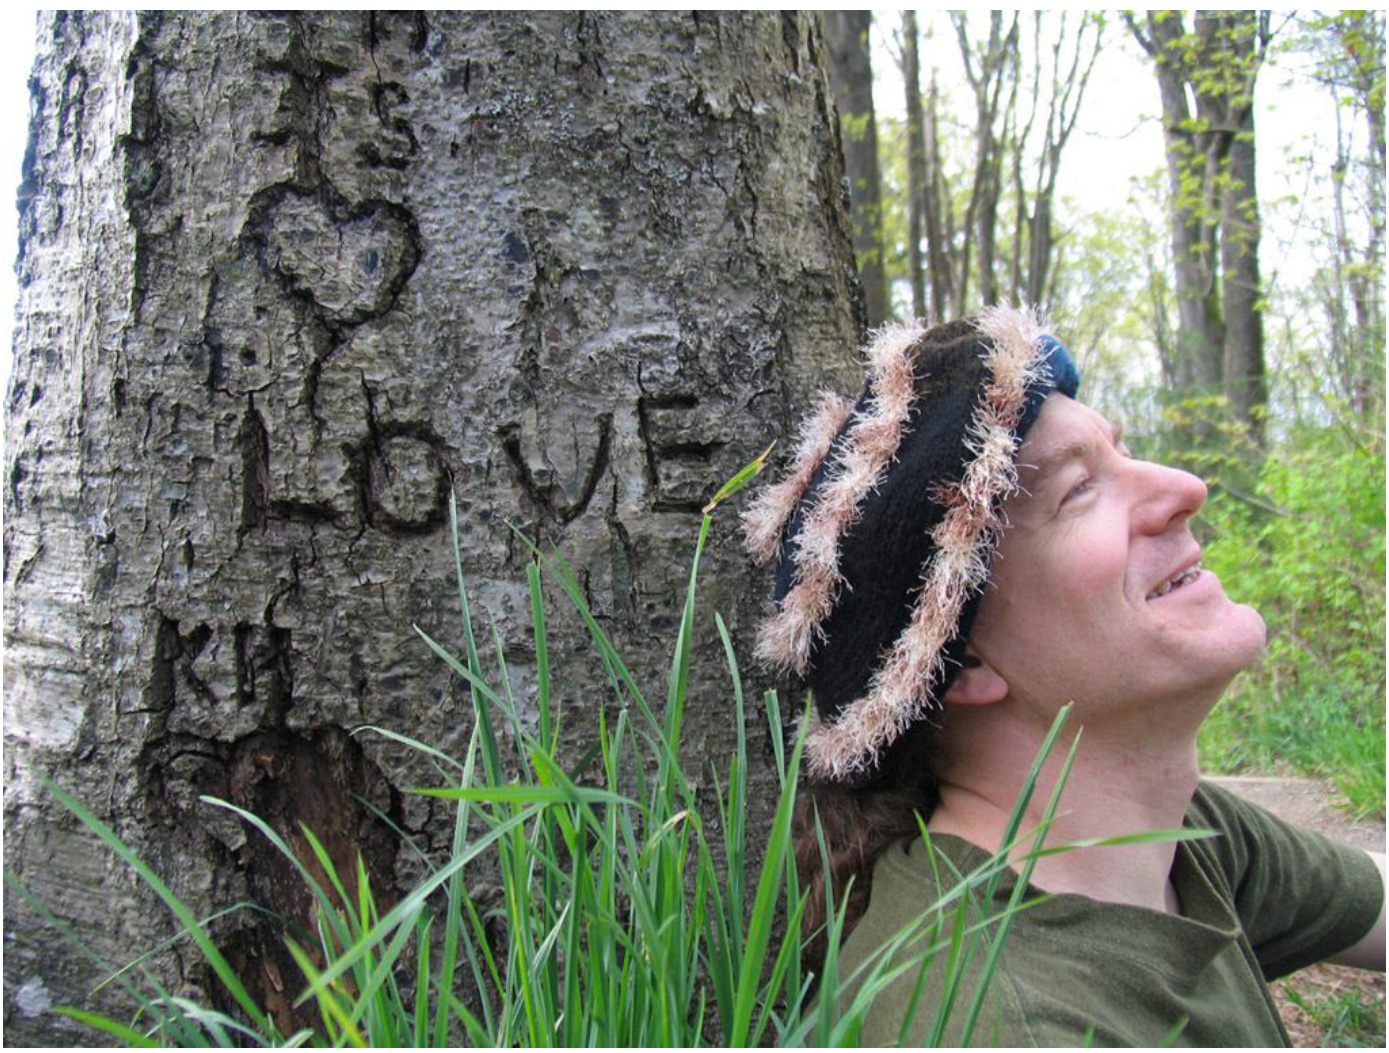
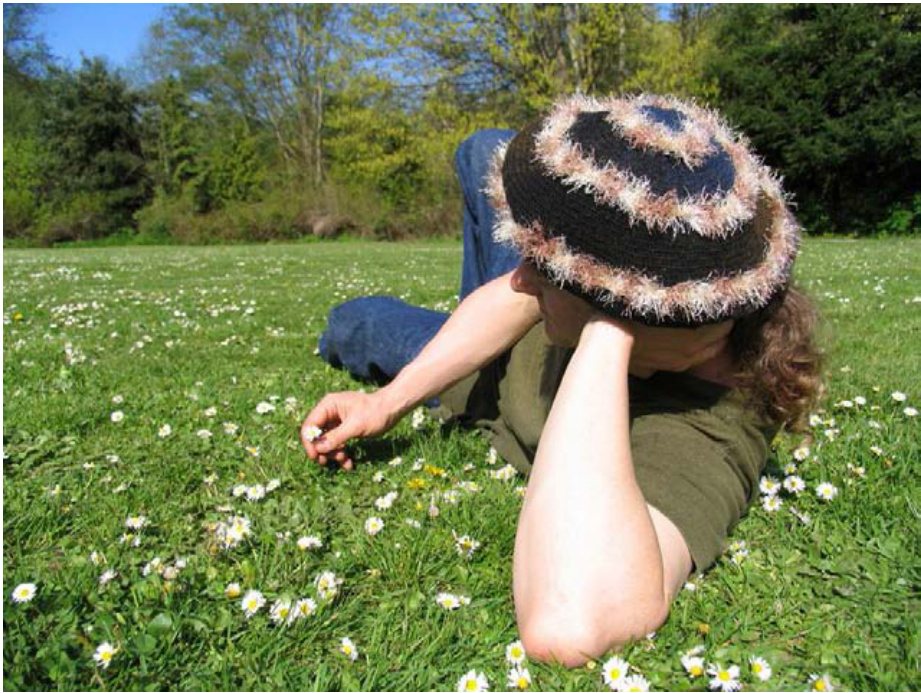
The hat is best blocked in two stages. The first stage smoothes out the top of the hat and creates a nice circular crease. The second stage blocks the area between the brim and the crease. Soak the hat, squeeze out extra water, and gently stretch it over a plate or shallow bowl about 11" (9.5") in diameter. Adjust as needed to locate the crease where you want it and to eliminate wrinkles from the top. Allow to dry. Remove the hat from the crockery carefully to avoid over-stretching the brim. Measure the brim or check the fit of the hat. The brim may have gotten stretched out from putting the hat on and off the plate or bowl. This is particularly likely in the case of the large hat. If the brim size is fine and the fabric looks consistent, you're done -- wear it with pride. If not, soak and squeeze the hat again. Lay it flat, top down. Use your fingers to press any wrinkles out of the top. Let it dry with no tension on the brim. You can use a hair dryer to increase the shrinkage and accelerate drying. Before using a hair dryer or other heat source, test it on a swatch to make sure your yarn won't be damaged. If you have any questions or comments contact me through Ravelry or at sonnetized.gmail.com. Photo credit [models: Matt Babcock and Sharon Fuller. photographers: Sharon Fuller and Matt Babcock.] Pattern and images copyright 2009 Matt Babcock.


