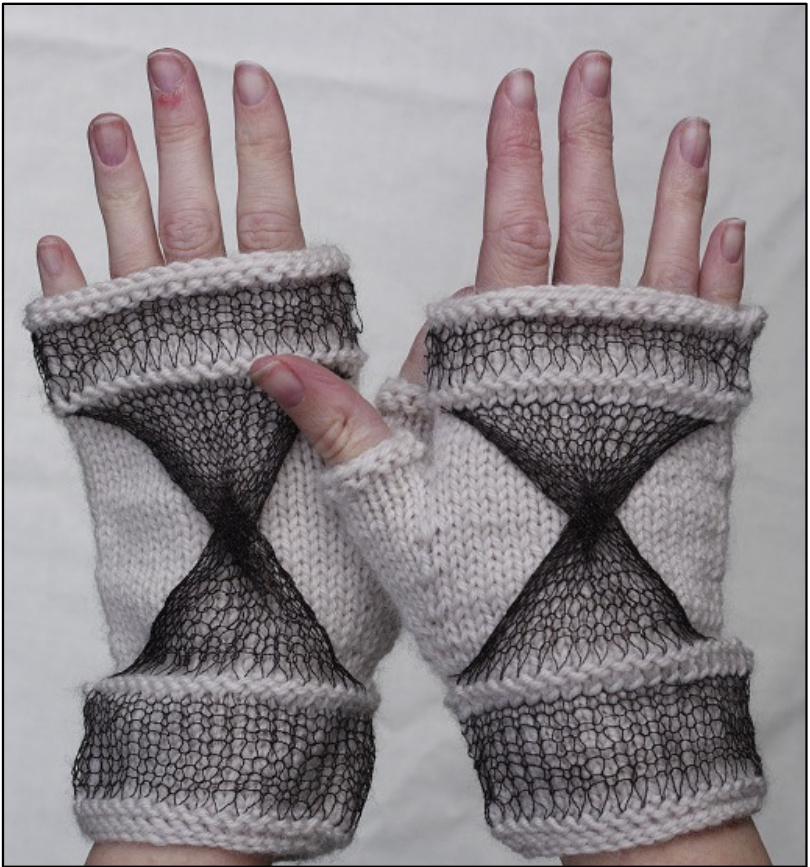
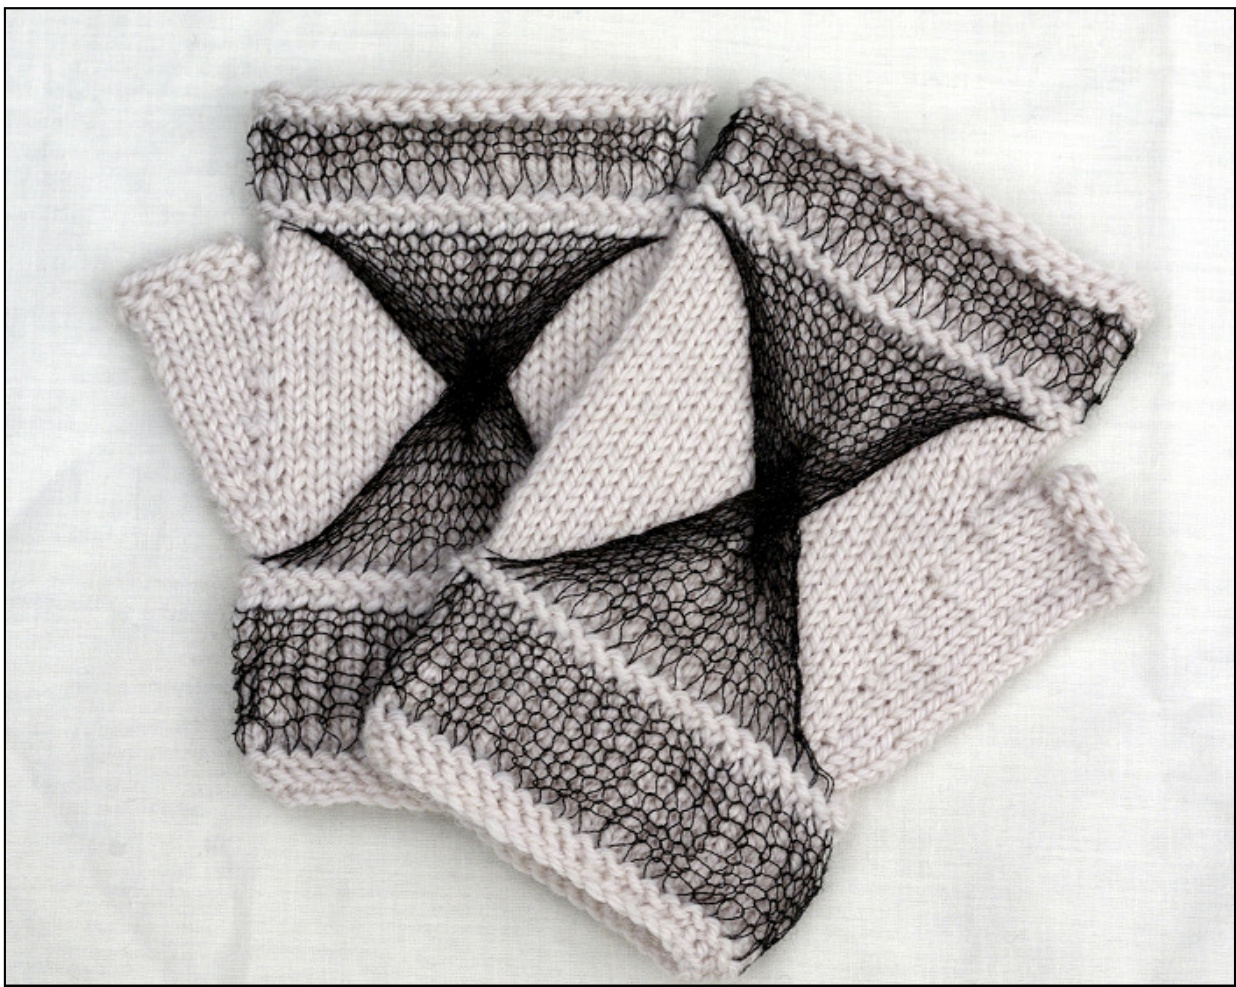
Chiaroscuro fingerless gloves
Uy Pixelated Mushroom (Nyss Parkes) http://pixelatedmushroom.Ulogspot.com
Pattern Information
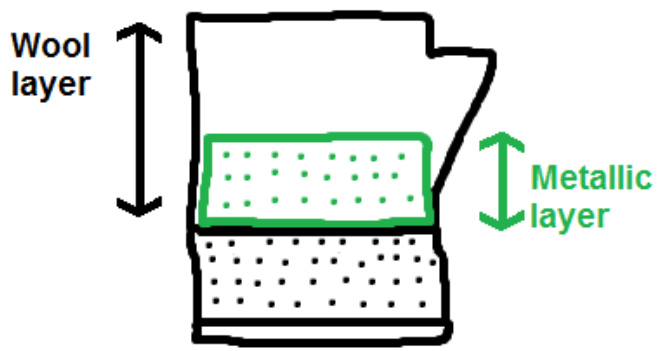
Chiaroscuro - in painting, photography and cinema - strong contrasts between dark and light serving to achieve a sense of depth and volume... This pattern was designed to feature metallic yarn (or other specialty fibres) without the commitment of a full garment. The delicacy of the metallic yarn will affect the durability of the project for every-day wear, but will also produce an individual creation depending on the yarn combinations chosen, like a small work of art. The gloves are knit from the bottom up, in three sections. The first and third sections involve creating two layers for a shadowed appearance; the middle section involves a cable on the back of the hand creating a vignette effect. This pattern is rated as challenging - due to the nature of the delicate yarn, and the fiddly-ness of having two magic loops available simultaneously.
Abbreviations
St/Sts-Stitch/Stitches K-Knit P-Purl Kfb - Knit into the front and back of a stitch to increase PM1 - Place marker RM - Remove marker St-st - Stockinette stitch SSK - Slip slip knit K2tog - Knit two stitches together K3tog - Knit three stitches together
Sizing
Small [Medium,Large] Finished measurements: Small - 6.75" (17cm) around knuckles Medium - 7" (18cm) around knuckles Large - 7.5" (19cm) around knuckles
Gauge
5.6 stitches and 8 rows = 1 inch (2.5cm) in Stockinette Stitch for wool yarn
Materials
2 stitch markers
Two 3.25mm circular needles or size required to achieve gauge Recommend using two sets of long metal needles (e.g. Addis) with a flexible cord rather than wooden needles for easy slipping of stitches and manipulation of magic loop). Yarn suggestions: Cleckheaton Country 8 Ply in a cream colour (50gm required for the medium pair, 60-70gm may be required for large depending on desired length) Metallic yarn: Dairing Wool Stainless C-35 (pictured) or HabuTextiles A-20/21 1/20 silk stainless steel (Only a small amount is required - e.g. less than 10gm)
Contact and version updates
The most recent version of this pattern will be available from Ravelry or my Blog. http://www.ravelry.com/designers/nyss-parkes http://pixelatedmushroom.blogspot.com.au I love seeing your project photos. Feel free to email them to the address above, or attach them to your project on Ravelry. For comments or questions please email pixelatedmushroom@gmail.com This is Version 2 - 18 November 2014. Make for yourself, friends or charity, but please do not distribute.
Thank you
Thank you to pattern testers: sowmyakrishna | louiseclsc171260 | lollipop748 | Pinkabella
Pattern
Pattern starts at the wrist and works up towards fingers.
Cast on
Using a knitted cast on and the wool yarn, cast on 38 [40, 42]. Arrange sts on magic loop so that there are 19 [20, 21] on front needle, and 19 [20, 21] on back needle, join for working inthe round. Next round:Knit into the back ofeach stitch. Purl one round.
Wrist section
Create two layers
Knit into the front of each stitch with metallic yarn, and the back of each stitch with wool yarn, doubling the stitch count = 76 [80,84]. \*Slip first metallic stitch to spare circular needle and hold in front, slip first wool stitch to the working needle, repeat from \* to end of round until all the metallic sts are on one circular needle, and all wool sts are on another.
Shift metallic working yarn to the outside of work.
Inside layer
Knit 10 [12,14] rounds with wool yarn.
Outside layer
Return your attention to the metallic sts. K1, kfb, k15 [16,17], kfb, k2, kfb, k15[16,17], kfb, k1 (4 stitches increased) = 80 [84, 88]. Starting with a purl round, continue in st-st for 9 [11, 13] rounds, being careful at the row ends to keep yarn fairly taught. Compare your metallic layer to the wool layer beneath, ensuring they match (the top layer should be stretched over the one beneath, but not enough to buckle the fabric. Add or remove rounds if required.
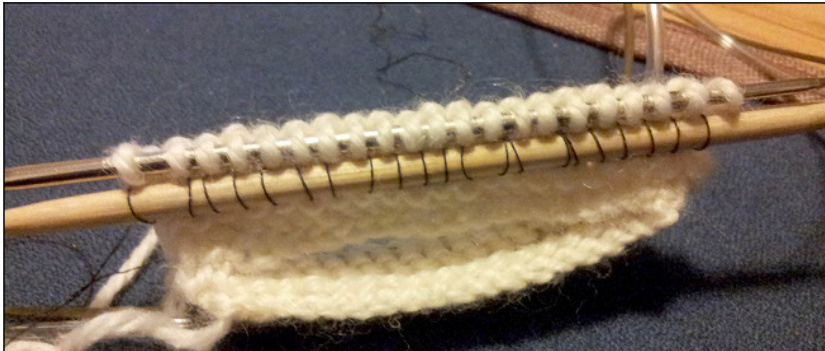
Join layers
Hold both left needles parallel with each other.
#lnsert right needle tip into first 2 metallic sts as if to knit, then first 1 wool st as if to knit, and k3tog with wool, knit the next 1 metallic and 1 wool st together in the same manner 17[18,19] times, knit the next 2 metallic sts together with the next 1 wool st, Repeat from # to round end = 38[40,42].
Middle section
Create two layers on the back of the hand Right hand only Shift metallic yarn to the inside of work. Purl one round with wool. Shift metallic yarn to the outside of work. Knit into the front with metallic and back with wool for 19 [20, 21] sts, knit remaining 19 [20, 21] sts with wool = 57 [60, 63]. \*Slip first metallic stitch to spare circular needle and hold in front, slip first wool stitch to the working needle, repeat from \* until 19 [20, 21] sts of each later are used up, slip remaining 19 [20, 21] wool sts to working needle.
Left hand only
Break metallic yarn (as it will be on the wrong end of work). Purl one round with wool. Knit 19 [20, 21] sts with wool, then re-join metallic yarn and knit into the front with metallic and back with wool for 19 [20, 21] sts = 57 [60, 63]. Slip 19 [20, 21] wool sts to working needle, \*slip next metallic stitch to spare circular needle and hold in front, slip first wool stitch to the working needle\*, repeat from \* until all sts are used up.
Both hands
Inside layer
Shift metallic yarn to outside of work. With wool, k4 [5,6] rounds.
Start increases for thumb
K17 [18,19], pm1, kfb, k2, kfb, pm2, knit to end = wool sts: 40 [42,44] Knit 3 rows. Continue as set up above, increasing after marker 1 and before marker 2, then knitting three plain rounds - until wool stitch count has reached 50 [54,58], finishing with the three plain rounds. (12 [14,16] sts increased). .8,19] sts to marker 1, rm, k2, slip 12 [14,16] thumb sts to waste yarn, k2, rm, kto end = 38 [40, 42 K 3 [4,5] rounds.
Outside layer
Return to metallic sts.
St-st until the metallic outside layer is half the height of the wool layer
Right hand only
Cable
Slip 10 [10,11] sts to cable needle and hold to front, k9 [10,10], k10[10,11] from cable needle. St-st as many rows as required to match the wool layer beneath.
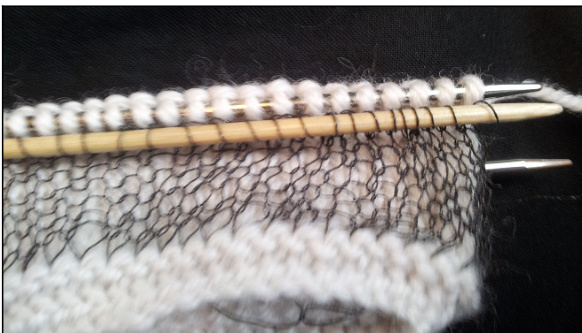
Join layers
Hold both left needles parallel with each other. \*Insert right needle tip into first metallic st as if to knit, then first wool st as if to knit, and k2tog using wool, repeat from \* until all metallic sts are used up, knit remaining stitches using wool = 38 [40,42]
Left hand only
Cable Slip 9 [10,10] sts to cable needle and hold to back, k10 [10,11], k 9[10,10] from cable needle. St-st as many rows as required to match the wool layer beneath.
Join layers
Hold both left needles parallel with each other. Using wool k19[20,21], \*insert right needle tip into next metallic st as if to knit, then next wool st as if to knit, and k2tog using wool, repeat from \* until all sts are used up = 38 [40,42]
Fingers section
Both hands
Move metallic yarn to inside of work. Purl 1 round in wool 'arn to outside of work (if metallic yarn is at wrong end of work, break it and rejoin at correct end. Repeat the instructions for the 'Wrist section', making your work measure 1cm less than desired gloves length. (Note totesters-/willlikelyaddexamplerownumbersinhere)
Cast off
After joining rows, shift metallic yarn to inside of work then break metallic yarn, leaving a long tail. Purl 1 round with wool. Cast of knitwise.
Lengthen thumb
Return 12[14,16] thumb sts to needle. Knit 2 [3,3] rows. Cast off knitwise.
Finishing
Weave in loose ends and soak in slightly warm water. Dry flat.