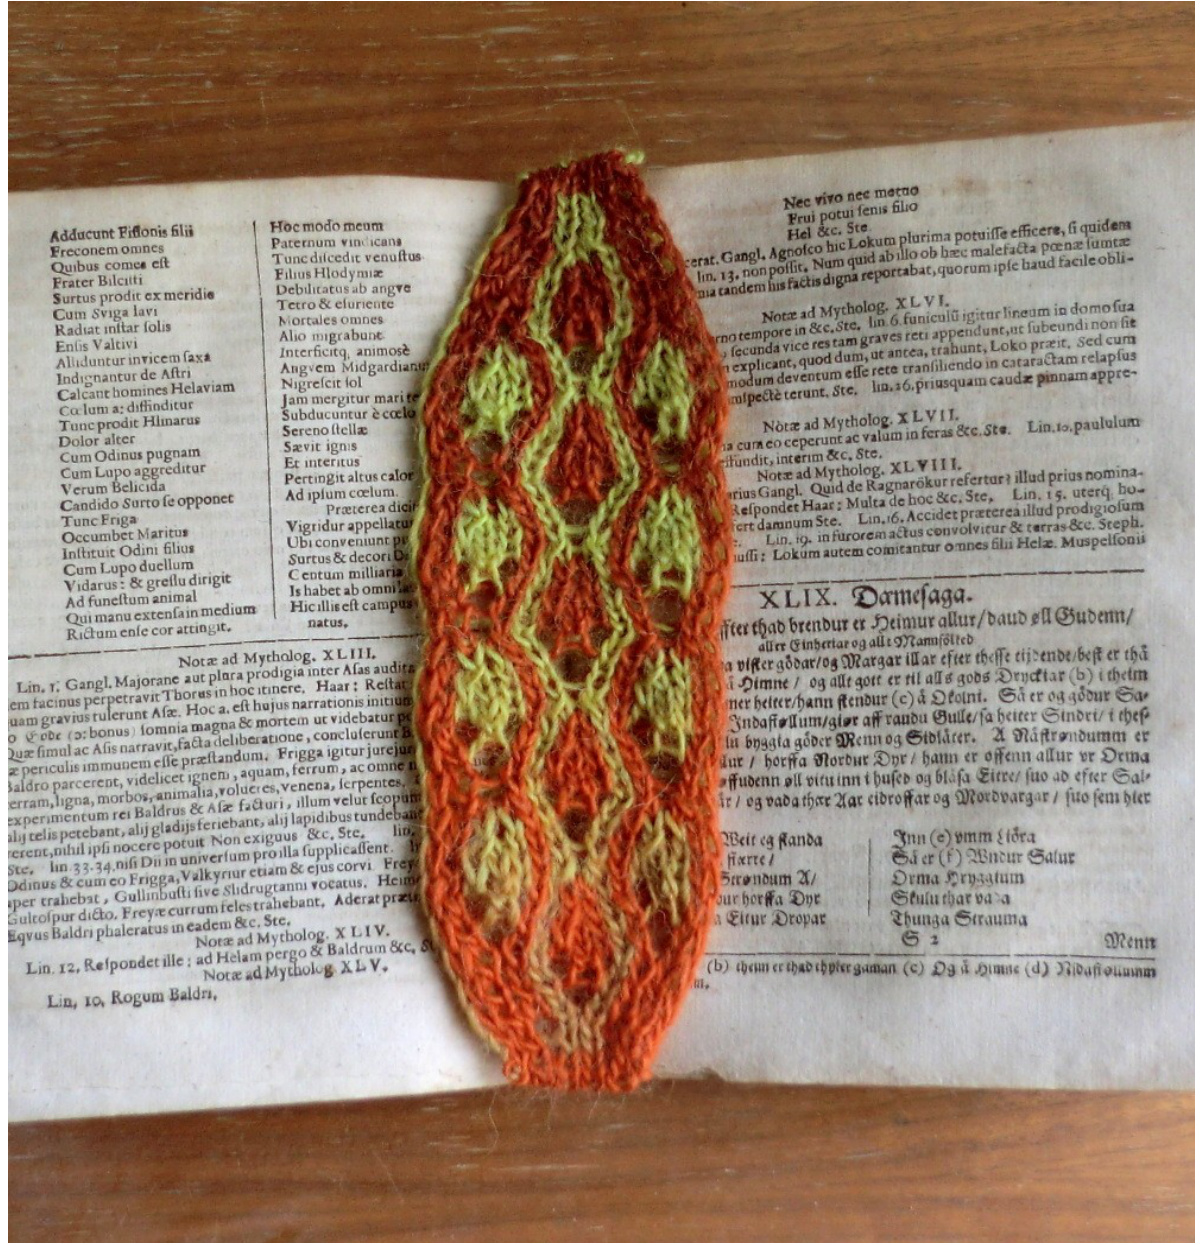
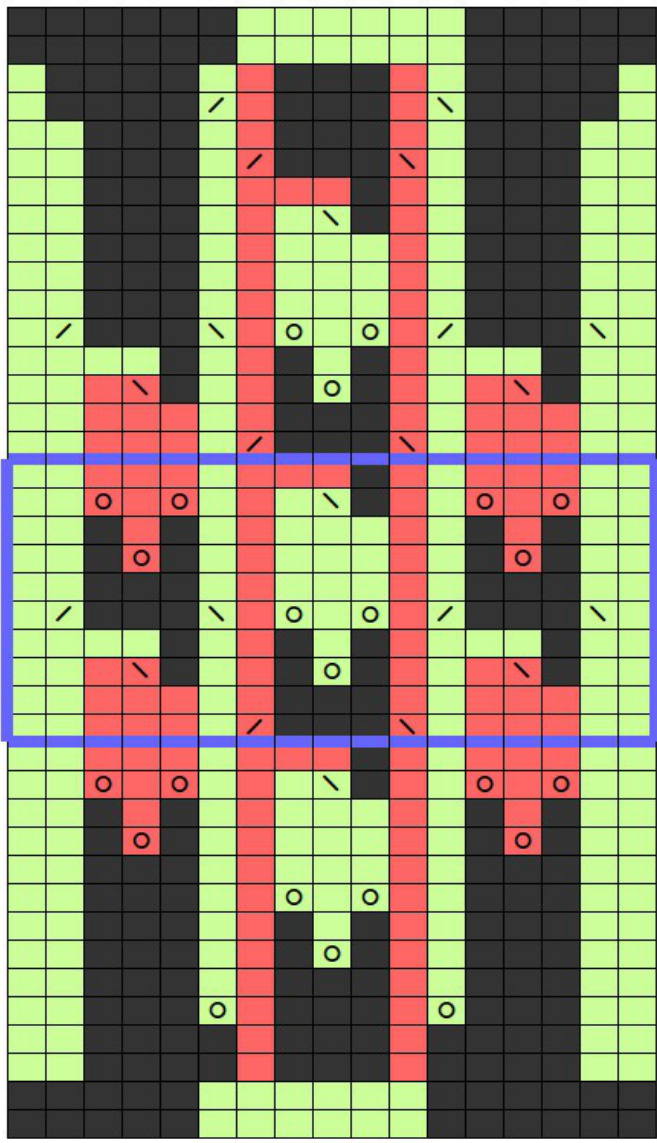
Laurelin
In The Silmarillion, Laurelin is described like this: "... The other bore leaves of a young green like a new-opened beech; their edges were of glittering gold. Flowers swung upon her branches in clusters of yellow flame, formed each to a glowing horn that spilled a golden rain upon the ground; and from the blossom of that tree there came forth warmth and a great light." This lace pattern made me think of the description of the younger of the Two Trees, so I named this little bookmark in her honor. It would be a perfect way to use up some of those inevitable remnants fingering weight yarn, as well as to try out the delightful art of double-knit lace.
Materials:
arn: Fingering weight yarn in two different colors, about 12 m of each color. Needles: 2.5 and 3 mm (US 1% and 2%/2) Sundries: Tapestry needle for binding off Gauge: Gauge is not important for this project
Instructions
Cast on 6 stitch pairs on smaller needles. Start knitting the chart, changing to larger needles after 2 or 3 rounds. Knit the section outlined in blue as many times as desired, until the bookmark approaches the desired size. Knit the rest of the pattern and bind off.
Charts
All rows are included in the charts.
Common lace stitches in double-knitting
Decreases
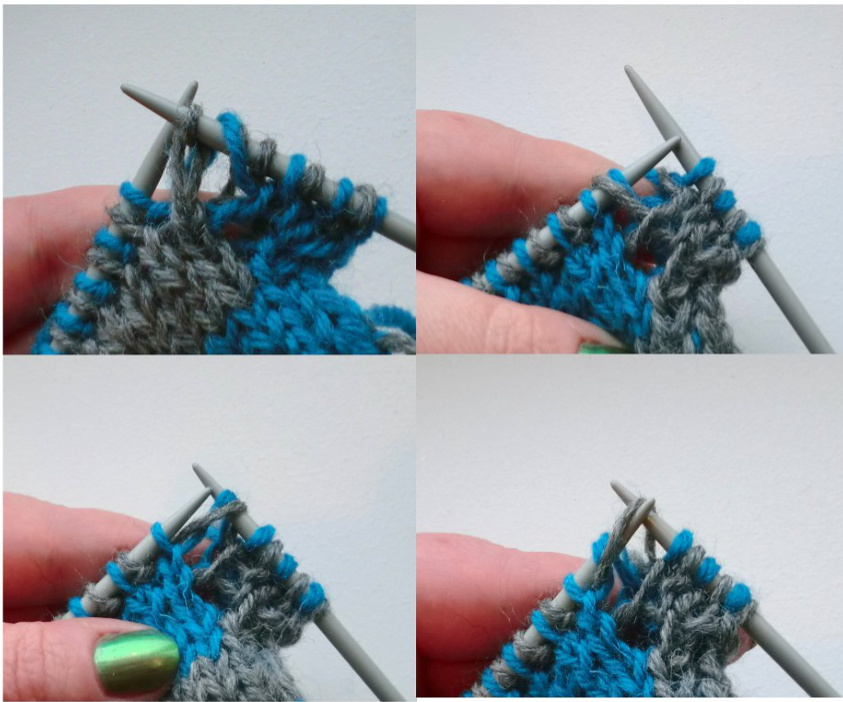
Before a decrease can be made, the stitches involved in the decrease need to be rearranged. An excellent tutorial on decreases in double stitching can be found here: https://www.youtube.com/watch?v=9JxWPQilBxQ My method for making decreases is slightly different, and it works well for me. Bear in mind that I am a Continental knitter, an English knitter may need to make adjustments to accommodate their technique. I do usually not use an extra needle when I rearrange stitches, since this would slow me down. I would recommend that someone wanting to do double-knitted lace learn this for the most common instances when rearranging stitches is necessary.
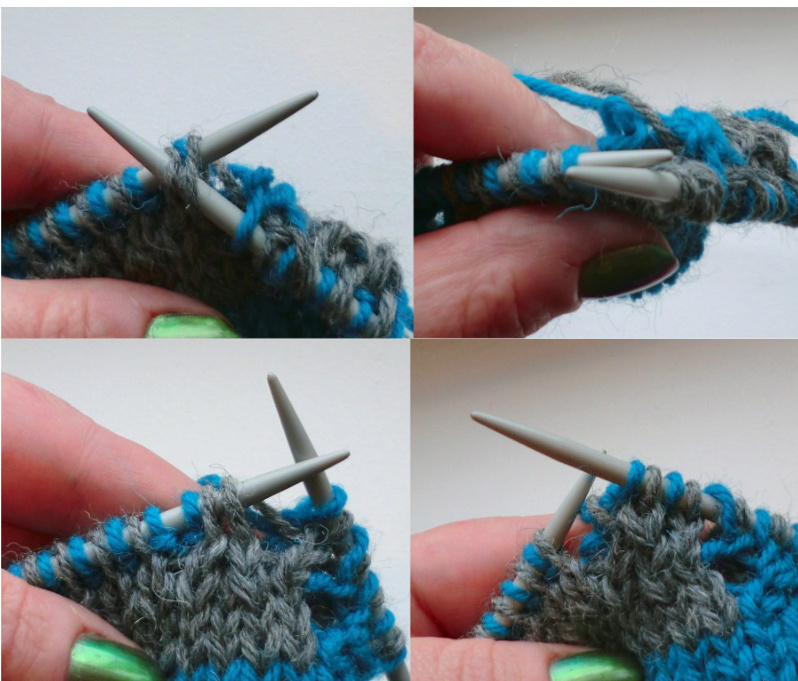
Slide the tip of the right needle through the facing side stitches of the next two stitch pairs. Slide the left needle out of the stitches, so that these two facing side stitches are on the right needle only. One back side stitch will have fallen off the needle in the process. Carefully pick up this stitch with your left needle. Return the two facing side stitches to the left needle. You are now ready to do the decrease stitch indicated by the pattern. K2tog - right-leaning decrease: k2tog on the front side, ssp wyif on the back side. - left-leaning decrease: ssk on the front side, p2tog wyif on the back sid When you do decrease stitch than slants towards one side, you want the stitches on both sides to slant in the same direction. If necessary, flip your work over to check that the back side stitches lean in the right direction.
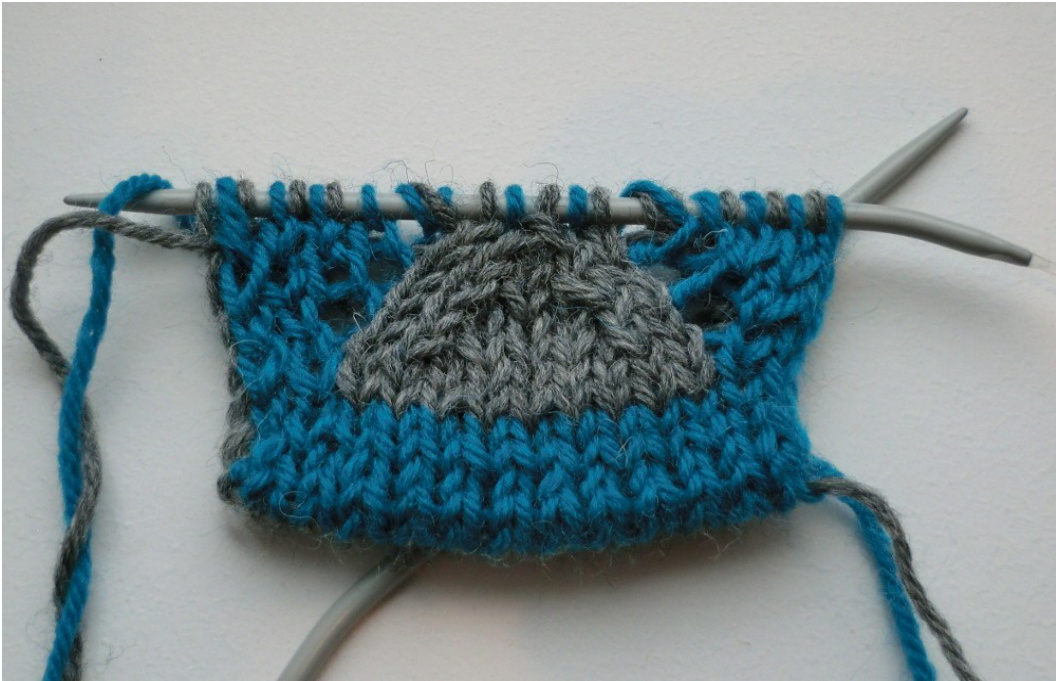
Double decrease:
A double decrease is similar to a single increase, but with three stitch pairs needing to be rearranged rather than two. Slide the tip of the right needle through the facing side stitches of the next three stitch pairs. Slide the left needle out of the stitches, so that these three facing side stitches are on the right needle only. Two back side stitches will have fallen off the needle in the process.
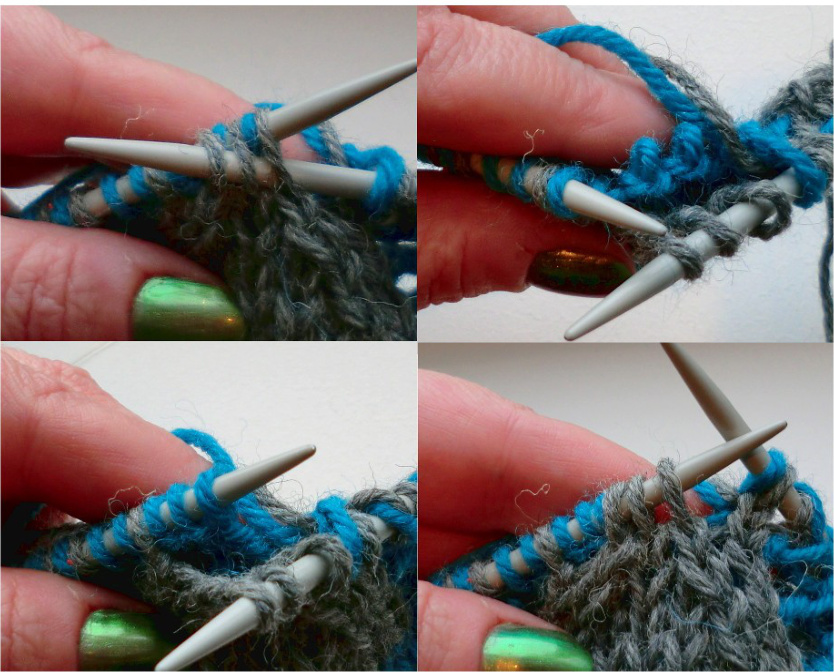
Carefully pick up these stitches with your left needle. Return the three facing side stitches to the left needle. You are now ready to do the decrease stitch indicated by the pattern. I usually do double decrease stitches like this: Facing side: Slip one st as if to knit, k2tog, psso. Back side: Slip one stitch wyif, slip 2 sts wyif as if to knit, slip these two sts back onto left needle, p2tog, psso.
Yarnovers
Make yarnovers with both strands of yarn, making certain the strands are not twisted, and that the strands lie over the needle in the right order. When knitting into a yarnover, first slip the YO loops together knitwise, then return them together to the left needle. Then pick the appropriate loop to knit and purl your stitches. 《Turning》 the loops in this way before knitting makes it much easier to get at the loop you want for your stitch.