Cielo Baby Blanket
Designed by: Lisa Dusseault Email: lisa@rtfm.com and website http://nih.blogspot.com Photographer: Nagendra Modadugu
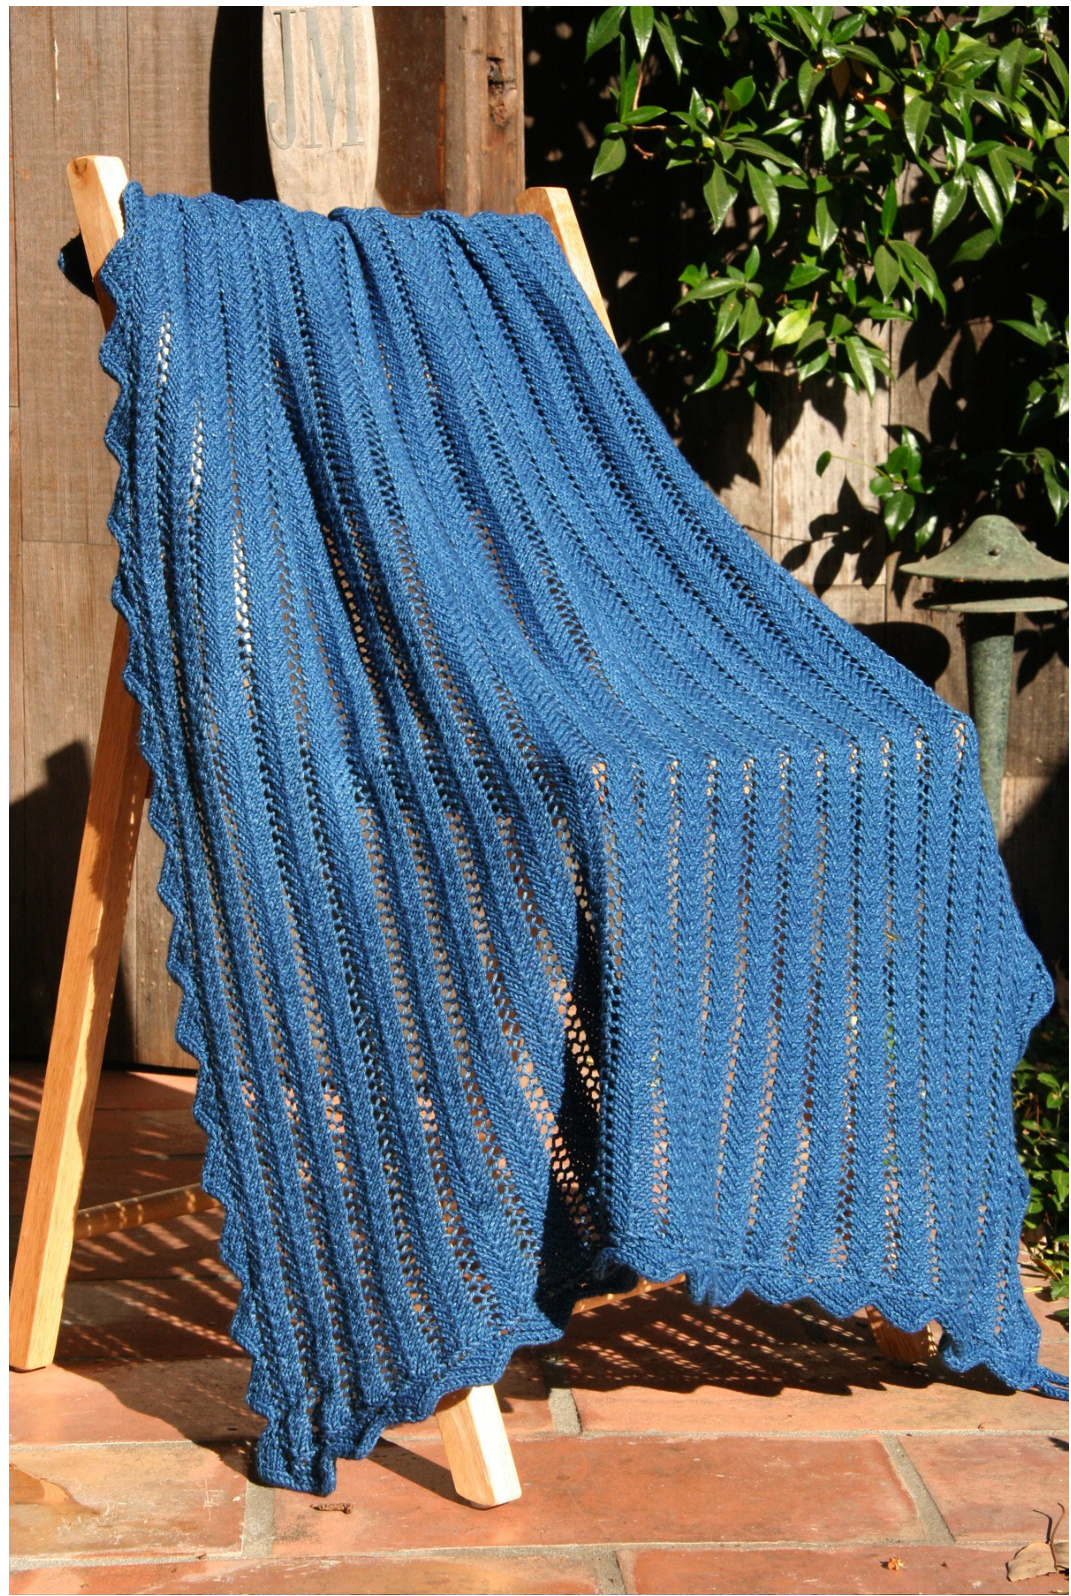
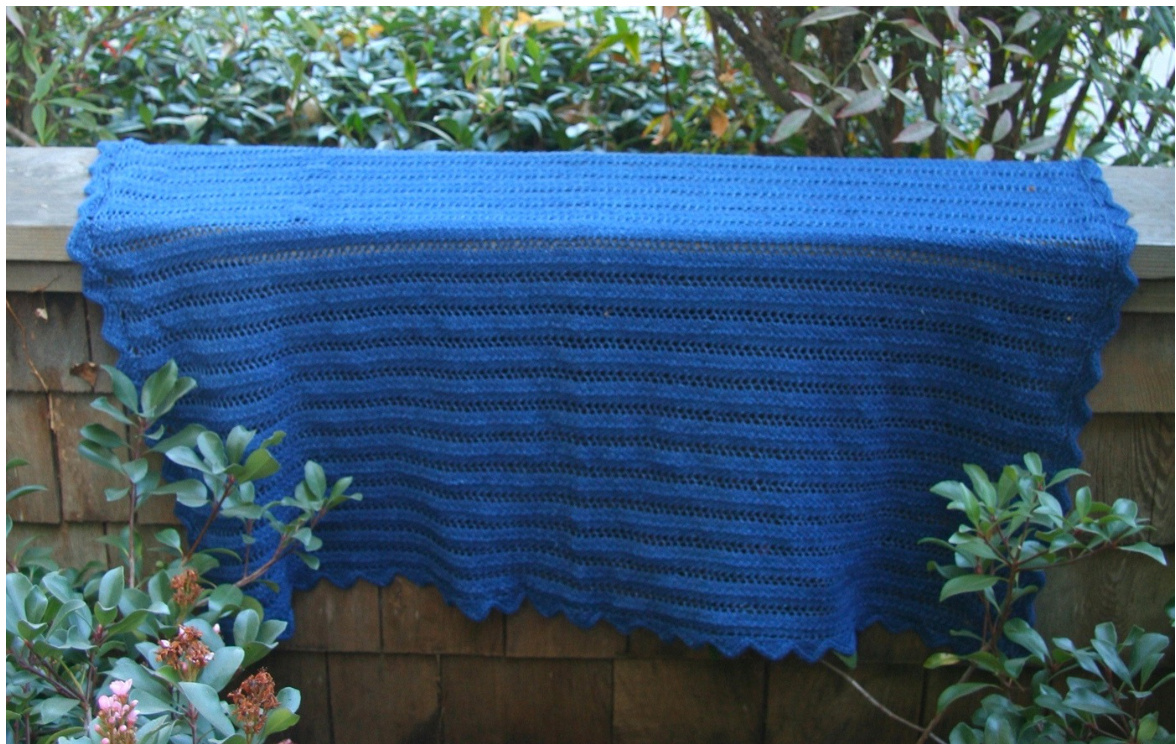
This blanket was designed for a friend expecting a baby before I knew whether it would be a boy or a girl (it's a girl). To me, indigo is a neutral color, not just for baby boys. Even better, the Mayans thought indigo was the best color to soothe pregnant women and unborn children (there's your motivation to finish it early). To make it work for either a boy or girl for many years, it's a robust blanket in durable cotton, but it also has a touch of lace and fancy edging. The yarn will fade and soften over time and through machine washings. My hope is to see the blanket five years from now being dragged over the floor, cried into and spilled on, having been washed umpteen dozen times, hardly blue any more, and starting to fall apart -- but still loved. Skill Level: Intermediate Single size: 34 inches wide, 44 inches long (after machine washing and drying)
Materials:
Yarn - Elann Den-M-Nit (100 yd/92m per $50\mathrm{g}$ skein), cotton, Mid Indigo, 13 skeins, worsted (Possible substitutes: Rowan Den-M-Nit, Blue sky alpaca organic cotton or dyed cotton.) Knitting Needles: US #5/3.75 mm circular needle $32^{\circ}$ long Gauge: 21 stitches / 26 rows $=4$ inch $\left(10\thinspace\mathrm{cm}\right)$ in pattern stitch
Pattern Stitch:
This is a variation chevron lace column stitch, modified to suit non-lace yarns because it uses single decreases every row rather than double decreases. This stitch is used throughout the main body of the blanket, over any multiple of 7 stitches: Row 1: YO, k2, ssk, k3. Repeat. Row 2: YO, p2, p2tog, P3. Repeat.
Design Notes:
The edging, zigzag with built-in I-cord, is best knit back and forth without turning the knitting. You will always have the stockinette side facing you. There's only one kind of stitch you need to learn to do backwards (a plain knit stitch), and it makes the work go much faster. Knitting without turning your knitting is useful for any narrow border, but especially this one with its integrated i-Cord edging that is always knit from the right side so the yarn drawn across will pullthe three stitches around to form a little tube. Slipping stitches is always knitwise to the left (from the right needle to the left needle) in these instructions.
Pattern:
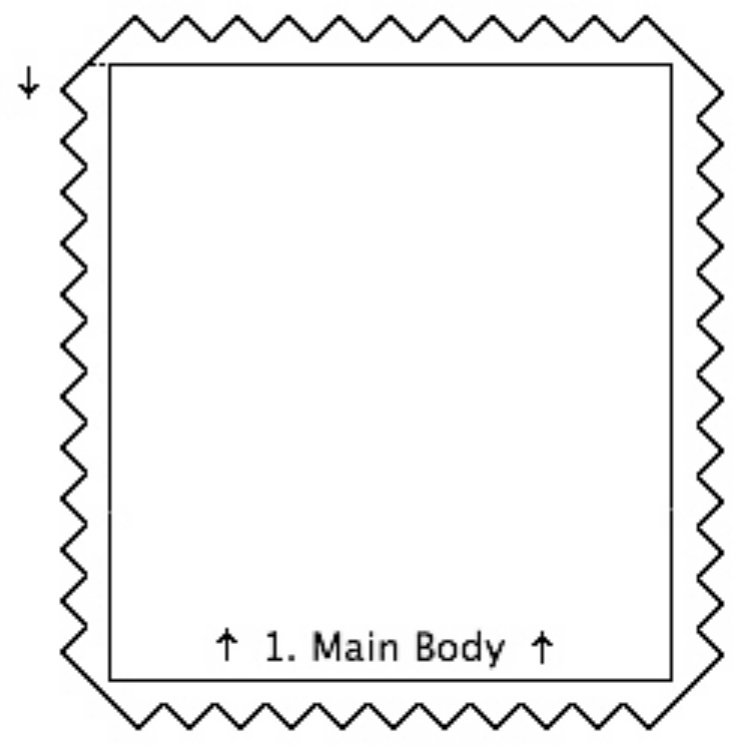
Main body - CO 168 stitches (or a multiple of 7 for a wider or narrower blanket). Work in chevron lace columns pattern stitch until the blanket is at least $15\%$ longer than it is wide to account for vertical shrinking. Bind off loosely. Leave nearly 2 balls (200 yards) to do the edging. Before I made the edging, I wove in loose edgings and machine-washed and machinedried the blanket. I did this because Den-M-Nit shrinks vertically after washing and I wanted to be sure I was putting on the edging at the right spacing. Washing at this step is optional if you're in a rush. Edging - CO3 stitches and prepare to start kniting onto the front, right-hand end of any side of the blanket.
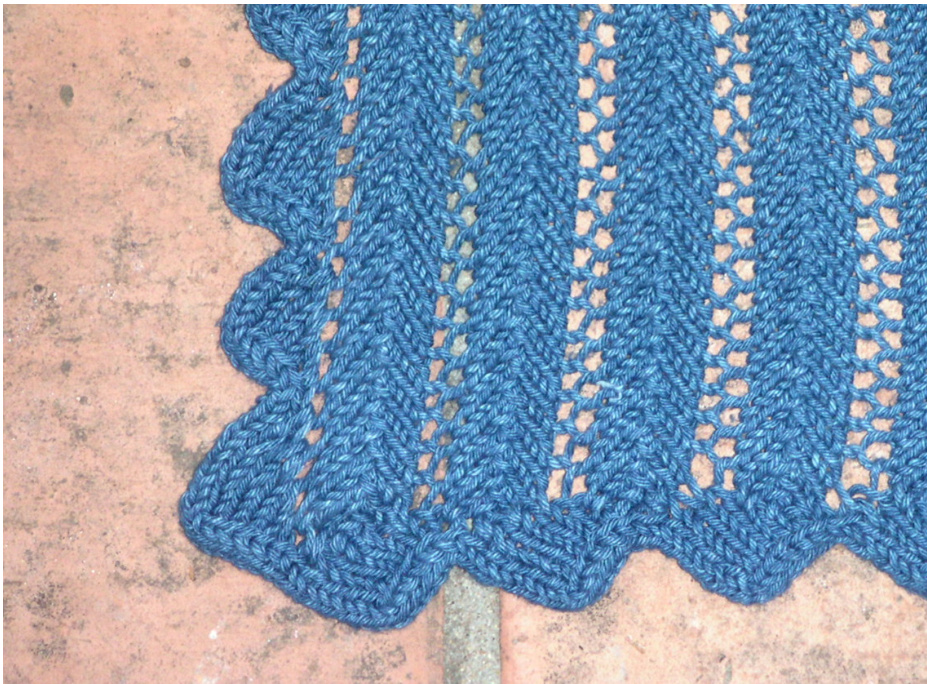
Note on picking up stitches from edge of blanket: Along the sides of the blanket, pick up one YO each time and this spaces out the zigzags a little snugly but very evenly. Along the top and bottom, skip one stitch and pick up the next, each time a cast-on or cast-off stitch needs to be picked up. To make one zigzag: you should have 3 stitches on the needle from casting on or from the previous zigzag, then: ZIGGING: Row 1, right to left: K3. Pick up and k1 from the edge of the blanket. Row 2 without turning: SI st (always knitwise from right needle to lef). Sl3 st, k3, sl 3 st. Row 3: K4, pick up and k1 from edge of blanket. Row 4: Sl st, k1 backwards. Sl 3 st, k3, sl 3 st. Row 5: K5, pick up and k1 from edge of blanket. Row 6: Sl st, k2 backwards. Sl 3 st, k3, sl 3 st. Row 7: K6, pick up and k1 from edge of blanket. Row 8: Sl st, k3 backwards. Sl3 st, k3, sl 3 st. Row 9: K7, pick up and k1 from edge of blanket. Row 10: Sl st, k4 backwards. S13 st, k3, sl3 st. Row 11: K3, sl 3 st. ZAGGING:Rows 12-16: K2, ssk, sl 3 st. Try to finish a zigzag at the end of each side of the blanket, so you can begin the new one around the corner. I used a short zigzag once to make them fit: to make a shorter zigzag. omit rows 9, 10 and 16.
Finishing:
Join up the beginning and ending of edging: when the zigzags reach all the way around, you can cast-off the I-Cord leaving a tail, and use the tail to sew the castoff three stitches to the three cast-on stitches. Or, before doing this, knit a couple extra inches of I-cord (K3, sl 3 st, each row) to form a loop before joining solidly. This loop might be handy to attach pacifiers to, or for small child to drag the blanket around. Weave in last ends. Do not block this blanket if it's made with Den-M-Nit or another sturdy cotton. You wouldn't want to have to block it every time it was spit up on or spilled on, would you? Just throw it in the washer, then the dryer.


