Amigurumi @ 2013 Kate Wood Small and Great Crochet www.smallandgreat.com Crochet Orange
Materials needed:

Finished size approximately 2.5" tall and 3" wide. · Gauge is not important for this pattern. · F / 5 / 3.75 mm crochet hook · tapestry/yarn needle · scissors · row marker · worsted weight yarn in orange (30 yards), cream (4 yards), green (4 yards), and brown (<l yard). · 9 mm black safety eyes (with washers/backs) · small amount of black yarn for embroidering mouth (and eyes, if desired) · small amount of poly fill or other stuffing
Skills needed:
· Basic crochet stitches: ch, sc, hdc, dc · Crocheting into the beginning chain · Working increases and decreases · Counting stitches and rows · Basic sewing THE FINE PRINT: This pattern is for PERSONAL USE ONLY. Items made from this pattern can be Used for yourself, as giffs, or donated to charity, but may NOT be sold. Please do NOT redistribute this pattern in any form, print, electronic, or otherwise. Printing a copy for yourself is fine; printing a copy for someone else is NOT. I sellthese patterns to support my being able to design more of them, and I genuinely appreciate your purchasing my pattern! If you have questions about what constitutes allowable usage, or you believe you've spotted an error, contact me at smallandkate@gmail.com. Thank you!
FRUIT:
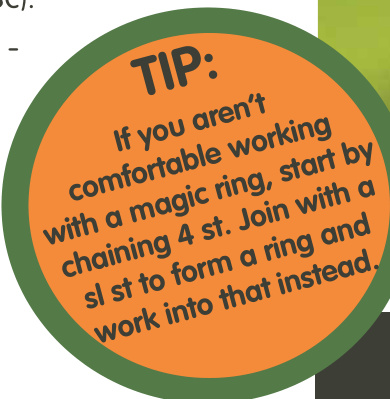
The fruit is worked continuously in a spiral. Use a stitch marker to keep track of your rows as you work! You will begin at the bottom of the orange and end at the top. Using orange yarn, begin by working 6 sc into a magic ring. Pull your ring closed, but not too tight. Row 1: Work 2 sc in each st (12 sc). Row 2: Sc 1, work 2 sc in next st - repeat 6x (18 sc). Row 3: Sc 2, work 2 sc in next st - repeat 6x (24 sc). Row 4: Work 2 sc in next st, sc 3 - repeat 6x (30 sc). Row 5: Sc 4, work 2 sc in next st - repeat 6x (36 sc). Rows 6-1l: Work even for 6 rows (36 sc). Row 12: Sc2tog, sc 4 - repeat 6x (3
Pause here to embellish. Thread needle with brown yarn, and work a French knot (see how-to at right) through the opening of your magic ring to make a litfle nub of stem at the bottom of your orange. Using black yarn, sew on mouth, then embroider eyes or attach safety eyes. Stuff the bottom of your orange. Row 13: Sc next 3 st, sc2tog - repeat 6x (24 sc). Row 14: Sc2tog, sc next 2 st - repeat 6x (18 sc). Row 15: Sc 1, sc2tog - repeat 6x (12 sc). Pause again to finish stuffing before you close up your orange. Row 16: Sc2tog - repeat 6x (6 sc). Fasten off, closing up the open end. Weave in your yarn tail using your tapestry needle.Don't worry too much about neatness -- the leaf and blossom will cover your stitching! @ 2013 Kate Wood Small and Great Crochet www.smallandgreat.com

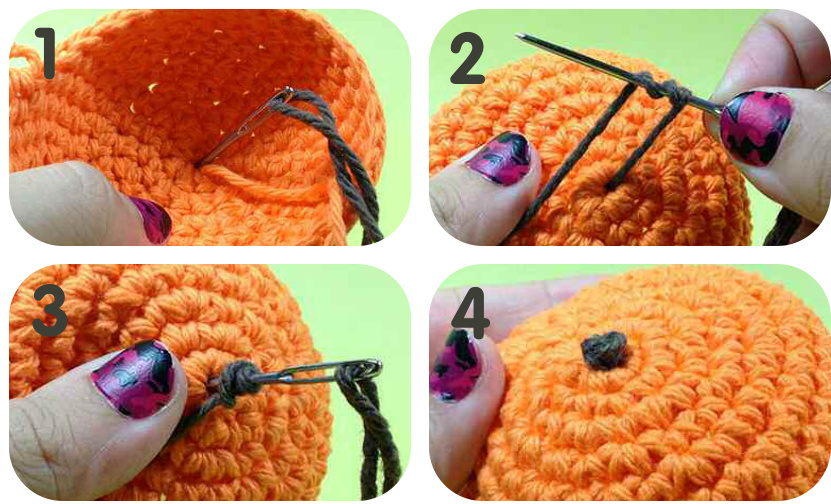
French Knot How-To:
1. Thread your tapestry needle with brown yarn. Bring the needle through the center of your magic ring, working from the wrong side (inside your orange) and bringing the needle out on the right side (outside). 2. Holding the yarn taut, wrap it around your needle 3 or 4 times. No matter what happens, keep holding onto that yarn! 3. Insert the needle back into your magic ring, continuing to hold the yarn taut. As you pull the needle through, the loops should stay on the outside. 4. Voila! There's your French knot. Tie off and trim the excess yarn on the inside of the orange.
LEAF:
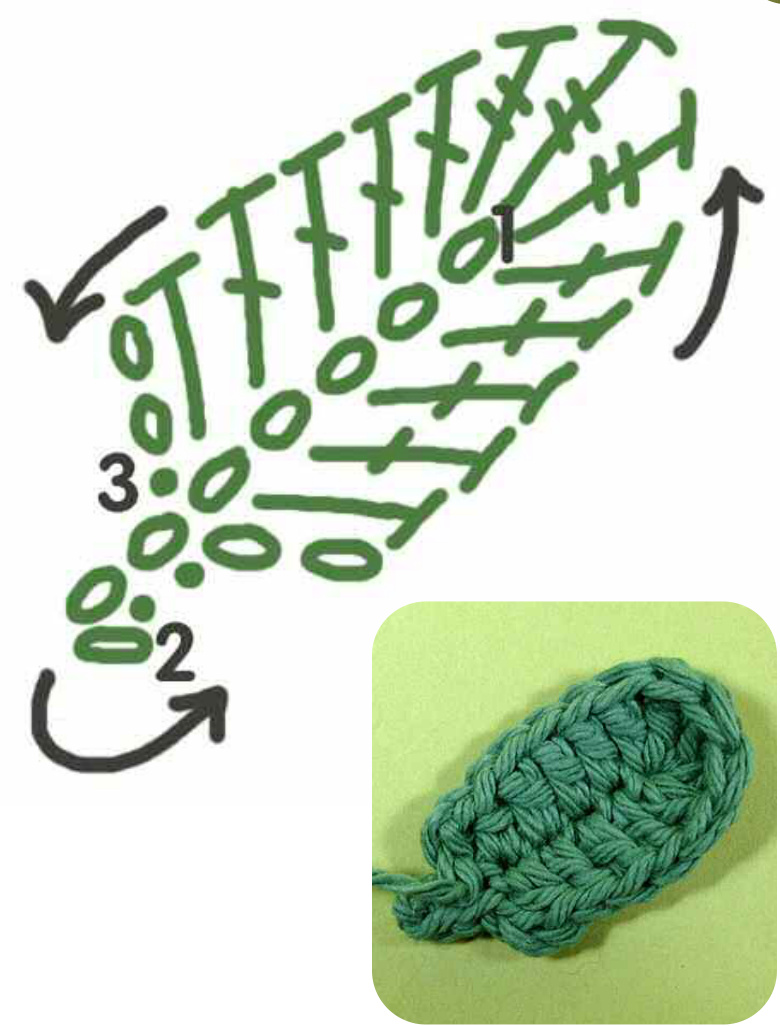
The orange's leaf is worked as a single flat piece, working into the top loops on one side of the chain first, and then the other. See the chart below for help. Using green yarn, ch 8 (first ch is marked 1 in chart). Starting in second ch from the hook (2), sl st 2, working into the loops on the left of the beg ch. Continuing to work in the left loops only, ch 2, hdc next ch loop, then dc next 3 ch loops. Work [1 dc - 3 tr - 1 dc] into the final ch. You will now work back down the other side of the beg ch, working in the right loops only. Dc in next 3 right ch loops, hdc next ch loop, then ch 2 and sl st back to "stem" (3 on chart). Fasten off, leaving a long tail for sewing. With tapestry needle, sew leaf stem to top of orange -- this should take just a few stitches. Weave in and trim your loose end (all of your stitching should be concealed by the leaf).
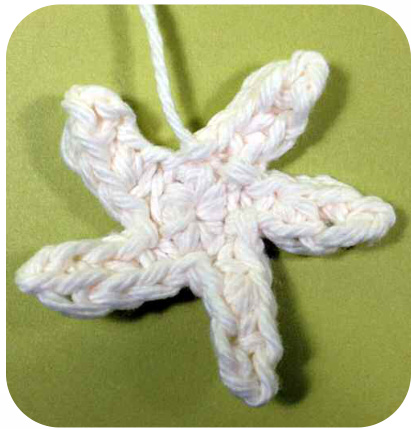
BLOSSOM:
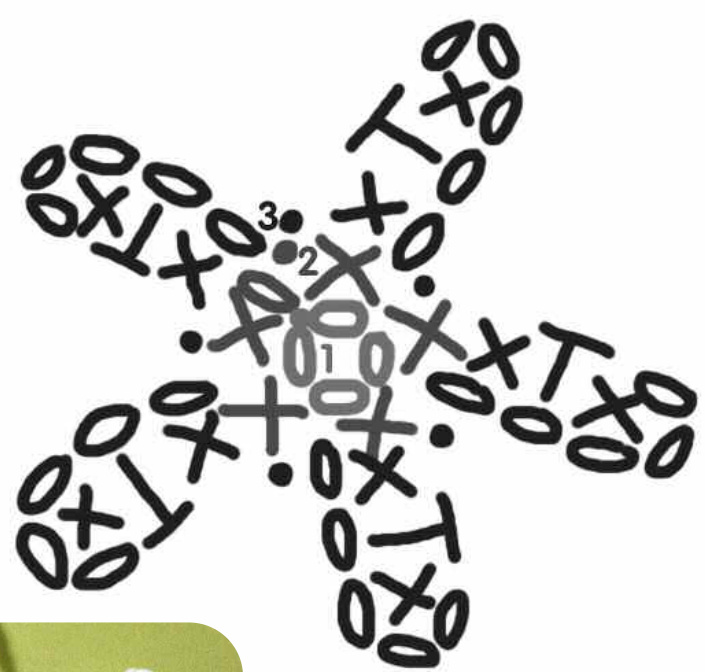
The orange blossom is worked flat in just a few quick rounds. See the chart above for reference. Using cream yarn... Round 1: Ch 4 and sl st to join into a ring. Round 2: Ch 1 and sc 5 st evenly around ring. Sl st to join round (5 sc). Round 3: Ch 5. Sc in third ch from hook, hdc in next ch, sc in last ch. Sl st to next sc in round 1. Repeat 4 more times, creating 5 petals. Fasten off, leaving tail for sewing. Use tapestry needle to sew blossom atop orange and leaf. Your orange is all done -- a little fresh-stitched cuteness to brighten your day! @ 2013 Kate Wood Small and Great Crochet www.smallandgreat.com


