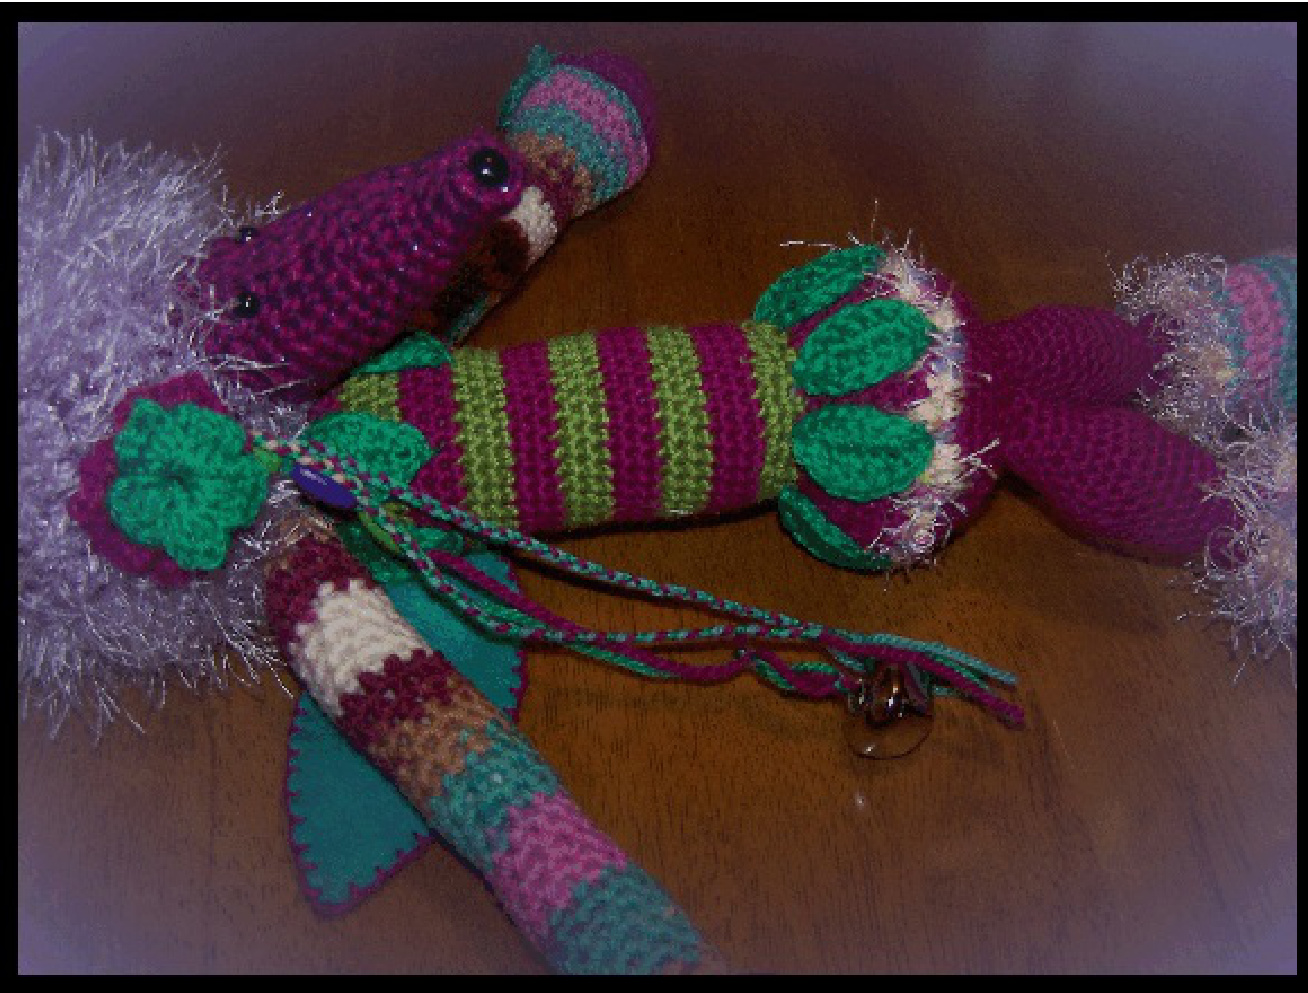
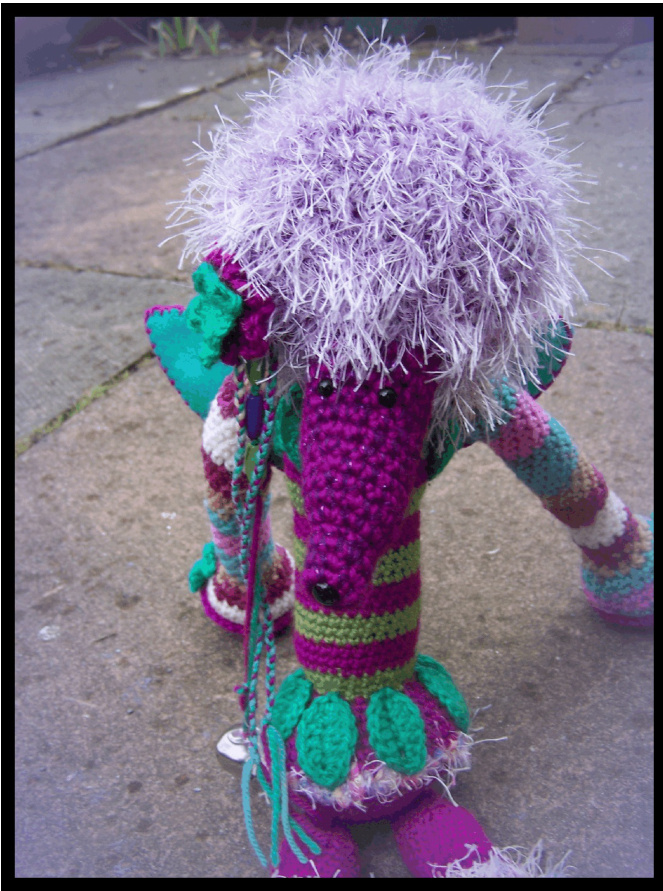
Faery Hedgepig.
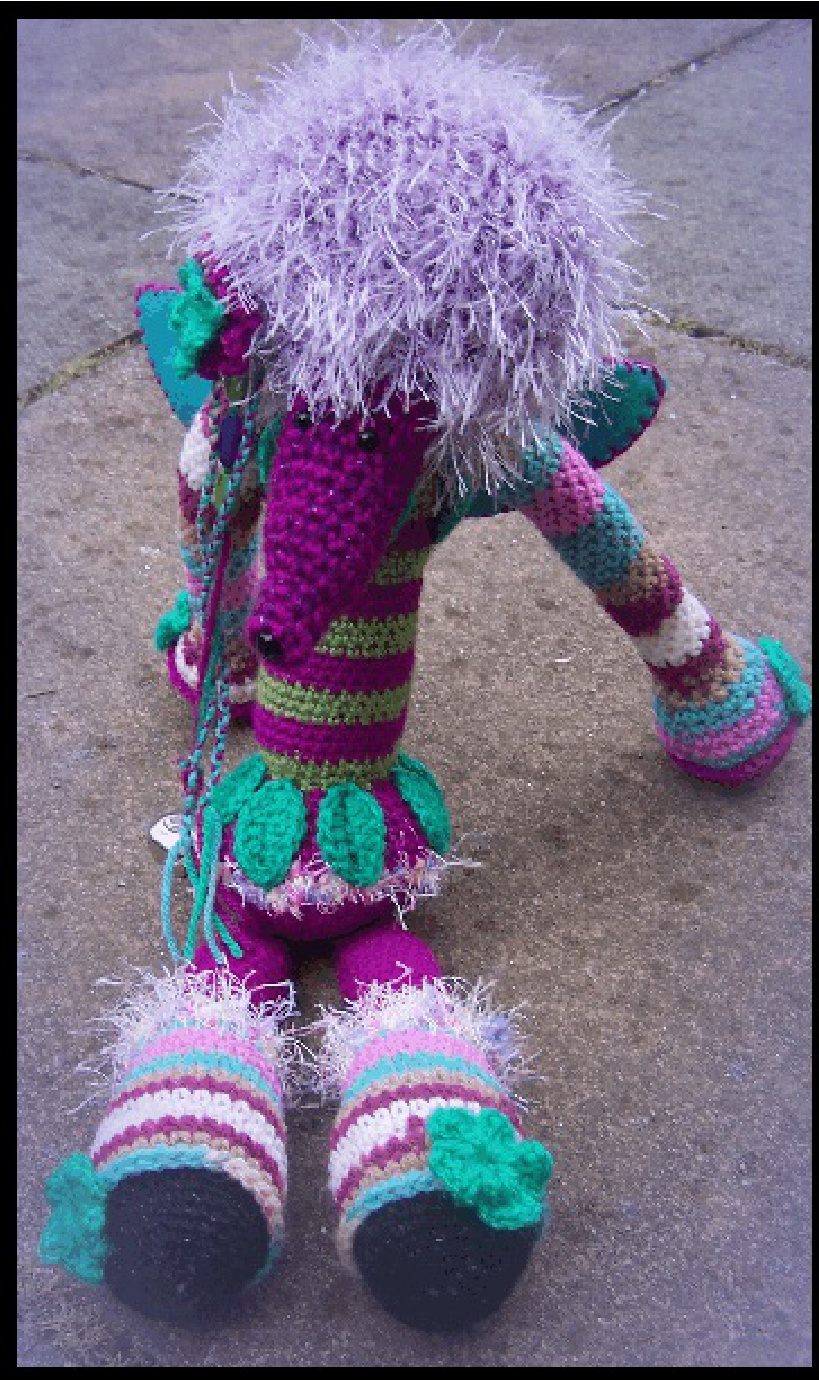
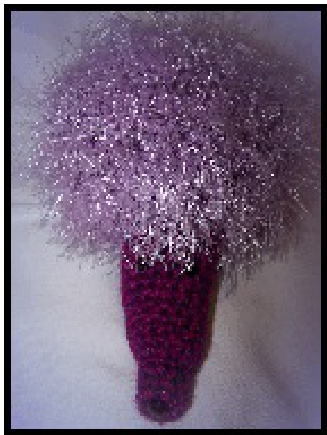
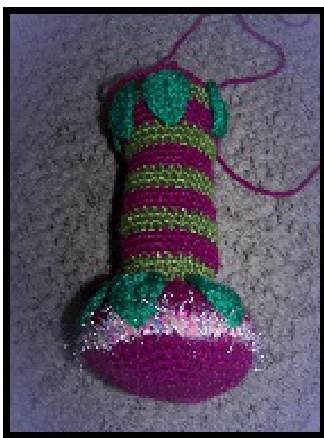
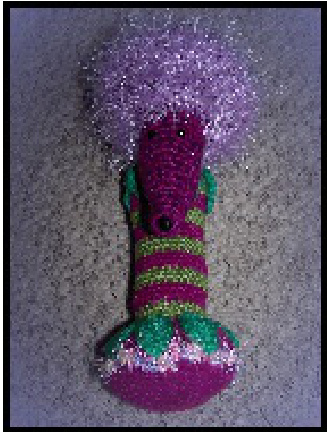
You will need: Any DK yarn in colours of your choice. I used a 3mm hook, but adjust for your yarn. It's best to use a hook a size smaller than the yarn would normally use as this prevents stuffing from showing through your amigurumi. Stuffing. Wool needle. Safety eyes. Safety nose or button. Felt. Thread. Optional beads, bells, buttons etc for decoration. Stitch marker. This can be very handy to keep track of rounds. This pattern is written in American crochet terms and is worked in the round. SC = single crochet HDC=half double crochet DC=double crochet Dec=decrease two together sl=slip stitch ch=chain inc=increase(2scinto1SC) If you want to use English crochet terms: Replace SC with DC HDC with HT DC with TC Head: SC 2 6SC into 2"d chain from hook Alternatively 6 into magic ring. 1.SC 6 around (6) 2.SC1 SC 2 into next 3 SC SC 2 (9) 3.SC 9 4.Dec 1, Dec 1, SC 5 (7) 5.SC 2 into each SC around(14) 6.2SC into the next 2 SC. SC 12 (16) 7.SC 16 Pause here to add nose. I used a 9mm round safety nose. Or you can use a button which can be stitched on after you have finished your head. 8. SC 16 9.2SC into the next 2 SC, SC14 (18) 10-12. SC 18 11.2SC into the next 2 SC SC 16(20) 12.2SC into next 2 SC SC 18 (22) 13. SC 22. Place eyes about 4 rows down from opening, 4 or 5 stitches apart. I used 6mm round safety eyes. Join in hair yarn. I used a DK with a fun fur held together. If using any kind of fur yarn it is best to turn your piece and work the ‘wrong’ way around as this makes the fur stand out more. 14. SC 22 15. 2SC into next SC ,SC14, 2 SC into next SC,SC 6 (24) 16.SC 3 inc 1 x 6 (30) 17. SC 4 inc 1 x 6 (36) 18. SC 5 inc 1 x 6 (42) 19. SC 6 inc 1 x 6(48) 20. SC 7 inc 1 x 6 (54) 21. SC 8 inc 1 x 6 (60) 22-24. SC 60 25. SC 8 dec x 6 (54) 26. SC 7 dec x 6 (48) 27. SC 6 dec x 6 (42) 28. SC 5 dec x 6 (36) 29. SC 4 dec x 6 (30) 30. SC 3 dec x 6 (24) Pause here to stuff head. Finish stuffing as you go. 31. SC 2 dec x 6 (18) 32 SC 1 dec x 6 (12) 33. Dec x 6 (6) Close. You now have one head!
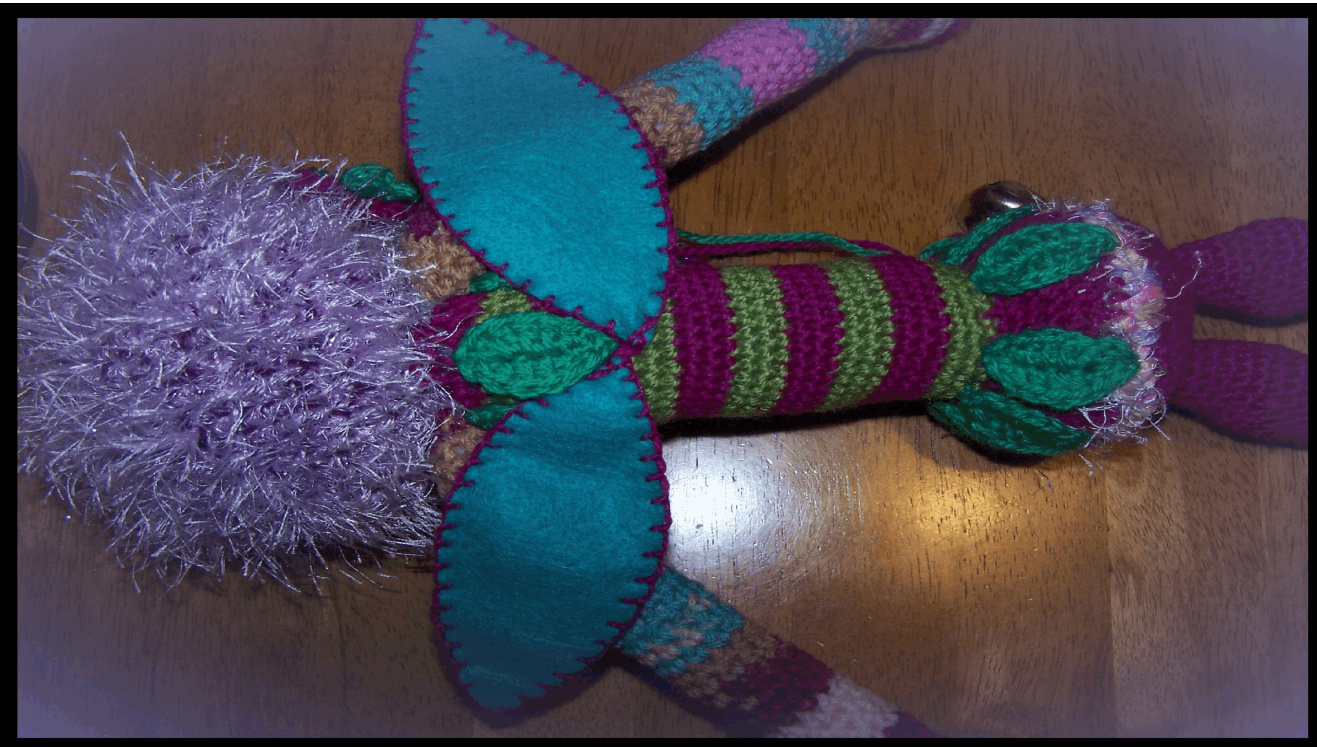
Body: Worked from bottom up. For the body you can use one colour, or stripe the colours. If you are going to work in stripes then change colour as shown in the pattern, if using one colour just ignore the colour change. Ch 2 6 SC into second chain from hook. Or 6 into magic ring. 1.Inc x 6(12) 2. SC 1 inc x 6 (18) 3. SC 2 inc x 6 (24) 4. SC 3 inc x 6 (30) 5.SC 4 inc x 6 (36) 6. SC 5 inc x 6 (42) 7. SC 6 inc x 6 (48) 8. SC 7 inc x 6 (54) 9.SC 54 (optional: I used a fluffy yarn for this round, you could use a different colour, or just continue in the yarn you are using) 10-11. SC 54 12.SC 7 dec x 6 (48) 13. SC 6 dec x 6 (42) 14. SC 5 dec x 6 (36) 15. Dec all around (18) 16. SC 18 change colour. 17.SC 18 18.SC 2 inc x 6 (24) 19.SC 3 inc x 6 (30) change colour 20-22. SC 30 change colour. 23-25. SC 30 change colour. 26-28. SC 30 Pause here to stuff bottom. Then continue to stuff as you go. Change colour. 29-31.SC 30 Change colour. 32-34. SC 30 Change colour. 35-37.SC 30 change colour 38-40.SC 30 change colour. 41-43. SC 30 change colour. 44. SC 30. 45. SC 3 dec x 6 (24) 46. SC 2 dec x 6 (18) fasten off. To decorate body. Leaves. I made 7 for the base of the body and 6 for the neck. Make as many as you like and decorate as you like.
Chain 7.
In second chain from hook, DC x 2, DC into next 3 chains, HDC into next, 3SC in last chain. Working on opposite side. HDC into first chain. DC into next 3 chains. DC x2 into last chain. Slip stitch to join. Stitch to body with back stitch down the centre of each leaf.
Sew head to body. It's your choice how you do this. It is best to make it so the nose of the hedgepig droops down over the body. Legs(make 2)
I used a yarn which magically changed colour all on it's own! If you want to make stripes in the bottom of your hedgepig's legs, change colours after round 23 for each round,or every 2 rounds, until round 33. Chain 2. 5sc into second chain from hook Or 5 into magic ring. 1. Inc around(10) 2 and 3. SC 10 4.Inc SC 4 Inc SC 4 (12) 4. SC 12 5. SC 1 inc x 6 (18 6. SC 18 7. SC 2 inc x 6 (24) 8. SC 2 dec x 6 (18) 9-13 SC 18 14.SC 1 dec x 6 (12) Stuff top of leg. 15. Dec around(6) 16. SC 6 17. Inc around(12) 18.SC 12 19. SC 1 inc x 6 (18) 20-21. SC 18 22. In fluffy/fur yarn. SC 18. Change to lower leg colour. 23.SC 18 24. SC 2 inc x 6 (24) 25-27 SC 24 28. SC 3 in x 6 (30) 29-33 SC 30 34. SC around into front loop(outside loop) only. Change to foot colour. In skipped back loops SC around. Stuff as you go. 35-37 SC 30 38. SC 3 dec x 6 (24) 39. SC 24 40 SC 2 dec x 6 (18) 41. SC 1 dec x 6 (12) 42. Dec around (6) Finish stuffing. Fasten off and close up. Sew legs to body.
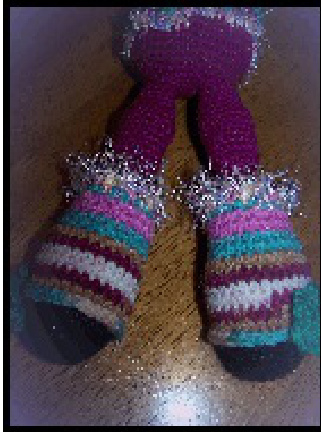
Small flowers to decorate shoes. I made 2. Chain 10. Join with sl stitch. Ch 3, DC 2 into ring, Ch 3, sl stitch into ring x 5. Leave a long thread. Weave in lose end. Using long thread weave through back of all stitches and pull tight to make the flower gather up. Stitch to side of shoe.
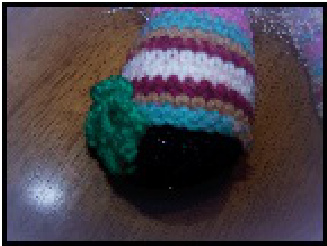
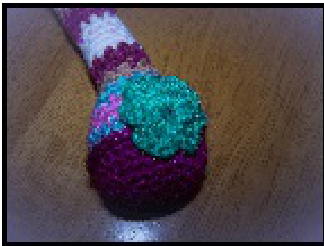
Arms(make 2) Again, I used a yarn which changed colour on it's own. If you want to stripe your arms change colour after row 8 every 2 or 3 rounds, depending on how thick you want your stripes tobe. In paw colour. Ch 2. SC 6 into second chain from hook Or 6 into magic ring. 1. Inc around(12) 2.SC1 inc x 6 (18) 3.SC 2 inc x 6 (24) 4. SC 3 inc x 6 (30) 5-7. SC 30 SC around in front loop(outside loop) only. Change to arm colour. Stuff as you go. Sc into skipped back loops. 8. SC 3 dec x 6 (24) 9. SC 2 dec x 6 (18) 10. Sc 18 11. SC 1 dec x 6 (12) 12-41 SC 12( 30 rounds) Fasten off and finish stuffing. Make 2 flowers (as for shoe) for the join between paw and arm.
Sew arms to body.
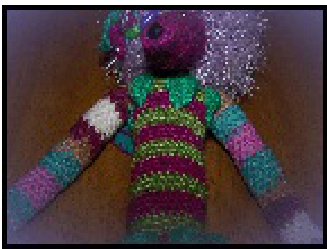
Flower and plaits for hair. Make one small flower as for the shoes/arms. Make one big flower: Chain 15. Join with sl stitch. Ch 3, DC 2 into ring, ch 3, sl stitch into ring x 9. Stitch flowers together with small one in the centre of the larger flower and stitch to head wherever you want it to be. Add various strands of different coloured yarn or thread. Make plaits, add beads, bells, flowers, buttons. Anything you chose to decorate your Hedgepig.
For the Wings. There's no template for the wings as depending on what yarn you have used your hedgepig may be a different size. They are just a basic leaf shape:
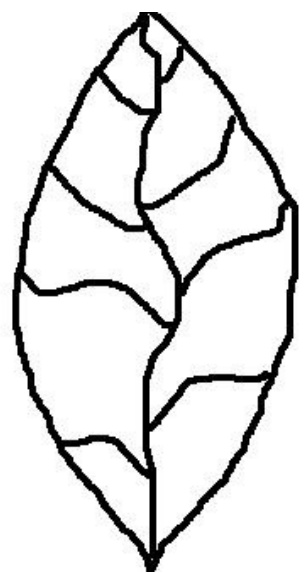
You can leave blank or decorate with stitching. I cut two pieces for each wing and blanket stitch them together. Then stitch them to the back of the hedgepig..
Something like this. And there you have one hedgepig! Take care of him(or her!). He likes rainy days and Pine trees and playing Hide and Seek. Other things you might like to add to your hedgepig: Ears. A beard. A hat. Bangles. Have fun personalising your hedgepig. What you can do with this pattern: You can: Make as many Hedgepigs as you like for yourself or for gifts. Make to sell for charity(please credit me, folksy.com/shops/DollyDollyDaydreams) Make a small amount to sell for profit(again please credit me) I'm allfor the small business. Please DO NOT: Sell the pattern. Copy and sell the pattern. File share the pattern. Please do no claim Faery Hedgepig as your own. Any questions about the pattern please email me: faeryfeller@yahoo.co.uk
Please stop by my Folksy store to see other creations: folksy.com/shops/DollyDollyDaydreams Or my Dreamaid store: www.dreamaid.com/store/DollyDollyDaydreams


