The Someone-Stole-the-Fingers-off-my-Gloves Gloves
Knit Version (Crochet version follows)
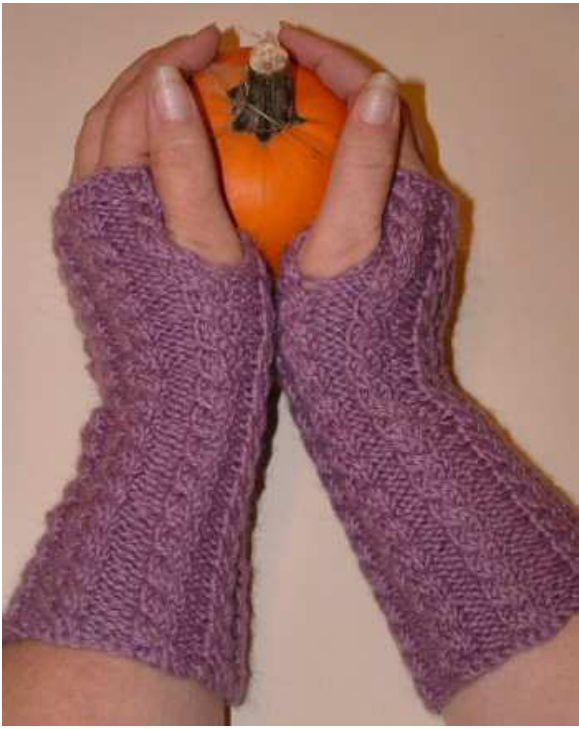
Gauge: About 6 stitches per inch over unstretched cable rib. Finished measurements $9^{\circ}$ long and $6.75^{\circ}$ around.
Materials:
About 150-180 yards of worsted/aran weight yarn. (The yarn I used was Classic Elite Follies which describes itself as an aran weight but which I feel is more like a worsted weight. Unfortunately, it has been discontinued). Set of double point needles, size 5 (US) 1 Cable needle Note: C4F - Place next two stitches on a cable needle and hold in front of the work. Knit the next two stitches off the left-hand needle. Then, knit the two stitches off the cable needle.
Cast on 48 stitches for an average to large hand. For a smaller hand, cast on 42 sts. Round $I\ {*}{\bf K}4$ , $\mathbf{P}2^{*}$ ; repeat around. Round $2*\!\mathrm{K}4$ , $\mathbf{P}2^{*}$ ; repeat around. Round $3*\!C4\mathrm{F}$ , $\mathrm{P}2^{*}$ ; repeat around. Round 4 \*K4, $\mathbf{P}2^{*}$ ; repeat around. Repeat these four rows until the arm/cuff is as long as you'd like it to be.
Thumb Hole
Now, simply turn and work back. Continue to work back and forth until thumb hole is the size you need. This sounds nutty on DPNs, I know, but it works fine. Just turn your work inside out for the wrong-side rows - trust me,it'll be much easier to manage - and then turn it right-side out again for right-side rows. Also, when you hit a cable row on the wrong side, work the cable exactly as you would on the right side of the work (see above note for C4F) - except purl the stitches instead of knitting them. When the thumb hole pleases you, re-join the work and continue in the round for another inch or so - whatever suits you and your hand. Try it on from time to time to see where things fall and how you like the way things are progressing. Cast off in pattern and enjoy your nice warm mitts!
The Someone-Stole-the-Fingers-off-my-Gloves Gloves Crocheted version
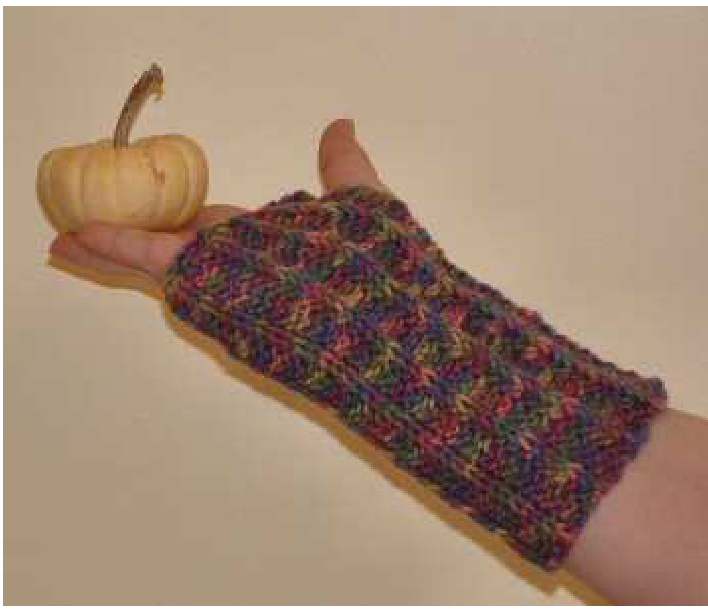
This couldn't be simpler. Basically, using worsted weight yarn and a size G hook, make a chain that's just a little longer than you want the length of your mitt to be. Then hdc back and forth until the piece is wide enough to go around your hand and forearm and sew up the side seam.
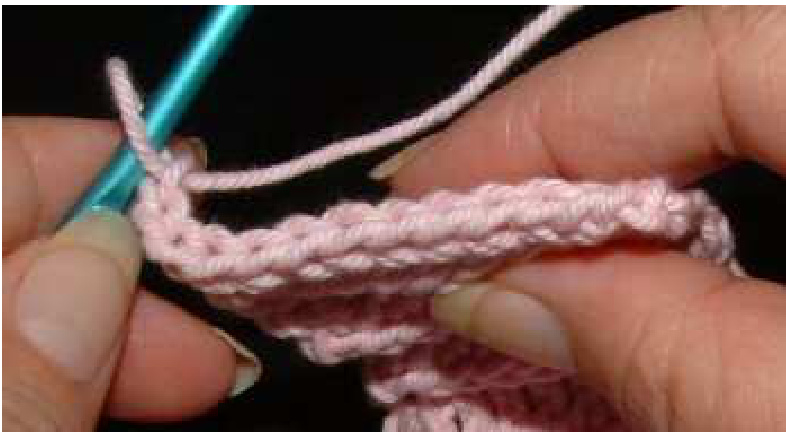
O-kay. Just to get the idea, grab some worsted weight yarn and a “G” hook and chain 12. Hdc in 4th chain from hook and in each chain across - 10 sts. Chain 3 and turn. Turn your work so you're looking down at the top edge of it. See that line of chains? We're going to displace it so that it runs up the length of our work. Since these chains are normally the stitches into which we would work the next row, we're going to have to do something different.
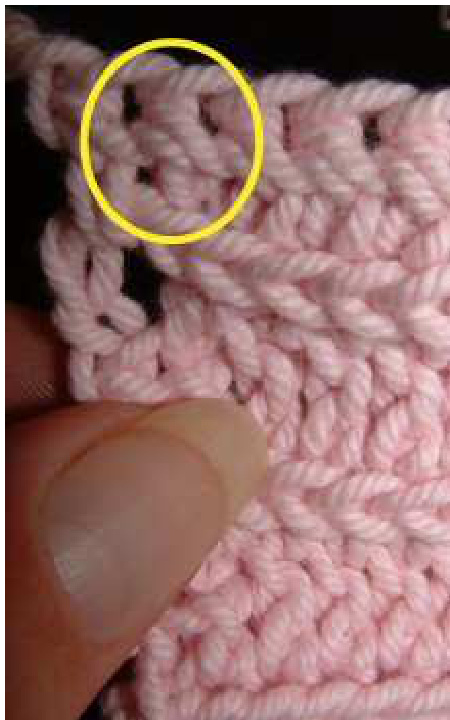
The circle in the picture above highlights the hdc as it appears after you've turned you work. The horizontal thread at the top is one side of our chain stitch. See those two diagonal threads just below? That's where we're aiming - we're going to crochet into the top diagonal thread.
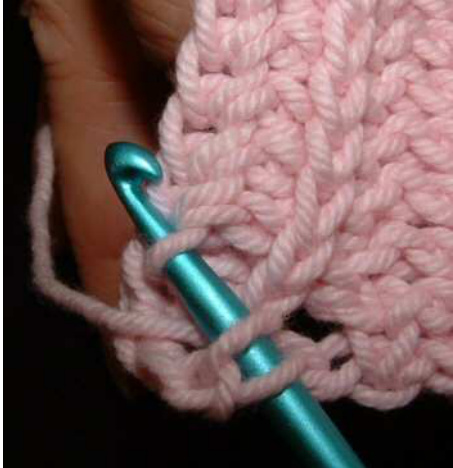
That's exactly allthere is to it. Instead of crocheting into the front or back (or both) loops of the top of the stitch, you're crocheting into the diagonal thread just beneath it. Keep your tension relaxed and just continue to do that on both sides of the work until the piece is the size you want. Simple, eh?
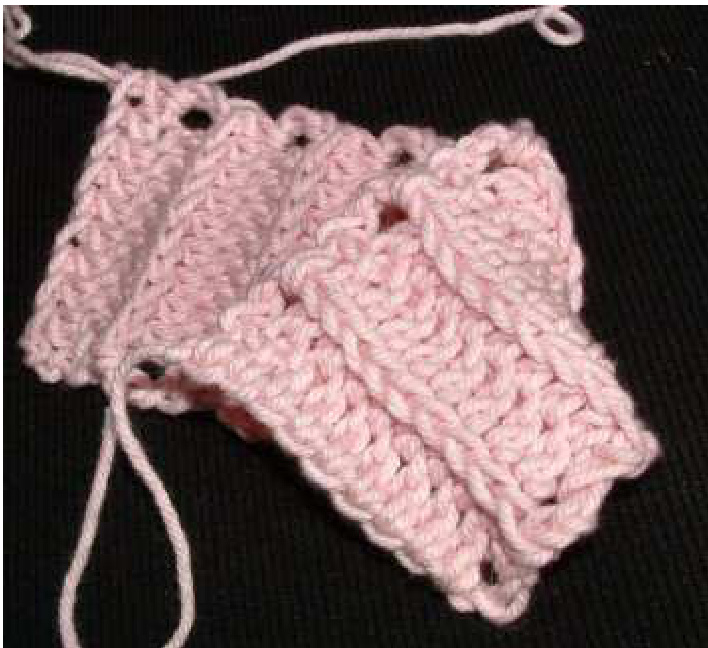
This makes a reversible fabric. The chains are offset one row from one another on the front and reverse sides, but if you're careful with sewing up and weaving in yarn ends, you can make reversible mitts :) So for the mitt as I made it:
Materials
Worsted weight yarn (I used Red Heart Super Saver in “Art Print") "G' crochet hook Tapestry needle for sewing seam
Methods
Chain 38. Hdc in 3rd chain from hook and in each chain across - 36 sts. Chain 2, turn. Hdc in the diagonal thread just below the 2nd stitch (in other words, the “chain $3^{\circ}$ counts as the first hdc) and continue this way across the work; 1 hdc in turning chain - 36 sts. Repeat row 2 until work is as wide as you need. Sew seam up to where you want your thumb hole to be. Run your thread under a few stitches (for length of thumbhole) and finish stitching on the other side. And enjoy!


