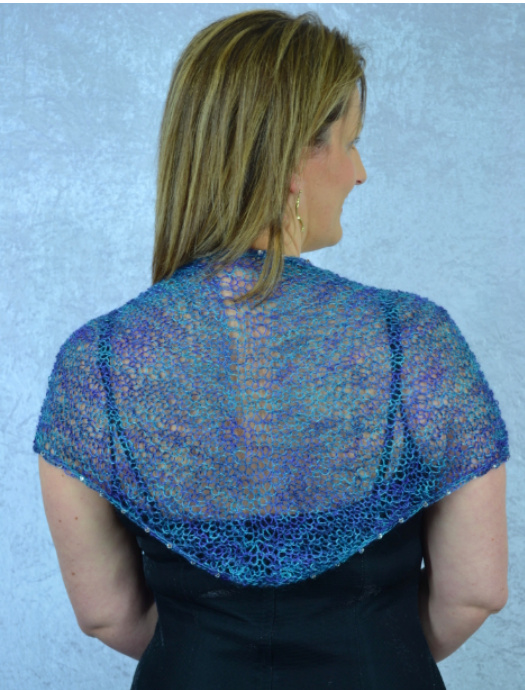
Silver Or6 Spider Silk Lace Blends Scarf
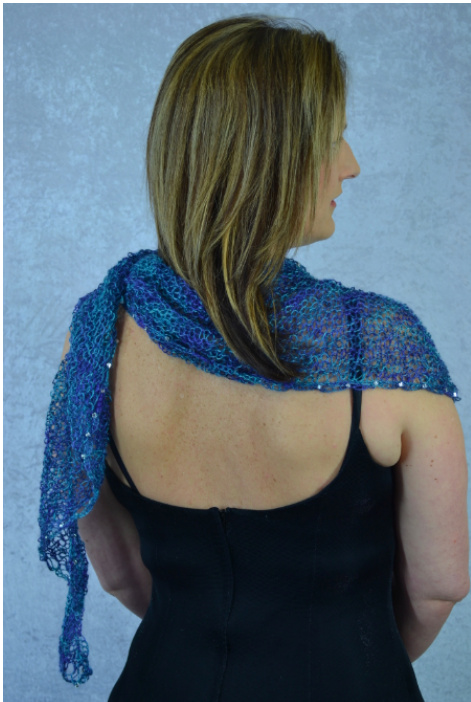
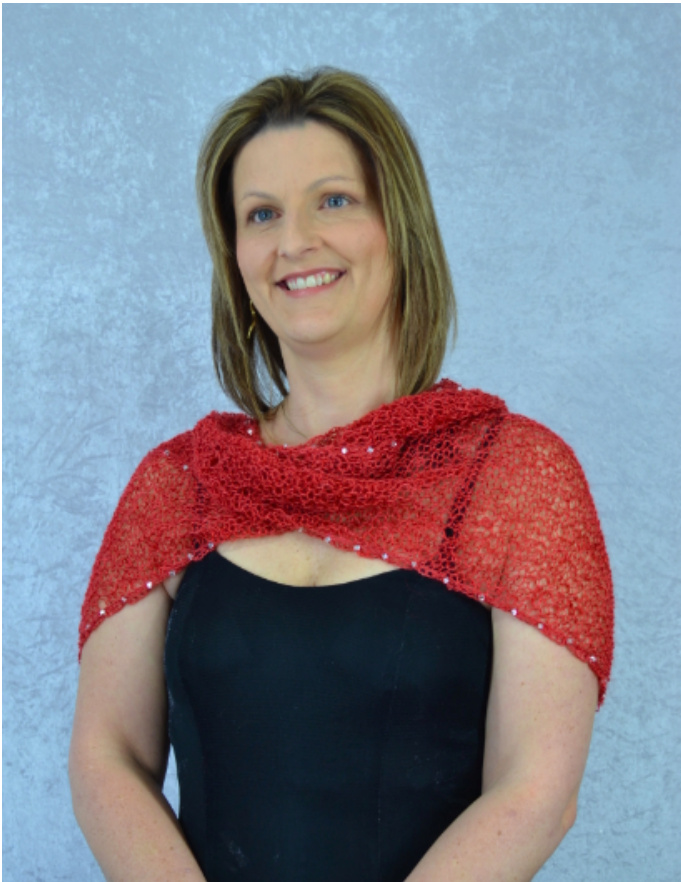
An elegant, simple knitted project for the beginner with an incredibly beautiful and rewarding result! The entire triangular scarf is knitted from the lower back, working upward, increasing in each row. Once completed, beads are applied to the circumference using a simple crochet chain stitch, adding lovely weight and a jewelrylikefeel. YARN:
Colinton Lace Blends
80% Australian Young Goat un-brushed mohair /20%Silk
PROJECT:
1 x 50 gr skein (250yds/229m) US Size 13 (9mm) straight knitting needles for CO, first 4 rows and BO. US Size 11 (8mm) circular needles, long enough to comfortably hold 205 stitches US Size 10 (1.25mm) steel crochet hook sized to drawthroughbead 3 × Stitch markers (1 in contrast color) NOTIONS: GAUGE: Beginner. Uses basic stitches and beading.
#135 x 4 mm cube silver lined glass beads
USE ALIFELINE:
11 sts x 22 rows = 4" square after blocking. SKILL LEVEL: EQUIPMENT:
An easy way to'catch' dropped stitches! Run a fine thread through the stitches of a completed row. It takes just a few seconds. If disaster strikes, you only ever have to unravel back to the lifeline' row and your stitches will be safe and easy to slip back onto the needle. Use a lifeline as often as you like and knit with confidence!
STITCH TECHNIQUES:
Note: When winding your yarn into a ball, begin by measuring 30yds and tie securely with a bright, non-slip thread. You will knit back towards this mark from the far end of the skein and the final 30yds will be used to bind off your knitting and complete the beaded crochet edging around the scarf's circumference. Refer to section on 'Beading'.
MAKE ONE STITCH (M1)
Make one stitch increase as a firm, backward loop on the needle. GENERAL WASHING AND BLOCKING INSTRUCTIONS: The best results are achieved by completing this step. The CO and BO must be stretchy and loose to allow for blocking to the full desired shape. A tight cast on or bind off can confine or distort your project. While the knitting itself will slide and move due to the silky quality of the mohair, the garment size will be defined by the CO and BO edges. Leave long tails at completion or on any knots and weave these in before washing. Knots have a tendency to loosen until after the wash process. Fill sink with lukewarm water. Dilute mild detergent solution before submerging garment and allow it to soak. We recommend using Unicorn Fiber Wash. Minimize agitation as this may felt the fibers. Rinse thoroughly under tap until suds are eliminated. If there is concern over residual dyes left in the yarn, we recommend adding some white household vinegar tc the wash water to complete dye absorption. We highly recommend adding a 10-minute soak in Unicorn Fiber Rinse solution diluted in cool water. It helps to remove static and protect the garment. Gently squeeze out excess water in a towel and proceed to block the garment. Stretch to the desired dimensions and pin into place on dry towel. Use pins to stretch and hold corner points and to create an even edge in between. The stitching will become very smooth and even. Allow to completely dry before unpinning.
INSTRUCTIONS
With Size 13 needles, CO 3 stitches loosely. Set up row: K1, place marker, K1, place marker, K1. Row 1: yo, K1, M1(see above), slip marker, K center stitch, sl marker, M1, K1. (6 sts) Row 2: yo, K to end of row. (7 sts) The next two rows increase stitch numbers by 5 (in Row 3) and 1(in Row 4) respectively. These two rows form the ongoing pattern. Row 3: yo, K1, M1, K to marker, M1, sl marker, K center stitch, sl marker, M1, K to last st, M1, K1. (12 sts) Row 4: yo, K to end of row. (13 sts) :hange to Us Size 11 (8mm) circular needle to continue, repeating Rows 3 and 4. As you do so, place the contrast color stitch marker near the beginning of each Row 3 repeat, as a reminder to make 5 increases on that row. Move the marker as needed to keep it near the beginning of each Row 3. Continue repeating Rows 3 and 4 until you approach the tied thread that marks your final 30 yards of yarn. If midrow, complete that row. At this point, depending on your personal knitting tension, you will have approximately 205 stitches in all (102 on either side of the central stitch) but the final stitch count will vary between knitters. BIND OFF using a very loose, stretchy method on US 13 needles. Do not cut yarn. Slip last stitch to crochet hook.
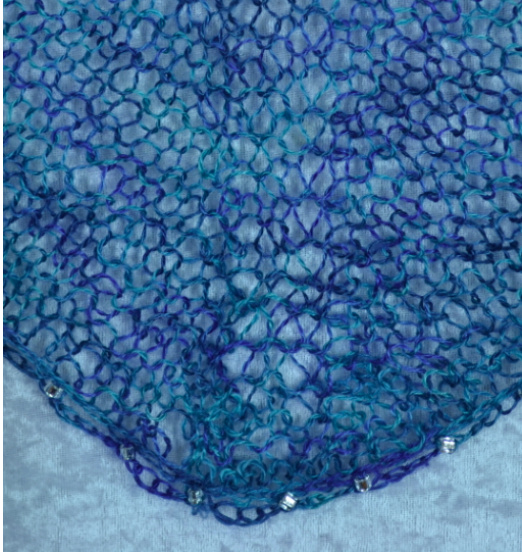
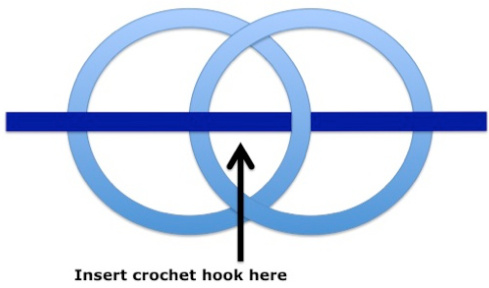
BEADINGAROUNDCIRCUMFERENCEOFSCARF:
With 1 loop on steel crochet hook, chain 5 stitches. \*Slip bead onto hook, holding it in place with your middle fingertip, slip ho throuah stitch intersection (see diagram) pick un thread loon and pull throuahheadveepullthrouah1stjoonyoppullthrouahhothloonsonhool Choiugr ptead,yo, pun tnrougnl 1 Toop, yo, pun thfougnf botr loops onf hook. Cnain5stitcnes Repeat from \* adding a bead at every fifth stitch intersection on side edges of scarf and every third stitch intersection along top (because BO edge uses larger needle size). Cut yarn and pull through last stitch. See notebelow regarding measurements.
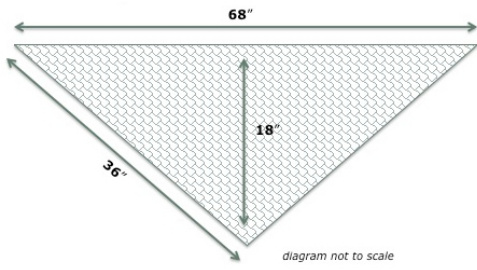
Approximate measurements for beaded edging:
For every 12 inches of garment edge you will need 60 inches of yarn and 13 beads to create 13 attachment points. Five (5) chain stitches form each loop and the 6th stitch becomes the beaded attachment point. This scarf has an estimated circumference of 140 inches, using up to 30yds of yarn and up to 135 beads for the crochet edging. NB 30yds was marked off when winding yarn ball before CO and 135 includes spare beads to allow for adjustments. The crochet edging should be even and consistent and should not pull or constrict the garment's edges.