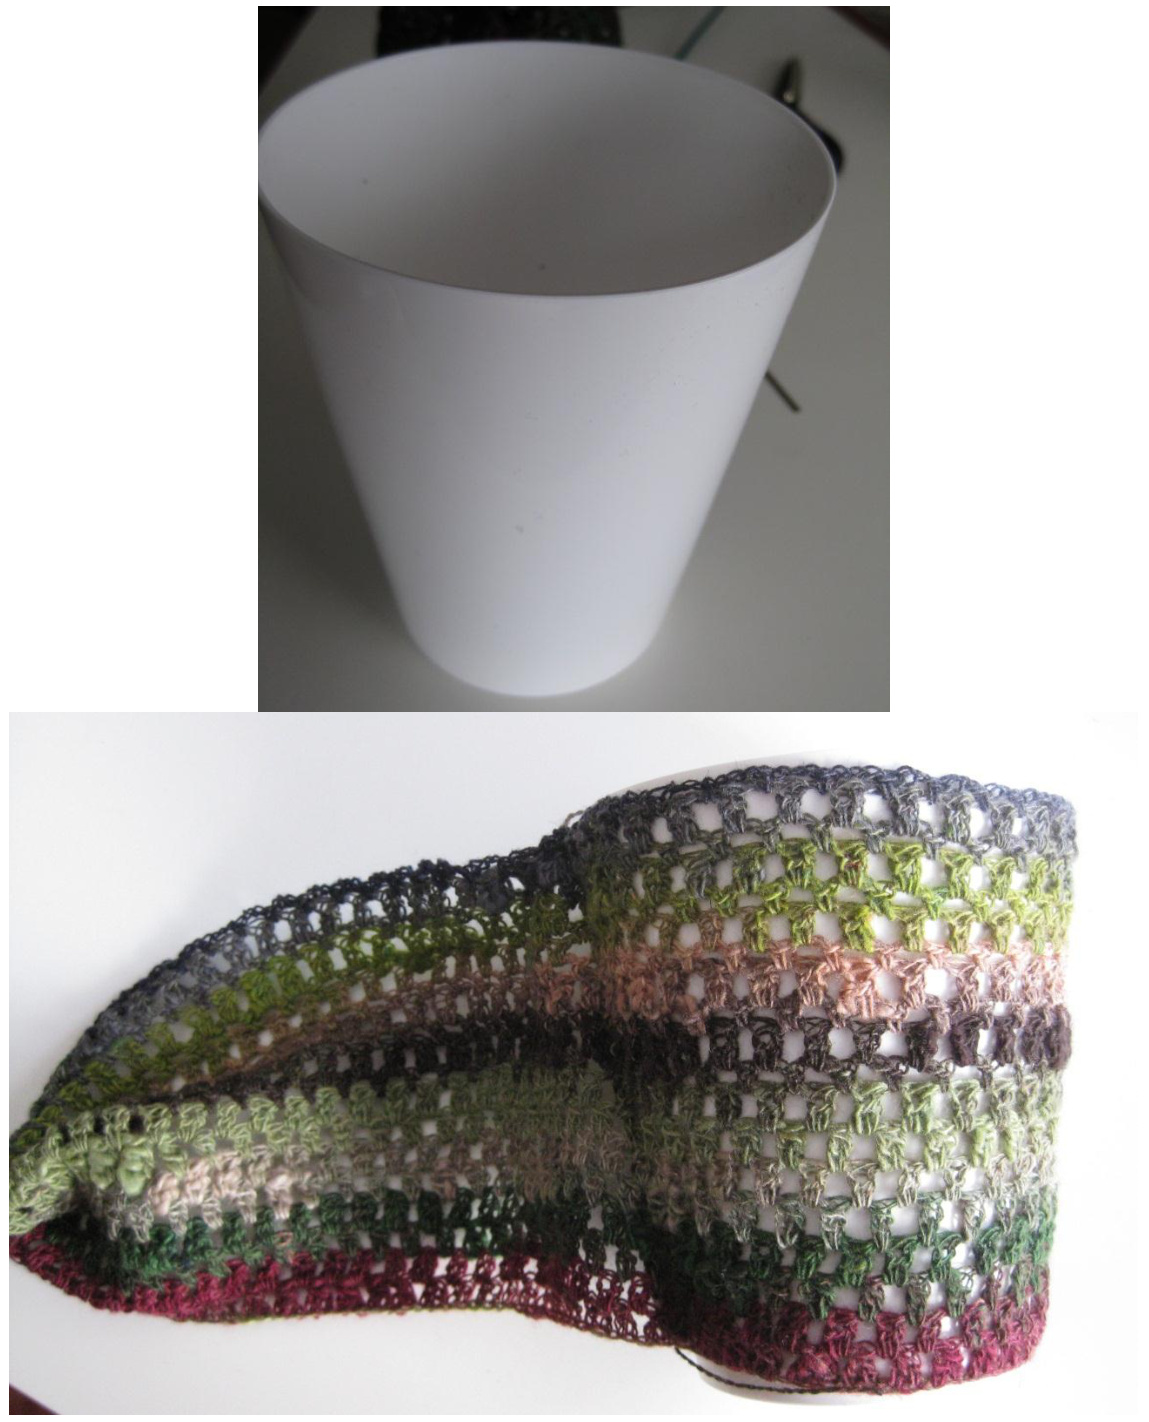
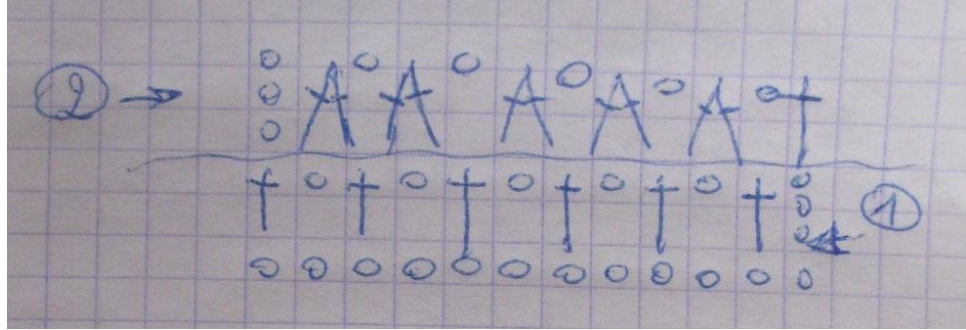
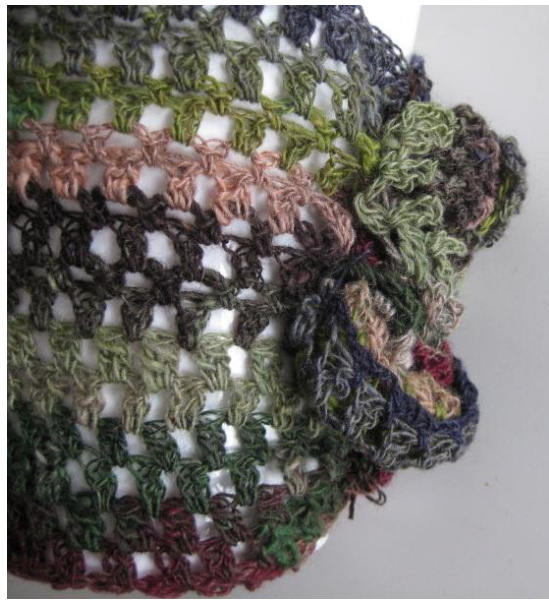
Take a flower pot - I took one in plastic Might be any form or your material you like! Prenez un cache pot - j'ai pris un exemplaire en plastique - prenez la forme et la matiere que vous desirez Take crochet and yarn and make a rectangle twice the circumference of your pot· I did this design - put crochet in space between two stitches of row below. Faites un rectangle au crochet qui a le double du contour de votre pot· J'ai fait le dessin ci-dessous en piquant le crochet entre deux mailles du rang de dessous·
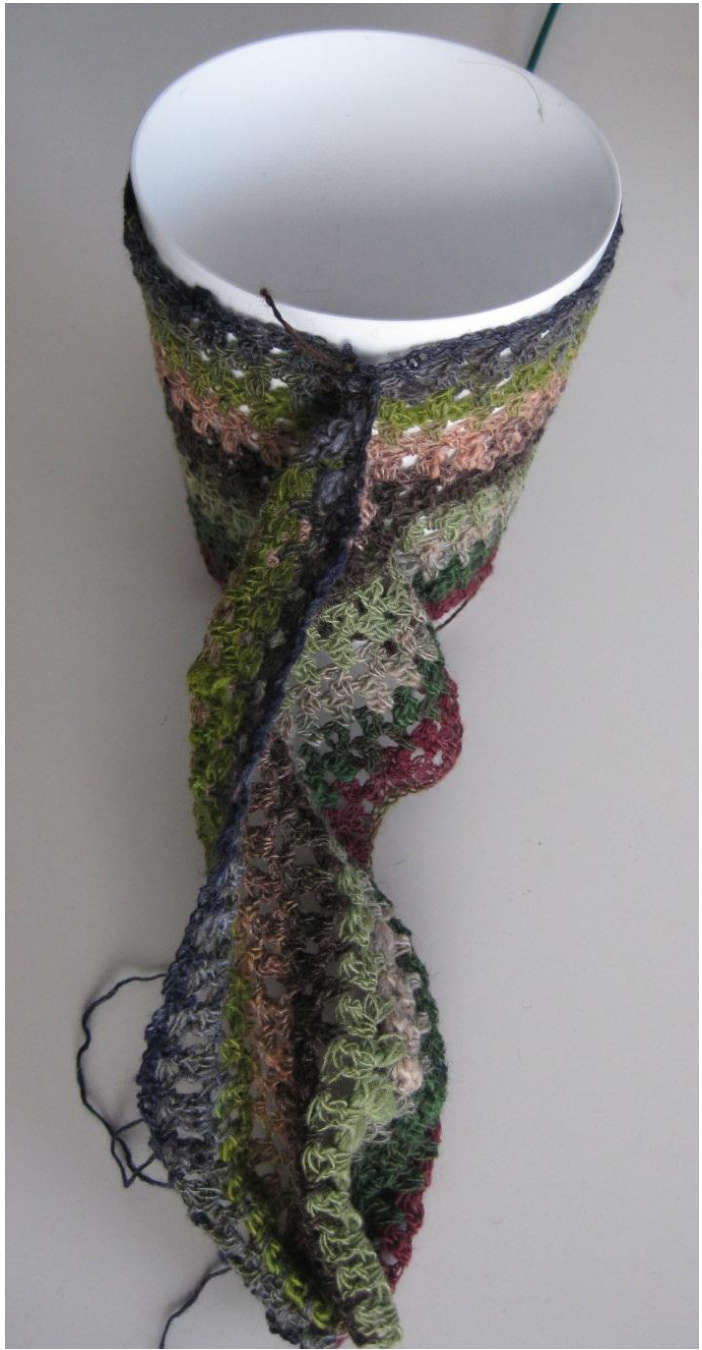
I worked the whole project with Holstgarn Supersoft in several colors· (used a lot of my leftovers!) You can also use your leftovers to make this project· Sew a short side to the middle (+/-) of your rectangle so that it fits round your pot- measure to be sure! You'll have a ‘flap' of about half your rectangle leftover: here is the view from upside Le projet a été réalisé en Holstgarn Supersoft, mais vous pourrez bien sur prendre vos restes de laine dans vos couleurs preférées! Cousez votre rectangle autour de votre cache-pot avec un coté court attaché au centre (plus ou moins)· Vous aurez un morceau 'libre'. Voici la vue d'en haut du résultat·
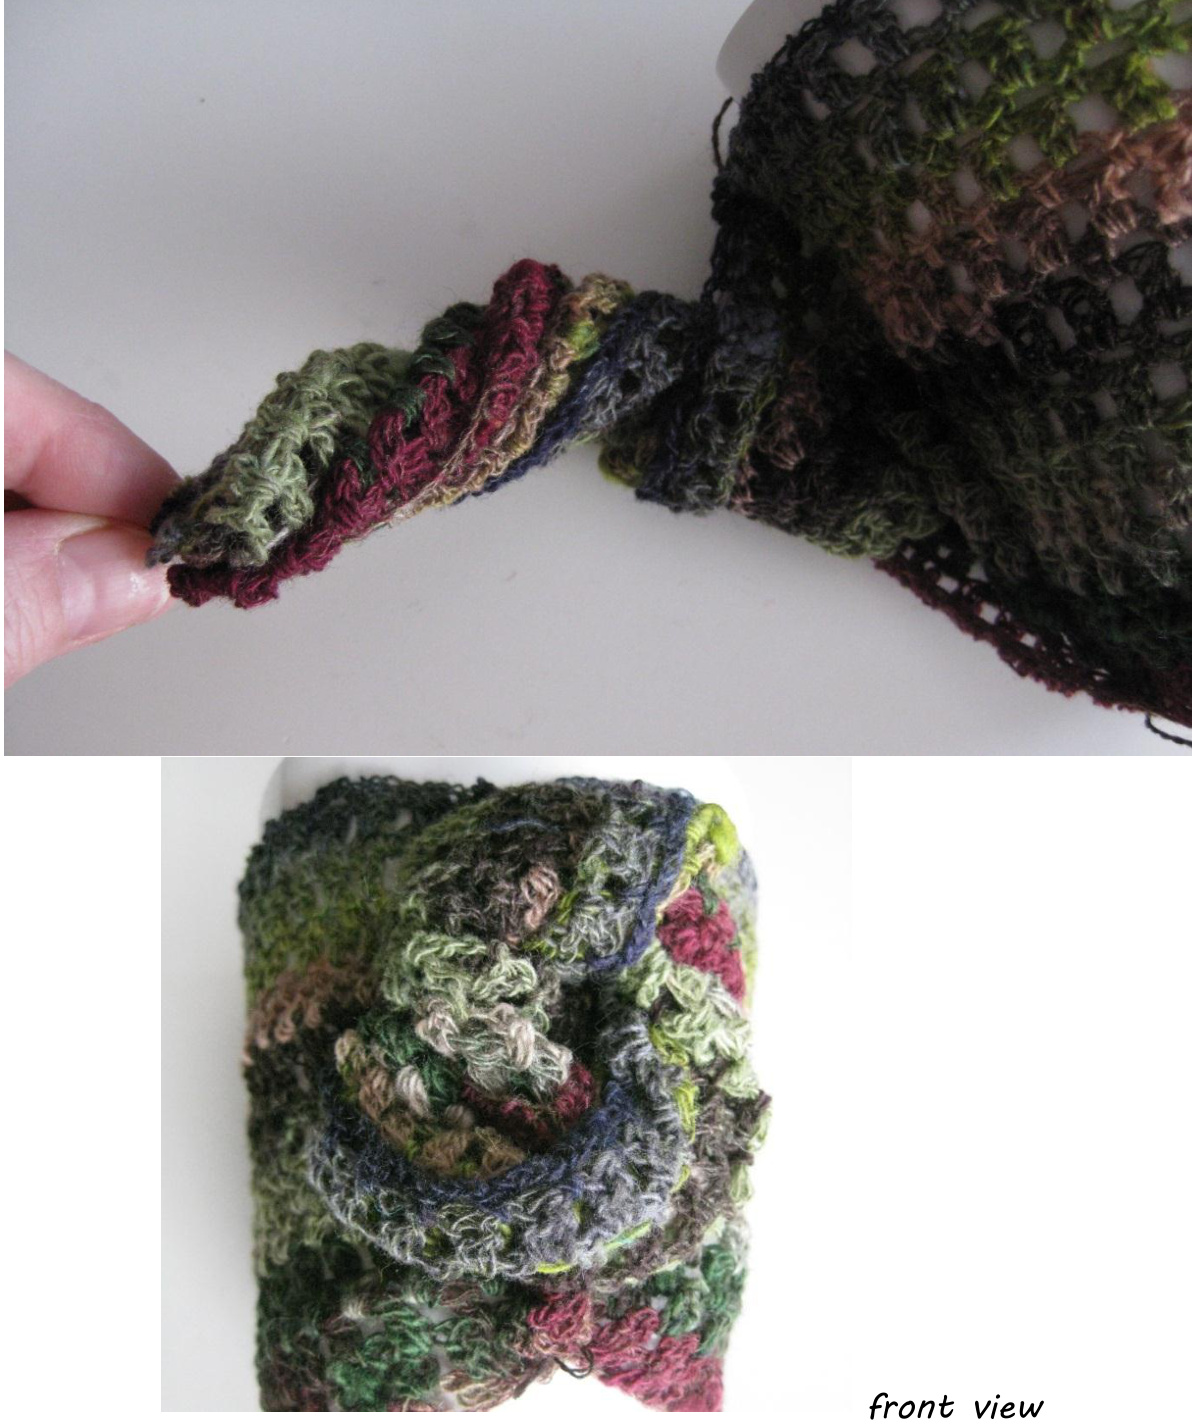
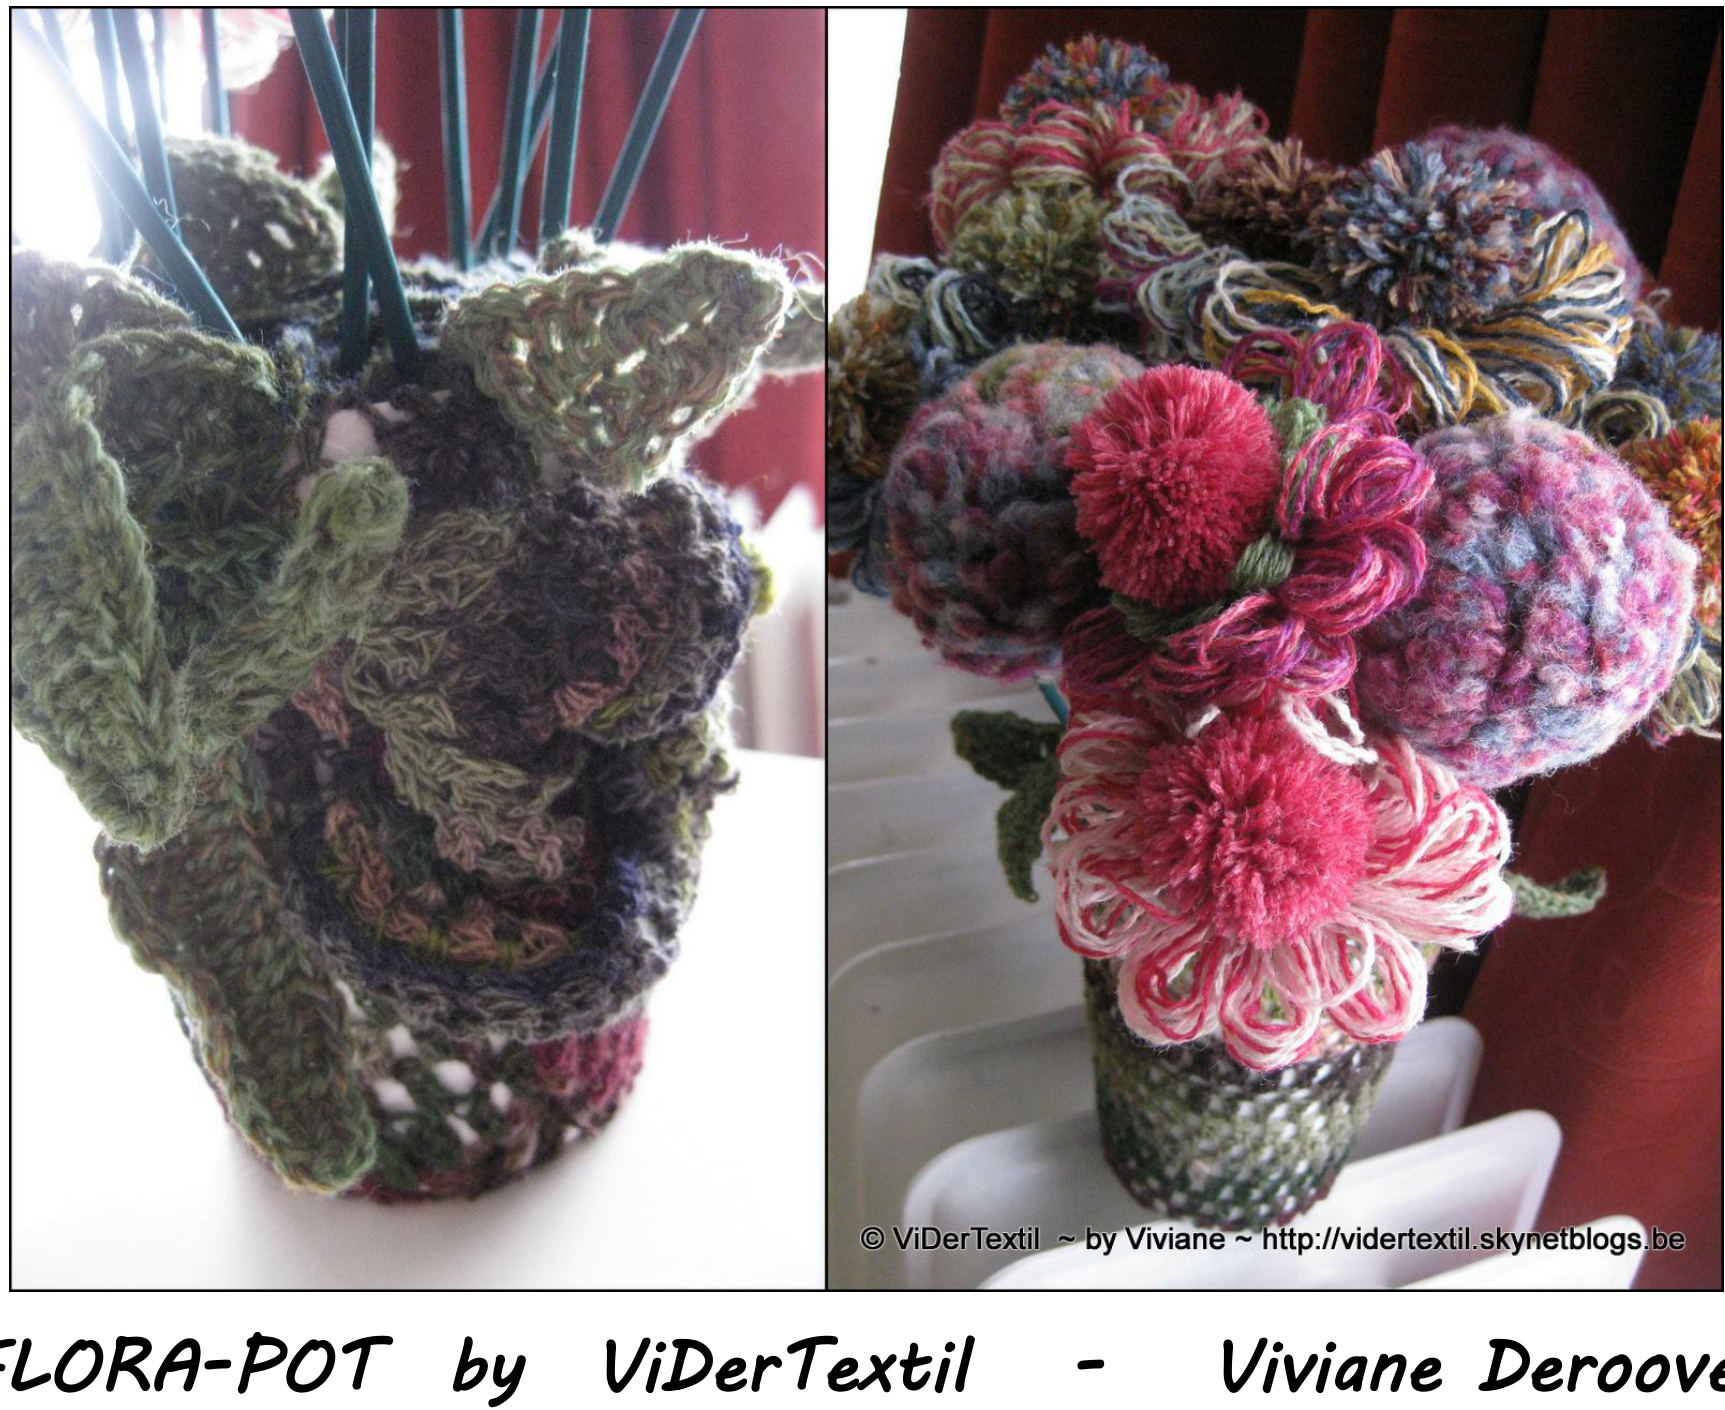
erTextil vof. Tous droits réserves - All rights reserved - [http://vidertextil.skynetblogs.be Take the end of the ‘flap' and turn it to obtain a swirl. Keep it fixed to the sewed part round your pot with pins and keep it together with a few stitches· You'll have a button, or flower, depends what your fantasy sees @ · Prenez le bout de morceau et tournez pour obtenir une spirale que vous fixez avec des épingles a la piece qui est autour de votre cache-pot· Cousez avec quelques points· Dépendant de votre fantaisie vous y verrez un bouton ou unefleur· This is the result. - Voici le résultat· Make a chain with one color of the yarns - or if you use a stronger yarn, you just can take a piece of yarn· (single yarn Holstgarn is not solid enough)· Fix the under part of your cover - see the pic. You can also crochet a circle and sew it underneath ...
view from the side
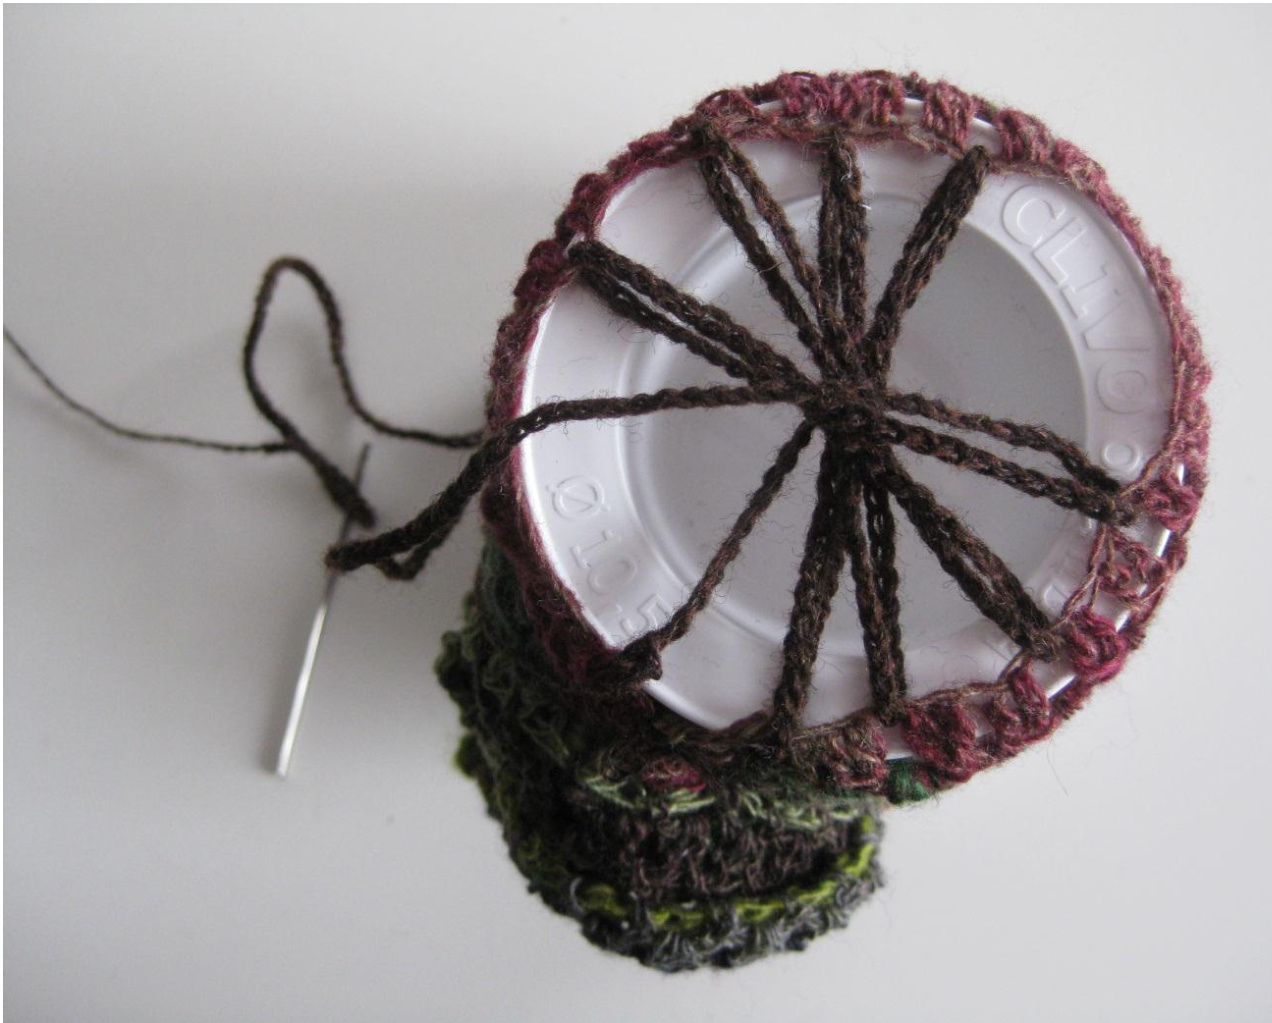
Avec une chainette dans un des fils vous allez fixer le dessous de votre couverture du cache-pot· Si votre fil est solide, vous utiliserez juste le fil (Holstgarn en fil simple ne I'étant pas, j'ai fait ma chainette)· Si vous désirez vous pouvez tout aussi bien crochetez un cercle et le fixer sur le dessous.. Now we'll make the flowers, start with one.. Nous allons maintenant passer a la réalisation d'une fleur
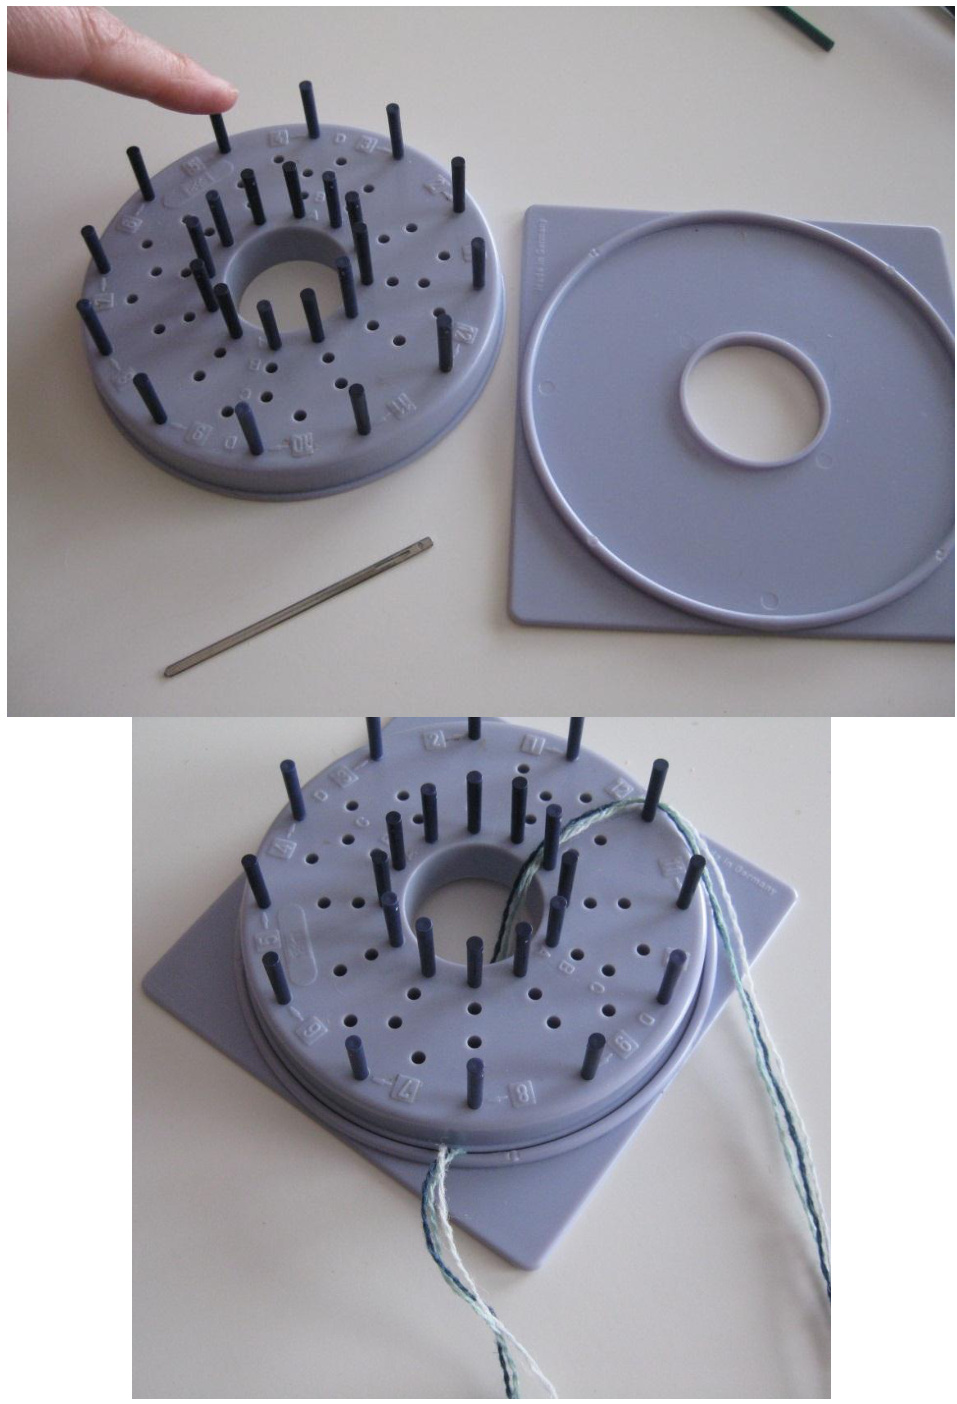
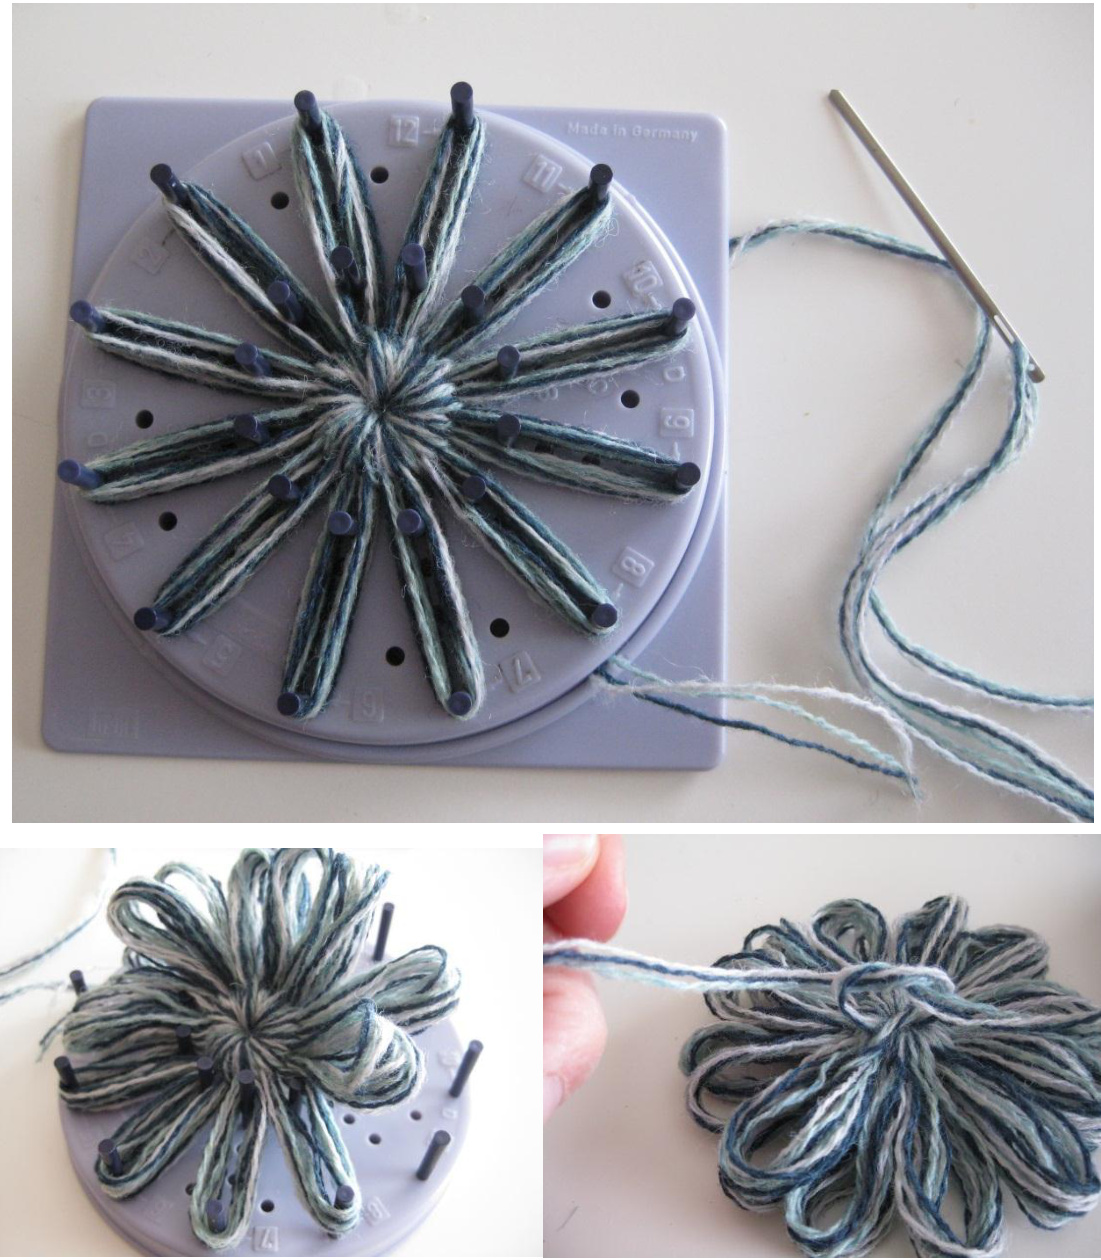
I used the flower loom of Prym· It comes with a flat piece, one with little holes to put in the plastic pins (will make pattern of your flower). And you'll need also a large needle. I placed the pins on outer edge (size of my flower) and also on the inside circle because this makes it easier to fix the flower (you'll see that further). J'ai pris I'appareil a fleurs de Prym : une plaque ou I'on place un cercle avec des petits trous, et beaucoup de picots en plastique· Il vous faudra aussi une grande aiguille· J'ai placé mes picots a I'exterieur (forme de ma fleur) et aussi a l'interieur car cela me facilite le travail - vous verrez plus loin· Place the beginning of your yarn between the part with the holes and the flat piece· So your thread is blocked. Pull the thread through the top in the middle, so that you can start wrapping the thread round the pins· I used 3 strands of Holstgarn together, so my colors are well mixed. Fixez votre fil de départ entre les deux parties de I'appareil, ainsi votre fi lest fixe et vous pourrez tirer dessus pour bien tender votre fleur· Sortez avec votre fil au centre afin de pouvoir commencer a tourner autour des picots· J'ai pris 3fils Holstgarn en meme temps afin de bien melanger mes coloris?
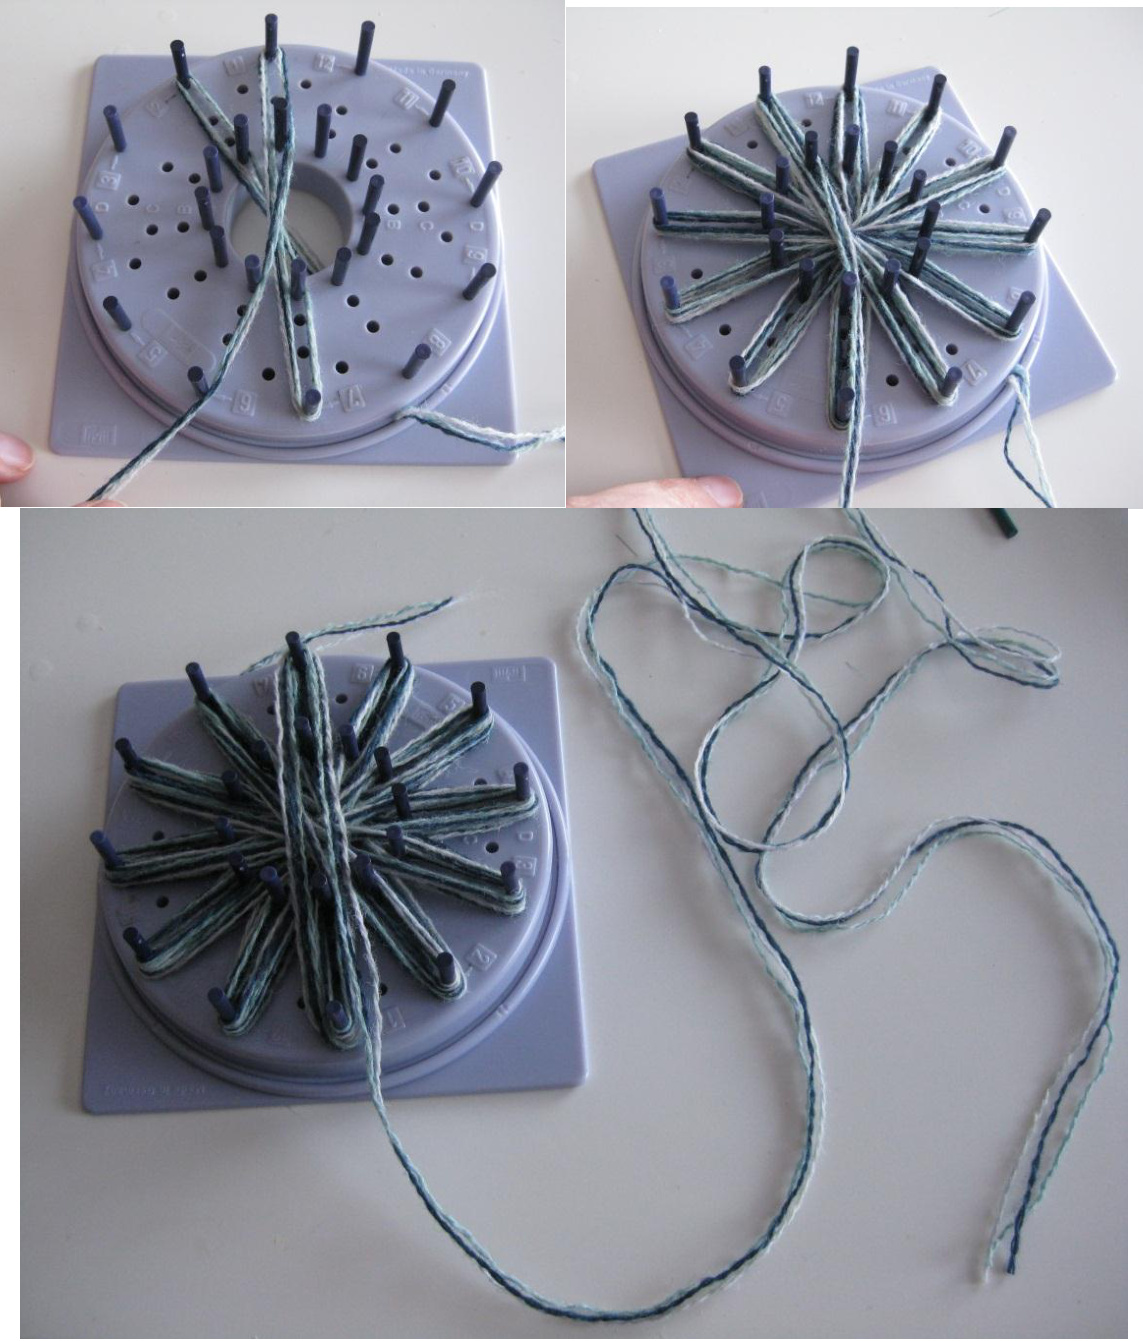
Look how I turn round the pins! You turn as much as you want, the more, the thicker your flowers will be· Your choice! Regardez la facon de tourner autour des picots· Faites plusieurs tours jusqu'a ce que vous avez I'épaisseur désirée· Vous pourrez en faire de tres grosses fleurs, aussi bien qu'elles peuvent étre fines et transparentes· When you have the thickness of your flower as you wish, you cut a tail of about 6O cm and put it on your needle. Quand vous avez I'épaisseur voulue, vous coupez le fil a 60 cm environ et enfilez-le sur votre aiguille·
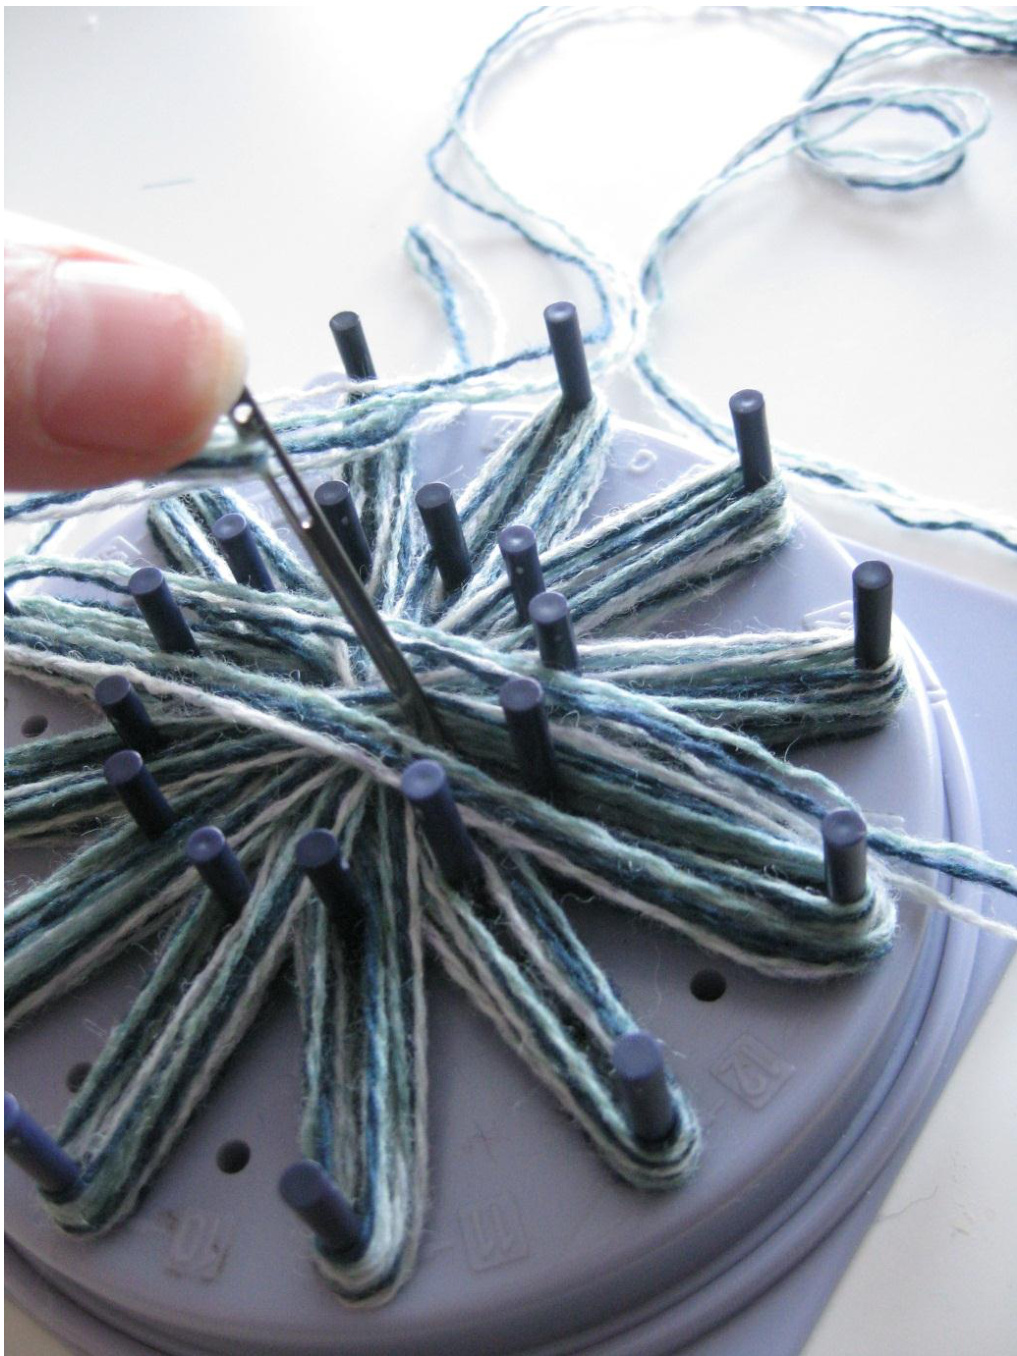
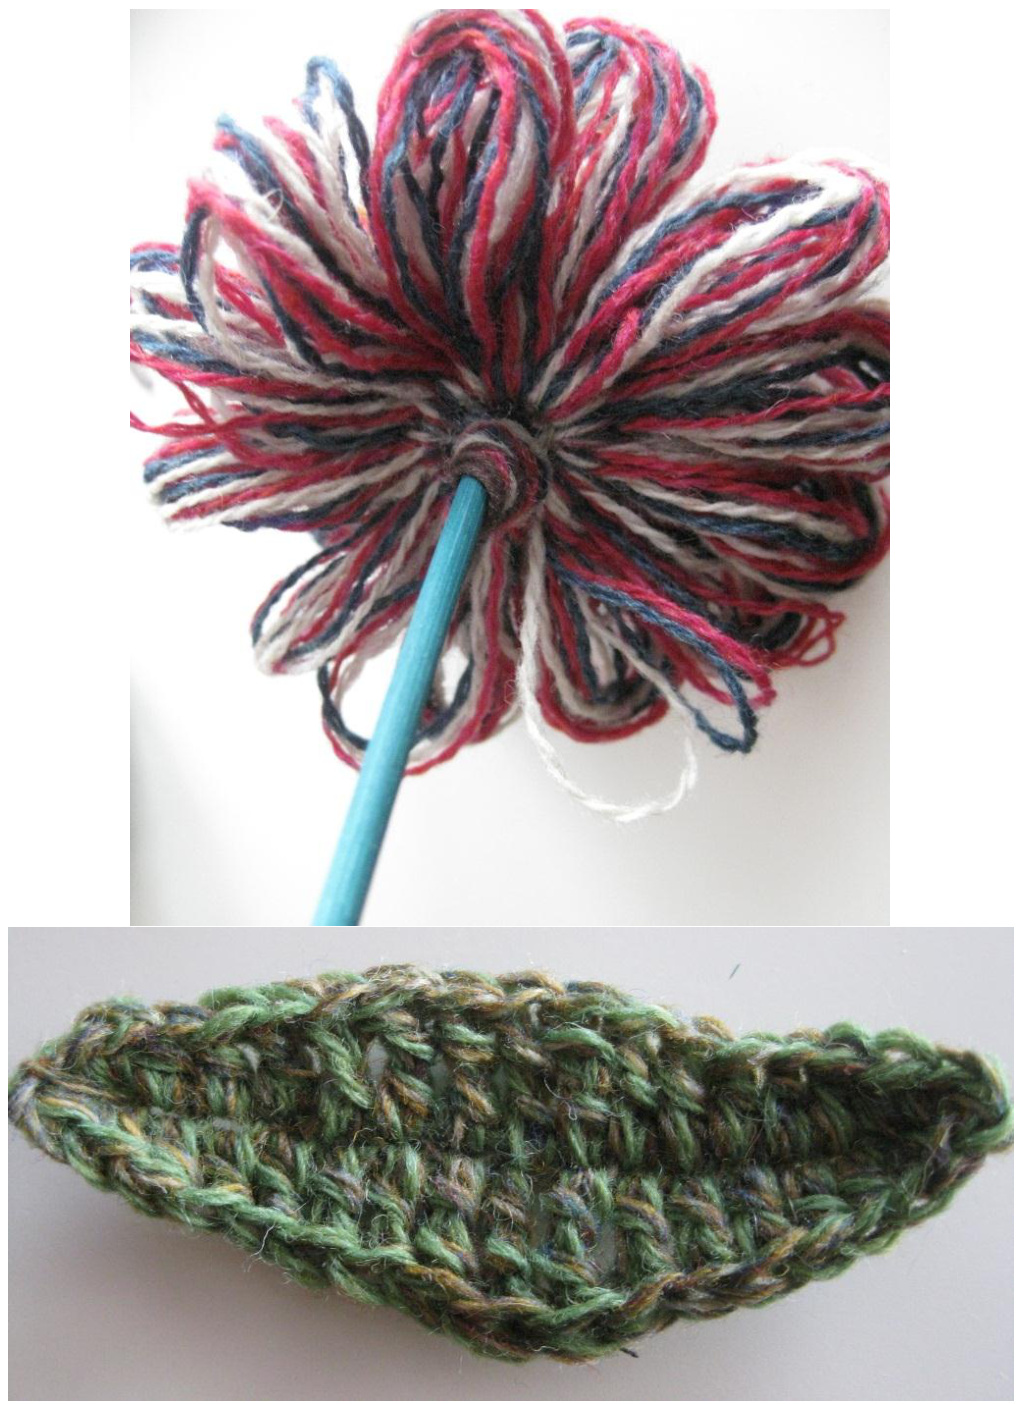
First you'll go with the needle down just near an inner pin in the center hole - not in the middle of that hole, but along the side, and you'll pick between the threads that will form a petal of your flower. Look at further pictures to put it right· You'll then pull the thread(s) down· I'm still working with the three strands of my Holstgarn together. Vous allez piquer I'aiguille dans le trou central mais juste le long du bord du trou, a coté du picot intérieur, donc pas dans le point central du trou et ceci entre les fils qui formeront un petale de fleur· Tirez le fil vers le bas. (sur la photo vous voyez que pour la solidité et la continuite de la couleur je travaille toujours avec mes trois brins de fils).
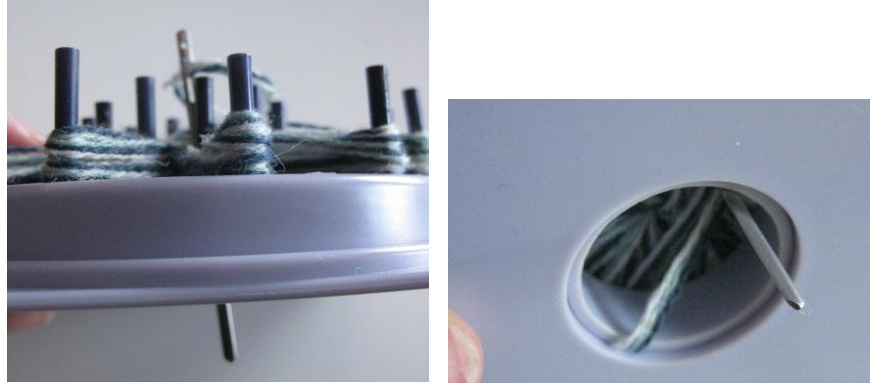
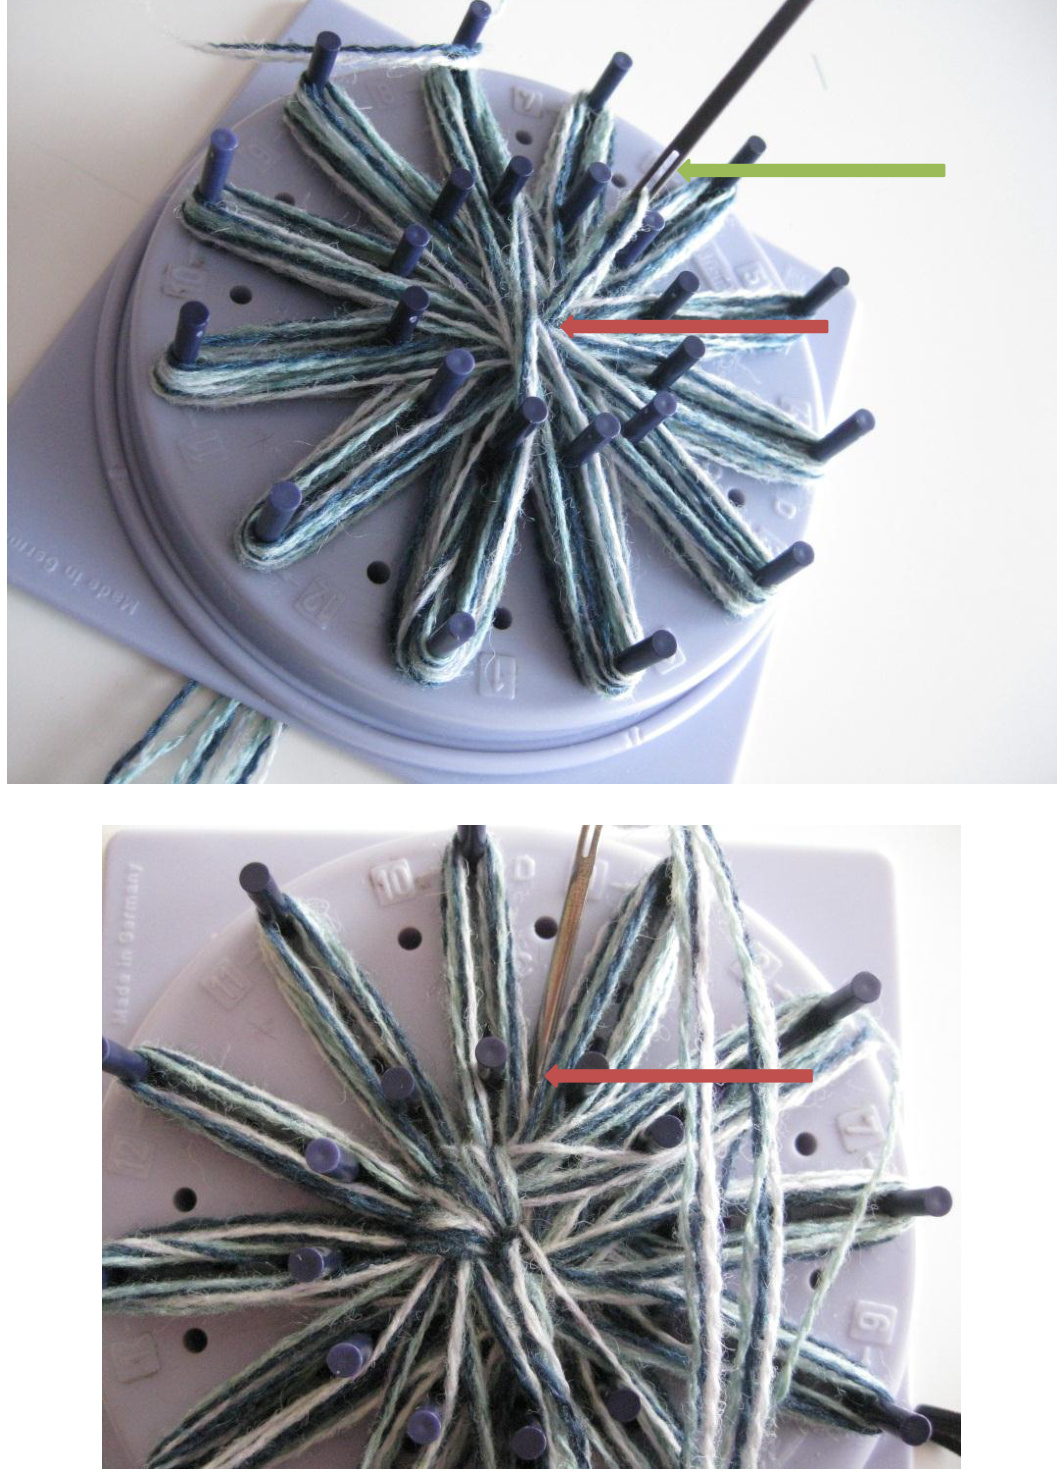
erTextil vof. Tous droits reserves - All rights reserved - [http://vidertextil.skynetblogs.be Then you'll have to come up again with your needle and thread: pick from down through the center of all the threads. (red arrow - green arrow shows the needle). Puis il faudra remonter avec votre fil et aiguille : piquez bien au centre de tous vos fils (fleche rouge, la verte montre I'aiguille) Go up and down this way, picking down once between the threads of your petal and once between the petals themselves so that every thread is fixed· Look to the photo. Finish with the yarn under the loom· Continuez ainsi et piquez une fois entre les brins de votre petale lui-meme et une fois entre les petales afin de bien fixer tous les fils. Voyez sur la photo· Finissez avec le fil vers le bas de I'appareil. This is the final result.
Now, let's make the pompons
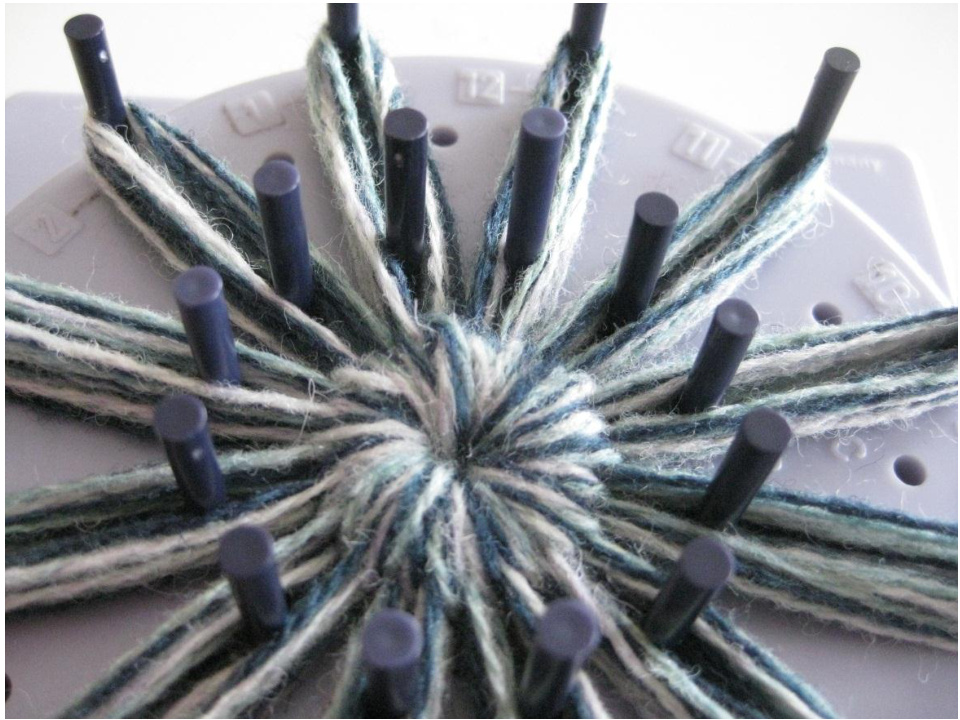
Voici ce qu'il faut obtenir! Remove now the flower from your loom and make a double knot in the two ends of the flower· Your flower is well fixednow! Enlevez la fleur de I'appareil et faites un double noeud avec les deux brins de fil. La fleur est bien fixee maintenant· Nous allons faire les pompons maintenant .
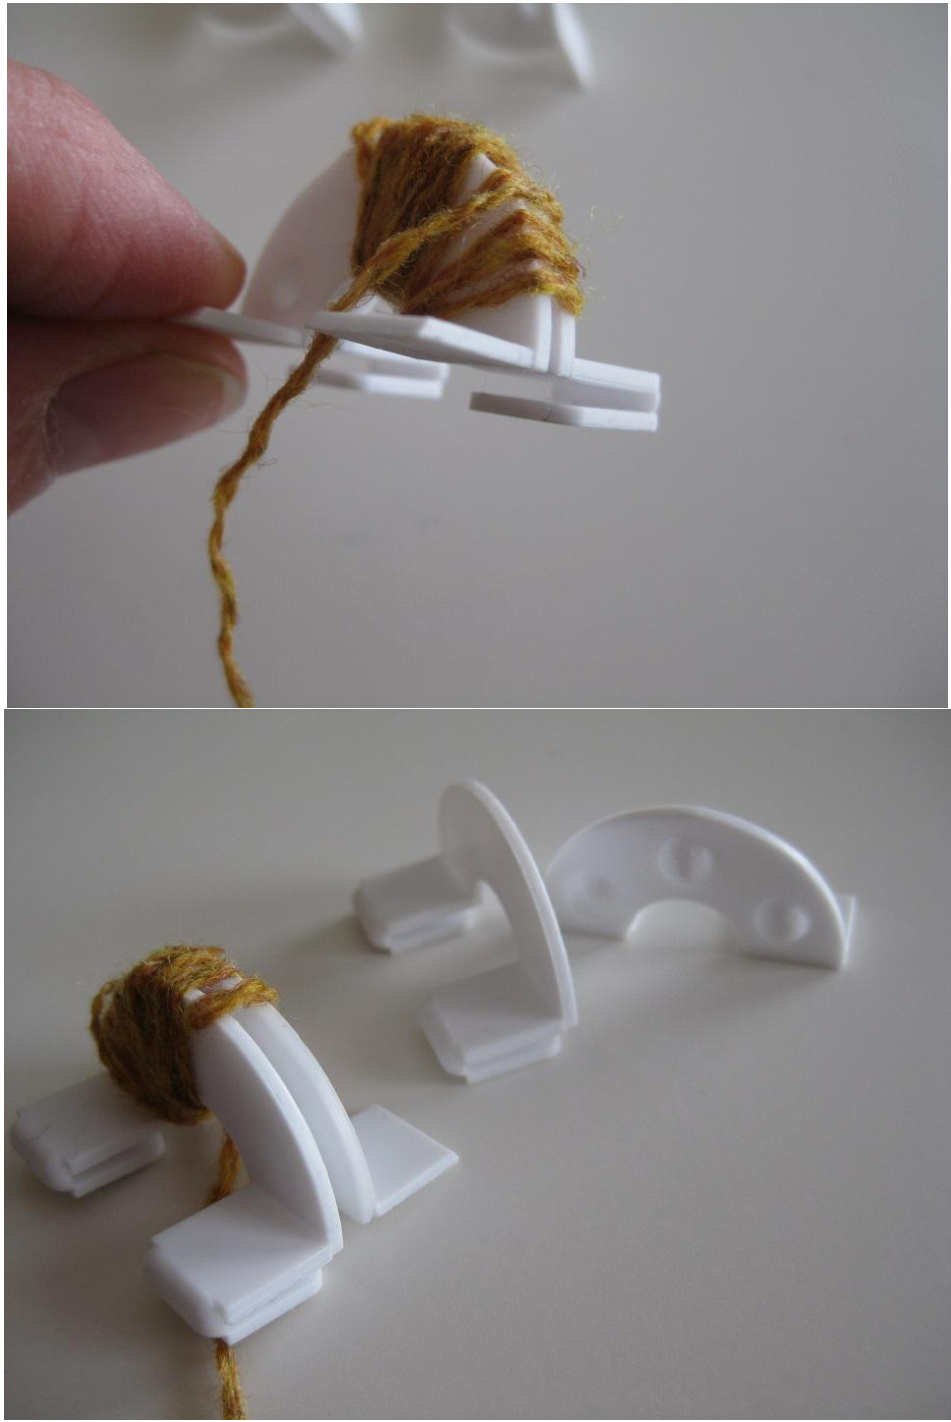
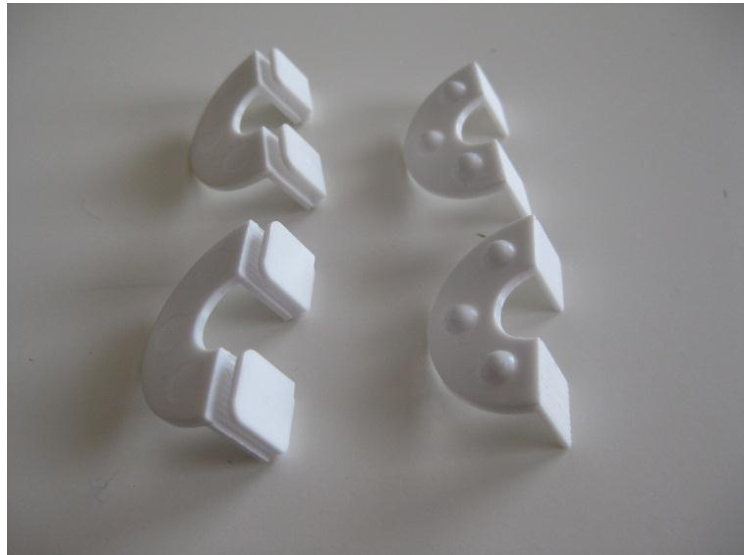
I use the pompon maker of Prym. It comes in four sizes, this is the smallest· You have pieces like little bridges in half circle: two with slots or spaces and two without. Take one with and one without and start turning the yarn round it· Look at photo· L'appareil a pompons de Prym a quatre tailles· Ceci est la taille la plus petite· ll y a quatre pieces comme des petits ponts en demi-cercle : deux avec une fente et deux sans espace· Prenez ensemble un morceau avec fente et un autre sans, et tournez le fil autour·
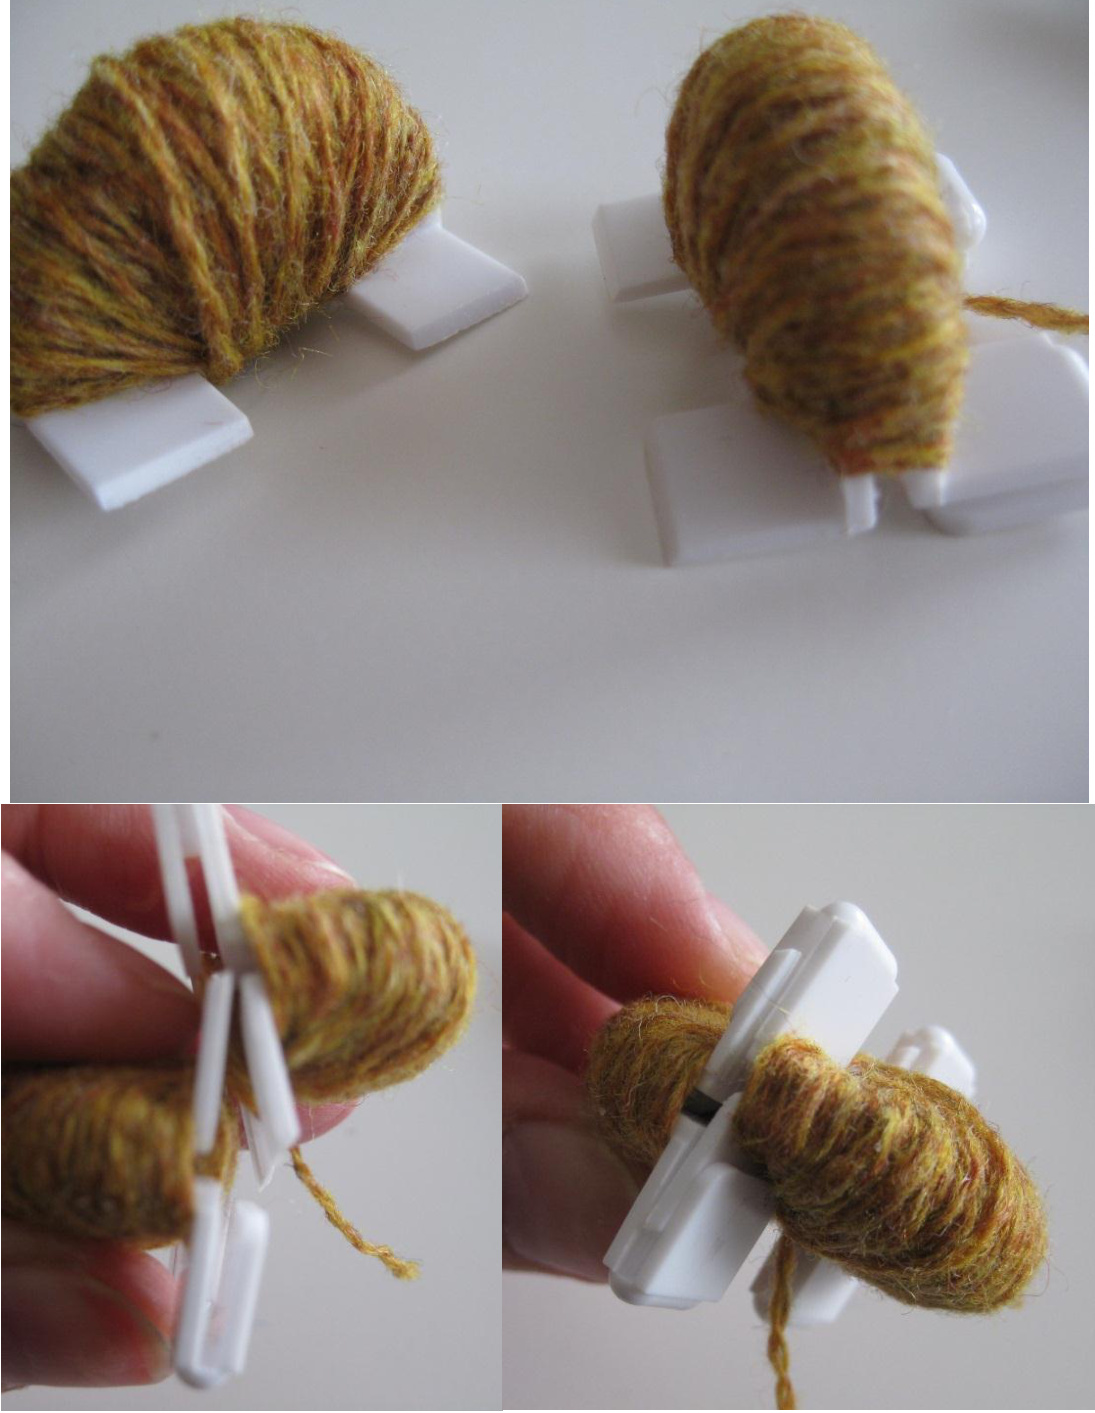
Fill with yarn, and do the same with the two other parts together. Tighten well your yarn! Work regularly round the two pieces· Vous remplissez de fil les deux autres parties aussi· Resserrez bien votre fil. Enroulez de facon réguliere votre fil. Slide the two parts together: one slot into the part that doesn't have it and vice-versa Glissez les deux parties ensembles: les parties avec fentes enquinconce·
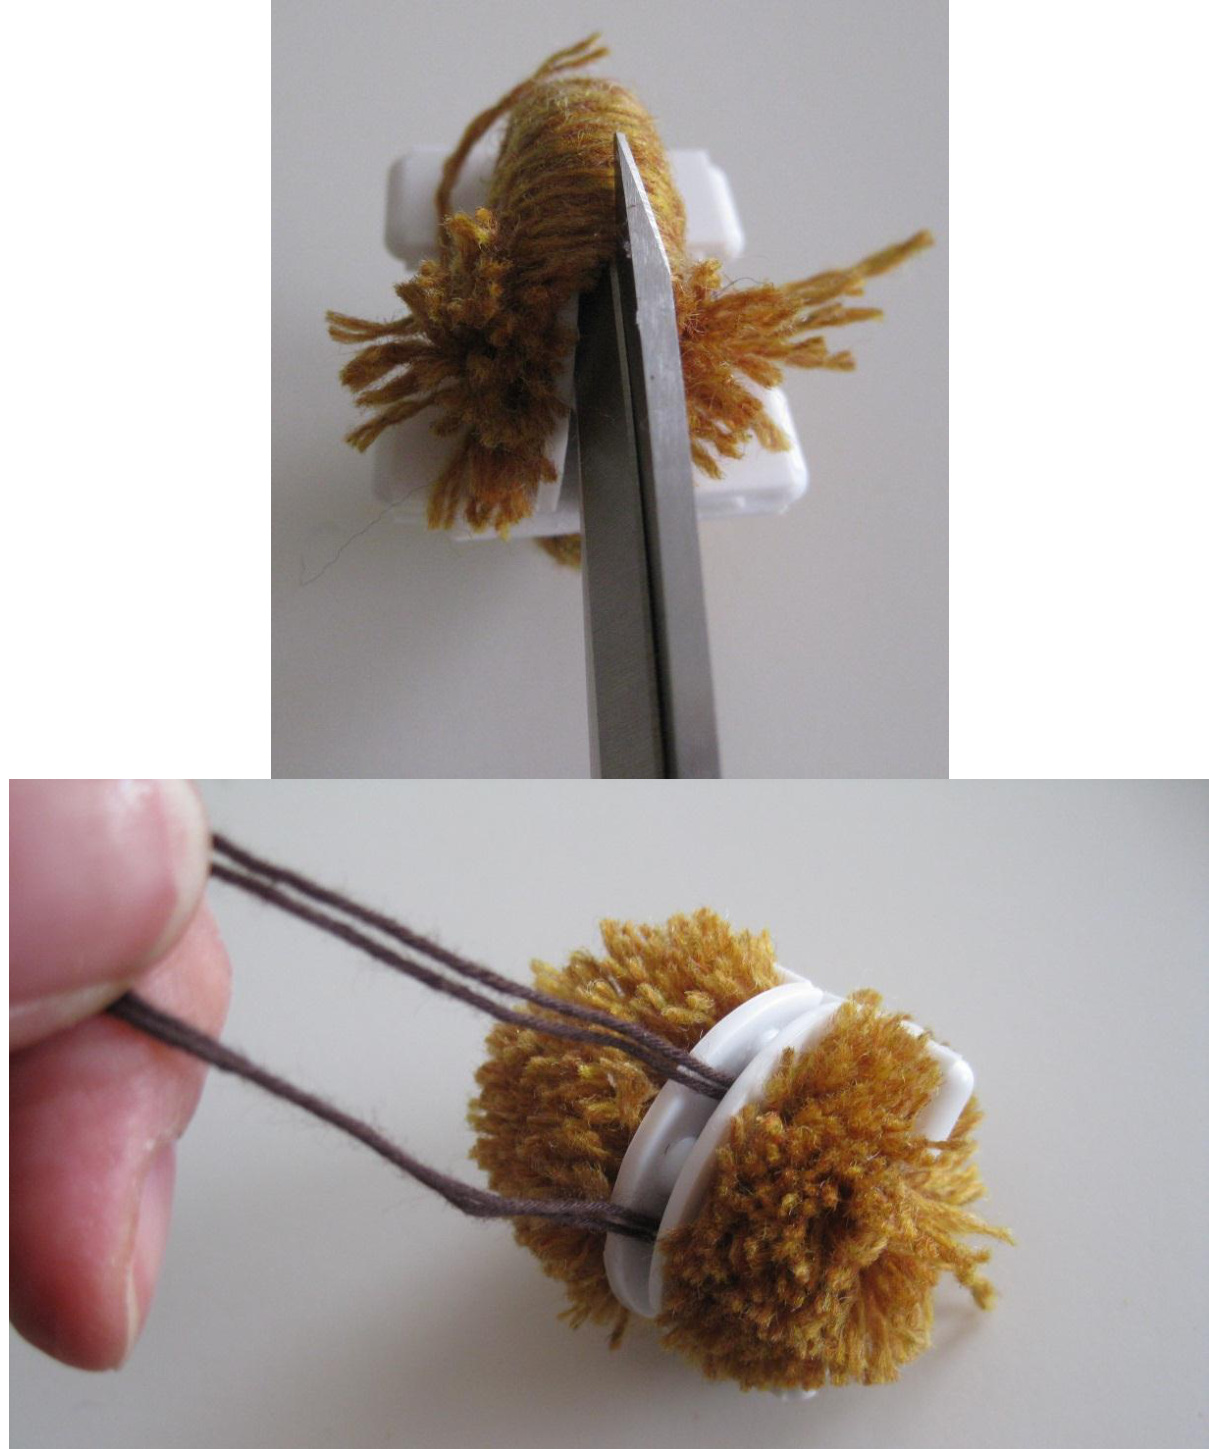
erTextil vof. Tous droits reserves - All rights reserved - [http://vidertextil.skynetblogs.be Take sharp scissor and cut between the two \* two parts. Prenez des ciseaux pointues et coupez entre les deux fois deux parties - tout autour Take a strong yarn (l used cotton in double) and pass the yarn between the spaces (left by cutting the yarn) of the little pieces and tighten· There is enough space to do this @ Prenez un fil solide (j'ai pris un coton double) et passez-le entre les fentes a l'interieur des quatre pieces la ou vous avez coupe les fils?
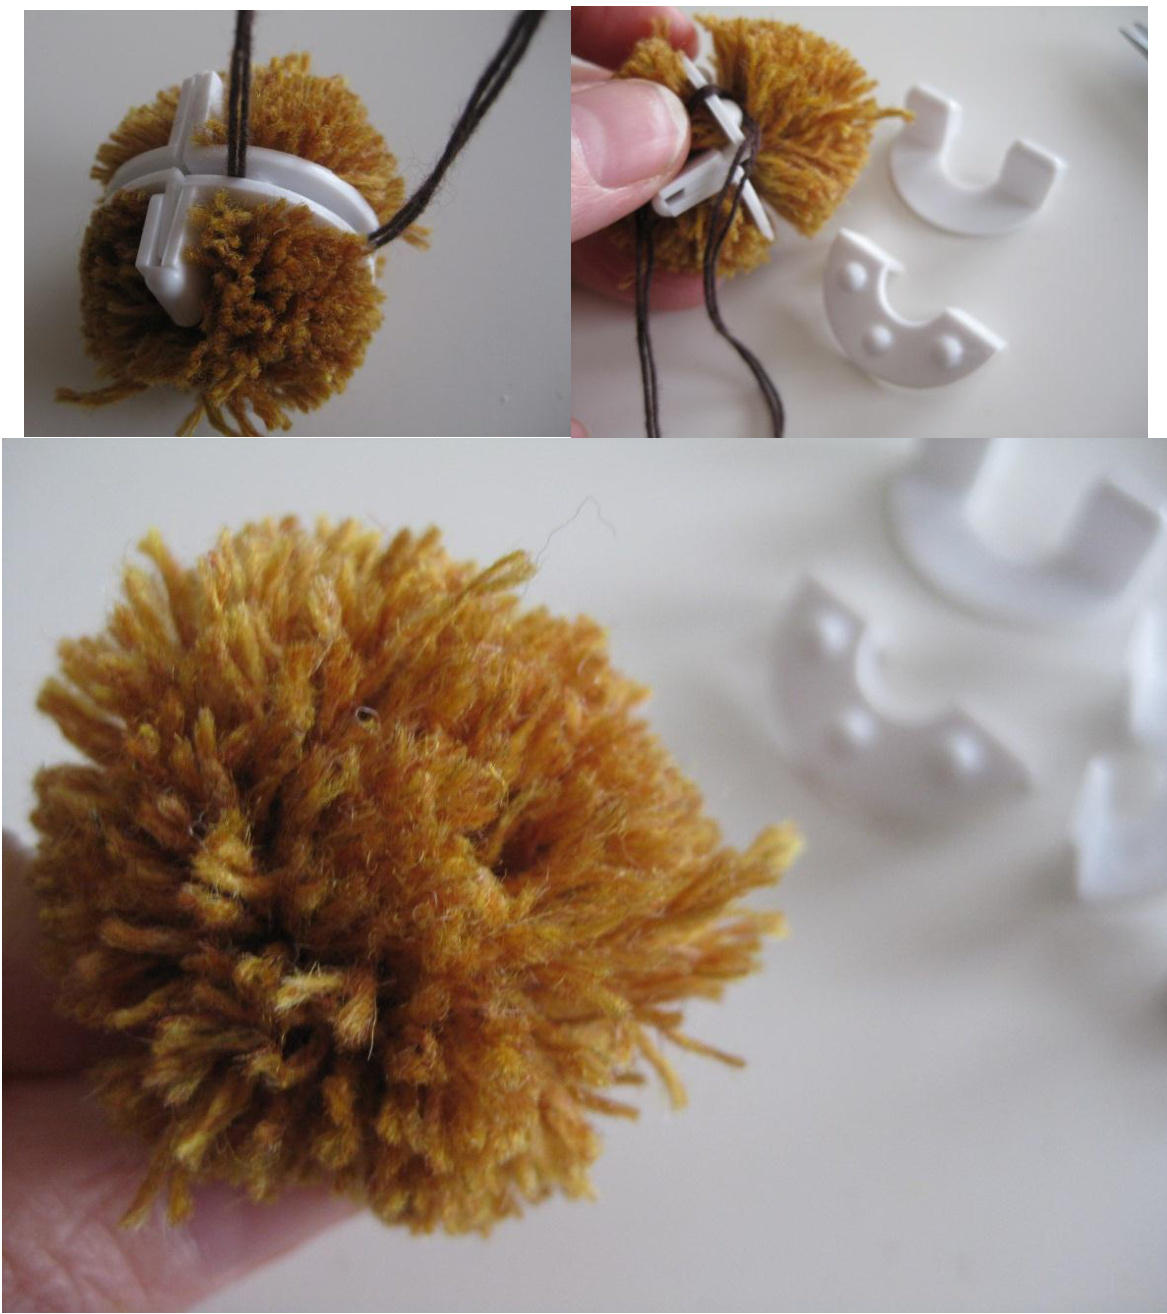
Make double knot and then remove the pieces of the pompon maker Faites un double noeud et puis retirez les 4 parties en plastique qui vous ont servis a faire le pompon· There it is your pompon : you'll probably have to cut little pieces of yarn to equalize the roundness of your pompon Voila le pompon : il vous faudra probablement couper quelques brins de fils qui depassent la belle boule que votre pompon devra devenir·
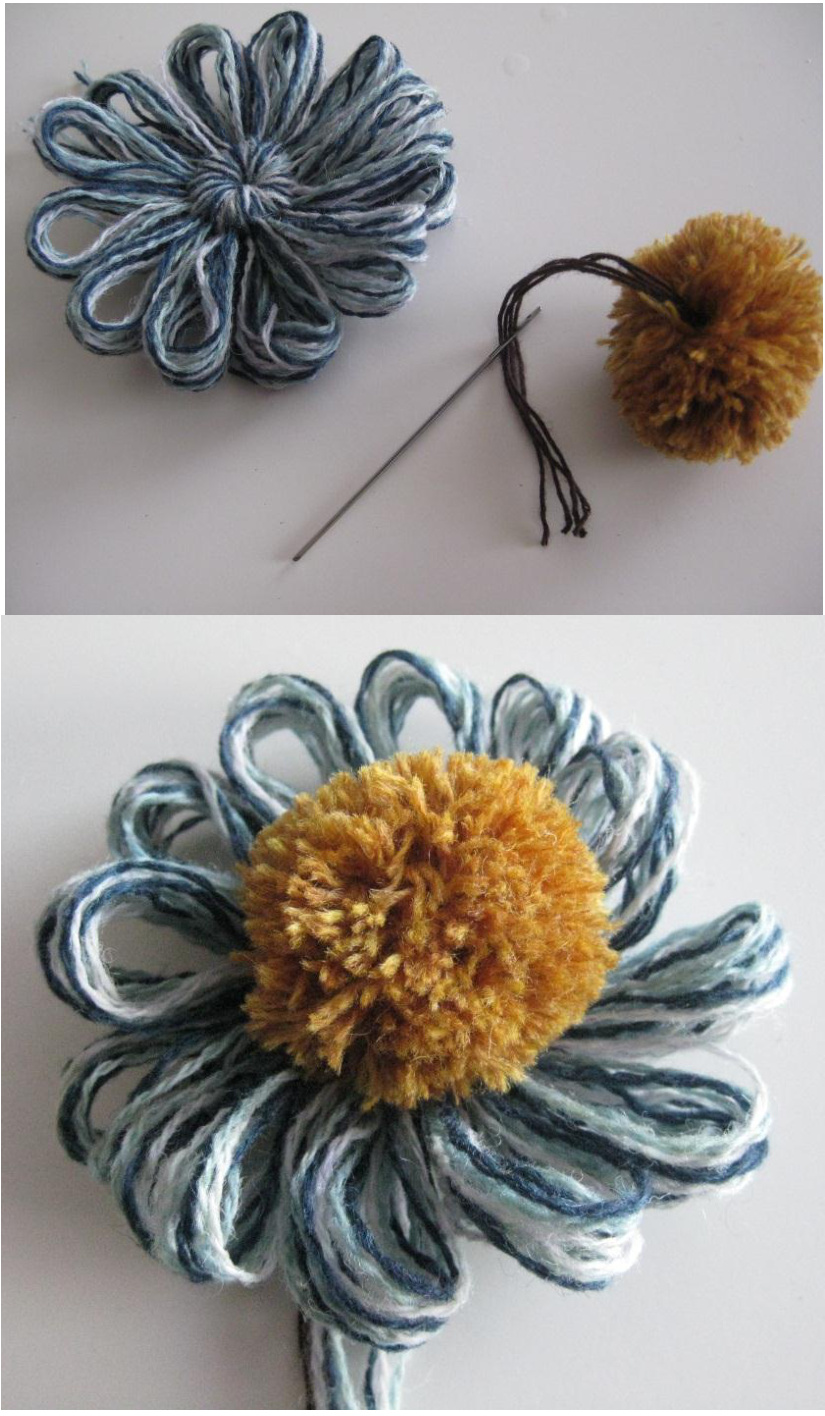
Pull the thread from your pompon through the center of the flower and make knot under it with the ends of your flower-yarn· Now you have the flower ready to be fixed on a brooch, a flower stem, as decoration on a bag, on a hat ...whatever! Tirez les fils de votre pompon au travers du centre de la fleur et faites un double noeud avec les fils de celle-ci pour bien fixer le pompon a la fleur· Maintenant vous pouvez I'utiliser pour garnir un sac, un chapeau, en faire une broche ou la fixer sur un tige pour en faire de 'vraies' fleurs·
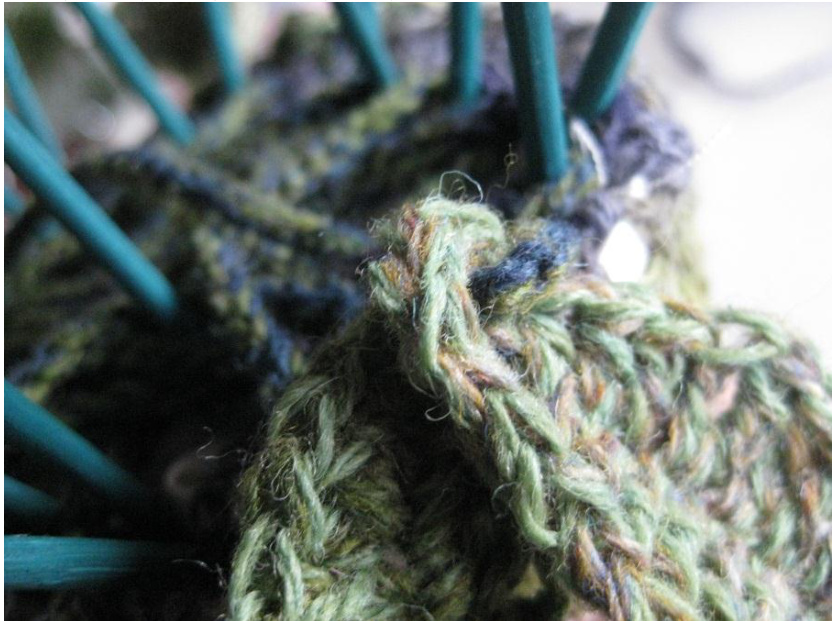
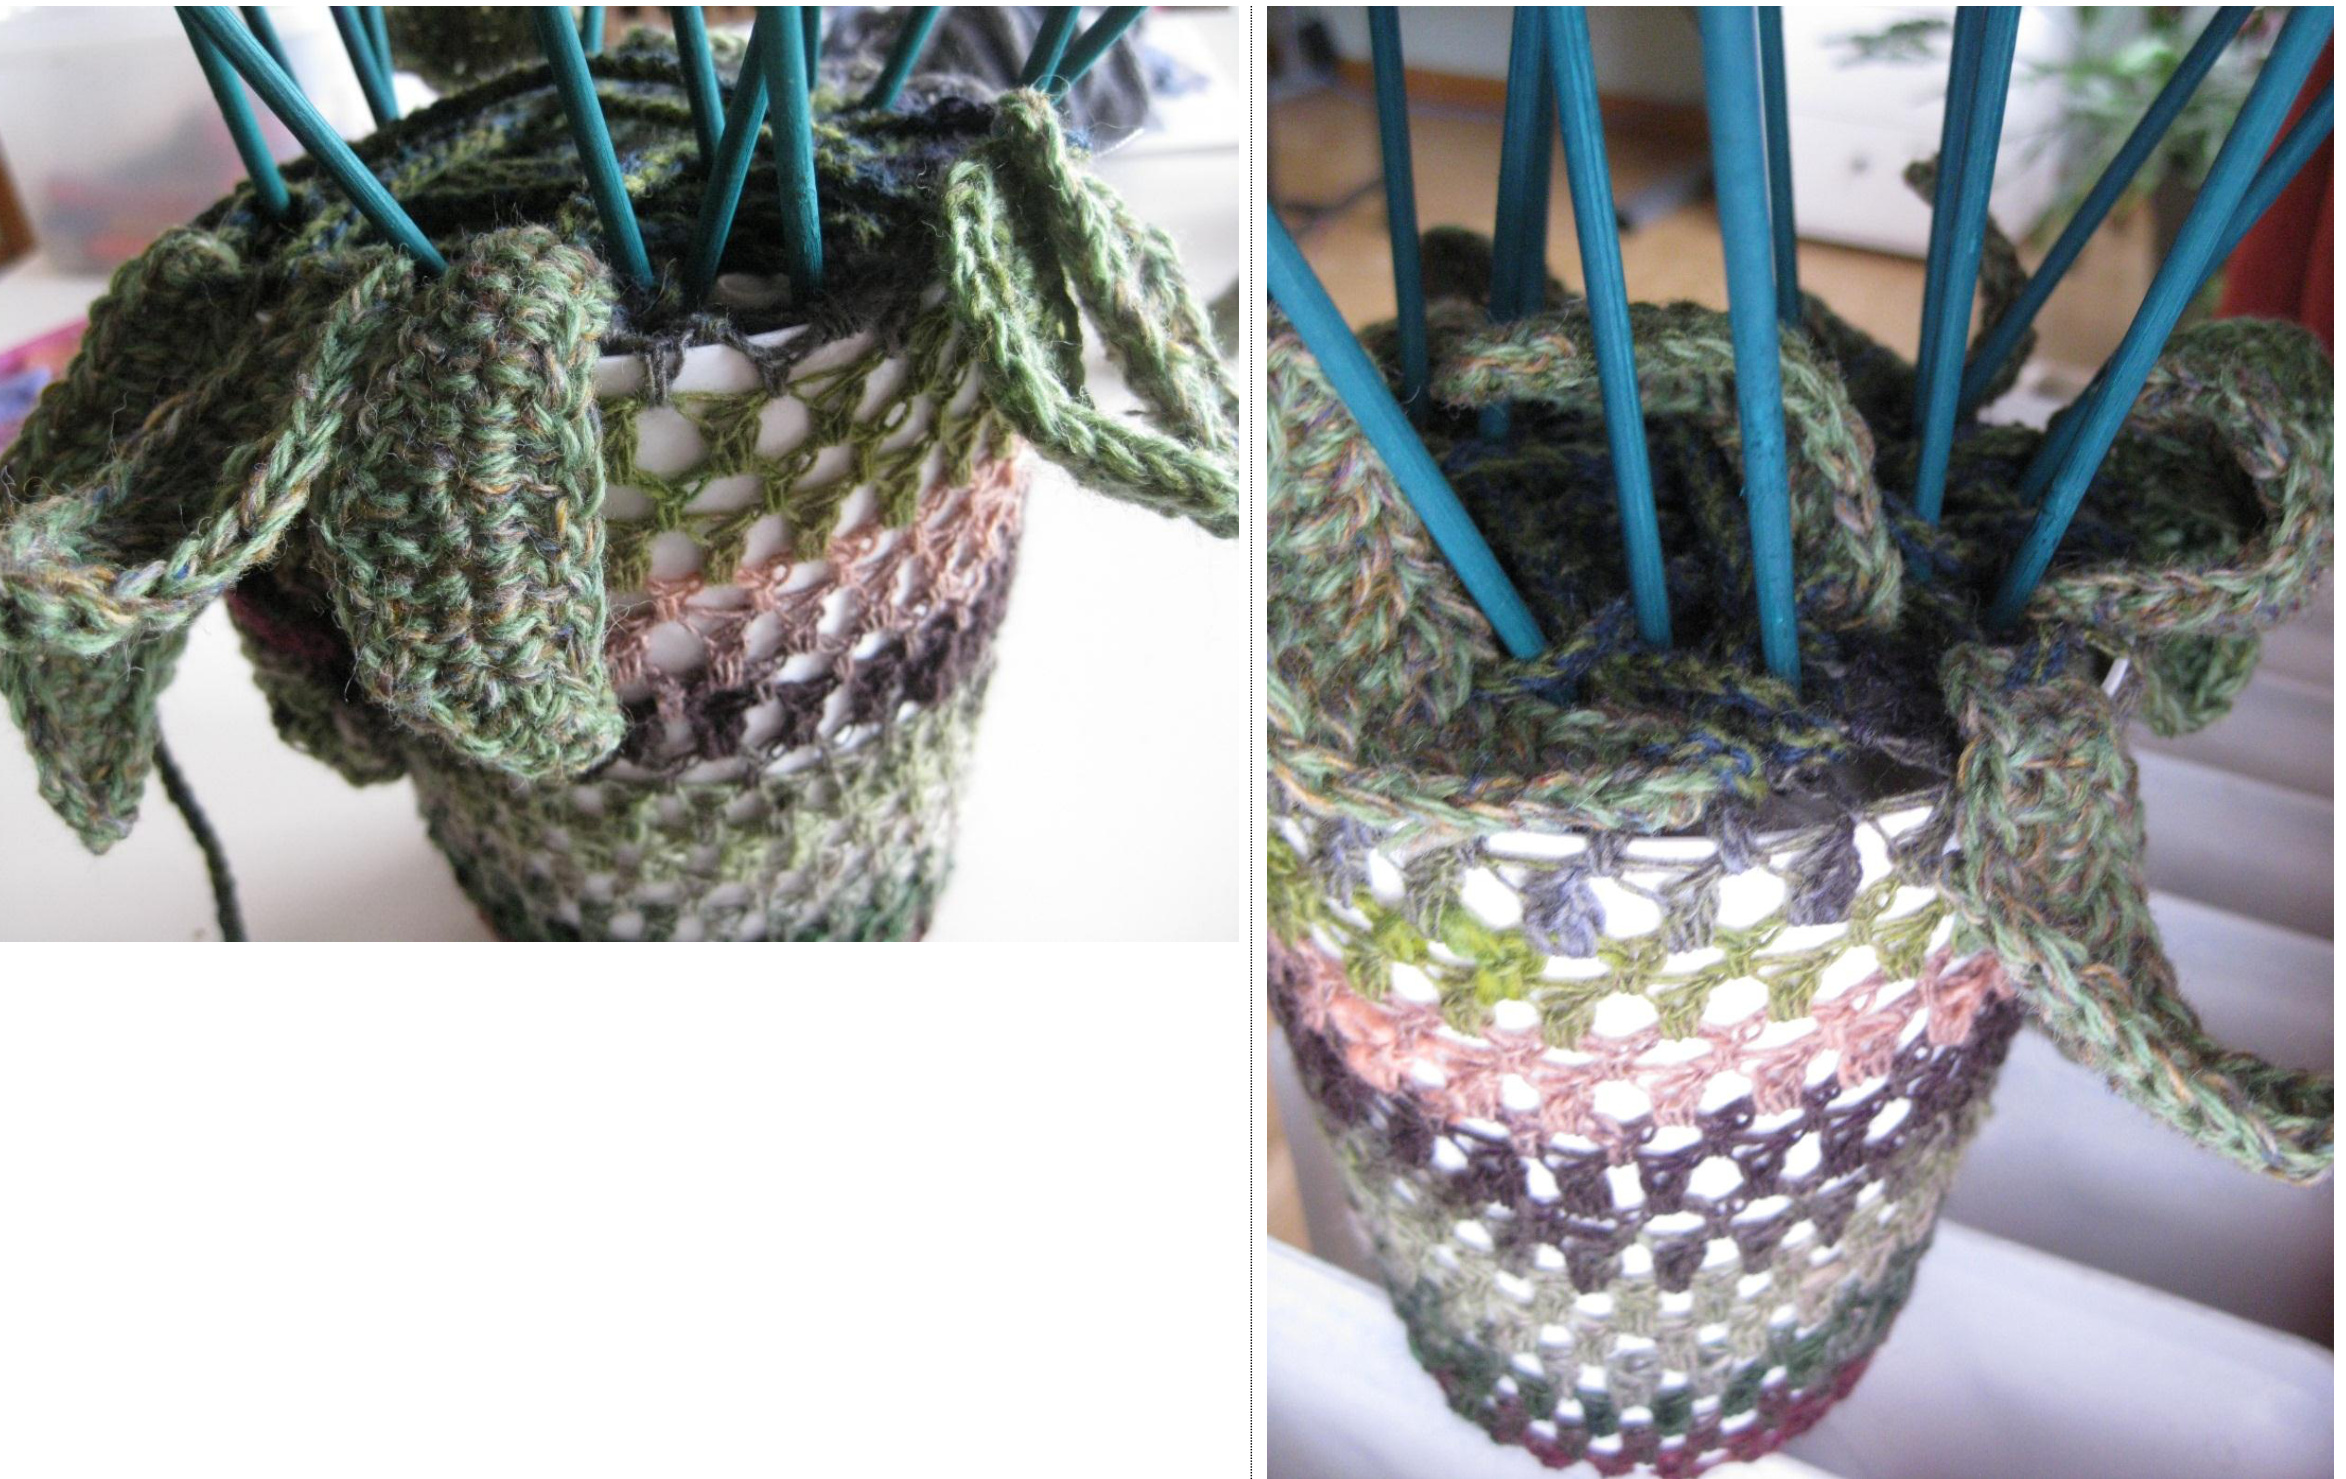
I used textile glue to fix the center of the flower on a stick that I have to attach my plants· You can use any strong and fine material.. J'ai fixé ma fleur a un petit baton qui sert a fixer les plantes avec de la colle textile, mais vous pourrez bien sur utiliser n'importe quel materiel pour faire votre tige· I also made some leafs in crochet ... J'ai aussi fait quelques feuilles ...
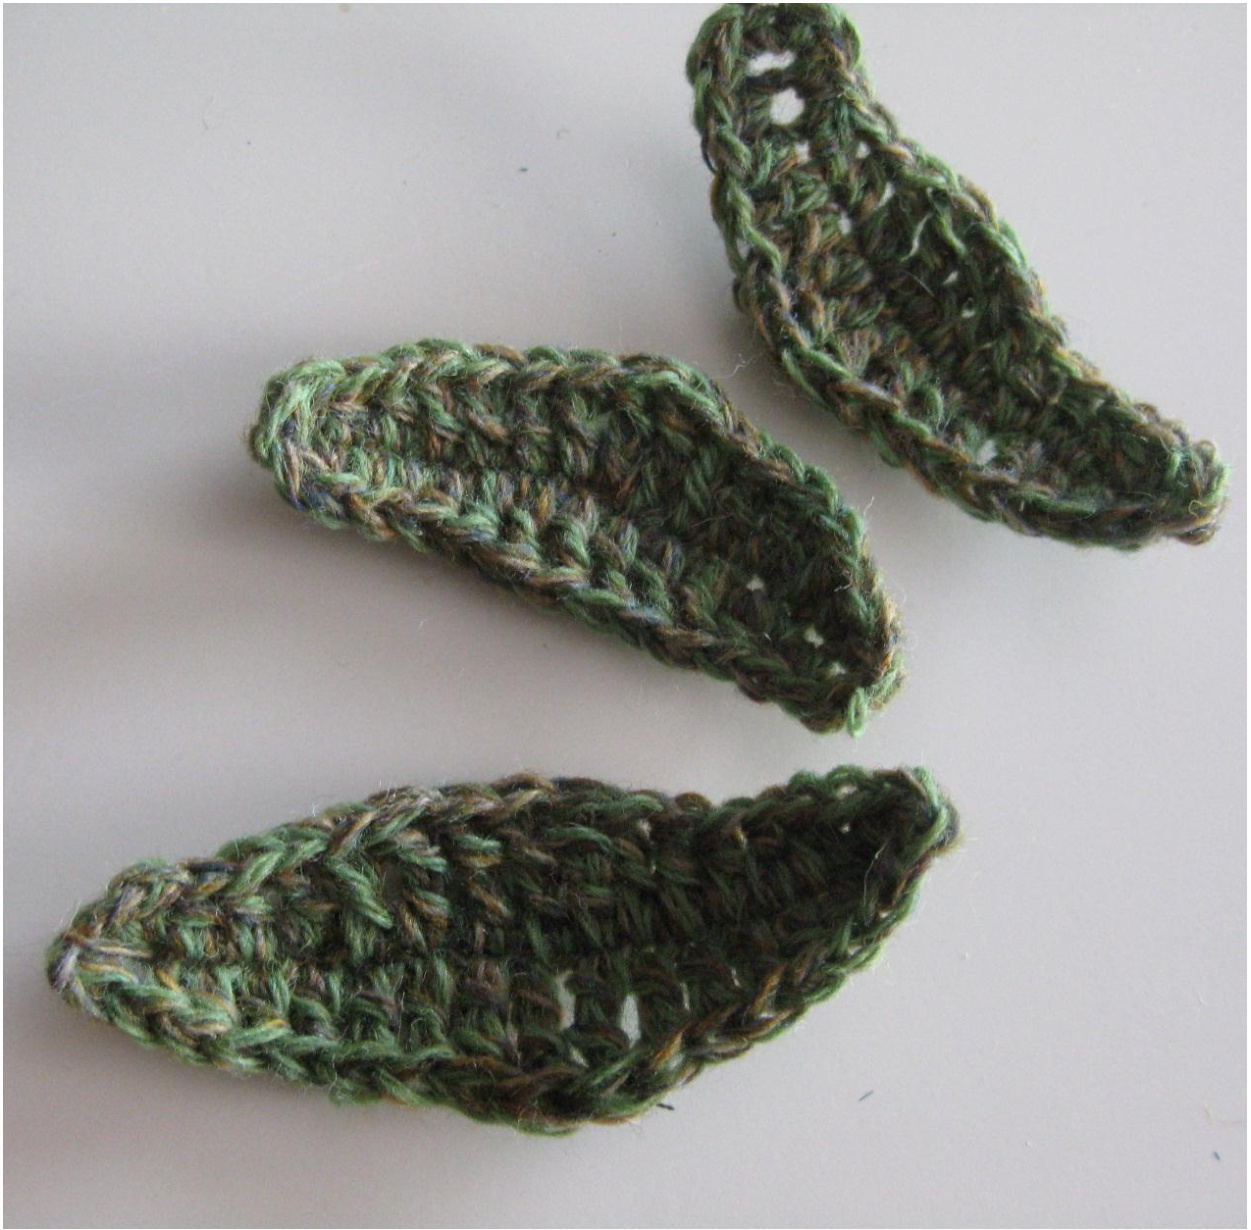
Put your flowers in the pot (glue them to the bottom, fix them with sand or weight in the pot, with clay .. ) Starting with two strands of Holstgarn supersoft I made a chain of about 15 to 20 stitches and made some single crochet, some double & trebles, double and finish the row with single crochet; and then the same on the other side of the chain. Not in a regular way, they are all different as in nature no two leafs are the same· J'ai pris deux fils de Holstgarn Supersoft et j'ai fait une chainette de 15 a 20 mailles en I'air· Puis un rang de mailles serrees, brides et double brides, brides et mailles serrees ; et la meme chose de I'autre coté· Pas dans un ordre régulier puisque je me suis dit que dans la nature deux feuilles ne sont pas identiques non plus.. Mettez vos fleurs dans le cache-pot (collez les au fond, mettez du sable, des billes, de I'argile ..) Now you have to fix the upper border of the crochet cover round the pot· As I didn't want a surface that was neat, but rather a "moss filled ground" I crochet a chain (double strand) and passed it through the holes of the last row of my crochet cover from one side to the other one·
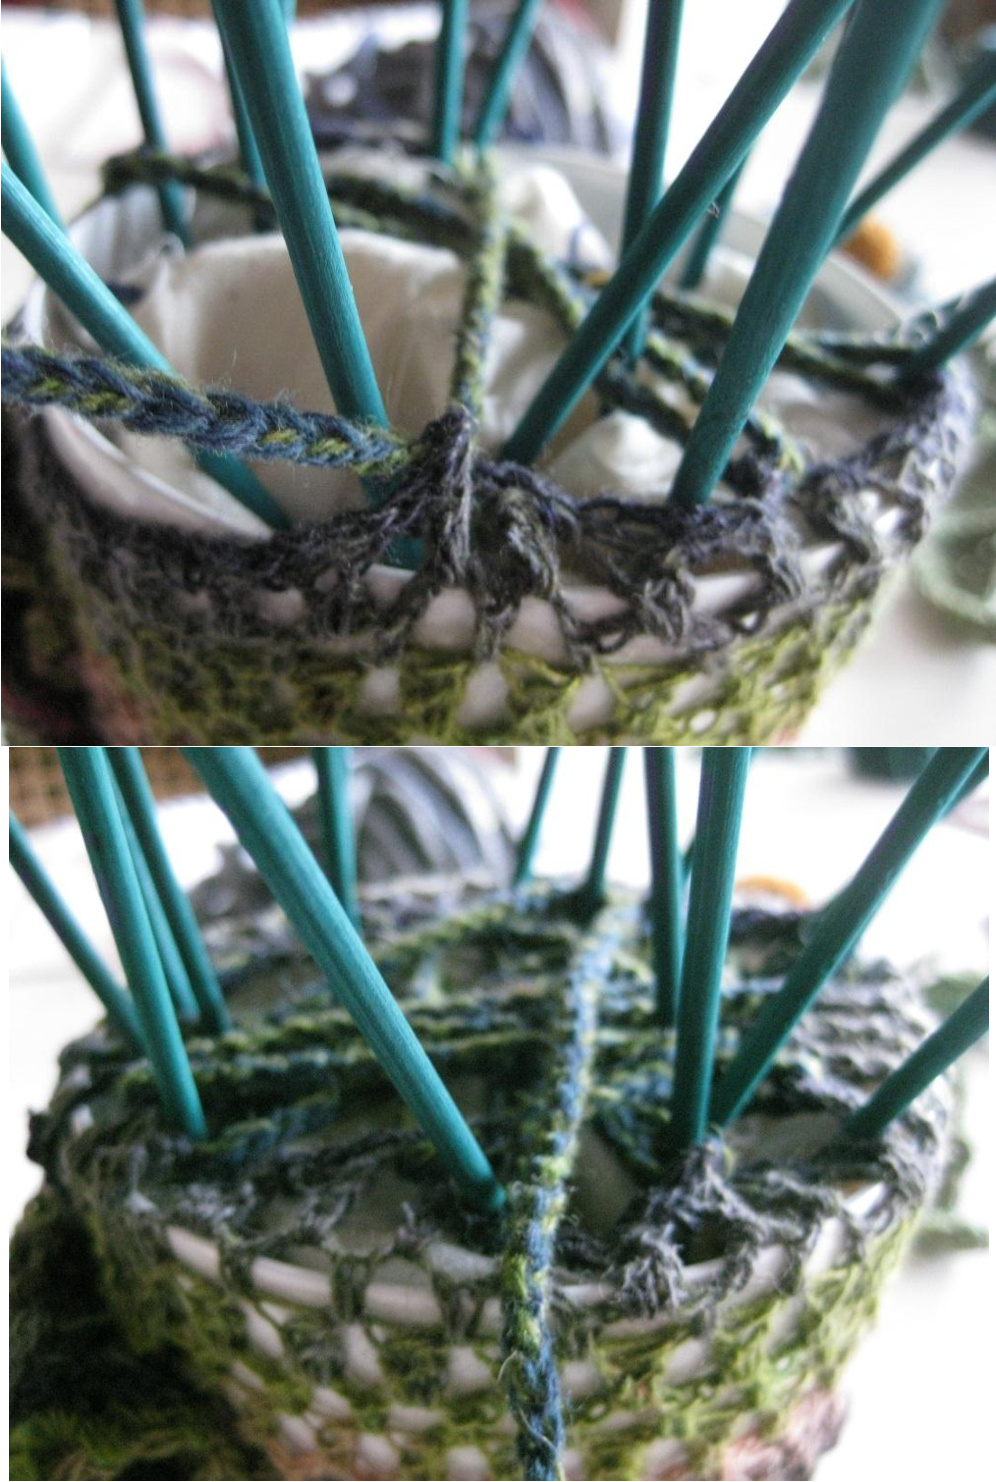
erTextil vof. Tous droits réserves - All rights reserved - [http://vidertextil.skynetblogs.be Maintenant il faut encore fixer le bord superieur de votre enveloppe crochetée autour du cache-pot· Comme je ne voulais pas de surface lisse mais plutot un sol irrégulier rempli de mousse, j'ai fait une longue chainette (deux brins de Holstgarn) que j'ai passée d'un cote a I'autre au travers des trous du dernier rang de mon enveloppe en crochet. And then i took some leafs on the chain with it ... Et puis j'ai glisse quelques feuilles sur ma chainette .
Page 19
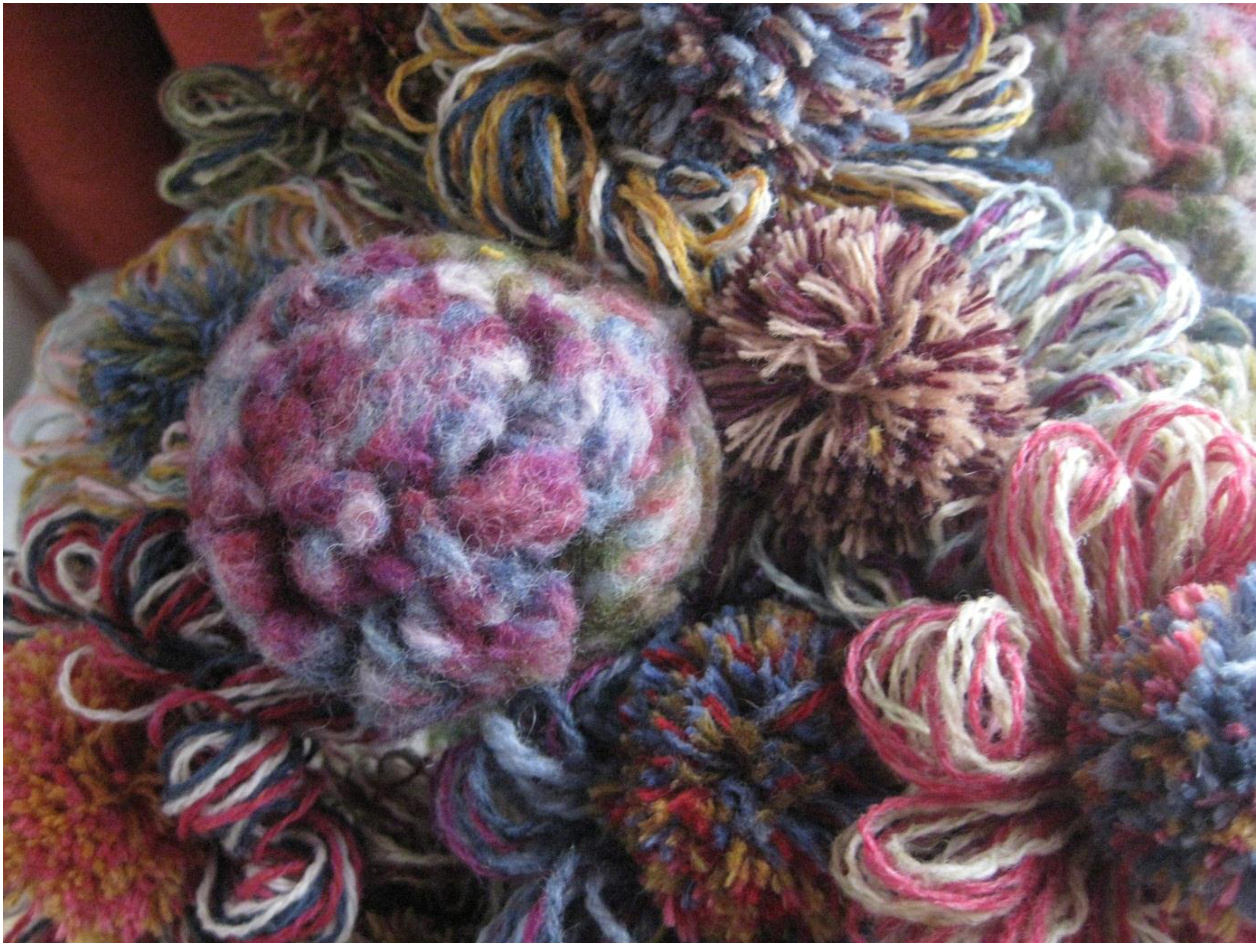
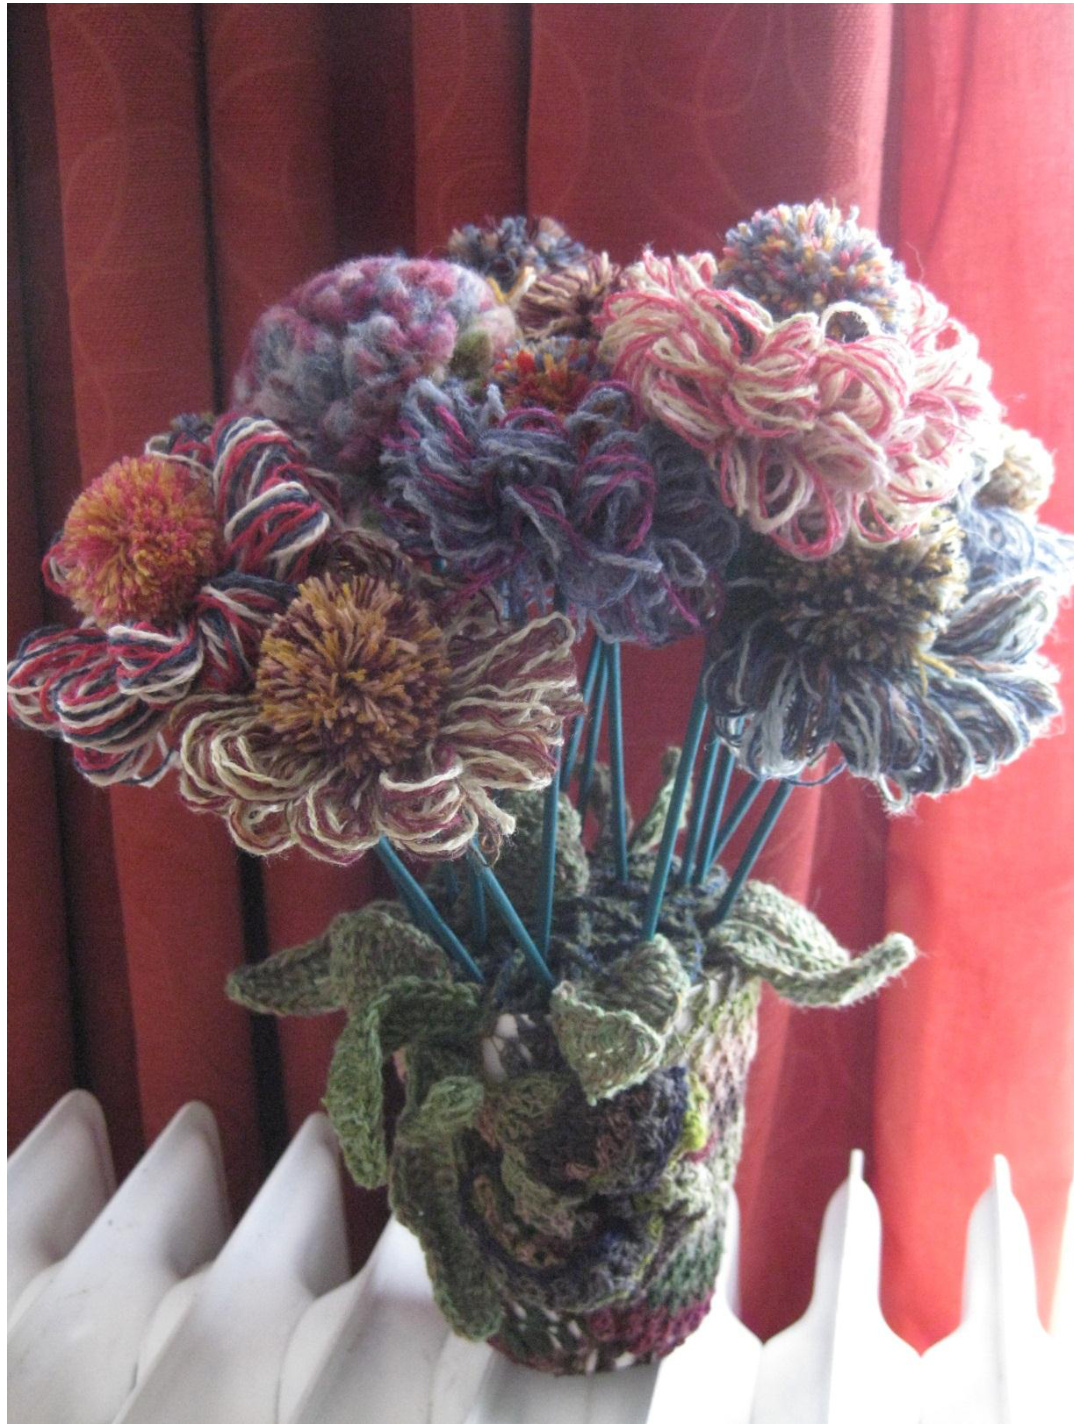
I put some bigger pompons on sticks too· These were felted in the washing machine ... a little fantasy to give my bouquet a soft touch ... J'y ai ajouté quelques pompons plus gros et feutrés dans la machine a laver. Cela me fait une petite touche de fantaisie toute douce dans mon bouquet Make many different flowers pompons to obtain a cheerful mix of colors !
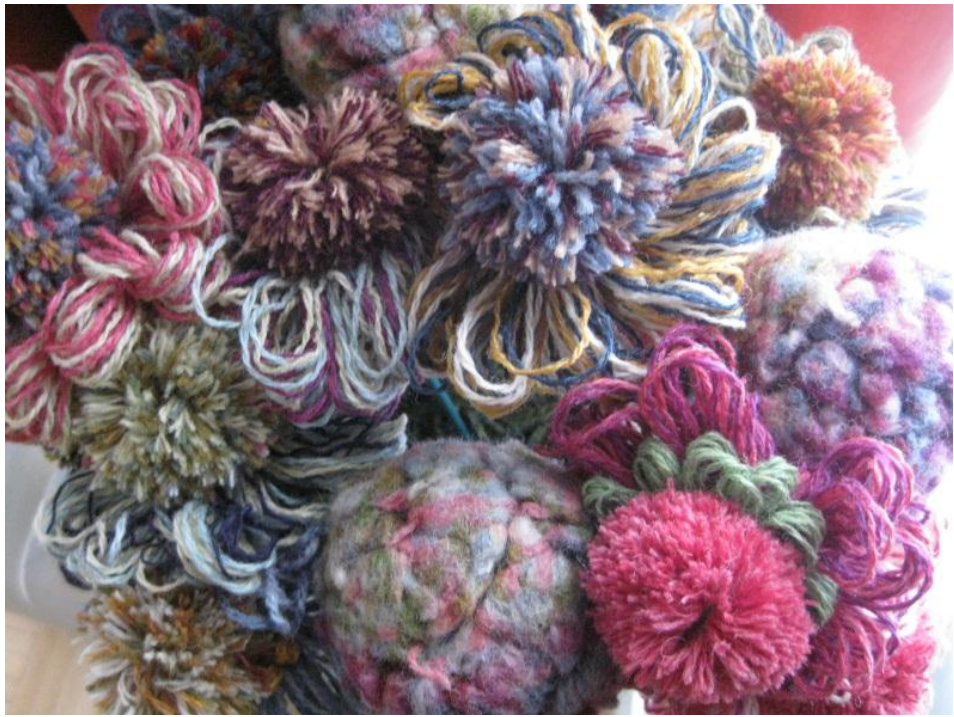
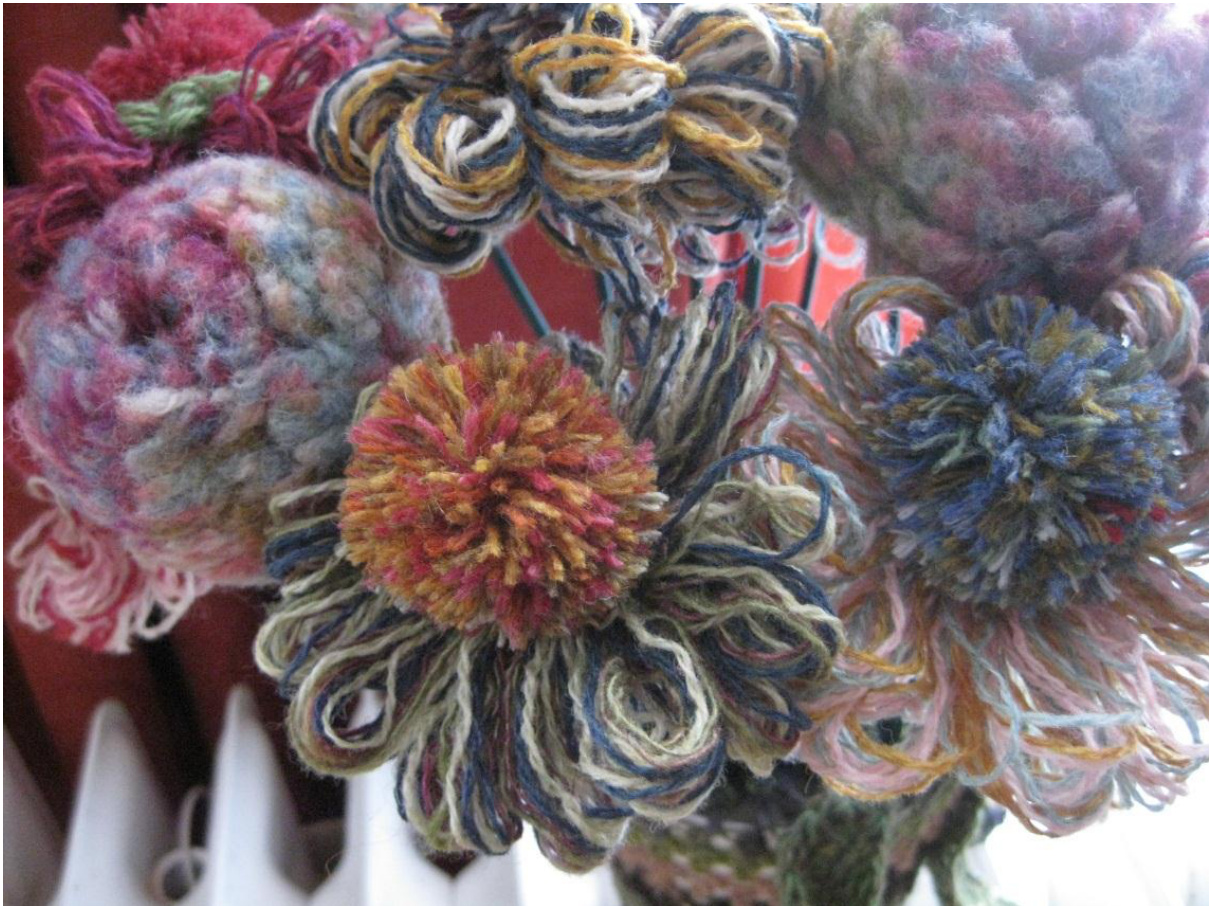
Faites toutes des fleurs et des pompons différentes afin d'obtenir un bouquet dans des tons variés !