FreshStitches afresh approachto crochet
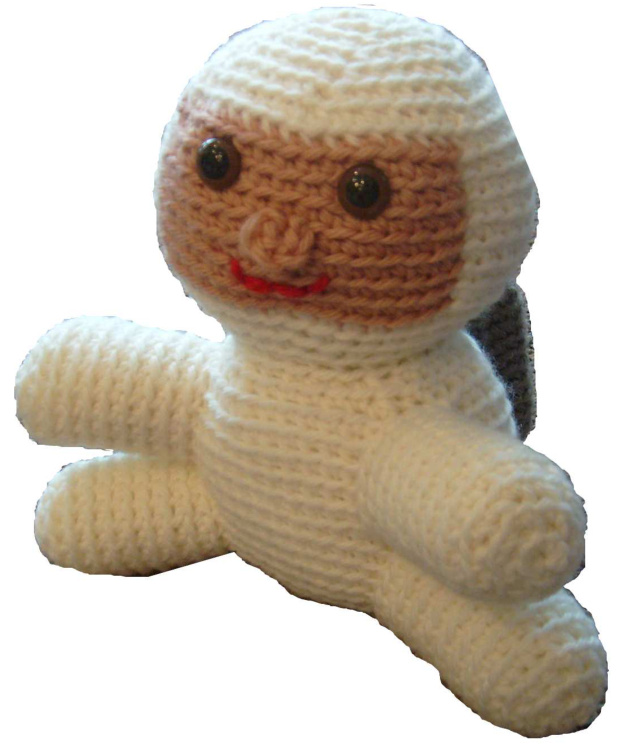
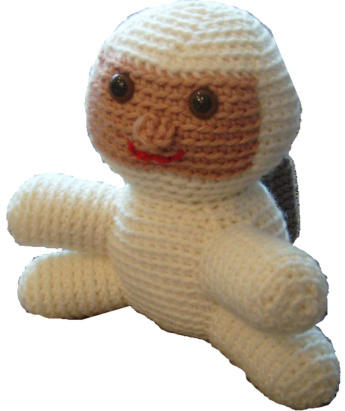
Troy the Astronaut designed by: Stacey Trock Height: 6 inches DOB: 0ctober, 2008 For detailed instructions, articles and more patterns, visit: http://www.freshstitches.com
Abbreviations
Materials
ch: chain ch tog: chain together fl: front loop sc: single crochet st: stitch Size H crochet hook tapestry needle two $12\mathrm{mm}$ brown animal eyes a few handfuls of stuffing
Yarn
Less than 220 yards (1 skein) is required for each color. For the yarn, I use 100% wool worsted weight (Ela Rae is the brand used in the sample). However, any worsted weight yarn is fine (including acrylics such as Red Heart). MC- White (Ella Rae Classic color # 01) SC- Peach (Ella Rae Classic color # 23) AC- Grey (Ella Rae Classic color # 15) a small piece of red for embroidering on mouth
Directions
Stitch into the back
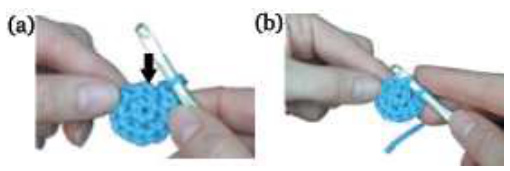
All stitches in the round are into the back loop, unless otherwise directed. Look at picture (a), and see how the arrow points to the back loop? You will stitch into this loop, as pictured in (b). Stitching into the back loop creates ridges on the right side of the piece. For rows, you will stitch into the front loop, unless otherwise directed. You can stitch into both loops if you desire, but this will change the look of the final product.
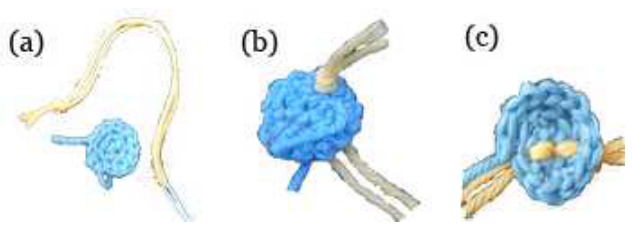
Starting out: the sloppy slip knot
Most pieces in this pattern (as they are based on circles) begin with stitching six times into one loop. We recommend the 'slopply slip knot' to avoid creating a hole in the center (a). To do this, twist the yarn around the hook to begin, and crochet as directed. Once you have $\textcircled{\mathbf{c}}2008$ FreshStitches, LLC. All rights reserved. This pattern and items made from this pattern are for personal use only, and may not be distributed or sold without written consent. completed your frst round, pull on the tail, while holding the loop you have created (b). The loop will end up tighter, as pictured in (c).

Color Changes
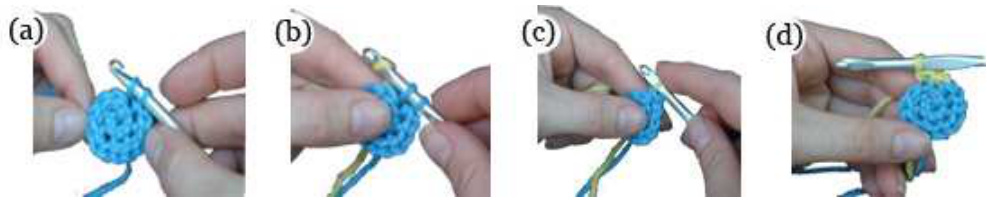
This pattern calls for switching from one color to another, but there is a trick to doing it so the change in color is very clean. Stitch up to 2 stiches before you are supposed to change colors (we are demonstrating here with the single crochet). In the next stitch (the last one of your current color), do not pull the final loop through, leaving as pictured in (a). Instead, loop the new color around your needle (b), and pull the loop through (c). Now, just stitch as normal. This technique leaves you with a clean color change, as shown in (d).
Fasten off with long tail
What does this mean? It just means that when you are ending a piece, to leave a lot (about 6-9 inches) of extra yarn, as pictured. This will be used to attach this piece to another piece. To attach your piece to another, just thread the long tail through a tapestry needle, and stitch to the second piece.

Attaching parts
In this pattern, you willbe instructed to attach two pieces together, either attaching a leg to the body, or attaching the head and body together. First, let's see how to attach the head to the body. This is the easiest type of attachment, because the last row of the head and the last row of the body have the same number of stiches. You left a long tail on one of the parts (right?), so thread a tapestry needle with the long tail. This serves to have already anchor your stitches. Now, loop the embroidery needle through $\textcircled{\mathbf{c}}2008$ FreshStitches, LLC. All rights reserved. This pattern and items made from this pattern are for personal use only, and may not be distributed or sold without written consent. each st on the head and body, going allthe way around. When you are done, tug the string a little bit to tighten (so the guy has a neck) and tie a knot to fasten off. Use the tapestry needle to pull the knot inside of the head, so you don't have any loose ends sticking out. Attaching a smaller part (such as a leg) onto a larger part (like a body) is similar. The small part (in this case, the leg) will have a row of stitches at the opening, and a long tail. Thread a tapestry needle with the long tail. Put the leg where it should go along the body, and pick up a stitch on the body. Keep going (one stich on leg, one stitch on the body), until you have stitches all the way around the leg. When you are done, tie a knot to fasten off.
Embroidering on details
In this pattern, you will be instructed to embroider on some details. To do this, thread the tapestry needle with a length of yarn (about a foot or two). Tie the two ends of the yarn together with a knot, as pictured in (a). Pull the needle through the back of the work (so that the knot is anchored), as in (b). Then, stitch according to the desired pattern, as shown in (c). When done,tie off!
The Pattern
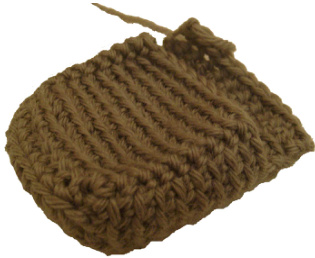
Body
With MC, ch 2 Round 1: sc 6 times in 2nd ch from hook (6) Round 2: sc twice in each st (12) Round 3: \* sc twice in next st, sc in next st. Repeat from $^\ast\,5$ times (18) Round 4: \* sc twice in next st, sc in each of next 2 sts. Repeat from $^\ast5$ times (24) Round 5: \* sc twice in next st, sc in each of next 3 sts. Repeat from $^\ast5$ times (30) Round 6: \* sc twice in next st, sc in each of next 4 sts. Repeat from $^\ast5$ times (36) Round 7: \* sc twice in next st, sc in each of next 5 sts. Repeat from $^\ast5$ times (42) $\circledcirc$ 2008 FreshStitches, LLC. All rights reserved. This pattern and items made from this pattern are for personal use only, and may not be distributed or sold without written consent. Round 8: \* sc twice in next st, sc in each of next 6 sts. Repeat from $^\ast5$ times (48) Round 9: sc in each st (48) Round 18: \* ch tog next 2 sts, sc in each of next 6 sts. Repeat from $^\ast5$ times (42) Round 19: \* ch tog next 2 sts, sc in each of next 5 sts. Repeat from $^\ast5$ times (36) Round 20: \* ch tog next 2 sts, sc in each of next 4 sts. Repeat from $^\ast5$ times (30) Fasten off with long tail.
Legs
Make 2. With MC, ch 2 Round 1: sc 6 times in 2nd ch from hook (6) Round 2: sc twice in each st (12) Round 3: \* sc twice in next st, sc in next st. Repeat from $^\ast\,5$ times (18) Round 4: sc in each st (18) Rounds 5-11: Repeat round 4 Fasten off with long tail.
Arms
Make 2. With MC, ch 2 Round 1: sc 6 times in 2nd ch from hook (6) Round 2: sc twice in each st (12) Round 3: \* sc twice in next st, sc in next st. Repeat from $^\ast5$ times (18) Round 4: sc in each st (18) Rounds 5-11: Repeat round 4 Fasten off with long tail.
At this point, stuff arms and legs, then attach arms and legs to body.
Nose
With SC, ch 2 Row 1: sc 5 times in 2nd ch from hook (5) $\circledcirc$ 2008 FreshStitches, LLC. All rights reserved. This pattern and items made from this pattern are for personal use only, and may not be distributed or sold without written consent. Fasten off with long tail.
Head
With MC, ch 2 Round 1: sc 6 times in 2nd ch from hook (6) Round 2: sc twice in each st (12)
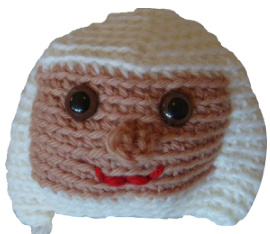
Round 3: \* sc twice in next st, sc in next st. Repeat from $^\ast\,5$ times (18) Round 4: \* sc twice in next st, sc in each of next 2 sts. Repeat from \* 5 times (24) Round 5: \* sc twice in next st, sc in each of next 3 sts. Repeat from \* 5 times (30) Round 6: \* sc twice in next st, sc in each of next 4 sts. Repeat from $^\ast5$ times (36) Round 7: \* sc twice in next st, sc in each of next 5 sts. Repeat from $^\ast5$ times (42) Round 8: \* sc twice in next st, sc in each of next 6 sts. Repeat from $^\ast5$ times (48) Round 9: With SC, sc in each of next 16 sts. With MC, sc 1 in each of next 32 sts (48) Rounds 10-16: repeat round 9 Round 17: With MC, \* ch tog next 2 sts, sc in each of next 6 sts. Repeat from $^\ast5$ times. (42) Round 18: \* ch tog next 2 sts, sc in each of next 5 sts. Repeat from $^\ast5$ times. (36) Round 19: \* ch tog next 2 sts, sc in each of next 4 sts. Repeat from $^\ast5$ times. (30) Fasten off. Fasten eyes onto the head. To do so, insert post between desired stitches, and press washer onto back post to secure. Attach nose to face. Embroider on mouth, as pictured.
At this point, stuff head and attach head to body
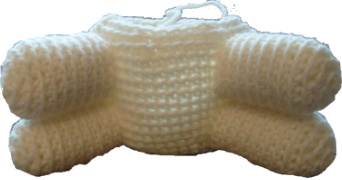
Jet Pack
With AC, ch 10, turn Row 1: sc in each st, starting at 2nd from hook. (9) Row 2: ch 1, turn. sc in each st (9) Rows 3-5: repeat row 2 begin to work in round Round 1: sc in next 5 sts (now turning first corner), sc in next 10 sts (turning first corner), sc in next 4 sts (turning third corner), sc in next 9 sts (28) Round 2: \* sc in fl, sc in next 3 sts, sc in fl, sc in next 9 sts. Repeat from $^*\textbf{1}$ time (28) Rounds 3-9: repeat round 2 end work in round, make top for pack Row 1: ch 1, turn. sc in next 11 sts (12) Rows 2-3: repeat row 1 Fasten off with long tail.
To finish pack, stuff pack with stuffing. Stitch top to body, sealing off pack. Attach jet pack to body on the back of the astronaut.
Congrats! You now have an adorable astronaut!