Turtle Butt
by Melanie Hoffman
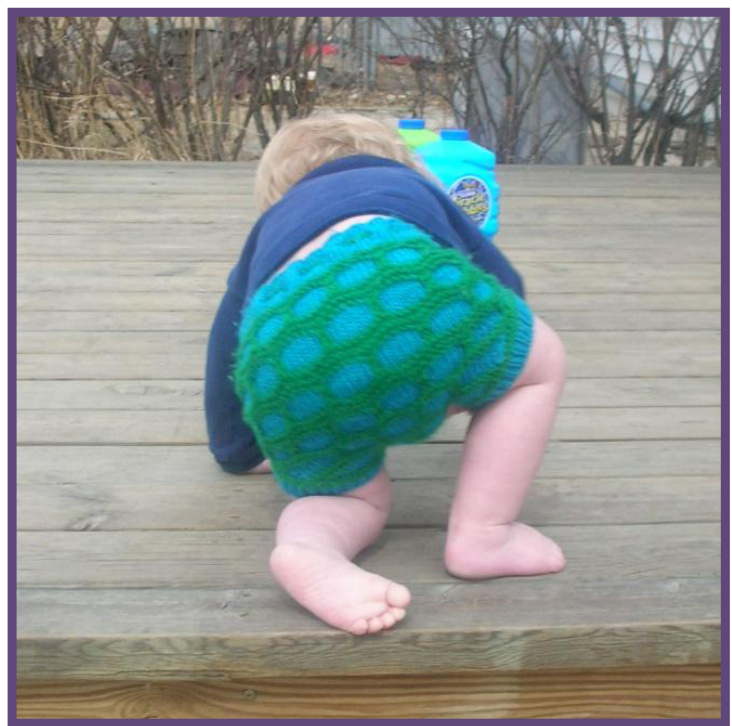
This diaper cover has been designed with cloth diapers in mind, though use with disosibles is just fine. Wool has natural anti-bacterial qualities and when lanolin is added back in, becomes a great waterproof barrer that neutralizes urine.
Materials, special sts and size chart. Waistband and body.. Divide for crotch. Garter Graft. Leghole Openings . Stretchy Bind-Off. Customizing Directions
Materials:
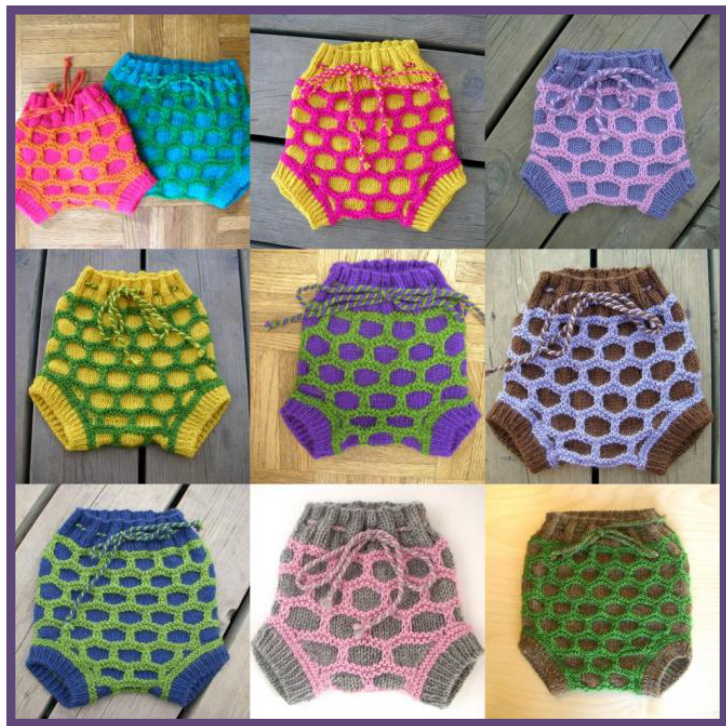
100 gms, 218 yards worsted weight wool, 50 gms of MC (main color or background color) and $50~\mathrm{gms}$ of CC (contrast color or foreground color). Doodlebirds BFL or Nifty wool is recommended htp://www.doodlebirds.com US#6 $(4\mathrm{mm})$ circular needle, $16^{\circ}$ long Set of dpn's US #6 (4 mm) Tapestry needle 2 st markers labeled A and B Gauge: 20 sts per $4^{\circ}$ in stockinette st. Check you gauge!!!
Special Sts:
Short rows: Use whichever method of short rows you prefer, YO method is used in the pattern. My tutorials can be found here http://www.theknittingsiren.com/pages/Tutorials.php Sl: On the right side slip stitches with yarn in the back. On the wrong side slip st with yarn in the front. Keep the yarn loose as you slip the stitches. P2tog tb: purl 2 together throug the backloop. YO:yarn over
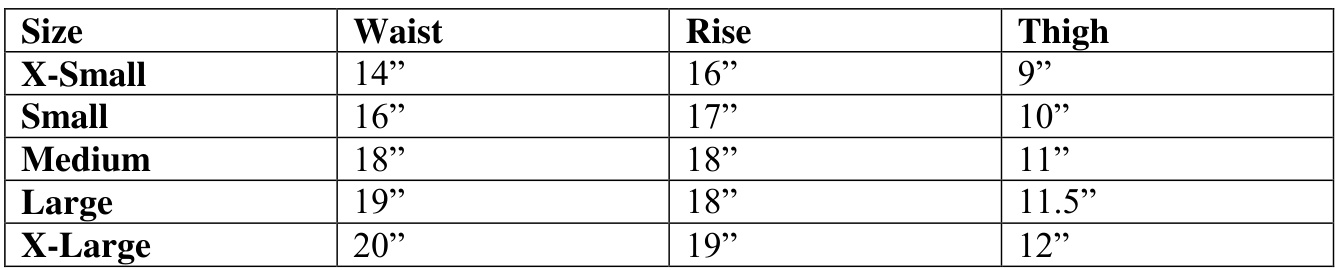
Waistband x-small, (small, medium, large and x-large):
Using smaller needle, with MC, CO 72 (80, 88, 96, 104) loosely. Join in a round being careful not to twist the stitches, place stitch marker A to mark the beginning of the round.
X-Small, Medium and X-Large:
Rnds 1-6: p1, $\ast\mathtt{k}2$ , p2; repeat from \* across, end p1. Rnd 7, eyelet round: P1, $\ast\mathtt{k}2$ yo, p2tog; repeat from \* to last st, yo, slip next st, take off st marker, place slipped stitch back onto left needle, place st marker on right needle, p2tog. Rnds 8-12: Repeat rnd 1.
Waistband small and large:
Rnds 1-6: K1, \*p2, k2; repeat from \* to last st, end k1. Rnd 7, Eyelet round: K1, \*p2tog, k2; repeat from \* to last st, end k1. Rds 8-12: repeat rnd 1.
Body
Switch to larger needle. Rnd 1: With CC, k4 (5, 5, 6, 6), M1, $^{*}\mathrm{k}9$ (10, 11, 12, 13), M1; repeat from \* around to last 5 (5, 6, 6, 7) sts, end k5 (5, 6, 6, 7). Total of 8 increases, 80 (88, 96, 104, 112) sts total. Place st marker B after 40 (44, 48, 52, 56) sts to mark the halfway point. Rnd 2: Purl even. Rnd 3: Knit even. Rnd 4: Purl even. Rnds 5-10: With MC k3 (1,3, 1, 3), \*sl2, k6, repeat from \* around to last 5 (7, 5,7, 5) sts. End sl2, k3 (5,3, 5, 3). Rnds 11: With CC, knit even. Rnd 12: Purl even. Rnd 13: Knit to 1 stitch before the end, turn. Backward YO, slip the first st, knit to 1 st before st marker B, turn. Backward YO, slip first st, knit to first YO, knit YO together with the next st. Rnd 14: Purl to 1 st before second YO, s next st knitwise,p2tog tbl, purl to beginning. Rnds 15-20 (x-small, medium, x-large): With MC, sl 1, k6, \*sl 2, k6; repeat from \* around to last st, sl 1. Rnds 15-20 (small,large): With MC, k5, \*sl 2, k6; repeat from \* around to last 3 sts, end sl 2, k1. Rnds 21-24: Repeat 11-14. Rnds 25-30: Repeat 5-12. X-smallsize only, go to “Divide for leg hole" 3 MC sections and 2 rows of CC ending with rnd 2 as the last round. Rnds 31-40 (smallonly): Repeat 11-20. Go to “Divide for leg hole" 4 MC sections ending with md 20 as the last round. Rnds 31-42 (medium and large): Repeat 11-22. Go to “Divide for leg hole."” 4 MC sections and 2 rows of CC ending with rnd 2 as the last round. Rnds 31-50 (x-large only): Repeat 11-30. Go to Divide for leg hole.' 5 MC sections ending with rnd 10 as the last round. $\copyright$ Adorabubble Knits. This pattrn is for personal use only. Please do not copy and distribute it without permission. If you would like to sell from this pattern, please contact me at melanie $@$ adorabubbleknits.com
Divide for leg holes:
Front: With CC, bind off 4 (4, 4, 5, 5) stitches at the beginning of the next round, knit t marker B, remove marker, turn. Bind off next 4 (4, 4, 5, 5) stitches, knit to end. Remaining in pattern, decrease 1 st on each end, every alternate row until 18 (18, 20, 20, 20) sts remain. End having worked either the last row of a MC section or one of the first 3 rows of a CC section.
With CC, join at the back, knit across, turn.
Knit across WS and turn. Remaining in patern, derease 1 st on each end every alternate row until 18 (18, 20, 20, 20) sts rmain. Work even until the pattern matches up to the front. \*\* see charts for exact row for row instructions.
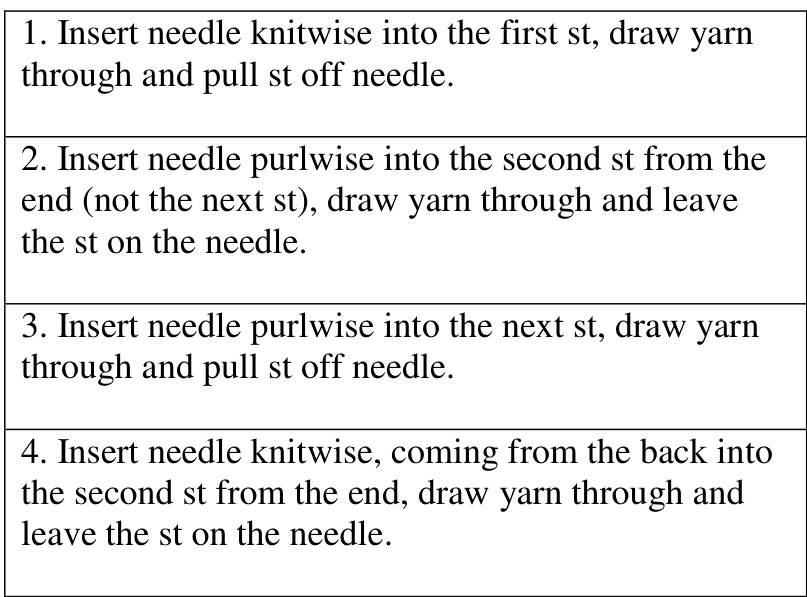
Garter Graft
Video can be found here http://www.theknittingsiren.com/pages/Tutorials.php Cut C yarn, leaving about a $36^{\circ}$ tail. Cut MC,just enough to weave in end. Place held front crotch sts onto a needle. Hold the front and back needles together and graft as follows.
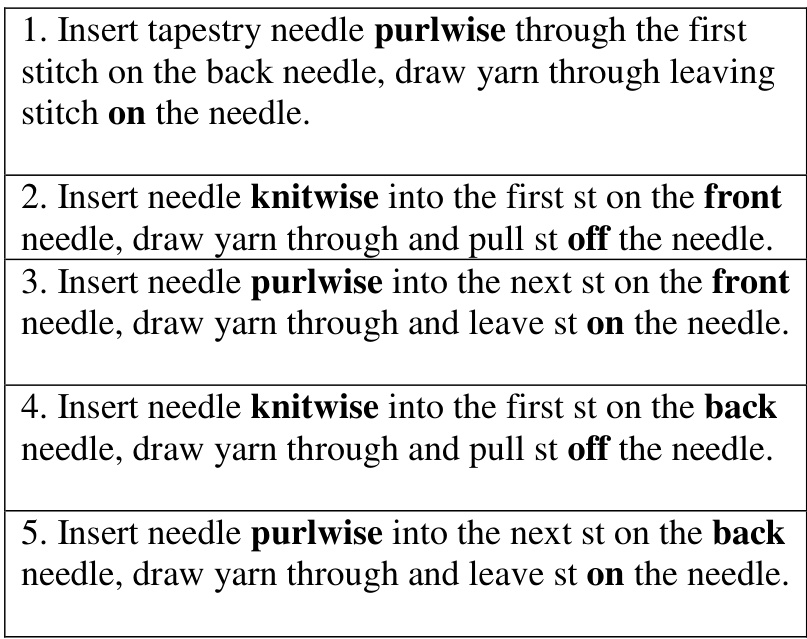
Repeat 2-5 until all the stitches are worked. \*epea taki k aays plin ktise stofft. $\copyright$ Adorabubble Knits. This pattern is for personal use only. Please do not copy and distribute it without permission. If you would like to sell from this pattern, please contact me at melanie $@$ adorabubbleknits.com
Legholes
1. With CC, pick up and knit 46 (50, 56, 58, 60) around the leg hole. An easier way to do this is to place a marker at the haifway point and pick up half the stitches between the beginning and the marker. Pick up the remaining stitches from the marker to the end. 2. Purl around. 3. Knit around 4. Purl around. Cut yarn. 5. With MC, knit around. 6. $^{*}\mathrm{K}1$ , pl tbl; repeat from \* around. 7. Repeat row 6, 5 more times for a total of 7 rows in the MC, or until desired length is reached.
Leg Bind Off:
Video can be found here htp://www.theknittingsiren.com/pages/Tutorials.php. Cut yarn leaving about a $36^{\circ}$ tail.
Repeat 1-4 until all the sts have been worked. Repeat for the second leghole.
Weave in Ends
Now for the real work! You've got close to a million ends to weave in, have fun!
Wavs to Customize Your Sizing
To add more inches to your rise, you can add another set or two of MC patterning. To add just alile bit of rise, make the waistband longer. $\copyright$ Adorabubble Knits. This pattern is for personal use only. Please do not copy and distribute it without permission. If you would like to sell from this paern, please contact me at melanie $@$ adorabubbleknits.com To make the legholes larger, work 6 rows of garter stitch between MC rows instead of 4. It's already this way on the medium, you can do extra rows of garter stitch on the front sections as well for added length. To make legholes smaller, do not work the 6 rows of garter stitch as directed in the charts, just do 4 rows. Or work crotch as directed but pick up less stitches for the leghole hem.
Short Rows: YO method
1. Work to short row placement as directed in the pattern, turn. Wrap yarn around the right needle, slip the first stitch and knit to second short row placement, turn. Wrap yarn around the right needl, slip the first stitch and purl to the beginning of the round $\copyright$ Adorabubble Knits. This pattrn is for personal use only. Please do not copy and distribute it without permission. If you would like to sell from this patterm, please contact me at melanie $@$ adorabubbleknits.com


