bonami
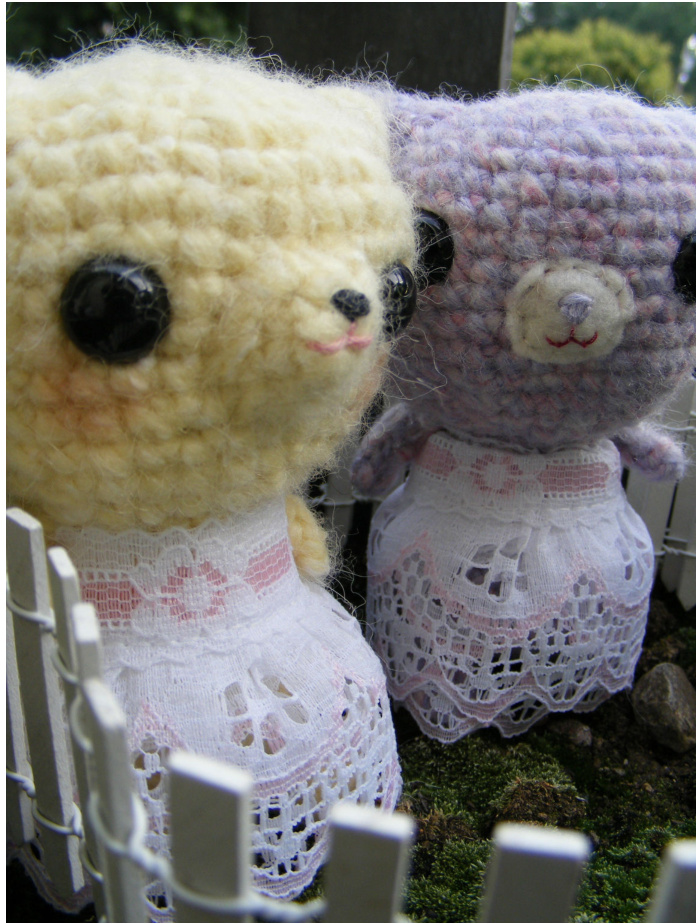
Meow Miss Pattern
Materials Needed:
\* yarn of your choice (preferably worsted weight or thicker. cheap, non-shiny acrylic is best for beginners. I used Jo-Ann Sensations Dolcetto for the purple kitty and Bernat Haven for the white kitty.) \* crochet hook of your choice-my choice is a bamboo hook, size E \* plastic animal eyes (the pictured kitties have 9mm eyes) \* embroidery yarn for the face \* darning needle \* straight pins \* polyil stfing \* felt scraps if you want to make the nose like the purple kity \* stiffspool lace for the dresses \* US Size 5 double pointed knitting needles for the arms and legs

Introduction
Hopefuly, you have basic knowledge of how to make up a simple amigurumi. If not, I vil do my best to keep this simple. If you have any questions or problems, please feel free to email me! the number in parenthesis is the total number of stitches per row. also, there are some visuals to help you out if youre lost and some pro-tips at the end! you can start with the head and work your way down the body parts, or you may find it easier to start with the nose So you can sew it on before you stuff the head. Whatever works for you! abbreviations: ch = chain stitch SC = single crochet stitch inc = increase (2 sc insame stitch) dec = decrease (I sc over two stitches) tbl = through back loops (creates shaping) sl = slip stitch (pull up a loop and through the loop on hook) ☆ = repeat everything enclosed in stars the listed number of times after the star.

Head:
Round 1: Chain 2, 6 sc in second ch from hook Round 2: 2 sc in each sc around (12) Round 3: \*Sc 1, inc. 1\* repeat 5 times (18) Round 4: \*Sc 2, inc. 1\* repeat 5 times (24) Round 5: \*Sc 3, inc. 1\* repeat 5 times (30) Round 6: \*Sc 4, inc. 1\* repeat 5 times (36) Round 7: \*Sc 5, inc. 1\* repeat 5 times (42) Round 8-12: Sc in each sc around (42) Round 13: \*Sc 5, dec. 1\* repeat 5 times (36) Round 14: \*Sc 4, dec. 1\* repeat 5 times (30) Position the eyes and begin stuffing after this row, or the opening wil be too small to work with. Round 15: \*Sc 3, dec. 1\* repeat 5 times (24) Round 16: \*Sc 2, dec. 1\* repeat 5 times (18) Round 17: \*Sc 1, dec. 1\* repeat 5 times (12) Round 18: \*dec every stitch around\* repeat 6 times (6) Finish off and leave a long tail for sewing!
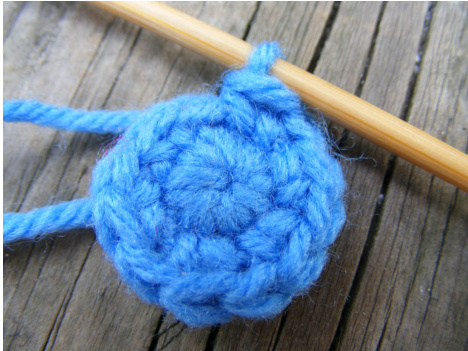
This is what it should look Like after row 2.

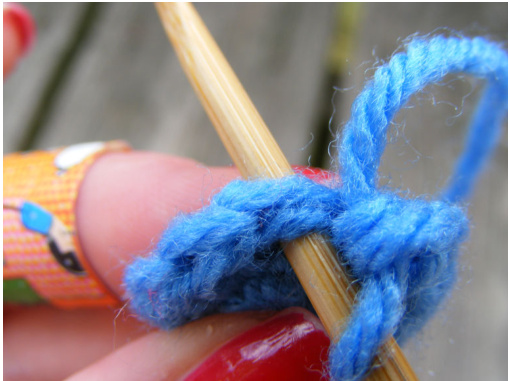
This is where you should insert your hook for a stitch.

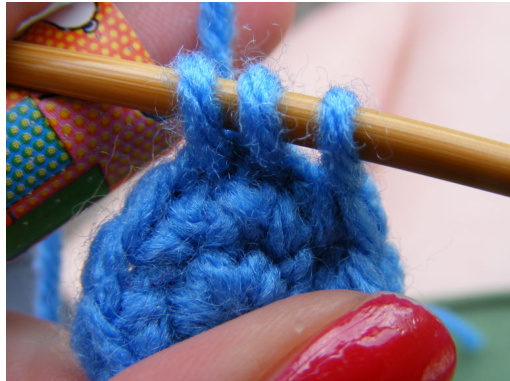
Another view of where to Put your needle. Forgive the band-aid. This shows a decrease. Pull up a loop in the next stitch, then In the one after that and pullthrough all three. Forgive the blinding white legs. Body: Round 1: Chain 2, 6 sc in second ch from hook Round 2: 2 sc in each sc around (12) Round 3: \*Sc 1, inc. 1\* repeat 5 times (18) Round 4: \*Sc 2, inc. 1\* repeat 5 times (24) Round 5-8: 1 sc in each sc around (24) Round 9: \*Sc 2, dec. 1\* repeat 5 times (18) Round 10: 1 sc in each sc around (18) Finish off!
arms: make 2 of them!
We're going to knit these, by knitting i-cord. if you don't know how, here's a very helpful link to a video that can show you how it's done: http://www.knittinghelp.com/videos/knitting-tips Cast on 3 stitches. Knit 3 rows of I-cord. Cast off,leave a long tail for sewing.
legs: make 2 of them.
again ith the -cord. No big deal right? Cast on 5 stitches Knit 5 rows of I-cord Cast off, leave a long tail for sewing.
Nose
Round 1: Chain 2, 4 sc in second ch from hook Round 2: 2 sc in each sc around (8) Round 3: 1 sc in each sc around (8) Finish off, leave a tail for sewing. Stretch it out a bit so it resembles a cone like shape. Embroider a nose and mouth on the nose, or you could cut a circle out of felt and do it that way if you prefer. Then sew your nose on the kitty's head.
Ears: make 2 of them'
Round 1: Chain 2, 4 sc in second ch from hook (4) Round 2: 2 sc in each sc around (8) Round 3: \*Sc 1, inc. 1\* repeat 3 times (12) Round 4: 1 sc in each sc around (12) Finish off leave a long tail for sewing. Stretch out the top into a cone like shape and place on the head and sew them on using the tail
that's all of the body parts!
You're done! Make sure you stuff all the parts to your liking, and use one of the long tails you've left and sew them up! For the head and neck, sew the open sides together. For the legs and arms, your bind off row will be the top that attaches to the body and the cast on will be the hands/feet. More visual aids are on the next page, which are obviously not a kitty and the wacky colors are to make things more visible.


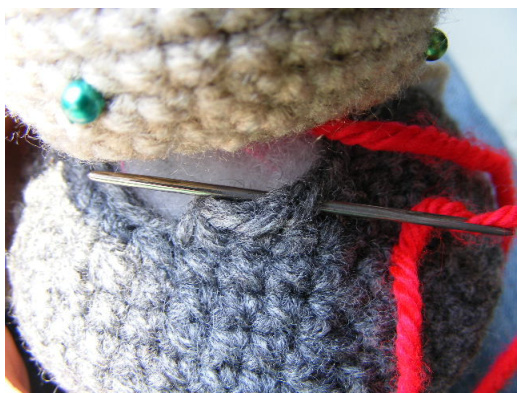
Line up your body parts open ends Together and pin them in place.
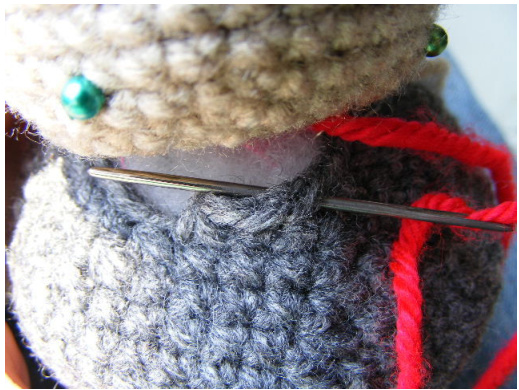
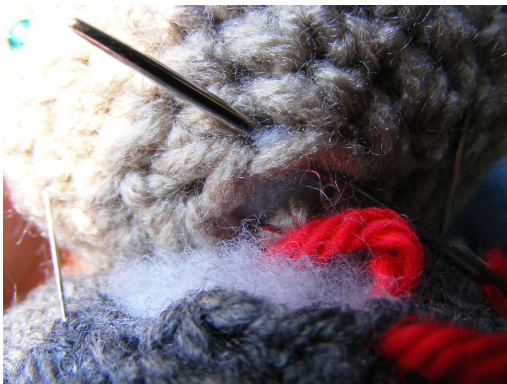
Thread your needle and bring it front toback through both Loops on the neck. Pullit igtly therough.
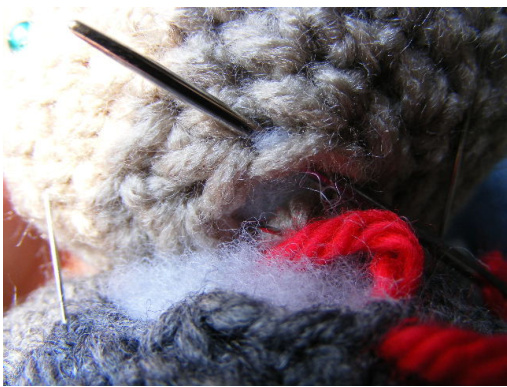
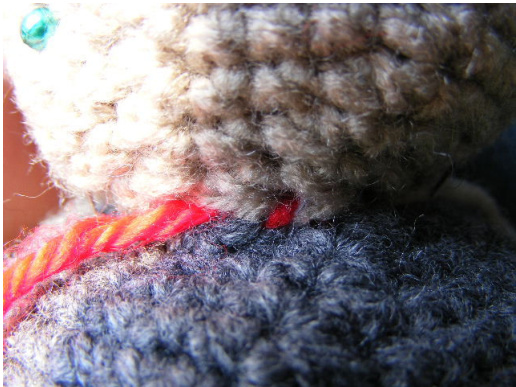
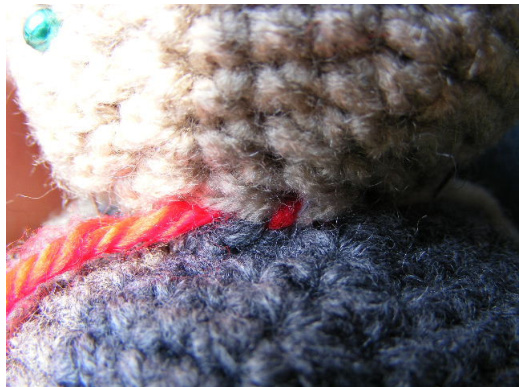
Same thing with the head. Insert needle Back to front through both loops, pull. And there you go! Do that through each Stitch all the way around.
Sewing
Use straight pins to line up the stitches as much as possible. When sewing the head/body seams, make sure that you go through OTHLOOPS on each body part for each stch. Pratitptq a long way, and you wil to if you're just starting out. Face tips: Put eyes in first. Don't put the backs on until you're sure that they're even. Use the eyes to help center the nose and mouth. ry a few different facial expressions if you're not sure. You can pull them out, soit's not the end of the worldi your kitylooks deranged for litle while. _
your kitty needs some clothes!
Hopefully, you have some stiff spool lace on hand. What I used is the really scratchy, stiff cheap-o stuff. This helps your kitty stand. Unroll a bit, and here's the step-by-step: 1. Put the raw edge in the midle of kitty's back. Line it up so it's under her arms and looks pretty. Like a dress! 2. Sew in some anchoring stitches along this raw edge. 3. Wrap the lace around the kitty 3-4 times to make the dress. 4. Cut the lace straight so that the cut edge lies in the middle of kitty's back. 5. Whip stitch the cut edge to the previous layer of lace (that you wrapped around kitty). 6. Make sure that your stitches are tight and you can go back through and sew another line of stitches throughal thelacelayers andpickup someof kity'sback yarn into that too. You can't really see the stitches, so make sure she won't have any wardrobe mishaps.
Other amigurumi
Steer clear of any yarn with a sheen to it. It's not forgiving at al. Cheap acrylic yarn is best for beginners. Throw yourmetalhookaway lt wllcreate more pain for you thanjoy. Gobamboo,Ilove my Clover hook. You'll thank me later. Little Mousey Pattern \* yarn of yourchoice (preferably worsted weight or thicker. cheap, non-shiny acrylic isbest for beginners. I used red heart super saver for my mousey. You won't need much!)
\* crochet hook of your choice-my choice is a bamboo hook, size E \* plastic animal eyes (the pictured mousey has 9mm eyes) \* embroidery yarn for the face \*darning needle \*straight pins \* polyfill stuffing
Introduction
Hopefully, you have basic knowledge of how to make up a simple amigurumi. f not, I will do my best to keep this simple. If you have any questions or problems, please feel free to email me! the number in parenthesis is the total number of stitches per row. Also, there are some visuals to help you out if you're lost and some pro-tips at the end! Do not join between rounds, and I always find it helpful to put a safety pin in to mark the beginning of a row. These patterns are wrtten to start with the chain 2 method, but you can substitute i for the magic loop method. I prefer and only use the magic loop, but I couldn't explain it to save my life. ABBREVIATIONS: ch $=$ chain stitch SC $=$ single crochet stitch inc $=$ increase (2 sc in same stitch) dec $\underline{{\underline{{\mathbf{\delta\pi}}}}}$ decrease (I sc over two stitches) tbl $=$ through back loops (creates shaping) $\mathsf{s l}=$ slip stitch (pull up a loop and through the loop on hook) $^\star=$ repeat everything enclosed in stars the listed numberof times afethe star.
bonami
Head:
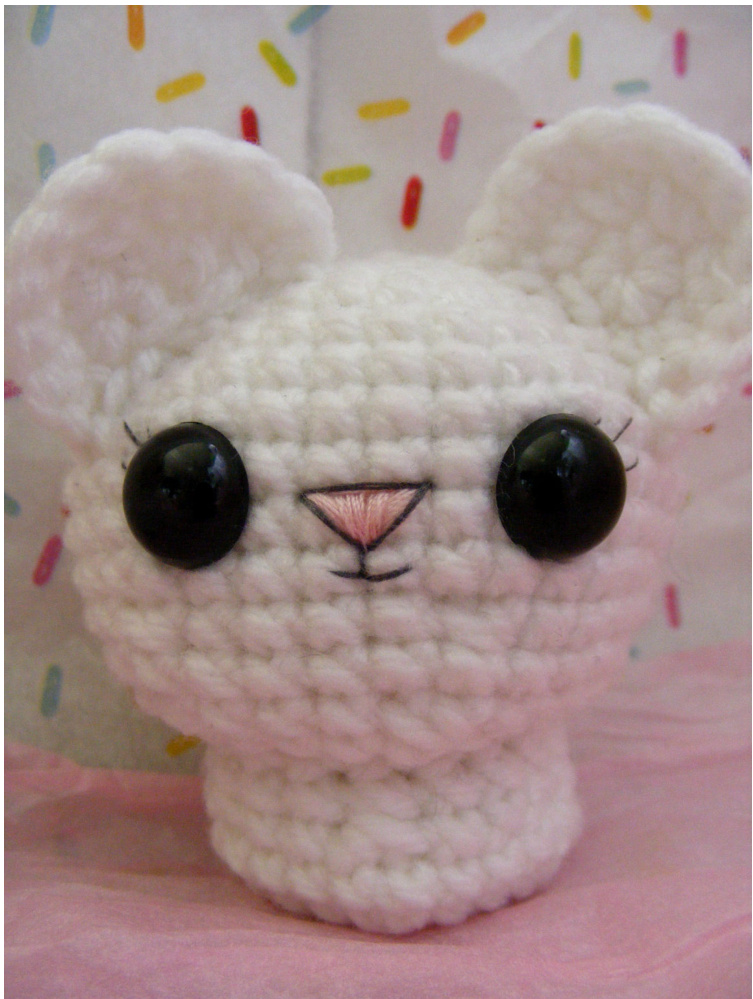
Round 1: Chain 2, 6 sc in second ch from hook Round 2: 2 sc in each sc around (12) Round 3: \*Sc 1, inc. 1\* repeat 5 times (18) Round 4: \*Sc 2, inc. 1\* repeat 5 times (24) Round 5: \*Sc 3, inc. 1\* repeat 5 times (30) Round 6: \*Sc 4, inc. 1\* repeat 5 times (36) Round 7-12: Sc in each sc around (36) Round 13: $^{\star}\mathtt{S c}\,4$ , dec. 1\* repeat 5 times (30) Insert the eyes where you would like them to be placed, but do not put the backs on yet. Instead, sew threelitle eyelashes on each side so the ends will go under the eye. Embroider the face.I sew a triangle for the nose and fill with satin stitches, then Isew a mouth. Put the backs on the eyes. Begin stuffing after this row, or the opening wil be too small to work with. Round 14: Sc in each sc around (30) Round 15: $^{\star}\mathtt{S c}\,3$ , dec. 1\* repeat 5 times (24) Round 16: Sc in each sc around (24) Round 17: \*Sc 2, dec. 1\* repeat 5 times (18) Round 18: \*Sc 1, dec. 1\* repeat 5 times (12) Round 19: \*dec every stitch around\* repeat 6 times (6) Finish off and leave a long tail for sewing!I finish off by threading the yarn through the front loops of each stitch in the last row. In this case, you will have six. Then you pull the thread tight and voila! Nice finish. Of course, this won't work for some cotton and wool yarns. If you're using Red Heart, tug away!
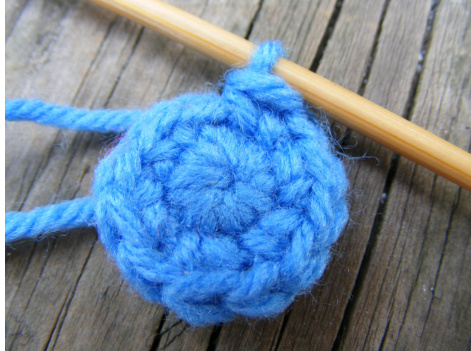
This is what it should look Like after row 2.
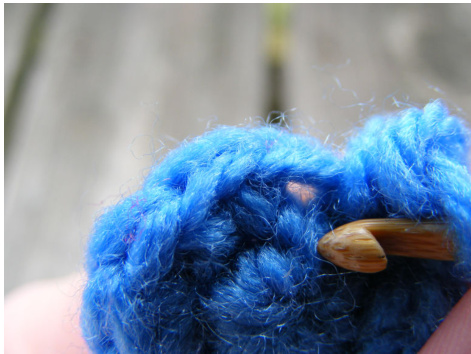
This is where you should insert your hook for a stitch.

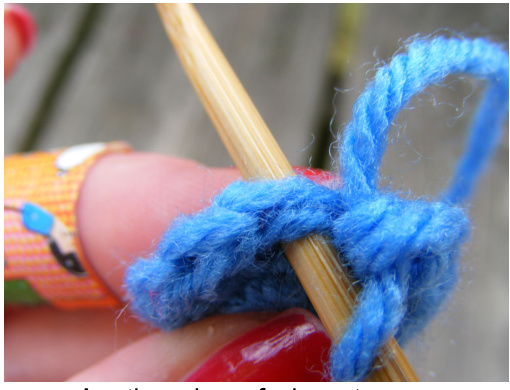
Another view of where to Put your needle. Forgive the band-aid.
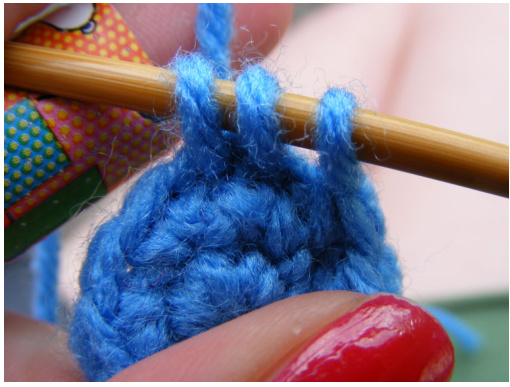
This shows a decrease. Pull up a loop in the next stitch, then In the one after that and pul through all three. Forgive the blinding white legs.
Body:
Round 1: Chain 2, 6 sc in second ch from hook Round 2: 2 sc in each sc around (12) Round 3: \*Sc 1, inc. 1\* repeat 5 times (18) Round 4: $^{\star}\mathtt{S c}\,2$ inc. 1\* repeat times (24) Round 5: 1 sc in each sc around (24) Round 6: $^{\star}\mathtt{S c}\,2$ , dec. 1\* repeat 5 times (18) Finish off. Cut to about 6 inches of yarn. Thread that 6 inches of yarn through your last live stitch. Tuck the yarn down in the body. Stuff!
Ears: make 2 of them!
These wil beworked a litte differentlythan the start of the body and the head.Were going to turn at the end of the row. Round 1: Chain 2, 6 sc in second ch from hook Round 2: 2 sc in NEXT 5 st around (10) ch1, turn Round 3: 1 sc in $2^{\mathsf{n d}}$ sc from hook, 1 sc in next 8 st (9) Finish off the same way as the body was finished.
that's all of the body parts!
You're done! Make sure you stuff all the parts to your liking, and use one of the long tails you've left and sew them up! For the head and neck, sew the open sides together. Place the ears on the head with straight pins to make sure you like it. More visual aids follow, which are obviously not a mousey and the wacky colors are to make things more visible.

Line up your body parts open ends Together and pin them in place.
Thread yourneedle and bring it front toback through both Loops on the neck. Pulli igtly through.
Sewing tips:
Use straight pins to line up the stitches as much as possible. When sewing the head/body seams, make sure that you go through BOTHLOOPS on each body part for each stitch. Practice makes perfect, 've tried pretty much every resource to find the right technique for me. Believe me, I've come a long way, and you will too if you're just starting out. Face tips: Put eyes infirst. Don't put thebacks on until you're sure that theyre even.Use the yes tohelp center th nose andmouth.Tryafewdiferent facialexpressionsif you're not sureYou canpull them out, soits not the nd of the world if your new friend looks deranged fo a litle while. - Thank you for trying my pattern.I've used it a few tmes, butif you have any difficulty, please don't hesitate to email me:
bonamimld@gmail.com
And when you're done with your new friend, please send me a picture of the finished fellow, I love to see other people's spin on my patterns! Meissa Lynn bonami.etsy.com And of course, allproducts made frm this patten are forpersonaluse and notfor salhe patte shall not be reproduced and/or distributed without permission of the author. $@2008$ MelissaDawson


