Materials: Yarn: Light Gray and blue are you main colors. Small amount of dark gray, black and red. Crochet Hook G (4.mm) or size needed to obtain gauge. Abbreviations: Beg: Beginning hdc=half double crochet Ch=chain Sl st=slip stitch Rem=remaining Fo= Finish Off Rep=Repeat Slst=Slip Stitch St=stitch(es) Ch2 at start of row counts as the first hdc. With blue 1. Ch 2 8hdc in second ch, join with slst. Ch 2 turn (8) 2. 2 hdc each st around join with slst. Ch2 turn (16) 3. Ch2, 1 hdc 2hdc around join with slst. Ch2 turn (24) 4. Ch2, 2hdc next 2 st, 2hdc in next st around join with slst (32) Switch to light gray 5. Ch2 hdc in next 3, 2hdc repeat around join with a slst (40) Switch to blue 6. 4hdc 2hdc hdc join with a slst(48) 7. 5hdc 2hdc join with a slst(56)hdc 8. 6hdc 2hdcjoin with a slst(64hdc) 9. 7hdc 2hdc join with a slst(72hdc) If you would like a larger hat. Change to gray in row 10 but continue increasing for 2 more rows 10. 8 hdc 2hdc around join with slst.(80hdc) 11. 9hdc 2hdc aound join with slst.(88hdc) Change to Gray 10-19 hdc around join with slst (72hdc) 12-19 hdc around join with slst (88hdc) Change to blue 20-21 Ch2 hdc around join with slst (72/88hdc) Change to gray 22-23 ch 2 fphdc next st. bphdc next st repeat pattern around. At end of 23 finish off leaving a tail to weave in.(72/88hdc)
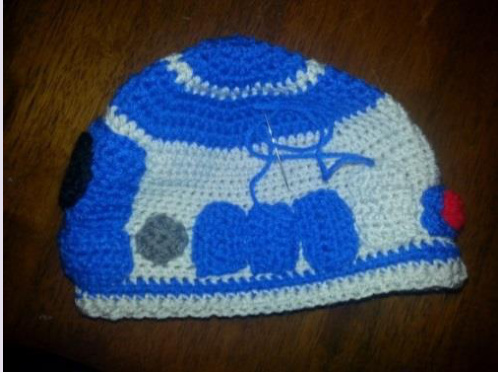
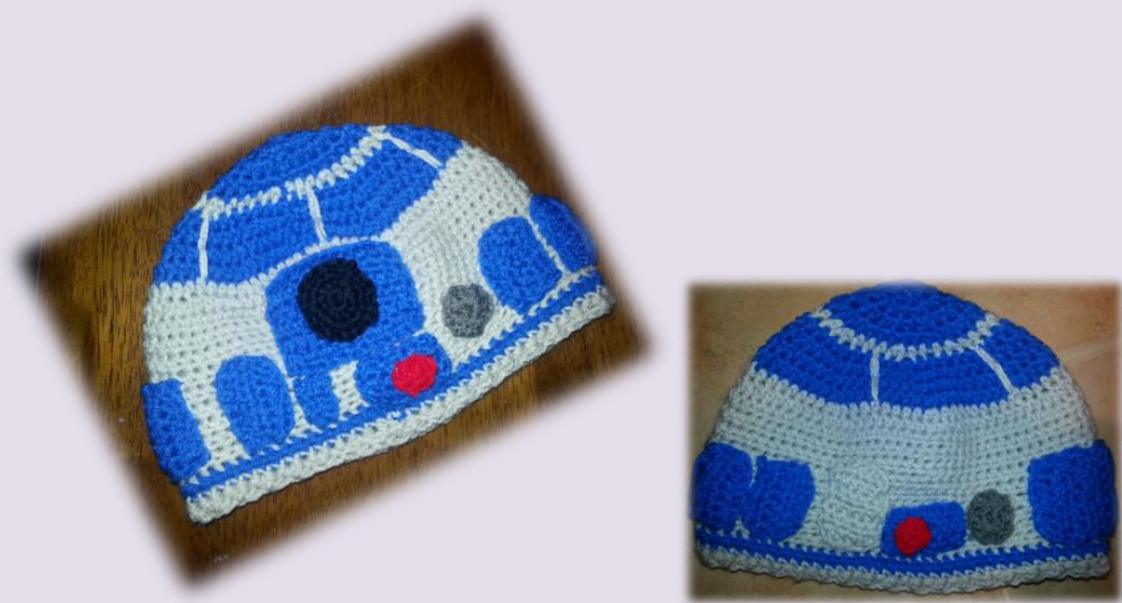
Patches Look at pictures for placement of patches around hat. You are welcome to use as many or as few as you would like. The hat has an overall R2D2 effect with only a few patches sewn on. There will be embroidery also if you want to get into super detail here is your chance. Otherwise a small line on top to divide the blue into 6 equal sections will be all that is necessary. With Blue Patch A) Make 6 1. ch8 turn 2-3 hdc in 2nd st from hook. Hdc across ch2 turn (7hdc) 4 Hdc across FO leaving a tail to sew patch on. (7hdc) Patch B Make 1 1. Ch7turn 2. Hdc in 2nd st hdc across FO leaving a tail to sew on hat. (6hdc) Patch C Make 1 1.Ch13 2-6 ch2 turn hdc across (12hdc). Ch2 turn hdc across (12hdc) F0 leaving a long tail to sew on hat Patch D Make 1 1.Ch8 2-11 Ch2 turn hdc across (7hdc) 12 Hdc across FO leaving a long tail to sew to hat.(7hdc) Patch E Make 1 1. Ch8 2-5 Hdc across ch2 turn (7 hdc) 6 Hdc across (7hdc) finish off leaving a long tail to sew to hat Black Make 1 Patch F 1 Ch2 12 hcd in 2nd ch from hook join with a slst 2 Ch2 hdc in same st. 2hdc in each st around join with a slst. (24 hdc) FO and leave a long tail to sew to hat Dark Gray Make 1 Patch G 1 Ch2 12hdc in 2nd ch from hook join and F0 leaving a long tail to sew on hat(12hdc) Red Patch H Make 2 1 Ch 2 12 sc in 2nd ch from hook join with slst F0 and leave a long tail to sew to hat. (12sc) You can sew patches on in any order. But the order listed below seems to work best for me and I have pictures for each one. Since ever persons crochet varies slightly I do not use a row count to sew on patches. I use the picture guide to apply them. Patch C Patch F Patch A Patch B Patch A Patch A Patch G Patch A Patch H Patch A Patch A Patch H Now take some pins and along top between row 5 and row 10 center the front over to of circle patch and pin in a straight line (once again refer to picture) now count on row 5 mark every 6 st around On row 10 mark every 14 st. Take some light gray and embroider a straight line! Done!
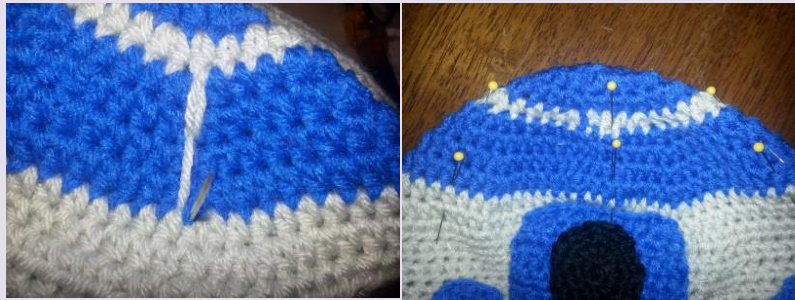
Patch Placement:


