Need clarification? Find an error? Please contact me (Jesse) through Etsy or by email: temple_ scribe@yahoo.ca.
He Prain Pillx
A Jolly Plum original design by Jesse Hampton
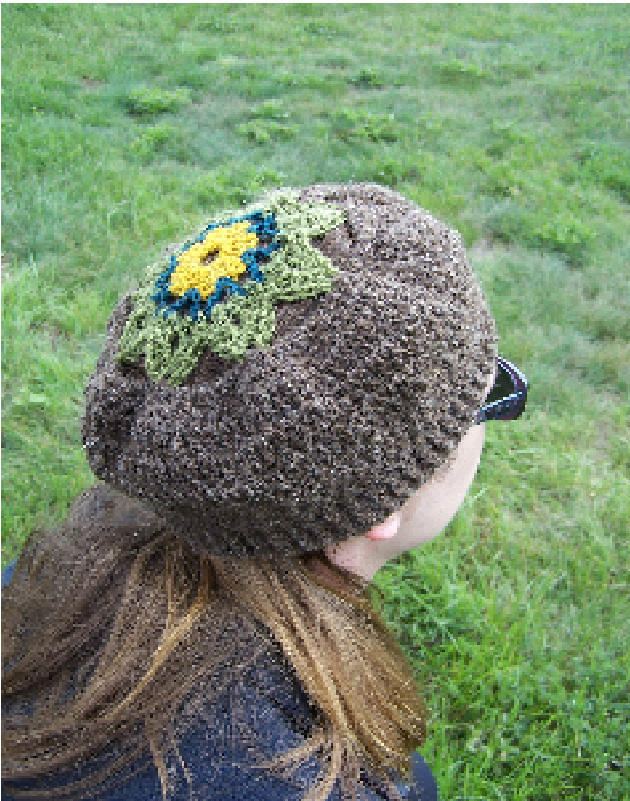
This adorable hat features rustic styling and an open, airy, lacy blossom on the crown. It works up in under two hours; make one tonight and wear it tomorrow! Its versatility makes it wearable year-round. This hat looks amazing in natural, hand-spun and hand-dyed fibres. The colour combos are virtually limitless.
Skill level: advanced beginner Size: average woman's head $(22-23^{\prime\prime})$ Gauge: none; the hat is meant to fit somewhat loosely, but would look fine if it fits somewhat snugly as well. To ensure that it is not too large, do not crochet too loosely. Stitches used: slip stitch, chain, single crochet, half-double crochet, double crochet, half-double crochet together (decrease)\*, front post double crochet\*, reverse single crochet\* (\*see Useful Links at the end of the pattern)
Materials needed :
1 skein light worsted weight yarn in main colour (mc) small amount of each colour for crown \*\* both hats pictured in this pattern were created with 100 per cent handspun, hand dyed/painted wool, which gives them a natural, rustic iook that suits the hat's style. You are free to crochet the crown in contrasting colours, one solid colour, or to crochet the entire hat in one colour - all would create unique and beautiful looks. 6mm crochet hook 8mm crochet hook yarn needle for weaving in ends
Directions
Crown
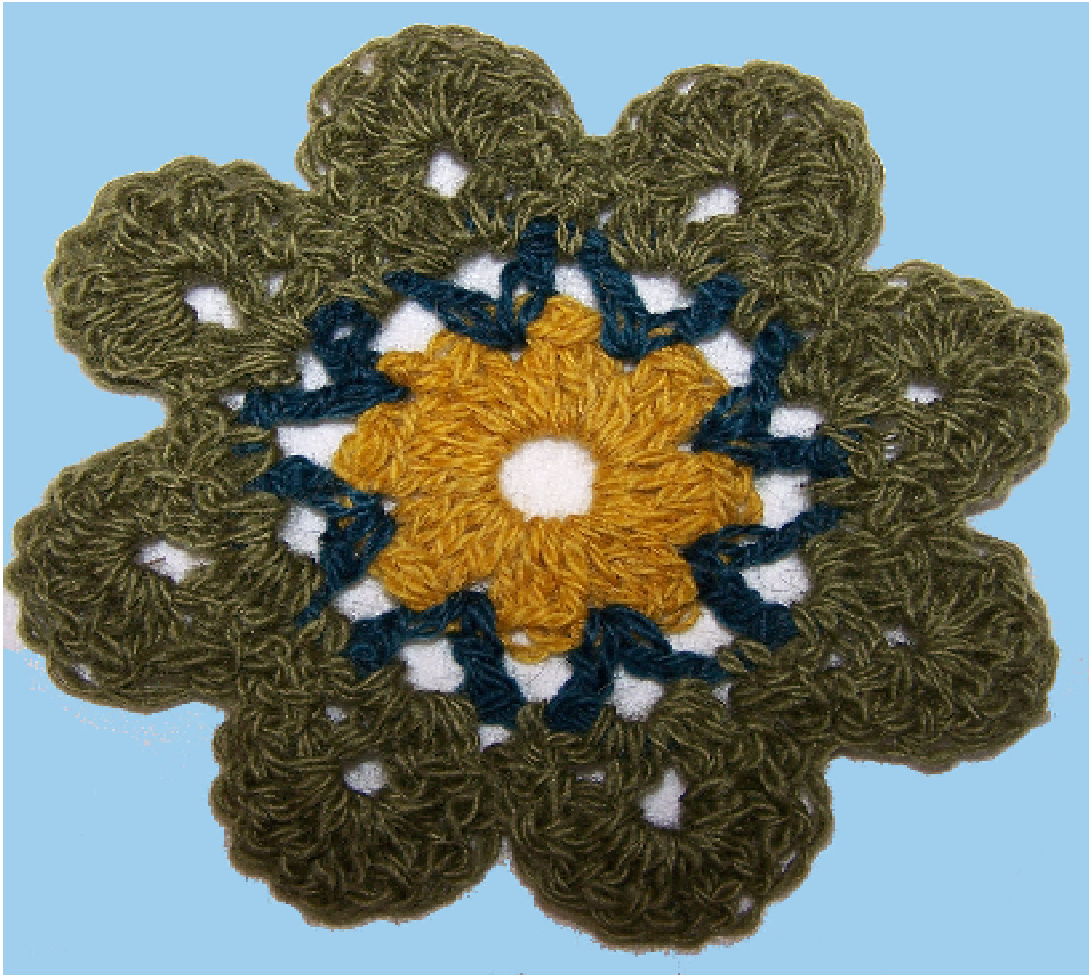
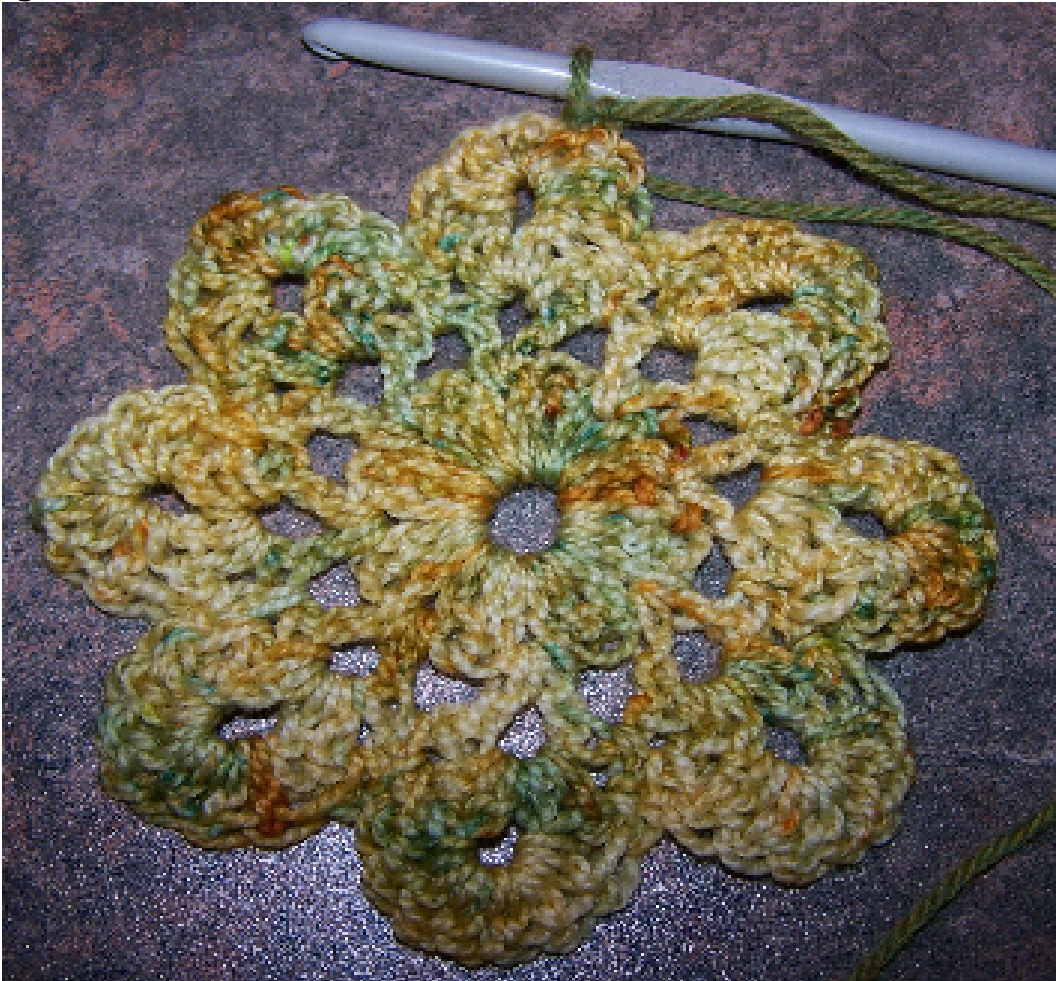
With 6mm hook, ch 6; sl st to first chain to make a ring. Ch 2; work 23 dc into ring. Sl st to $2^{\mathsf{n d}}$ ch at beg. Break off and change colour if you wish. Ch 4; work 1 dc into the same st as the sl st, ch 1. \* skip 2 sts; in the next st work 1 dc, ch 2, 1 dc; ch $_{1}*$ (7 times). SI st to $2^{n d}$ chain at beg. Ch 2; in remaining ch-2 sp at beg of preceding round work: 1 dc, ch 2, 2 dc; 1 sc in ch space which separate the 2 dc. \* In ch-2 sp work: 2 dc, ch 2, 2 dc; 1 sc in ch space \* (7 times). Sl st to $2^{n d}$ ch. Break off and change colour if you wish. In ch-2 space of preceding round work: 3 dc, ch 1, 3 dc; 1 sc in each side of the SC $^*$ (8 times). Break yarn, fasten off and weave in ends.
Start the hat: Your crown will look slightly different on either side. It doesn't really matter on which side you choose to join your yarn; however, the "pebbly" side looks best facing out. In the image below, the yarn is joined with the "pebbly" side facing the crocheter; this will ensure that when the hat is complete, the "pebbly" side will be facing out.
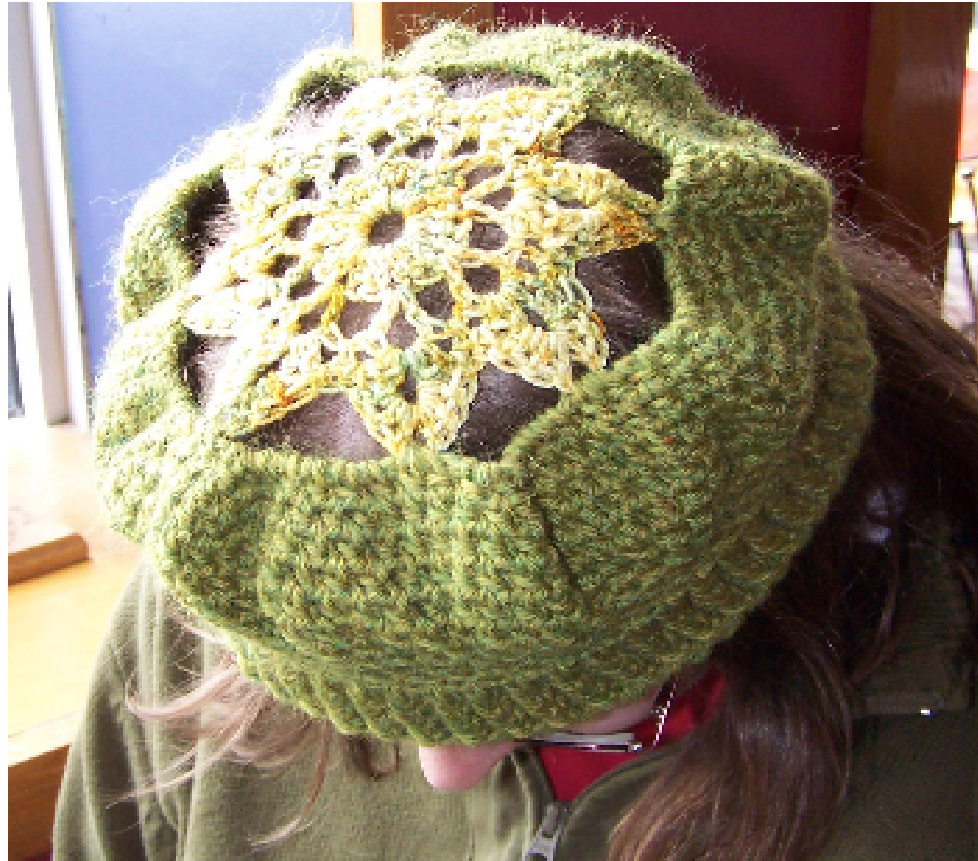
Row 1: Join your mc in any ch-1 sp at the tip of a petal. Ch 8, sl st in the ch-1 sp at the tip of the next petal 7 times. Join at the same ch-1 space at the beginning of the round. Row 2: Ch 2; 1 hdc in same sp. 7 hdc in the large loop created by the ch-8 from the previous round. 2 hdc in the ch-1 sp at the tip of the next petal. Continue around and join to the $2^{\mathsf{n d}}$ ch of the ch-2 at beg of round. You should have 72 sts when you finish this round. Row 3: Ch 2. Work around: 4 hdc, 2 hdc in next st. Join. You should have 84 sts when you finish this round. Row 4-7: Change to 8mm hook. Ch 2; hdc around and join to $2^{\mathsf{n d}}$ ch at beg of round. Row 8: Switch back to 6mm hook. Ch 2; hdc around and join to $2^{n d}$ ch at beg of round. Row 9: Ch 2. 3 hdc, hdc2tog. Continue around and hdc in the last 5 sts of the round. Join. You should end up with 69 sts. Row 10: Ch 2. Hdc around and join to $2^{\mathsf{n d}}$ ch at beg of round. Row 11: Ch 2. 3 hdc, hdc2tog. Continue around and hdc in last 4 sts of the round. Join. You should end up with 56 sts. Row 12: Ch 2. Hdc around and join to $2^{\mathsf{n d}}$ ch at beg of round. Row 13: Switch back to 8mm hook. Ch 3 and dc around. Join to $3^{\mathsf{r d}}$ ch at beg of round. Row 14-16: Ch 3. Fpdc around. Skip very last fpdc to ensure the "rib" pattern created by the fpdc stitch; join to $3^{\mathsf{r d}}$ ch at beg of round. Row 17: Ch 1. Reverse sc around and sl st to ch 1. Turn the hat inside out. Weave in ends.
Useful links
Reverse single crochet can be kind of a tricky stitch. Here's a helpful video: http://www.youtube.com/watch?v $=$ jhSbycwfpdo Here's a video for front post double crochet (the handy ribbing stitch): http://www.youtube.com/watch?v $=$ 6L1ZqACH5Uc This site has an excellent collection of crochet tutorial videos, including this one on doing a hdc decrease: http://www.nexstitch.com/v half double crochet dec.html


