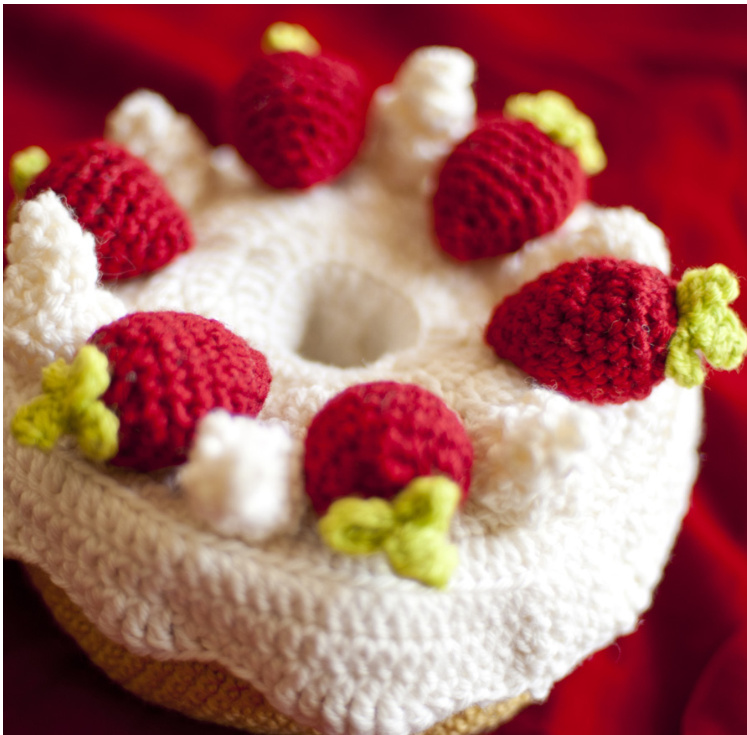
Angel Food Cake
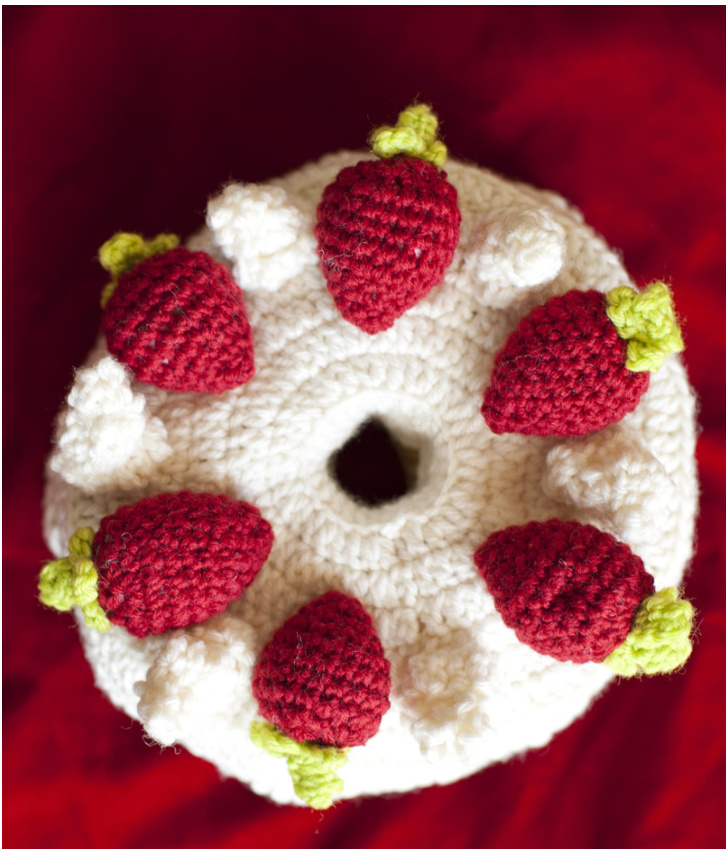
A close friend - due to a myriad of allergies and intolerances - can't eat cake. But it was her birthday, and not having a cake just WOULDN'T do! So I made her one. And lo! It looks tasty and if you like you can fllit with NON food treats :D Versatility in yarn baking, complete with strawberries on top! Skill Level: Intermediate Finished Measurements: approximately 10cm/4" tall by a 56cm/22" circumference, dependant on guage Tools&Materials: 4 x DK/Worsted weight yarn: Colour A: Beige (120m/130yds) Colour B: White (120m/130yds) Colour C: Red (120m/130yds) Colour D: Green (18m/20yds) 4.0mm Crochet Hook Tapestry Needle Optional Tools & Materials: 1 stitch marker Fibrefill/Pellets for plush toy Starch Spray for container Gauge: is not important as long as it is consistent and makes for a dense fabric Pattern is written in US crochet terms Unless otherwise stated, pattern is worked in the round. All sts in foundation chains should be worked through the back bump/butt. Where possible, ends should be worked in as you go to minimise on weaving in.
Abbreviations:
ch: chain sl st: slip stitch sc: single crochet dc: double crochet tr: treble crochet dtr: double treble crochet triptr: triple treble crochet quadtr: quadruple treble crochet quinttr: quintuple treble crochet fsc: foundation single crochet fdc: foundation double crochet Instructions: Base: Make 1. In Colour A: Chain 24. Join in the round, ch1. 1. sc injoined stitch, and in next 2sts, 2sc in next st. (sc in next 3 st, 2sc in next st) in rest of stitches around (30) Keep working in the round, if using optional stitch marker place in last stitch worked and keep moving at end of each round unless otherwise stated.
2. (sc in next 4 st, 2sc in next st) around (36) 3. (sc in next 5 st, 2sc in next st) around (42) 4. (sc in next 6 st, 2sc in next st) around (48) 5. (sc in next 7 st, 2sc in next st) around (54) 6. (sc in next 8 st, 2sc in next st) around (60) 7. (sc in next 9 st, 2sc in next st) around (66) 8. (sc in next 10 st, 2sc in next st) around (72) 9. (sc in next 11 st, 2sc in next st) around (78) 10. (sc in next 12 st, 2sc in next st) around (84) 11. (sc in next 13 st, 2sc in next st) around (90) 12. (sc in next 14 st, 2sc in next st) around (96) 13. sc in each stitch around through back loops only (96) 14. - 25. sc in each stitch around (96) 26. sc in each stitch to end, remove marker, and sl st in next three sts. Bind off (96 +3)
Angel Food Cake
Attach yarn at any point to the inside hole through a back loop ('top' loop when looking down into the donut-shape of the base) of the foundation chain. ch1 1. sc in joined stitch and in each st around through the back loops (24) Keep working in the round, if using optional stitch marker place in last stitch worked and keep moving at end of each round unless otherwisestated. 2. - 13. sc in each stitch around (24) 14. sc in each stitch around, remove marker and sl st in next three sts. Bind off (24+3) Weave in ends.
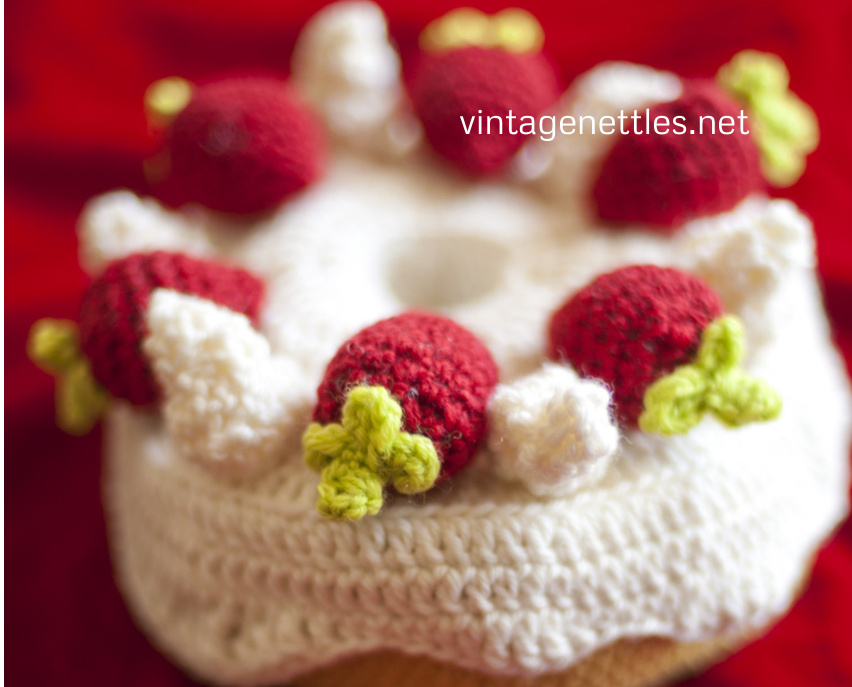
Icing: Make 1. For Icing, instance of ch 3 do not count as a dc In Colour B: Chain 24. Join in the round, ch3 1. (dc, 2dc in next st) around, sl st in top of 3rd chain, chain 3 (36) Keep working in the round, if using optional stitch marker place in 3rd chain worked and keep moving at end of each round unless otherwise stated. 2. (dc in next 2 sts, 2dc in next st) around, sl st in top of 3rd chain, chain 3 (48) 3. (dc in next 3 sts, 2dc in next st) around, sl st in top of 3rd chain, chain 3 (60) 4. (dc in next 4 sts, 2dc in next st) around, sl st in top of 3rd chain, chain 3 (72) 5. (dc in next 5 sts, 2dc in next st) around, sl st in top of 3rd chain, chain 3 (84) 6. (dc in next 6 sts, 2dc in next st) around, sl st in top of 3rd chain, chain 3 (96) 7. dc in each st around through the back loops only, sl st in top of 3rd chain, chain 3 (96) 8. dc in each st around, sl st in top of 3rd chain, ch 3 (96) 9. dc in next two stitches, tr, dtr, triptr in next two stitches, dtr, dc in next two stitches, hdc, sc in next three sts, hdc, dc in next four sts, hdc in next 2, sc in next 2, hdc in next 2, dc, tr in next 2, dtr, triptr in next 5, dtr, tr, dc, hdc in next 3, dc, tr, dtr in next 2, tr, dc, hdc, sc in next 3, hdc in next 3, dc in next 2, tr in nxt 2, dtr in next 2, triptr in next 2, quadtr in next 2, quinttr in next 2, quadtr, triptr, dtr, tr, dc, hdc, sc in next 3, hdc, dc in next 4, tr, dc in next 2, hdc, sc in next 2, hdc, dc in next 2, tr, dtr, tr, dc, hdc in next 2, dc in last 2, sl st in 3rd ch. (96) Bind off. Attach yarn at any point to the inside hole through a back loop ('top' loop when looking down into the donut-shape of the base) of the foundation chain. ch3 1. dc in each st around through the back loops only, sl st in top of 3rd chain, ch3 (24) 2. - 3. dc in each st around, sl st in top of 3rd chain, ch3 (24) Bind off, weave in ends. Cream Coils: Make 6. In Colour B: Fdc 25, bind off leaving a long tail to stitch coils to icing. Coil up and stitch each fdc piece into a spiral minaret and stitch each down at six equidistant positions around the icing portion of the cake.
Angel Food Cake
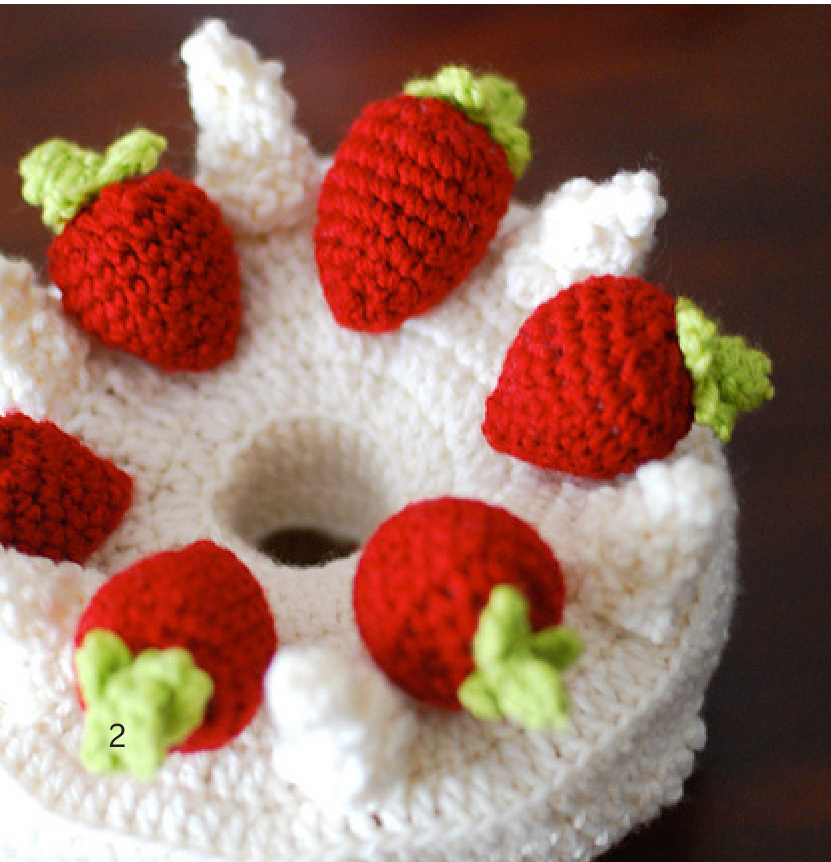
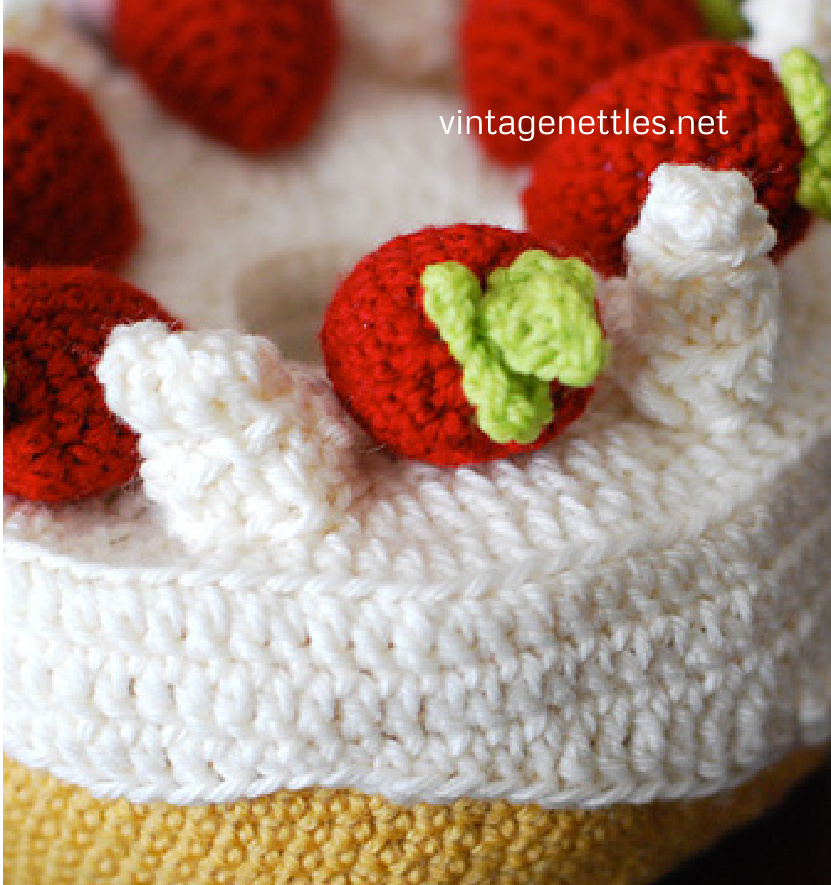
Strawberries: Make 6. Strawberry Fruit: In Colour C: Make magic circle, sc 6 into circle. 1. sc in each st around (6) 2. 2sc in each st around (12) 3. sc in each st around (12) 4. (sc in next st, 2sc in next stitch) around (18) 5. - 9. sc in each st around (18) 10. (sc, sc2tog) around (12) Stuff 11. sc2tog around (6) Bind off with tail long enough to close up hole. Weave in ends.
Strawberry Stalk:
In Colour D: Chain 6, sl st in first ch worked, chain 6, sl st back in previously sl stitched ch, chain 6, sl st back into first sl stitched ch. Fsc three. Bind off with long tail. Use tail to sew stalk and leaves onto strawberry. Weave in ends. Using yarn used for icing, stitch strawberries to icing piece.
How to make your own Starch Spray: Starch Spray is useful for stiffening collars on shirts when ironing, and for crisp lines for pleats. Tools & Materials: 1 spray/squirty bottle (with a mist setting) 400ml/16floz cold water 3tblspoons of cornflour (corn stach in the USA) Instructions: Pour the water into the bottle and add the cornflour. Stir until all of the cornflour is dissolved. Before spraying, shake the bottle liberally. Assembly: There are several options for assembling this cake, dependant on what you'd like to do with the finished object. The main two recommended methods are as follows:
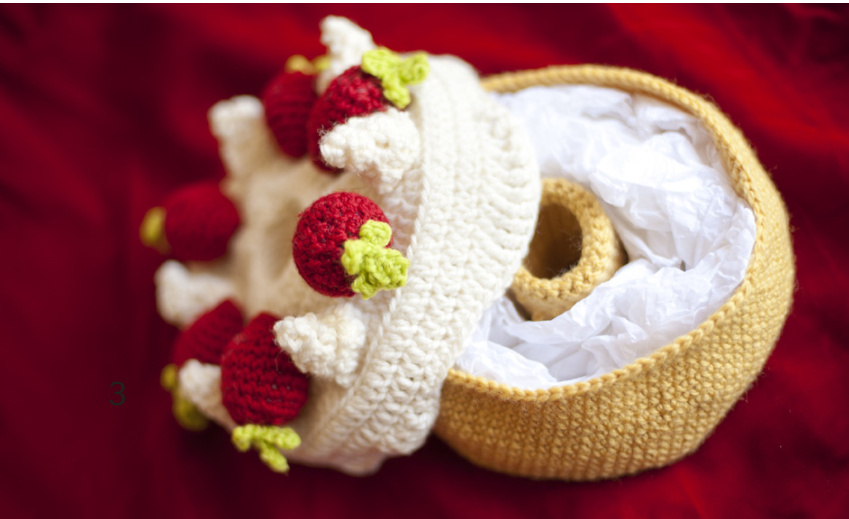
Openable Cake 'Box':
Concentrating on the base only, if your fabric is dense enough you may manipulate its shape to being as straight as you can, and then coat the base with many liberal applications of starch spray - allowing for drying time in between. For best and fastest results on this project, place cake base in the sun in between applications. When the fabric is stiffened to a point where it holds its shape securely on its own, you're done! To help with the shaping, you may like to make some simple shape-forms from taped sheets of flexible PVC (available from most craft stores), or even with taped flexible plastic cutting boards. Curl one/two sheets into the inside of the outer cylinder of the base, taping them so that the shape is stretched out firmly. And do the same with one curled up sheet on the inside of the middle cylinder. You may find you don't need to tape the inside as the force of the PVC attempting to uncurl will be enough. Stretch the sides up the sheets till flat and liberally apply the starch spray as described.
Angel Food Cake
Alternatively, you may choose to soak the base of the cake in a similar home-made or storebought starch solution. With this method you should submerge the base completely, ensuring 100% saturation, shape it and then allow to dry. Other alternative stiffening solutions include 'painting' the interior of the cake with child-safe PVA or white woodworking glue. Dipping the project in glue and shaping it as with the soakingstarch method should also work but bear in mind it may be a much messier option! ;)
Plush Toy Cake:
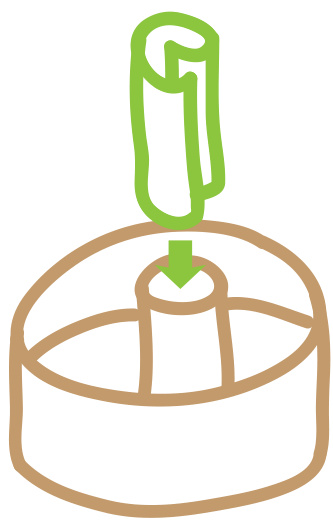
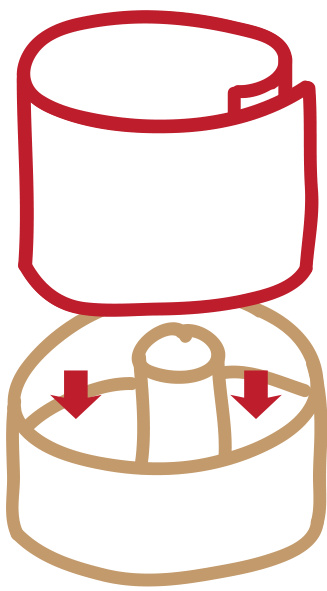
To make the cake a solid toy, first flip the Icing portion inside out and using Colour B, sew the inside'corner' edge of the middle column securely to the bind off edge of the middle column on the base. Stuff the base with Fibrefill/Pellets (ensuring that the pellets are secured in a bag or stocking etc). Please don't replicate/reprint this pattern, nor claim it as your own. Rather, link back to vintagenettles.net, or to the ravelry pattern download page. Thankyou! You may like to also use this opportunity to put some bells or other child-safe noisemaking devices into the cake - remembering that due to the smaller parts this plush is definitely recommended only for those children aged 3 and up. Now, still with Colour B, sew the inside corner edge of the outer side of the icing securely to the bind off edge of the outer wall of the base. Fold the icing 'flaps' back down and voila! Optionally, you may also prefer to secure the 'poured' bind off edge of the icing to the base at this time by stitching it down with Colour B.
Your choice of yarn colours can GREATLY modify the look and type of cake you make. Substitute a rich dark brown for beige and instantly this cake becomes a delicious chocolate cake. Choose instead a rich red for the base and you've created a delicious red velvet cake. Choose a variegated yarn in beiges, browns and oranges for the base, and use an orange yarn for the strawberries and voila! You've a carrot cake with cute decorative carrots on top. Crocheting fruit slices instead of - or in addition to - the strawberries can also change the look and type of cake you make. Simple lemon or lime slices can be worked in the following manner: In a light yellow/green yarn: make magic circle, work sc 6 into circle. 1. sc in each st around (6) 2. 2sc in each st around (12) 3. sc in each st around (12) 4. (sc in next st, 2sc in next stitch) around (18) 5. (sc in next st, 3sc in next stitch) around (24) 6. (sc in next st, 4sc in next stitch) around (30) Change to a darker/more saturated yellow/green 7. (sc in next st, 5sc in next stitch) around (36) Fold in half and slip stitch edges together. Using white yarn, embroider lemon/lime segments and seeds onto the half-moon shape. For Kiwi Fruit: Use white for rounds 1 & 2, green until the end of row 7, then brown for the slip stitches. Embroider on tiny black seeds to complete the kiwi fruit pieces.
Angel Food Cake
Stitch How-Tos:
This pattern includes many multiple-wrap stitches and three types of foundations stitches. The following are some basic instructions for how to accomplish some of the more unusual ones. If in doubt, the internet - youtube especially - is a really helpful tool with learning how to work a stitch you've not encountered before. dtr: Wrap yarn around hook three times and insert hook into next stitch. yarn over and draw back through. (5 loops on hook). Yarn over and draw through two loops four times. triptr: Wrap yarn around hook four times and insert hook into next stitch. yarn over and draw back through. (6 loops on hook). Yarn over and draw through two loops five times. quadtr: Wrap yarn around hook five times and insert hook into next stitch. yarn over and draw back through. (7 loops on hook). Yarn over and draw through two loops six times.
quinttr:
Wrap yarn around hook six times and insert hook into next stitch. yarn over and draw back through. (8 loops on hook). Yarn over and draw through two loops seven times. fsc: With slipknot on hook, chain 2, insert hook in 2nd chain from hook, yarn over and draw back through (2 loops on hook). Yarn over, draw through 1 loop (forms the “chain"). Yarn over and draw through 2 loops (forms the single crochet). \*Insert hook under 2 loops of the “chain" of last st, yarn over and draw back through (2 loops on hook). Yarn over and draw through 1 loop, yarn over and draw through 2 loops.\* Repeat from \* for the length of the foundation. fdc: Chain 3. Yarn over, insert hook in 3rd chain from hook, yarn over and draw back through (3 loops on hook). Yarn over and draw through 1 loop (forms 1 chain), [yarn over and draw through 2 loops] 2 times (forms the double crochet). \*Yarn over, insert hook under 2 loops of the "chain" at bottom of last st, yarn over and draw back through (3 loops on hook). Yarn over and draw through 1 loop, [yarn over and draw through 2 loops] 2 times.\* Repeat from \* for the length of the foundation.
Thanks so much to my pattern testers: Yadvi, n8kpl, hazelly, lhmkc, ylchewserena, Eleisaga, TellyCHC & lampi, for doing such great work, for all your suggestions and assisting in making this pattern so complete! Thanks to Gianna of GPix for fabulous additional photography and for being SO excited about receiving the cake in the first place. If you would like to make and sell finished products made from this pattern, please contact Nett @ nett@vintagenettles.net Copyright @ Nett Hulse 2011


