Little Owl's Hut
Crochet Pattern
By Galina Astashova
Skill level: Intermediate

About this pattern
Dolly is crocheted in continuous spirals without joining the rounds. You will need a stitch marker to keep track of where the beginning of each round starts. Move the marker up to the first stitch of the next round after finishing the previous one. I use USA terminology for my pattern (don't worry if you use UK terms, all the differences are explained in the pattern). This pattern is easy to follow with step-by-step instructions.
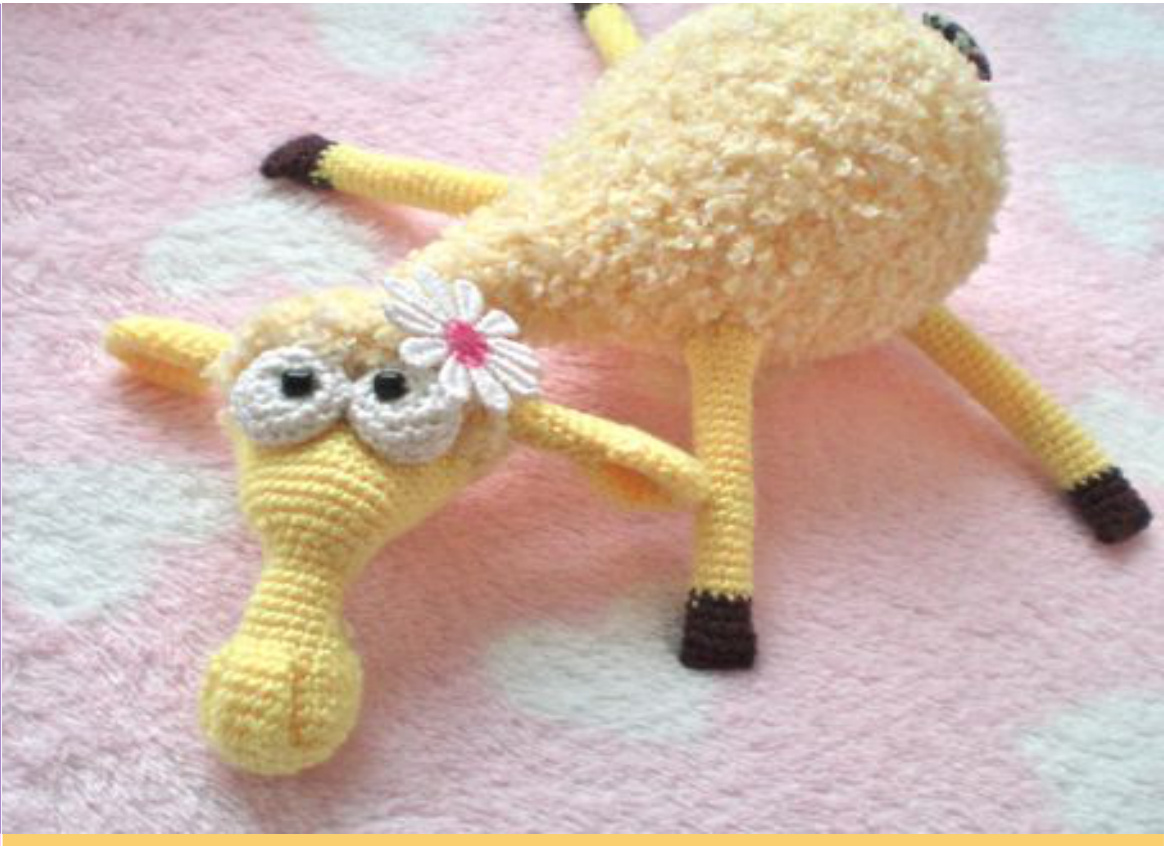
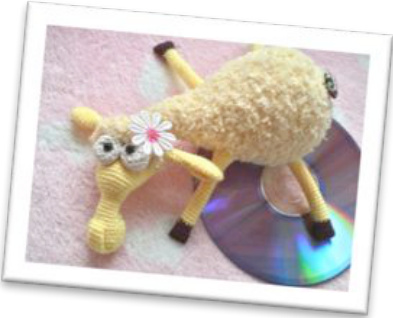
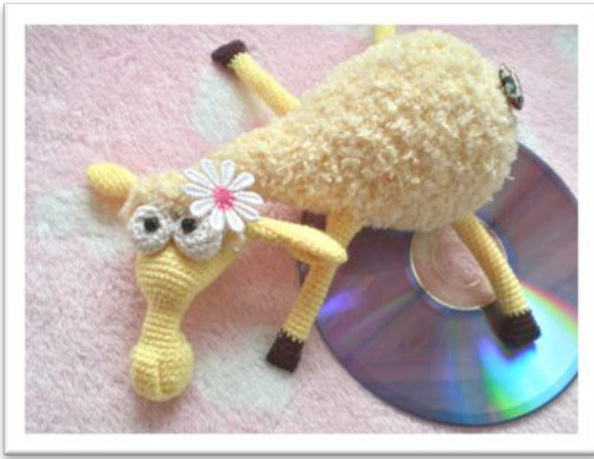
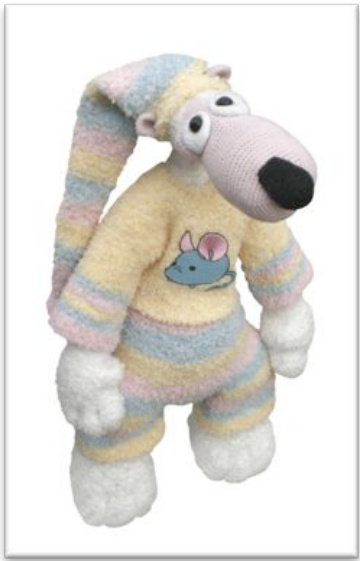
Dolly the Sheep!
Hello! My name is Dolly
You will ask: "Why Dolly?’ Simply because you can crochet this toy in a few hours, it's easy to make, and it doesn't require special skills. You can use leftover yarn in any colour, so you can clone the sheep in any quantity you wish.
Counting sheep could be a great method to fall asleep but... wouldn't it be nicer to hug one of these sweet fluffy pals? This toy is intended for children over 3 years old, and it's soft and has interesting features, so your child definitely would like to play with it. Ready? Let's begin... Happy crocheting!
Finished size Approx. 11.5 inches (29 cm) long or 8 inches (20 cm) - it depends on yarn Materials and tools You will need two types of yarn: 1。 Very fluffy yarn (Bouclé) for the body 2. Smooth yarn for the muzzle, eyes, ears, legs and hooves 3 colors - white for eyes, brown for hooves, and third for the muzzle and legs. Hook matching to the yarn thickness (see “Gauge” section) Two small black beads for eyes. Polyester fiberfill (stuffing) One beautiful button for the tail / Decorative flower. Yarn and hook suggestions
| Type | Yarn weight | Name | Quantity | Hook size mm | Dolly Finished size | |
| 1 | Fluffy | Aran - Chuncy | Diamond Yarn Alpaca Bouclé | 66.0 yards (60.4 m) | 4.5 | 11,5 inches (29 cm) long |
| Smooth | DK/8 ply (11 wpi) | Diamond Yarn Luxury Collection Alpaca Peru | 82 yards (75 m) | 3 | ||
| 2 | Fluffy | DK | Sirdar Snuggly Snowflake DK | 70 yards (64 m) | 4.5 | 8 inches (20 cm) long |
| Smooth | Fingering / 4 ply | Sirdar Wash 'n' Wear 4 ply | 82 yards (75 m) | 2 |
Hook conversion chart
| mm | US UK |
| 2 | Steel hook - 1 14 |
| 3 | Steel hook-00 11 |
| 4.5 | 7 7 |
| 5 | H/8 6 |
Tip (marker)
If you don't have stitch marker, you can always use scrap of contrasting yarn instead.
Abbreviations
ch = chain inc = increasing (2 sc in 1 st) ins = insert dec = decreasing (sc2tog) sc2tog = single crochet two together Rnd = round st(s) = stitch(s) sl st = slip stitch sc = single crochet pic = picture
Tip
You may use any yarn you have to crochet Dolly. Smooth yarn should be thinner then the yarn for the body. It is better to use boucle yarn for the body. Make the swatch first to be sure that you have chosen the right yarn. See “Gauge” section.
Gauge (tension) IT IS VERY IMPORTANT!
To make sure that you have chosen the right yarns crochet 2 swatches first. First: Work first swatch using smooth yarn and matching hook (use smaller hook than suggested on the yarn label). Crochet tight. Second: Work second swatch using boucle yarn and matching hook (use smaller hook than suggested on the yarn label). Crochet loose. Instruction for the both swatches: Rnd 1: 6 sc, in a magic ring. Rnd 2: 6 inc = 12 sts. Rnd 3: (1 sc, 1 inc) x 6 = 18 sts. Rnd 4: (2 sc, 1 inc) x 6 = 24 sts. Rnd 5: (3 sc, 1 inc) x 6 = 30 sts. Rnd 6: (4 sc, 1 inc) x 6 = 36 sts. Rnd 7: (5 sc, 1 inc) x 6 = 42 sts. Compare your swatches. Small swatch should be almost 2-3 times smaller then the big one. If not, take bigger hook than you used before and work another swatch using boucle yarn or you may try to crochet small swatch tighter using smaller hook or thinner yarn. If it does not help - choose different yarn and make another swatches.
USA/UK terminology comparison chart. Skill levels
| Abbreviations USA | Abbreviations UK |
| ch - chain | ch - chain |
| sc - single crochet | dc-double crochet |
| hdc -half double crochet | htr - half treble |
| dc - double crochet | tr - treble |
| tr - treble | dtr -double treble |
| dtr - double treble | tr tr -t triple treble |
| sl st - slip stitch | sl -slip stitch |

Projects for first-time crocheters using basic stitches. Other differences in crochet terminology used: Projects using yarn with basic stitches, repetitive stitch patterns, simple color changes, and simple shaping and finishing.
| Terminology USA | Terminology UK |
| fasten off | cast off |
| skip | miss |
| gauge | tension |
| yarn over (yo) | yarn nover hook (yoh) |

Projects using a variety of techniques, such as basic lace patterns or color patterns, midlevel shaping and finishing.

Projects with intricate stitch patterns, techniques and dimension, such as non-repeating patterns, multi-color techniques, fine threads, small hooks, detailed shaping and refined finishing.
This pattern is for personal use ONLY.
This pattern is protected under Creative Commons Attribution - Non Commercial - No Derivative Works 3.0 United States License. This pattern may not be copied, shared, or sold in any manner. Any finished items made using this pattern may not be sold for profit without permission from the designer. Make as many as you like, but please just keep them for yourself or give them away. Thanks! www.littleowlshut.com
Muzzle
Use smooth yarn and crochet tight Rnd 1: 6 sc in magic ring Rnd 2: 6 inc = 12 sts Rnd 3: (1 sc, 1 inc) x 6 = 18 sts Rnd 4: (2 sc, 1 inc) x 6 = 24 sts Rnd 5: (3 sc, 1 inc) x 6 = 30 sts Rnd 6-8: 1 sc in each st around = 30 sc. Rnd 9: 10 sc, skip 5 sts (this will be the right nostril)

the skipped part inwards, 2 sc, as you work the third sc, pick up (work through) the centre of the 5 missed stitches (this is done in order to secure the position of the nostrils), 1 sc, skip 5 (for the left nostril), 6 sc = 20 sts Rnd 10: 4 dec, 4 sc, then hook stitch from the main row and 3rd st of skipped 5 of the left nostril and do 1 sc, 3 sc, 2 dec = 14 sts Rnd 11-13: 1 sc in each st around = 14 sts Stuff the bottom of the muzzle Rnd 14: 1 sc in each st around = 14 sts to marker (do not replace marker yet), 2 sc, place marker. It is your new starting point for the next round.
Rnd 15: 5 sc, 1 inc, 1 sc, 2 inc, 1 sc, 1 inc, 3 sc = 18 sts Rnd 16: 6 sc, 8 inc, 4 sc = 26 sts Rnd 17: 1 sc in each st around = 26 sts Rnd 18: 5 sc, 1 inc, 16 sc, 1 inc, 3 sc = 28 sts Rnd 19: 5 sc, 1 inc, 18 sc, 1 inc, 3 sc = 30 sts Rnd 20: 5 sc, 1 inc, 20 sc, 1 inc, 3 sc = 32 sts Rnd 21: 5 sc, 1 inc, 22 sc, 1 inc, 3 sc = 34 sts Rnd 22: 5 sc, 1 inc, 24 sc, 1 inc, 3 sc = 36 sts Rnd 23: 5 sc, 1 inc, 26 sc, 1 inc, 3 sc = 38 sts Rnd 24: 5 sc, 1 inc, 28 sc, 1 inc, 3 sc = 40 sts Rnd 25: 5 sc, 1 inc, 7 sc, 1 inc, 14 sc, 1 inc, 7 sc, 1 inc, 3 cr = 44 ctc Rnd 26: 5 sc, 1 inc, 9 sc, 1 inc, 14 sc, 1 inc, 9 sc, 1 inc, 3 sc = 48sts Rnd 27: 1 sc in each st around = 48 sc. Fasten off by making 1 sl st, finish off and weave in loose end.

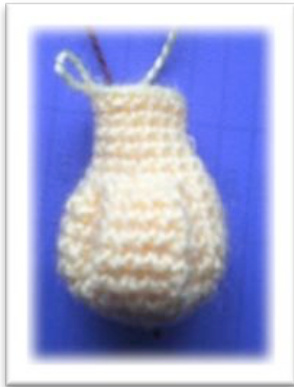
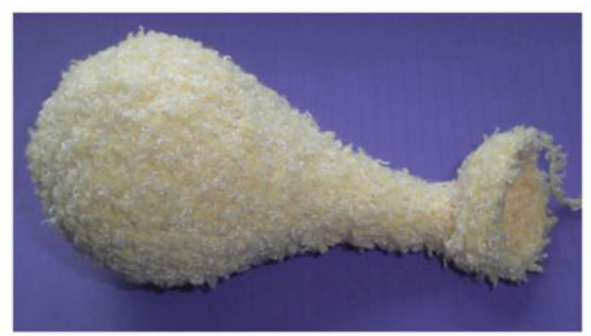
Body
Use Boucle yarn and do not crochet too tightly Rnd 1: 6 sc in magic ring Rnd 2: 6 inc = 12 sts Rnd 3: (1 sc, 1 inc) x 6 = 18 sts Rnd 4: (2 sc, 1 inc) x 6 = 24 sts Rnd 5: (3 sc, 1 inc) x 6 = 30 sts Rnd 6: (4 sc, 1 inc) x 6 = 36 sts Rnd 7: (5 sc, 1 inc) x 6 = 42 sts Rnd 8: (6 sc, 1 inc) x 6 = 48 sts Rnd 9: (7 sc, 1 inc) x 6 = 54 sts Rnd 10-13: 1 sc in each st around = 54 sts Rnd 14: (7 sc, 1 dec) x 6 = 48 sts Rnd 15: 1 sc in each st around = 48 sts Rnd 16: (6 sc, 1 dec) x 6 = 42 sts Rnd 17: 1 sc in each st around = 42 sts Rnd 18: (5 sc, 1 dec) x 6 = 36 sts Rnd 19: 1 sc in each st around = 36 sts Rnd 20: (4 sc, 1 dec) x 6 = 30 sts Rnd 21: 1 sc in each st around = 30 sts Rnd 22: (3 sc, 1 dec) x 6 = 24 sts Rnd 23: 1 sc in each st around = 24 sts Rnd 24: (2 sc, 1 dec) x 6 = 18 sts Rnd 25-26: 1 sc in each st around = 18 sts Rnd 27: (1 sc, 1 dec) x 6 = 12 sts Rnd 28-29: 1 sc in each st around = 12 sts Loosely stuff the body and neck Rnd 30: 1 dec, 8 sc, 1 dec = 10 sts Rnd 31-33: 1 sc in each st around = 10 sts Rnd 34: 3 inc, 4 sc, 3 inc = 16 sts Rnd 35: 3 inc, 10 sc, 3 inc = 22 sts Rnd 36-37: 1 sc in each st around = 22 sts
Tip
Compare the diameter of the body with the diameter of the muzzle. Two parts should be almost the same size (diameter of the end of the body can be slightly bigger then the diameter of the muzzle). If the muzzle slightly bigger you can undo the last 4 rows of the body and crochet it again using bigger hook. If the diameter of the muzzle is much bigger then the diameter of the body it means that you have chosen the wrong type of yarn or wrong size of the hook - go to section "Gauge" and make the swatch first to chose the right yarn and hook. Finish with 1 sl st. Finish off, leaving a long tail for sewing
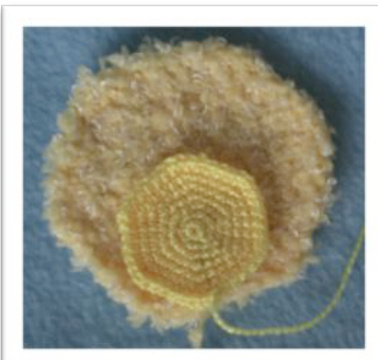
Ears (make 2)
Use smooth yarn Rnd 1: 5 sc in magic ring Rnd 2: 5 inc = 10 sts Rnd 3: (1 sc, 1 inc) x 5 = 15 sts Rnd 4: (2 sc, 1 inc) x 5 = 20 sts Rnd 5-7: 1 sc in each st around = 20 sts Rnd 8: 3 sc, 2 dec, 6 sc, 2 dec, 3 sc = 16 sts Rnd 9: 2 sc, 2 dec, 4 sc, 2 dec, 2 sc = 12 sts Rnd 10-14: 1 sc in each st around = 12 sts Row 15: Fold bottom edge and then hook simultaneously both sides of the fold crochet 6 sc

Fold together the long part of the ear (from 9 to 15 rows). Using flat stitches sew opposite sides together Leave long tail for sewing.
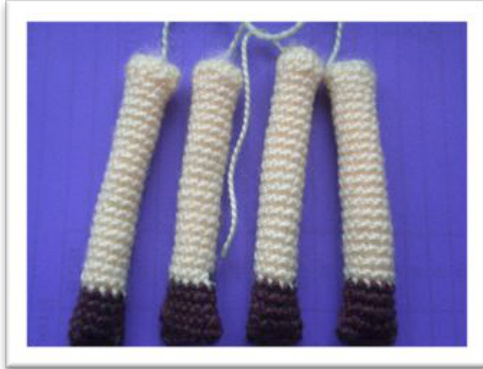
Legs (make 4)
Start with smooth yarn main colour Rnd 1: ch 10 and form a circle = 10 sts Rnd 2-20: 1 sc in each st around = 10 sts Attach brown yarn for hooves Rnd 21-24: 1 sc in each st around = 10 sts Fold bottom edge and then hook simultaneously both sides of the fold crochet 5 sc Stuff lightly.
Eyes (make 2)
Use white smooth yarn Rnd 1: 6 sc in magic ring Rnd 2: 6 inc = 12 sts Rnd 3: (1 sc, 1 inc) x 6 = 18 sts Rnd 4-5: 1 sc in each st around = 18 sts Rnd 6: (1 sc, 1 dec) x 6, 1 sl st = 13 sts Fasten off and weave in loose end. Stuff lightly.
Assembly
Because of the two types of yarn used and the different thickness of crochet, the head and the body will have a different stitch count at the end, however they will look about the same. When you sew the muzzle to the body the increase in the last row of the body should face upwards to the top of the head. Stuff the head gradually. Sew ears and eyes to the head. Sew ears to the fluffy part of the head (see pic. below) Sew legs to the body (see pic. below) ear and exit at the center of the eye, fasten the bead and exit behind the ear, tighten the yarn. Repeat 2-3 times for a better fix. Tightening makes the pupil sink inside the eye, plus it also creates the right shape for the head. Sew the button to make a tail. You can sew a decorative flower or bow on the top of the head if you wish
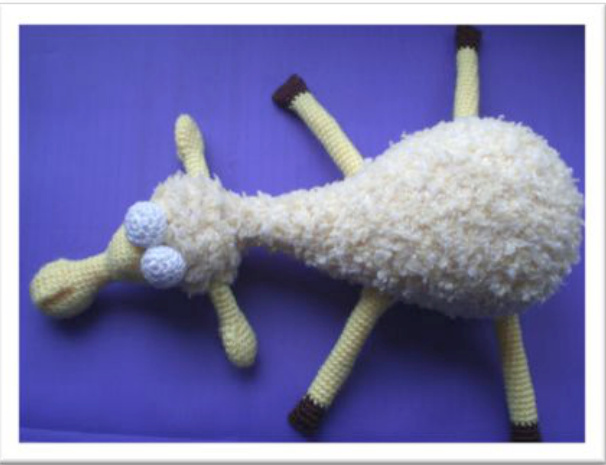
To sew pupil bead to the eye enter the needle behind the
NOTES:
Crochet patterns available for sale at Little Owl's Hut www.littleowlshut.com
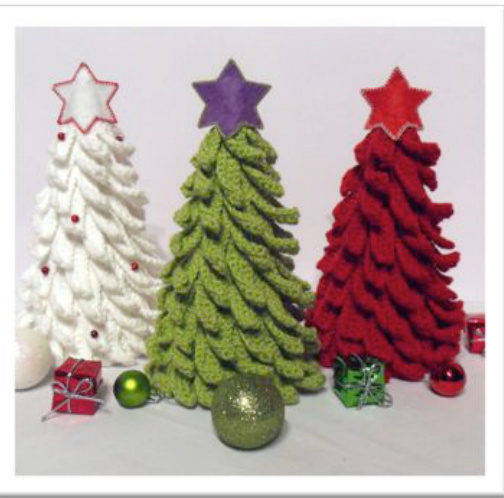
Christmas tree
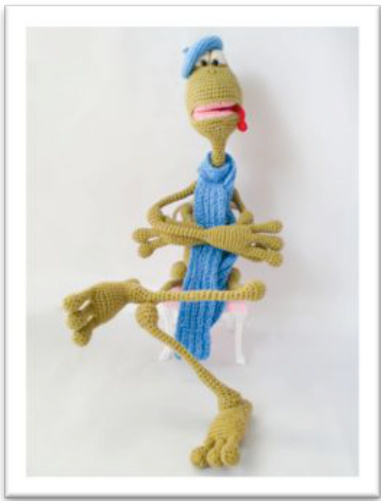
Frog “Kvak"

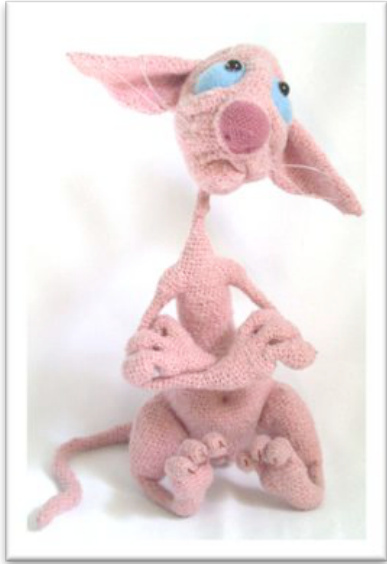
Giraffe "George”
Coming soon!
Subscribe to our Newsletter at www.littleowlshut.com to receive notification when pattern is available for sale and get 30%discount if you purchase it within a few days after release date.
Lady Cat "Filimon"
Bear

And much more at www.littleowlshut.com www.littleowlshut.com


