Santa Sack Foat
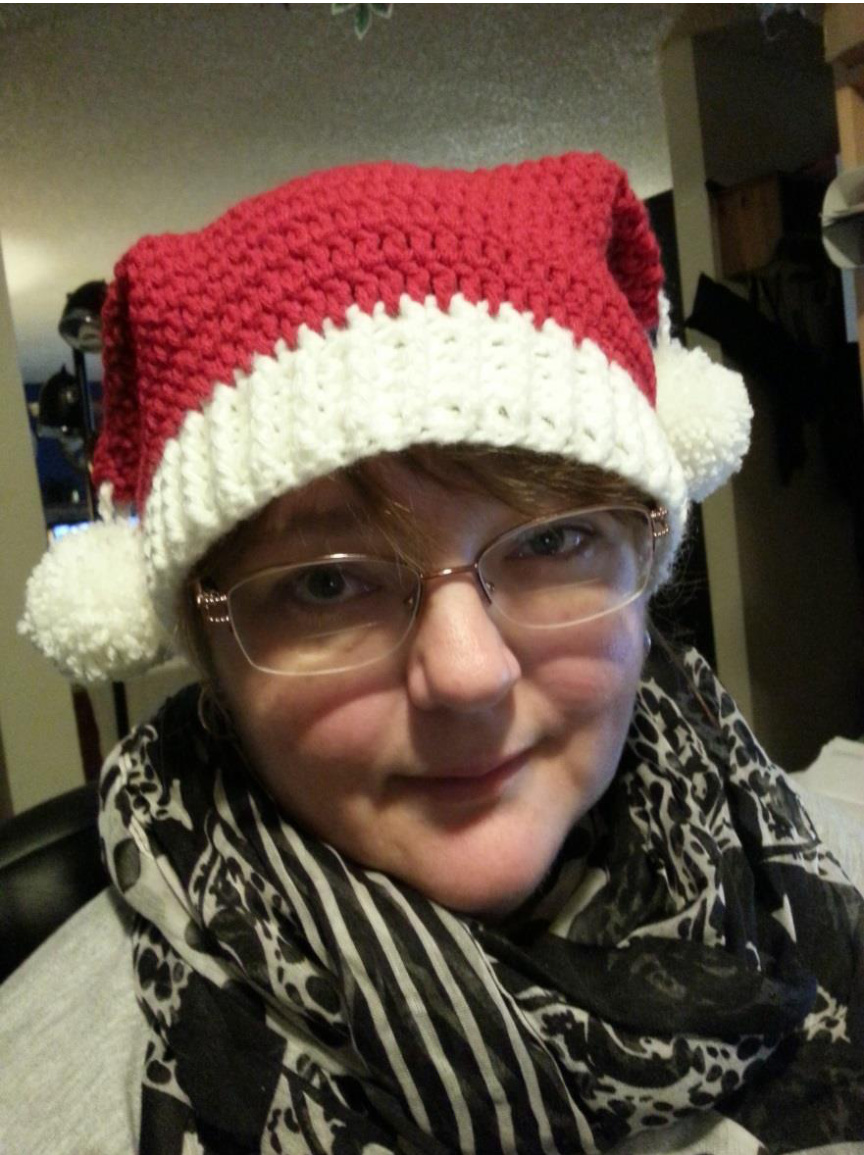
@ 2014Susan Elston /Yarncraft bySusan.All rights reserved. Pattern may not be copied or redistributed, in whole or in part, without express written permission. You may sellitems you make from this pattern. Please include pattern design credit to Susan Elston / Yarncraft by Susan / http://yarncraftbysusan.blogspot.com. This Santa Sack Hat has a comfortably loose, slouchy fit and no side seams on the crown for a smooth appearance. I admired Penny's cute double-tailed Santa hat that she wears in a Christmas episode of the popular American sitcom "The Big Bang Theory." This hat isn't an exact replica, but its dual pompoms do provide a touch of whimsy. I have a large head, 22.5 inches, so to achieve a loose fit, I worked a foundation chain with 88 stitches. To make different sizes, simply work a foundation chain until it's a length that fits loosely around your intended wearer's head. The foundation chain needs to have an even number of stitches, so if your foundation has an odd number, either add one or remove one to make an even number of stitches.
Size I (5.5 mm) and J (6 mm) crochet hooks Worsted or aran weight yarn in 2 colors Pompom maker, optional Yarn needle Scissors The Santa Sack Hat will stretch to accommodate a range of head sizes. Be sure to measure the wearer's head to determine length of the foundation chain.
Stitches used
fDC: foundation double crochet fpDC: front post double crochet bpDc: back post double crochet sc: single crochet hdc: half-double crochet dc: double crochet sl: slip stitch ch: chain
Hat instructions
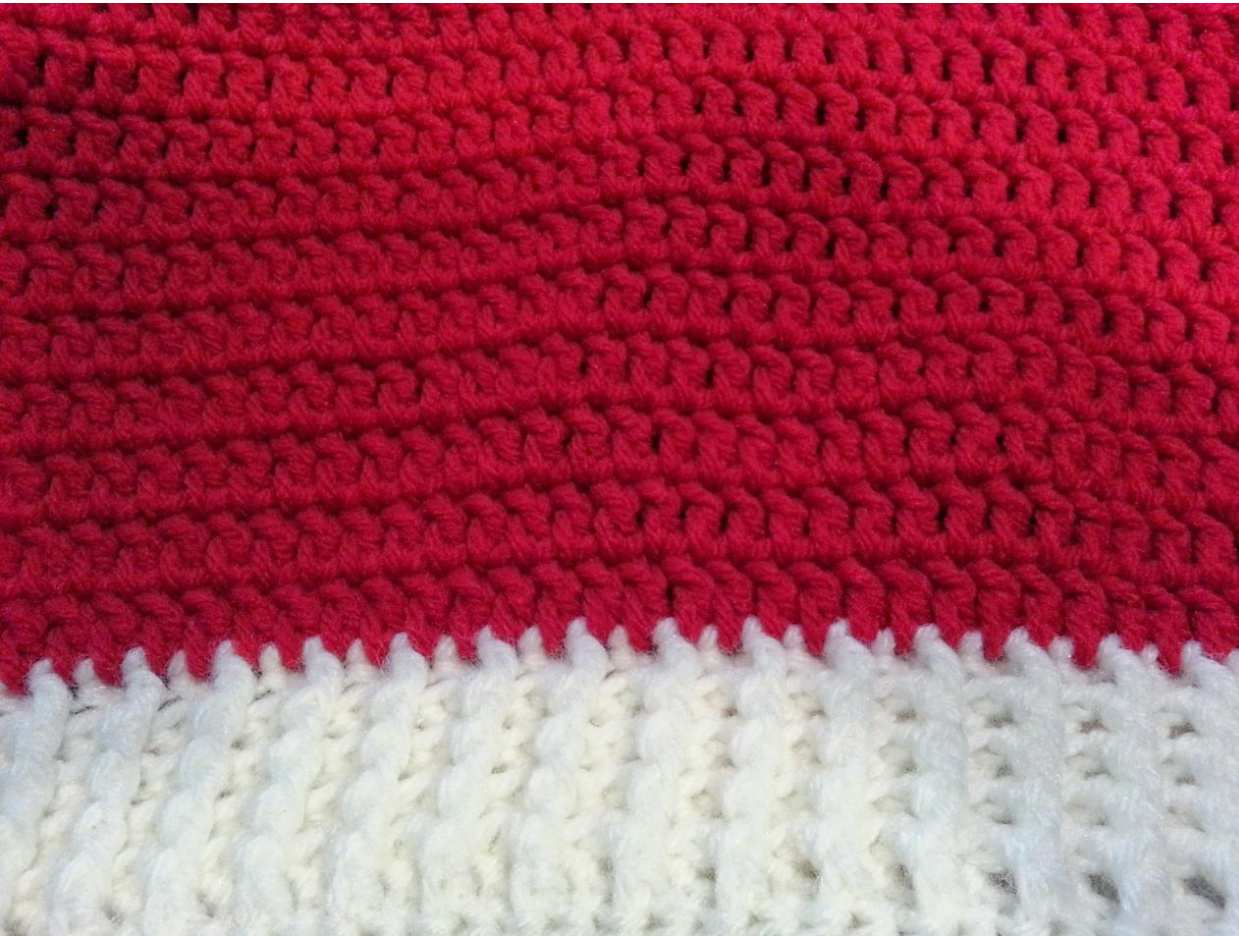
Hat is worked from the bottom up in rounds. Foundation chain: Begin using smaller hook. For size adult L, work a foundation chain in color A (white) of 88 fDC. Join with a sl to top of first fDC and continue working in the round with color A. Rounds 2-6 will make the hat's band of white ribbing. Round 2: Ch 2 (does not count as a stitch throughout). FpDC in first fDC. BpDC in next fDC. Work alternating fpDC and bpDC around, ending with a bpDC. Join with a sl to top of first fpDC. (88 stitches) Rounds 3-6: Ch 2. FpDC in first fpDC. BpDC in next bpDC. Work alternating fpDC and bpDC around, ending with a bpDC. Join with a sl to top of first fpDc. (88) Before joining at the end of round 6, break color A yarn, leaving a 6-inch tail. Insert hook into top of first fpDc; YO with color B (red) and pull through all loops to complete sl stitch and join the round. Switch to larger hook and continue working the rest of the hat in color B. Round 7: Ch 2. DC2tog over first 2 stitches. Work 1 dc in each of the next 42 stitches. DC2tog in next 2 stitches. Work 1 dc in each stitch to end of the round. The remainder of the hat's crown will be worked seamlessly, so do NOT join with a sl in top of first DCdec. PM to show beginning of round and move marker up into the first stitch of each subsequent round. (86 stitches) Round 8: Work 1 dc in each stitch around. (86) Round 9: DC2tog over first 2 stitches. Work 1 dc in each of the next 41 stitches. DC2tog in next 2 stitches. Work 1 dc in each stitch to end ofthe round. (84) Round 10: Work 1 dc in each stitch around. (84) Round 11: DC2tog over first 2 stitches. Work 1 dc in each of the next 40 stitches. DC2tog in next 2 stitches. Work 1 dc in each stitch to end of the round. (82) Round 12: Work 1 dc in each stitch around. (82) Round 13: DC2tog over first 2 stitches. Work 1 dc in each of the next 39 stitches. DC2tog in next 2 stitches. Work 1 dc in each stitch to end ofthe round. (80) Rounds 14-19: Work 1 dc in each stitch around. (80) After working round 19, remove stitch marker and work 1 hdc in the next stitch, 1 sc in each of the next 2 stitches, and 1 sl in thenext stitch.
Finishing & pompom trim
Break color B yarn, leaving a long tail (about 14 inches) for sewing the top of the hat closed. Turn hat inside out and flatten so the yarn tails at the beginning of the hat are on one side. Whip stitch across inside of top seam. Weave in other ends. Turn hat right side out. I prefer to make hat pompoms removable so that the hat itself can be machine washed. (As you may also have discovered, yarn pompoms generally don't take well to laundering!) So the pompoms for this hat include chain ties that can be untied and removed before laundering the hat. I used a Clover 2.5-inch pompom maker, but you can use whatever method that works best for you to make 2 pompoms in color A (white) in a size that's close to 2.5 inches in diameter. Cut 2 lengths of color A yarn 2 yards long each. Use 1 length of yarn to tie the center of each pompom, placing the pompom near the center of each length of yarn; double knot tightly around the center of the pompom to secure. Working with one long yarn tail at a time, make a slip knot in yarn tail as close as possible to the center of the pompom. Place slip knot loop on smaller hook and chain until the remaining yarn is too short to continue chaining. Pull end of yarn through last chain and tug to tighten into a knot. Repeat process for remaining long yarn tails. To attach a pompom to each top corner of the hat, poke the end of one chain between the stitches near the front side of a hat corner and pull through; poke the other chain between the stitches near the rear side of the same hat corner and pull through. Turn hat inside out and secure the yarn chains by gently tying a bow (in the way you would tie shoelaces). Repeat process to attach the second pompom to the other hat corner. Turn hat right side out again, and enjoy!


