South Park's Butters, Kyle, Kenny, and Stan Pattern By: Edward Yong
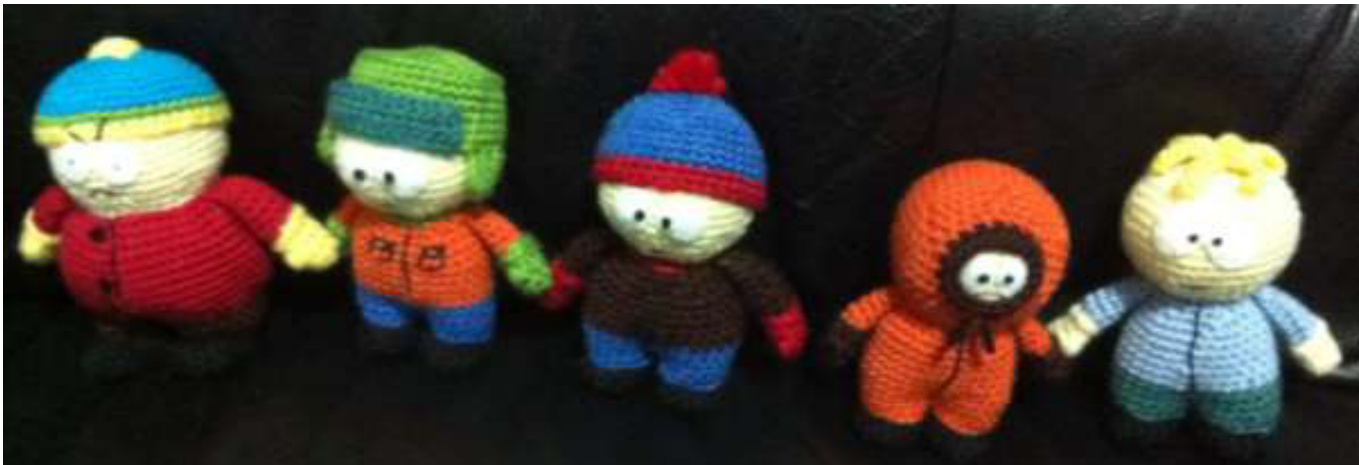
I created these little guys for one of my friends because he asked for the South Park characters as a wedding gift. Even though I thought it was a strange gift I honoured his request. Cartman was the first character I made so he's a bit rough looking. Cartman is another pattern so he's not included. This is the base pattern for all the other characters pictured above (i.e. Butters, Kyle, Kenny, and Stan) and the corresponding embellishments. If there are any corrections to the pattern please let me know and I will update it! Anyway, I used a 3.5mm (E) Hook and 10-ply worsted yarn for this pattern. My gauge was 6sc x 7 rows in an 1 inch square. This isn't really a requirement for the pieces as long as the yarn and hook are of the appropriate and equivalent size. Most of the rounds for each piece will be joined unless otherwise stated. I found working in the round did not create a nice division between the different colours.
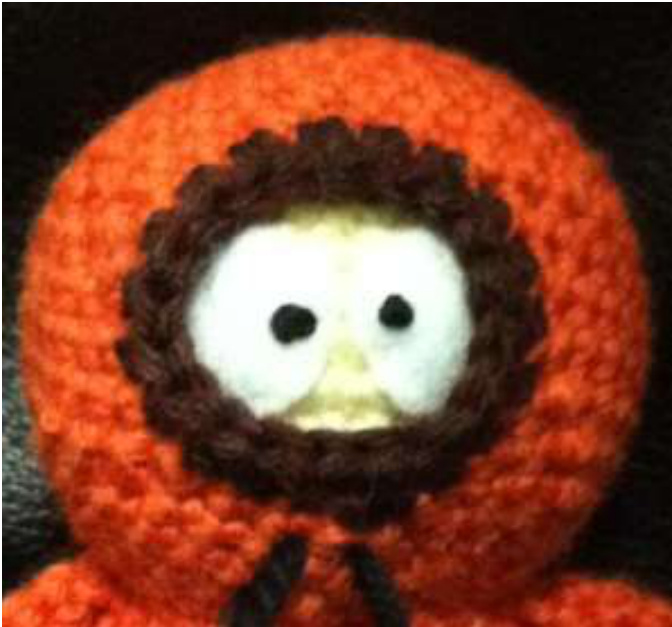
Materials Required:
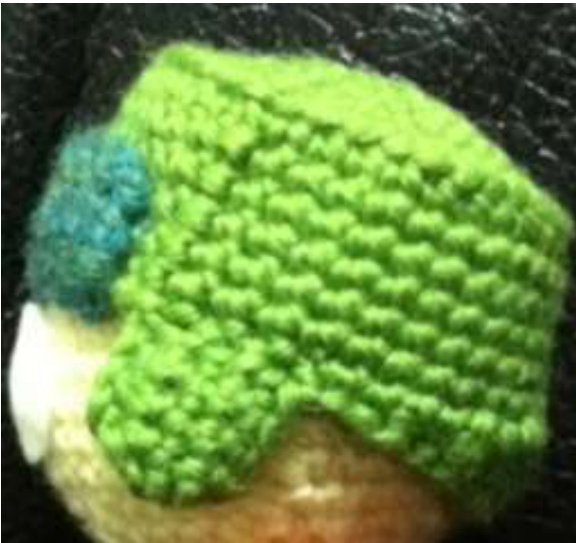
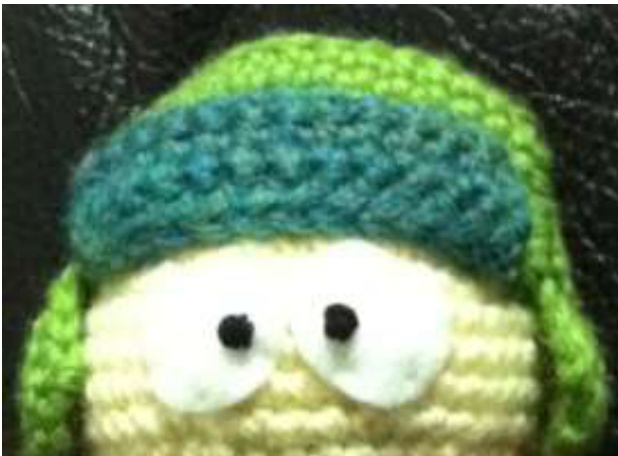
- Beige, black, dark blue, light blue, brown, dark green, light green, orange, red, and yellow coloured yarn - Fibrefill - White felt - 3.5mm (E) hook - Yarn needle - Sewing needle and thread - Black embroidery floss Basic Head: Using Beige and working in continuous round. Rnd 1: 6 sc into magic circle (6) Rnd 2: 6inc (12) Rnd 3: \*sc, inc\* x 6 (18) Rnd 4: \*2sc, inc\* x 6 (24) Rnd 5: \*3sc, inc\* x 6 (30) Rnd 6: \*4sc, inc\* x 6 (36) Rnd 7: \*5sc, inc\* x 6 (42) Rnd 8 -12: 42sc Begin stuffing the head. Continue stuffing as you work on the piece. Rnd 13: \*5sc, dec\* x 6 (36) Rnd 14: \*4sc, dec\* x 6 (30) Rnd 15: \*3sc, dec\* x 6 (24) Rnd 16: \*2sc, dec\* x 6 (18) Rnd17: \*sc, dec\* x 6 (12) Rnd 18: 6dec (6) F/O and leave long enough tail to sew the 6st opening close. Weave in Butter's Hair: Using Yellow and working in continuous round. Rnd 1: 6 sc into magic circle (6) Rnd 2: \*ch 6, ss into 2"d ch from hook, ss, 2sc, hdc, ss into next st in magic circle\* x 6 F/O and leave a long enough tail to attach hair to head. Kenny's Hoodie: Using Orange Rnd 1: 6 sc into magic circle, ss into 1st st, ch 1 (6) Rnd 2: 6inc, ss into 1st st, ch 1 (12) Rnd 3: \*sc, inc\* x 6, ss into 1st st, ch 1 (18) Rnd 4: \*2sc, inc\* x 6, ss into 1st st, ch 1 (24) Rnd 5: \*3sc, inc\* x 6, ss into 1st st, ch 1 (30) Rnd 6: \*4sc, inc\* x 6, ss into 1st st, ch 1 (36) Rnd 7: \*5sc, inc\* x 6, ss into 1st st, ch 1 (42) Rnd 8 -15: 42sc, ss into 1st st, ch 1 Rnd 16: \*5sc, dec\* x 6, ss into 1st st, ch 1 (36) Rnd 17: \*4sc, dec\* x 6, ss into 1st st, ch 1 (30) Insert the head into the hoodie and continue crocheting around it. Rnd 18: \*3sc, dec\* x 6, ss into 1st st, ch 1 (24) Rnd 19: \*2sc, dec\* x 6 (18) F/O the orange yarn and weave in the tails. Attach Brown to the joining stitch of previous round and continue. Rnd 20: 18sc, ss into 1st st, ch 1 Rnd 21: 18sc, ss into 1st st F/O and weave in the tail. Kyle's Hat: Using Light Green Rnd 1: 6 sc into magic circle, ss into 1st st, ch 1 (6) Rnd 2: 6inc, ss into 1st st, ch 1 (12) Rnd 3: \*sc, inc\* x 6, ss into 1st st, ch 1 (18) Rnd 4: \*2sc, inc\* x 6, ss into 1st st, ch 1 (24) Rnd 5: \*3sc, inc\* x 6, ss into 1st st, ch 1 (30) Rnd 6: \*4sc, inc\* x 6, ss into 1st st, ch 1 (36) Rnd 7: 36sc in front loops only, ss into 1st st, ch 1 Rnd 8-13: 36sc, ss into 1st st, ch 1
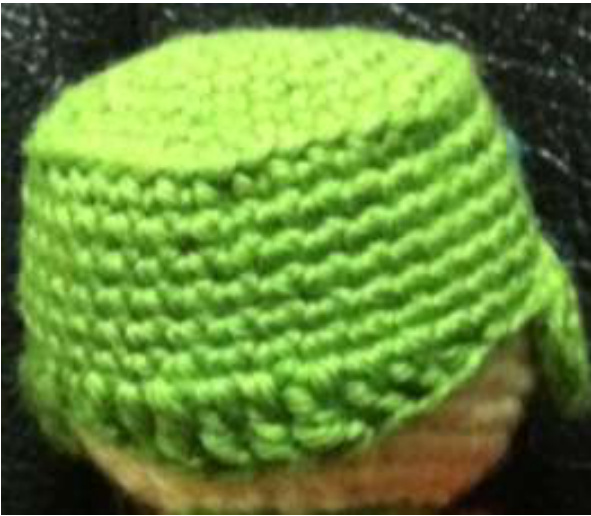
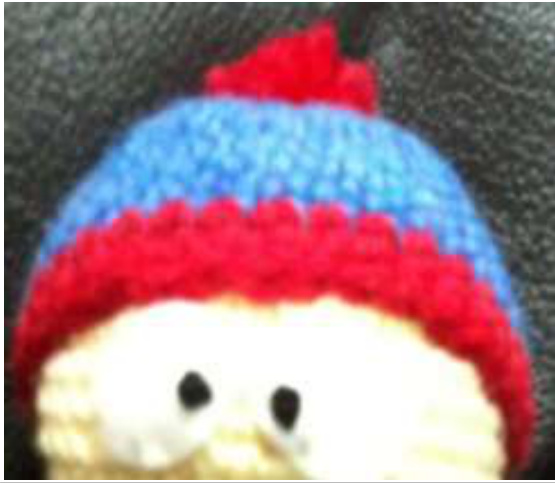
For Earflaps and Back of Hat: Rotate the hat so that it is horizontal (i.e. flat portion of cap facing the left hand and open end of cap facing the right). For the description below, each row will represent 1 sc on the hat working upwards and around (i.e. every time a new row is started it will either be from a sc on the last rnd of the hat or ss into a sc on the hat). Row 1: ch 4 Row 2: sc in 2nd ch from hook, 2sc, ss into the next st on hat, turn (3) Row 3: 2sc (work up the sc from the previous row and not along the hat), inc, ch1, turn (4) Row 4: 4sc, ss into next st on hat, turn Row 5: 4sc, turn Row 6: sk the 1"t sk, 3sc, ss, into next st on hat, turn This finishes off the earflap as pictured below. The next rows are to create the back of the hat. Row 7: sc into next st on hat Row 8: sc into next st on hat Row 9: hdc into next st on hat Row 10: hdc into next st on hat Row 11: dc into next st on hat Row 12: dc into next st on hat Row 13: tr into next st on hat Row 14: tr into next st on hat Row 15: tr into next st on hat Row 16: tr into next st on hat Row 17: dc into next st on hat Row 18: dc into next st on hat Row 19: hdc into next st on hat Row 20: hdc into next st on hat Row 21: sc into next st on hat Row 22: sc into next st on hat This finishes the back of the hat as pictured below. The following will create the other earflap. Row 23: ss into next st on hat, ch 4 Row 24: sc in 2nd ch from hook, 2sc, ss into the next st on hat, turn (3) Row 25: 2sc (work up the sc from the previous row and not along the hat), inc, ch1, turn (4) Row 26: 4sc, ss into next st on hat, turn Row 27: 4sc, turn Row 28: sk the 1" sk, 3sc, ss, into next st on hat F/O and leave a long enough tail to attach the hat onto the head. For Flap on Hat: Using Dark Green Row 1: ch 11 Row 2: sc in 2nd ch from hook, 9sc, ch1, turn (10) Row 3: 10sc, ch 1, turn Row 4: 10sc F/O and leave a long enough tail to attach flap onto the front of the hat as pictured below. Stan's Hat: Using Dark Blue Rnd 1: 6 sc into magic circle, ss into 1st st, ch 1 (6) Rnd 2: 6inc, ss into 1st st, ch 1 (12) Rnd 3: \*sc, inc\* x 6, ss into 1st st, ch 1 (18) Rnd 4: \*2sc, inc\* x 6, ss into 1st st, ch 1 (24) Rnd 5: \*3sc, inc\* x 6, ss into 1st st, ch 1 (30) Rnd 6: \*4sc, inc\* x 6, ss into 1st st, ch 1 (36) Rnd 7-10: 36sc ss into 1st st, ch 1 Rnd 11: 36sc, ss into 1st st F/O the dark blue yarn and weave in the tail. Attach Red to the joining stitch of previous round and continue. Rnd 12: 36sc ss into 1st st, ch 1 Rnd 13: 36sc, ss into 1st st F/O and leave a long tail for attaching the hat to the head.
For Puff on Hat: Using Red, make a pom-pom. I did this by loosely wrap the yarn around two fingers 10 times. I removed the yarn from my fingers and tied a piece of yarn around the centre of the loops. The piece of yarn will be used to attach the pom-pom to the top of the hat. Then I cut the loops on either ends and fluffed up the pom-pom.
Basic Feet: (Make 2) Using Black and working in continuous rounds. Rnd 1: 6 sc into magic circle (6) Rnd 2: 6inc (12) Rnd 3-5: 12sc Rnd 6: \*sc, dec\* x 4 (8) Rnd 7: 4 dec (4) F/O and leave a long enough tail to sew close the 4st opening and to attach the feet to the legs. Do not stuff the piece as it will be flattened to make the feet. Legs and Torso: Depending on the character you are making, there are different colours to begin with. Use the following chart to pick the colour.
| Character | Colour |
| Butters | Dark Green |
| Kenny | Orange |
| Kyle | Dark Blue |
| Stan | Dark Blue |
Rnd 1: 6 sc into magic circle, ss into 1st st, ch 1 (6) Rnd 2: 6inc, ss into 1st st, ch 1 (12) Rnd 3: \*3sc, inc\* x 3, ss into 1st st, ch 1 (15) Rnd 4: 15sc in back loop only, ss into 1st st, ch 1 (15) Rnd 5: 15, ss into 1st st, ch 1 (15) F/O the current leg and leave a tail. Repeat the above process to create a second leg. Using the tail of the first leg, sew the two together before beginning the next round. Rnd 6-7: 30sc, ss into 1st st, ch 1 (30) Now it is time to make the torso of the character. This may require a colour change as specified in the chart below. Attach the new colour to the joining stitch and continue.
| Character | Colour |
| Butters | Light Blue |
| Kenny | Orange (no change) |
| Kyle | Orange |
| Stan | Brown |
Rnd 8-13: 30sc, ss into 1st st, ch 1 (30) Begin stuffing the body and legs. Continue to stuffing as you work on the piece. Rnd 14: \*3sc, dec\* x 6, ss into 1st st, ch 1 (24) Rnd 15: \*2sc, dec\* x 6, ss into 1st st, ch 1 (18) Another colour change is required for some of the characters to create the collar of the jacket. Please see the specified colour change in the chart below:
| Character | Colour |
| Butters | Light Blue (no change) |
| Kenny | Orange (no change) |
| Kyle | Green |
| Stan | Red |
Hand and Arm: (Make 2)
Rnd 16: 18sc, ss into 1st st F/O and leave a long enough tail to attach body to head.
| Character | Colour |
| Butters | Beige |
| Kenny | Brown |
| Kyle | Green |
| Stan | Red |
Depending on the character you are making, there are different colours to begin with. Use the following chart to pick the colour. Rnd 1: 6sc into magic circle, ss into 1" st, ch 1 (6) Rnd 2: 6sc, ss into 1"t st, ch 1 (6) Rnd 3: 5sc, 3hdc in last st but do not finish the first 2hdc (i.e. do not pull through the 3 loops at the end before next stitch) ensuring that before you finish the last hdc there are 7 loops on the hook, sc, into last st, ss into 1" st, ch 1 Rnd 4: 6sc (ensure to go into the sc on the last st of previous round instead of the hdc), ss into 1st St, ch 1 Begin stuffing the hand. Continue stuffing as you work on the piece. Rnd 5a: 6sc in front loop only, ss into 1" st, ch 1 F/O and weave in tail. There will be another colour change. Refer to the chart below for the specified colour for the character you are making.
| Character | Colour |
| Butters | Light Blue |
| Kenny | Orange |
| Kyle | Orange |
| Stan | Brown |
Attach new colour to any back loop on Rnd 5 (I always attached it to the joining stitch from previous colour to ensure the seam continues) Rnd 5b: 6sc, ss into 1"t st, ch 1 Rnd 6-10: 6sc, ss into 1st st, ch 1 Stuff the arm moderately and leave room at the top. Fold the opening in half to line up the stitches then sc across the top to seal the arm closed (3sc). Ensure that the fold is with the length of the hand and not perpendicular to it (i.e. the flat seam so line up with the thumb). F/O and leave a long enough tail to attach the arm to the body.
Assembly:
1) Attach the head to the top of the body. I attempted to line up the 18st opening of the body with the Rnd 15 on the head. Add extra stuffing and shape the body before closing off the opening. This does not work on Kenny because the head is covered in the hoodie. Attempt to position the head as best as possible so that the opening of the hoodie is lined up with the body and faces straight out. 2) Attach the hat to the head. Angle the hat on the head of Kyle and Stan to designate which side is the back and which side is the front. The hat may be a tight fit so slide it on as best as possible. Pinning the piece may help with sewing it in place correctly. Kenny will not require any positioning as the hoodie is part of his head. In the case for Butters, attach the hair on top of his head. 3)With white felt, create the eyes. I cut out white ovals for the whites of the eyes and tied French Knots with black embroidery thread for the pupils. You can try and use black felt for the pupils but I found cutting out the tiny dots to difficult. 4) Position the eyes right in the middle of the head. The top of the ovals should be pointed together while the bottom of the ovals should be pointed away. Sew the eyes to the head. 5) Using black embroidery floss, embroider on the mouth. I gave everyone a smile. 6) Using black embroidery floss, embroider a line down the middle of the torso for the opening of the jacket. Kyle required some pockets so I used the floss for that as well. 7)Atach the arms to either side of the body where the head and torso meet. Ensure that the thumbs on the hands are pointed forward. 8)Attach feet to the legs. Ensure that the closed end is the back of the foot and the first rounds are the front of the foot. Line up the back closed end with the back of the leg. Now it's complete!
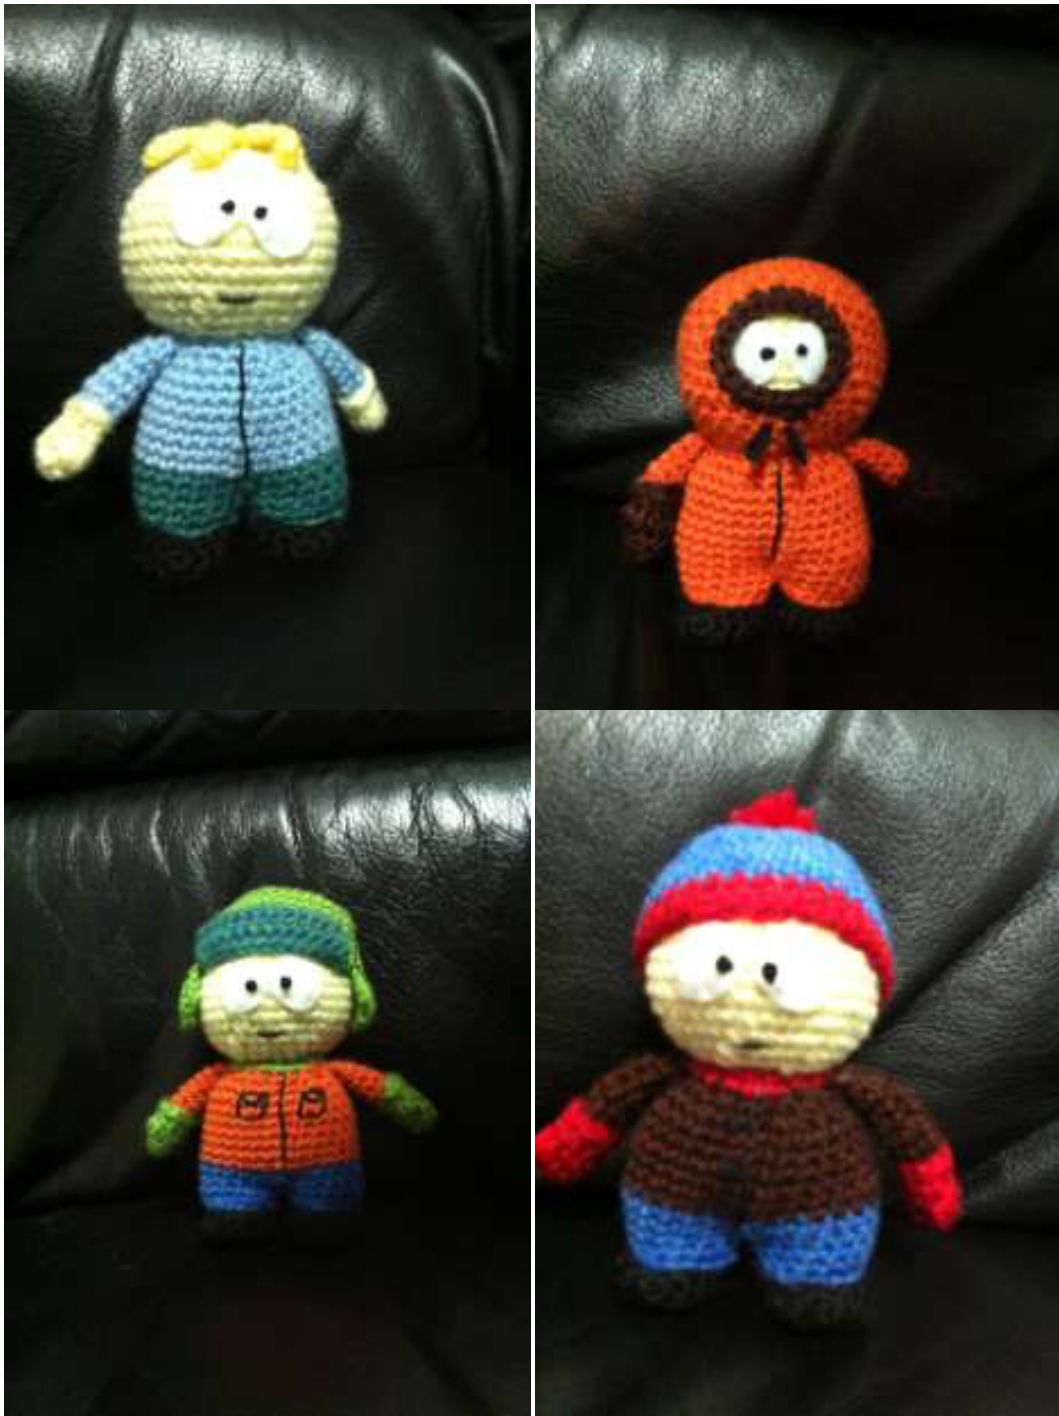
Hope you enjoyed making this as much as I did. I made several attempts at the various body shapes. At one point I was about to throw this thing across the room but I think it turned out great and am extremely pleased with the results. And just in case for legal reasons... South Park was created by Trey Parker and Matt Stone for the Comedy Central Television Network. I do not own or claim to own the images. This crochet pattern is an original pattern by Edward Yong (July 2013). Please do not claim this pattern as your own. If you wish to share this pattern, you may link to this pattern but please do not reprint it on your site. You may keep a copy for your own personal use but you may not sell or distribute it, or sell items made from this pattern.


