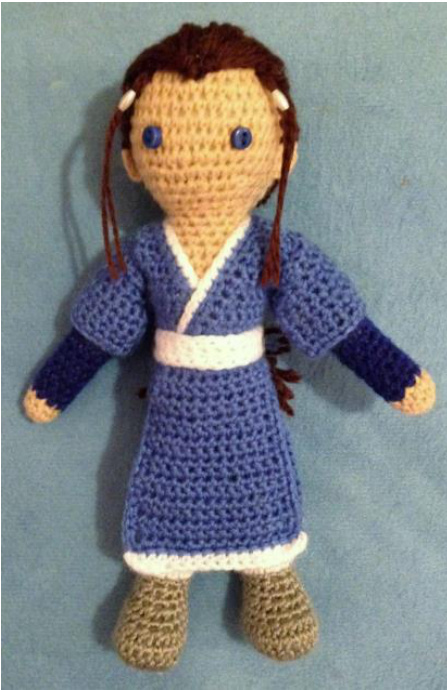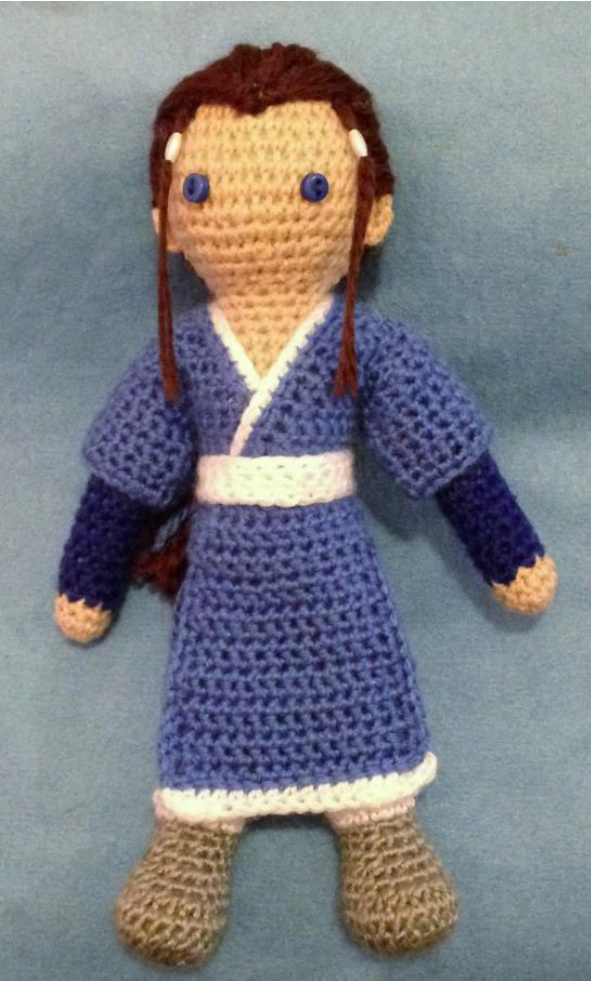
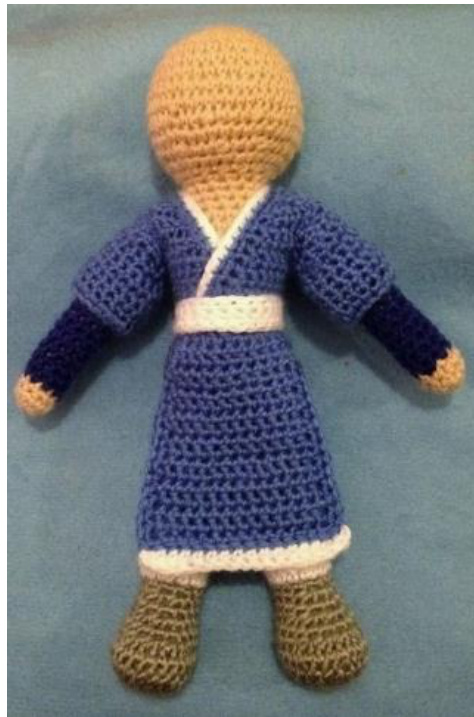
"Katara"
Designed and crocheted by Becky Ann Smith. This is a crocheted doll inspired by the character of "Katara," from the "Avatar: The Last Airbender" animated series. I do not own or make any claim to the character - this is my version of 'fan art.' Materials needed: Size 4 (1.75 mm) steel crochet hook Yarn needle or tapestry needle Sewing needle and blue thread Polyester fiberfill Craft glue Two 1/4-inch (8 mm) blue buttons, for eyes Two 3x6 mm pearl beads Optional: one small snap Dbl dec -Slip first and second stitches together as if to knit. Knit 1 stitch. Pass two slipped stitches over the knit stitch. "Katara" is about 6 inches tall when made with these materials. She can also be made using 4-ply yarns and an aluminum "F" hook for a larger doll. This doll was made using these stitches: Slip stitch sc=singlecrochet hdc=half-double crochet decrease=1 sc combining 2 stitches I used continuous rounds for much of this doll. You can also join each row and chain 1. This will form a 'seam. (Most of the seams can be hidden by hair or clothing). Do not turn pieces unless the pattern says to do so.
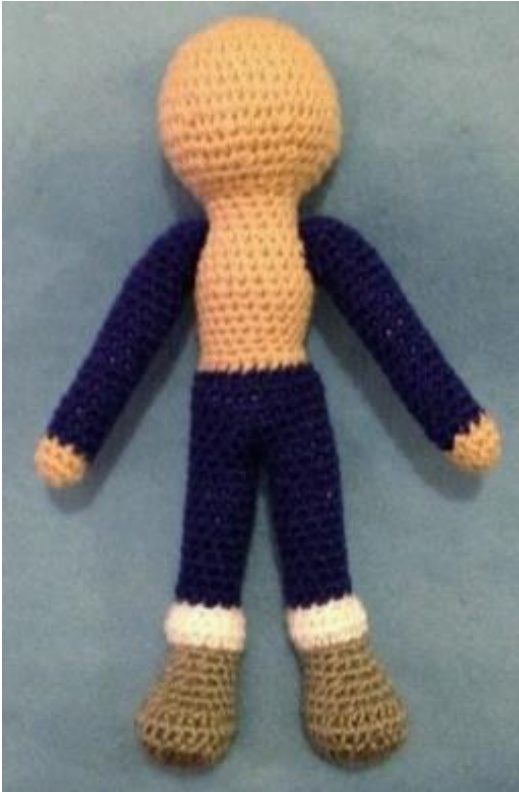
BODY
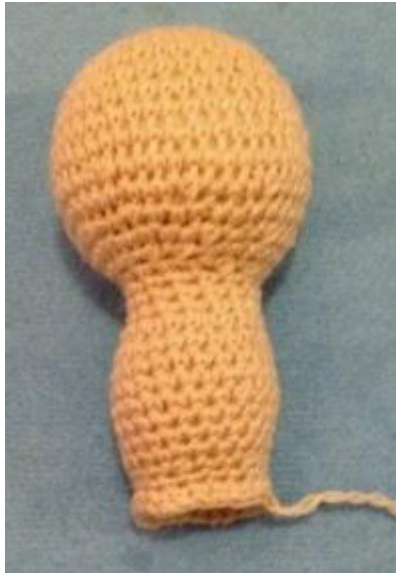
Head and torso
Row 1: With light beige color yarn, chain 2. 10 sc in second chain from hook. Row 2: 2 sc in each sc. (20) Row 3: 1 sc in each sc. (20) Row 4: (1 sc in first sc, 2 sc in next) 10 times. (30) Row 5: 1 sc in each sc. (30) Row 6: (1 sc in each of first 2 sc, 2 sc in next) 10 times. (40) Row 7: 1 sc in each sc. (40) Row 8: 1 sc in each of first 3 sc, 2 sc in next) 10 times. (50) Row 9: 1 sc in each sc. (50) Row 10: (1 sc in each of first 3 sc, 1 decrease) 10 times. (40) Row 11: 1 sc in each sc. (40) Row 12: (1 sc in each of first 2 sc, 1 decrease) 10 times. (30) Row 13: 1 sc in each sc. (30) Row 14: (1 sc combining next 2 sc) 15 times. (15) Rows 15-18 (neck): 1 sc in each sc. (15) At this point, stuff head with polyester fiberfill. It will appear misshapen until it's stuffed. Row 19: (1 sc in first 2 sc, 2 sc in next) 5 times. (20) Rows 20-25-: 1 sc in each sc. (20). Row 26: (1 sc in next 3 sc, 1 decrease) 4 times. (16) Row 27: 1 sc in each sc. (16) Row 28: (1 sc in each of first 3 sc, 2 sc in next) 4 times. (20)c End piece. Stuff torso.
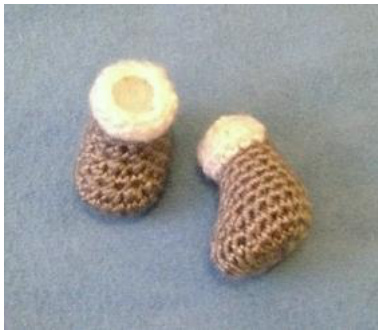
Boots and Legs
Make 2
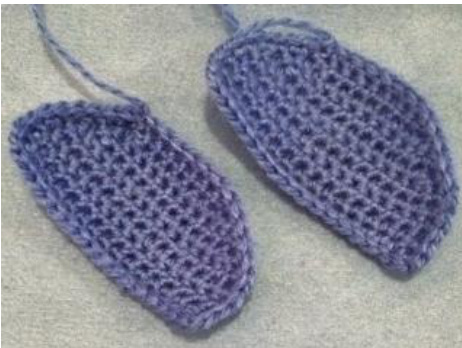
Row 1: With medium gray yarn, chain 2. 8 sc in second chain from hook. Row 2: 2 sc in each sc. (16) Row 3: Sc in first 6 sc. 2 hdc in each of next 4 sc. Sc in next 6 sc. (20) Row 4: Sc in each sc. (20) Row 5: Sc in first 5 sc. Decrease 5 times. Sc in next 5 sc. (15) Row 6: 1 sc in each sc. (15) Row 7: (1 sc, decrease) 5 times. (10) Rows 8-9: 1 sc in each sc. (10). End medium gray. Row 10: Join white yarn. (1 sc, 2sc in next) 5 times. (15). Row 11: 15 sc. Row 12: (1 sc, 1 decrease) 5 times. (10). End white yarn. Join midnight blue yarn, for legs. Row 13: In inner loops of row 12, 1 sc in each sc. (10) Rows 14-25: Sc in each sc. End leg 1. Do not end leg 2. Make sure last stitch on leg 2 is in the center back stitch (make a few extra stitches if needed). Stuff legs with polyester fiberfill.
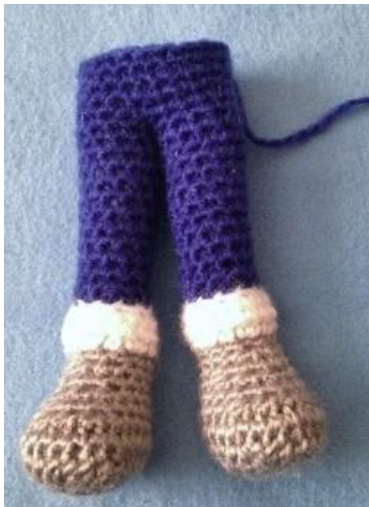
Row 1: Continuing on from leg 2: Sc in first 3 sc. In next sc, draw yarn through, leaving loop on hook. Draw yarn through corresponding stitch on leg 1 (put legs together, feet forward, to determine which stitch). Draw yarn through all loops on hook, combining legs. Sc in next 9 sc on leg 1. Draw yarn through same stitch used to combine legs, leaving loop on hook. Draw yarn through same combining stitch on leg 2. Draw yarn through all loops on hook. Sc in next 7 sc on leg 2. There should be 20 sc total around the tops of the legs. Rows 2-5: 1 sc in each sc. End, leaving length for sewing.
With yarn needle, sew torso and hips together, leaving an opening for stuffing. Fill torso and hips with polyester fiberfill. Sew remaining stitches together.
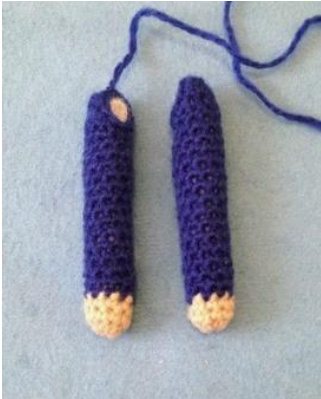
Arms Make 2
Row 1: With light beige yarn, chain 2. 8 sc in second chain from hook. Row 2-3: 1 sc in each sc. 8 sc. End light beige, join midnight blue yarn. Row 4: 1 sc in each sc. 8 sc. Row 5: 2 sc in first sc, 3 sc, 2 sc in next sc, 3 sc. 10 sc. Rows 6-17: 1 sc in each sc. 10 sc. Row 18: 1 sc in each of next 9 sc. Chain 1, turn. Row 19: 1 sc in each of next 8 sc. Chain 1, turn. Row 20: 1 sc in each of next 7 sc. Do not turn. 6 sc In armhole opening. Row 21. Decrease 3 times, slip stitch in next sc. Armhole should have 10 stitches around. Leave length for sewing. Stuff arms with polyester fiberfill. Sew arm to torso (top of arm should be on Row 19, bottom of arm on Row 22). Sew second arm to opposite side of torso.
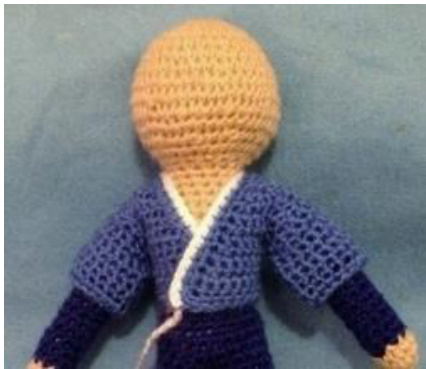
Tunic
Beginning at waistline:
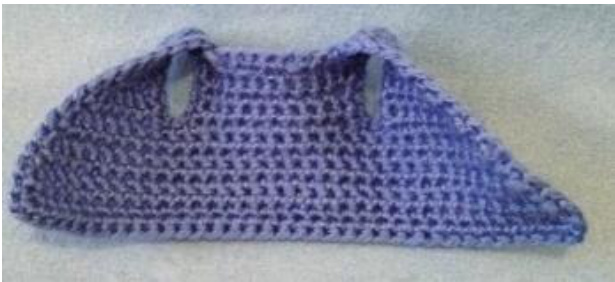
Row 1: With cobalt blue yarn, chain 28. Sc in second chain from hook and each chain across. (27) Chain 1, turn. Row 2: 27 sc. Chain 1, turn. Row 3: Skip first sc, 24 sc, skip next sc, sc in last. (25) Chain 1, turn. Row 4: 25 sc. Chain 1, turn. Row 5: Skip first sc, 22 sc, skip next sc, sc in last. (23) Chain 1, turn. Row 6: 5 sc. Chain 1, turn. Row 7: 5 sc. Chain 1, turn. Row 8: Skip first sc. 4 sc. (4) Chain 1, turn. Row 9: 4 sc. Chain 1, turn. Row 10: Skip first sc, 3 sc. (3) Chain 1, turn. Row 11: 3 sc. Chain 1, turn. Row 12: Skip first sc, 2 sc. (2) Chain 1, turn. Row 13: 2 sc. End.
Back:
Row 6: Skip 3 sc on row 5. Join yarn in fourth sc. Sc in same stitch and in next 8 sc. (9) Chain 1, turn. Rows 7-9: 9 sc. Chain 1, turn. Row 10: 2 sc in first sc, 8 sc, 2 sc in last. (11) Chain 1, turn. Row 11: 11 sc. End.
Left front:
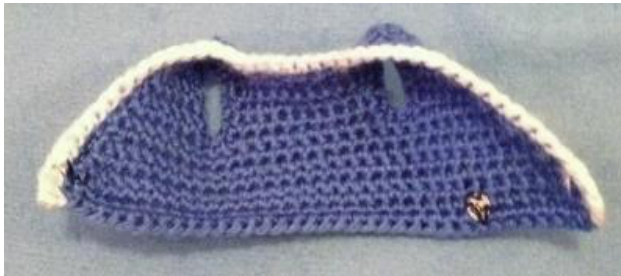
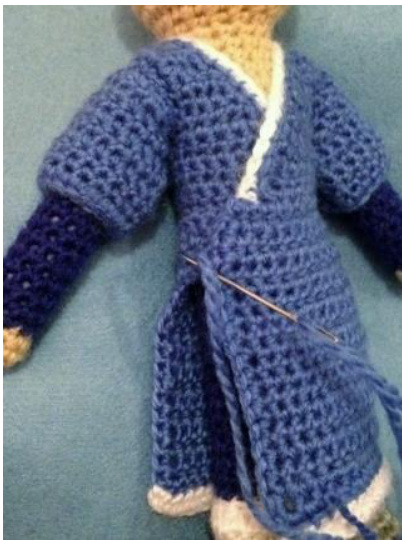
Row 6: Skip 3 sc on row 5. Join yarn in fourth sc. Sc in same stitch and in next 4 sc. (5) Chain 1, turn. Row 7: 5 sc. Row 8: 3 sc, skip next sc, sc in last. (4) Chain 1, turn. Row 9: 4 sc. Chain 1, turn. Row 10: 2 sc, skip next sc, sc in last. (3) Chain 1, turn. Row 11: 3 sc. Chain 1, turn. Row 12: 1 sc, skip next sc, sc in last. (2) Chain 1, turn. Row 13: 2 sc. Chain 1, turn. Row 14: 2 sc. Do not turn. Evenly crochet around edges of entire piece, with 13 sc in each armhole and 3 sc in each corner. End. Sew together at shoulders. Join white thread at one waist end, and crochet 1 sc in each sc around upper edge of piece. Optional: sew a small snap on outside edge of right front and on the 8th stitch from the end on the inside left front. (This helps keep the piece in place when sewing it together later, but is not absolutely necessary!)
Sleeves: (Make 2)
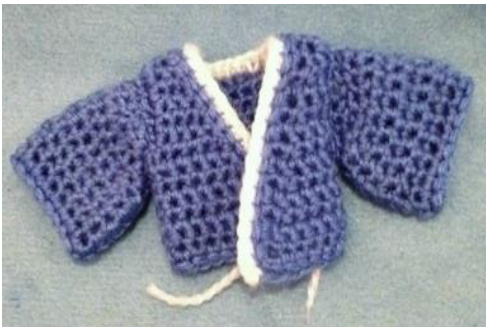
Row 1: Chain 17. Sc in second chain from hook and each chain across. (16) Chain 1, turn. Rows 2-4: 16 sc. Chain 1, turn. Row 5: Skip first sc. 13 sc. Skip next sc, sc in last. (14) Chain 1, turn. Row 6: Skip first sc. 11 sc. Skip next sc, sc in last. (12) Chain 1, turn. Row 7: Skip first sc. 9 sc. Skip next sc, sc in last. (10) Chain 1, turn. Row 8: Skip first sc. 7 sc. Skip next sc, sc in last. (8) Do not turn. Evenly crochet around edges of entire piece, with 3 sc in each corner of the bottom row. Sew 6 stitches together along shorter edges. Set sleeve into armhole and sew into place.
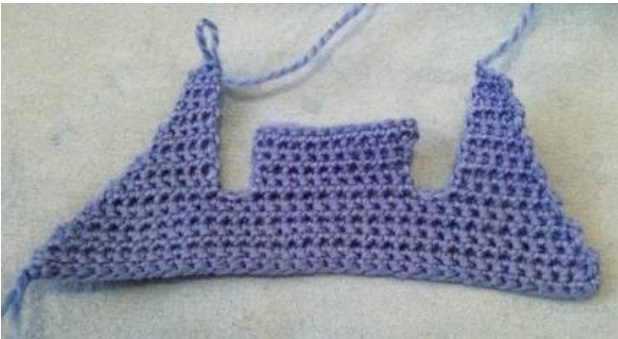
Skirt
Row 1: Join cobalt blue yarn in first stich on bottom left front. 2 sc in first stitch, 1 sc in each of next 24. (25) Chain 1, turn. Note: there will be 7 unworked stitches at the end of this row. Row 2: 25 sc. Chain 1, turn. Row 3: 2 sc in first sc, 24 sc. (26) Chain 1, turn. Row 4: 26 sc. Chain 1, turn.
Back panel:
Row 5: 10 sc. Chain 1, turn. Row 6: 10 sc. Chain 1, turn. Row 7: (3 sc, 2 sc in next) 2 times, 2 sc. (12) Chain 1, turn. Rows 8-12: 12 sc. Chain 1, turn. Row 13: (3 sc, 2 sc in next) 2 times, 4 sc. (14) Chain 1, turn. Rows 14-18: 14 sc. Chain 1, turn. Row 19: 14 sc. End.
Front panel:
Row 5: Skip 4 sc on row 4. Join yarn in fifth stitch. Sc in that stitch and in next 9 sc. (10) Chain 1, turn. Note: there will be 3 unworked stitches at the end of this row. Row 6: 10 sc. Chain 1, turn. Row 7: (3 sc, 2 sc in next) 2 times, 2 sc. (12) Chain 1, turn. Rows 8-12: 12 sc. Chain 1, turn. Row 13: (3 sc, 2 sc in next) 2 times, 4 sc. (14) Chain 1, turn. Rows 14-18: 14 sc. Chain 1, turn. Row 19: 14 sc. End. Join yarn at end of row 1 of skirt (see picture). Crochet evenly around edges of entire skirt, ending with a slip stitch in the other end of row 1.
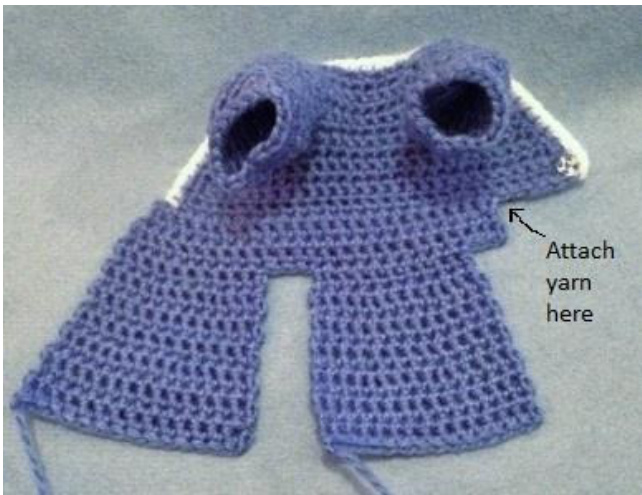
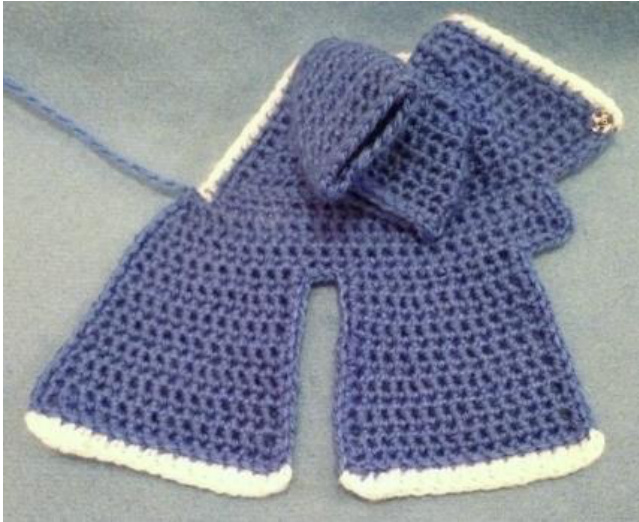
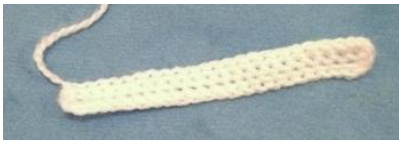
Join white yarn in corner at bottom of panel. 1 sc, 15 hdc, 1 sc, slip stitch in next corner. End. Weave in ends. Sew rows 1-4 of skirt together at waist. Belt: Chain 23. Sc in second chain from hook and each chain across. (22) Chain 1, turn. Rows 2-3: 22 sc. Chain 1, turn. End, leaving short length for sewing. Sew short ends together around waist of doll.
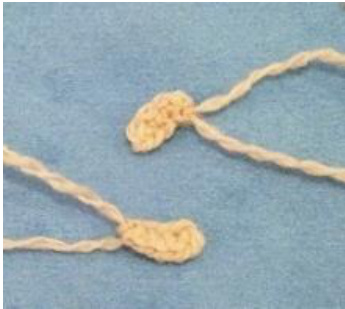
Ears Make 2
With light beige yarn, leaving a small tail, chain 4. 2 sc in second chain from hook. 1 sc in each of next 2 sc. End, leaving length for sewing. Tie a small knot using the tail and the sewing length (this makes the ear more rounded). Sew ears to sides of head. Top of ear should be on Row 9, bottom of ear on Row12.Weave in ends.
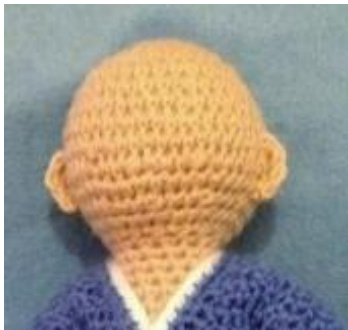
Hair
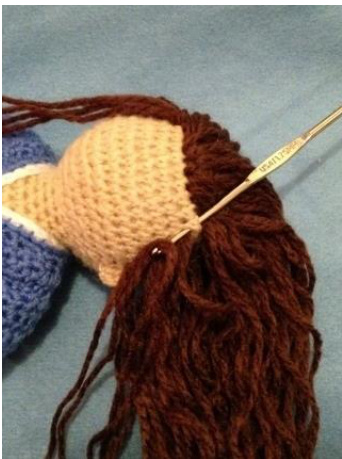
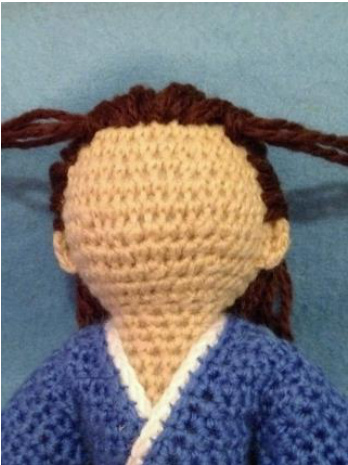
Cut 50 12-inch strands of Earth color yarn. Starting with the 6 center front stitches on row 3, pull 2 strands of yarn through each stitch. Working at an angle, pull 2 strands through the next stitch on each row from row 3 to row 9 (just above and in front of the ear). Repeat on other side of face beginning with the stitch above the ear. On row 3, pull 2 strands of yarn through each of the 'corner' stitches on the front of the head and knot.
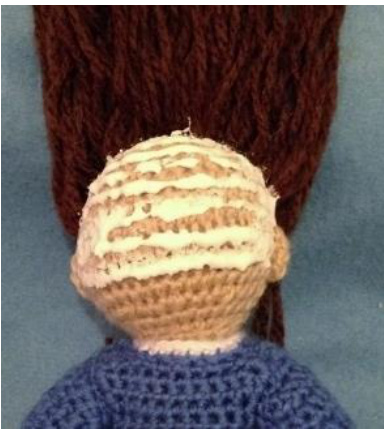
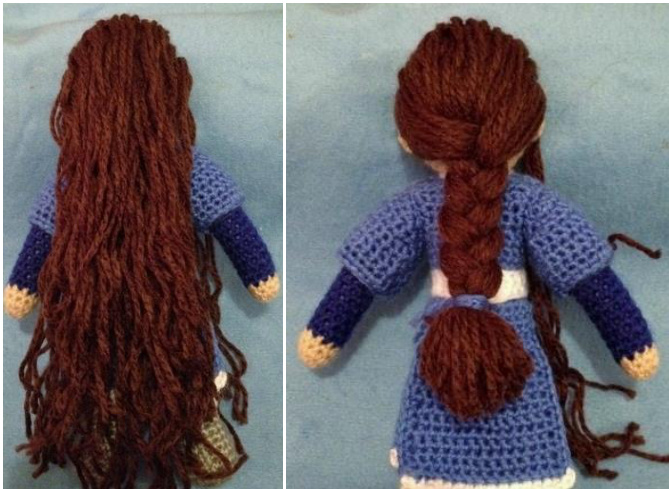
On back of head, apply a layer of craft glue. Flip hair back and press into glue. Arrange so there are no loose or out-ofplace strands. Let glue dry and braid hair.
(Note: if braid is too thick, carefully cut off some strands - no more than 2 or 3 at a time - under the bulk of the hair, next to the head just below the glued section, until hair is the desired thickness.) Tie with a strand of blue yarn. Trim ends.
Using 3x6 mm pearl beads, pull the 2 strands of yarn on either side of the forehead through one bead. (Note: this is easiest if you use a size 10 or 11 steel crochet hook to pull the yarn through.) Trim the strands so they end just above the belt.
Eyes
With blue thread, sew two small (8 mm) blue buttons 8 stitches apart on row 9 of the head. The doll is now complete!