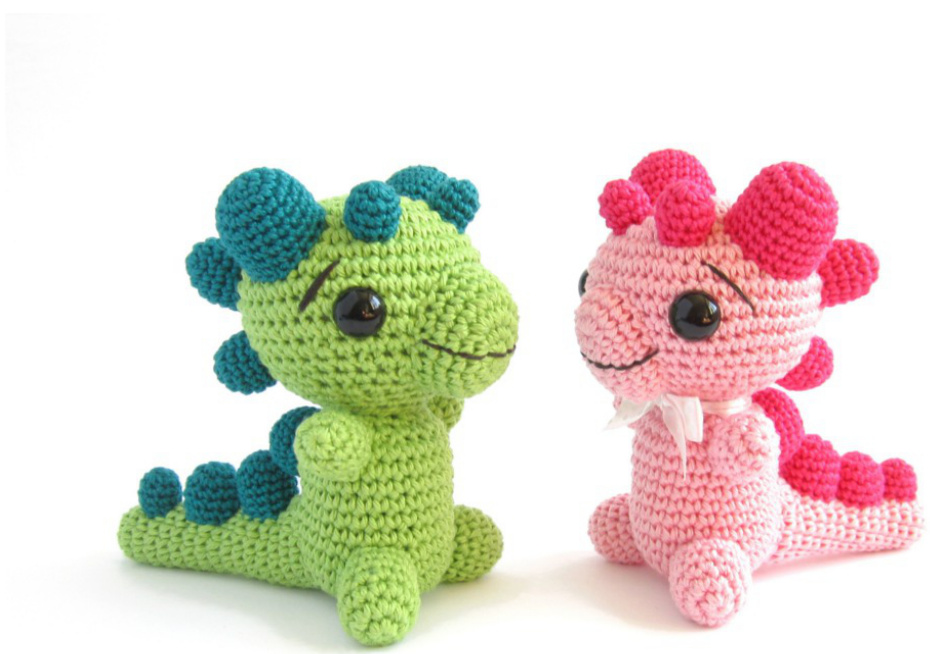
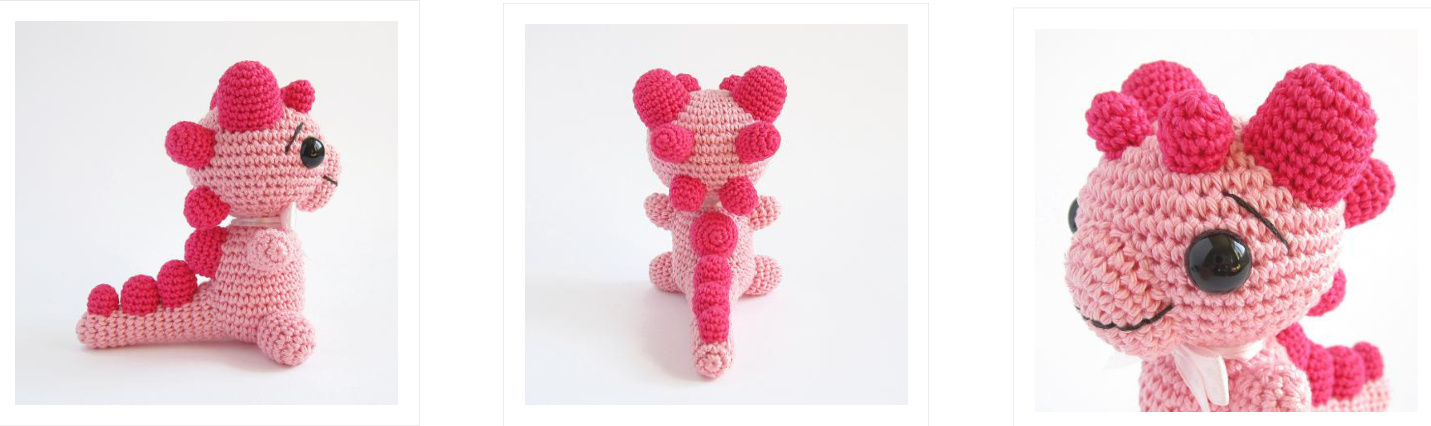
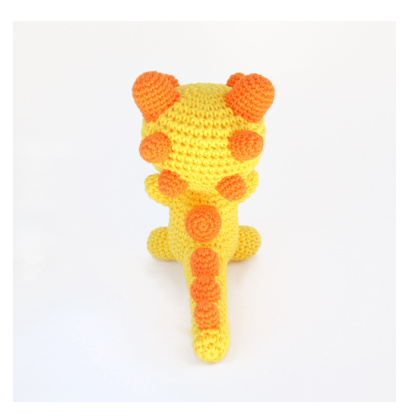
BABY DINOSAUR RATTLE
Crochet pattern by Kristi Tullus This tutorial provides a detailed description, with clear step-by-step photos, to make a 11 cm (4.3 in) tall baby dinosaur rattle. Pattern is written in English, using standard (US) crochet terminology. Skills required: Single crochet stitch, increasing and decreasing. In this tutorial I will explain starting a piece with magic ring (adjustable loop), finishing a piece, joining pieces, knotting and hiding yarn tails. Difficulty: medium. Pattern includes unlimited support from me via email - kristi@spire.ee For more patterns visit my shop - http://www.etsy.com/shop/SIDRUNsZoo For more crochet tutorials and amigurumi designs visit my blog - http://engsidrun.spire.ee You may NOT sell, redistribute, alter or publish this pattern. You MAY sell finished products made with this pattern, provided you credit me (KristiTullus, http://sidrun.spire.ee or http://www.etsy.com/shop/SIDRUNsZoo) as the designer.
Tip! You can use the same pattern to make larger or smaller toys by using finer or bulkier yarn. Pick a crochet hook at least a size smaller than suggested on yarn label. Use a hook as small as possible in order to achieve a tight gauge that retains stuffing and does not allow it to show through the fabric.
Materials
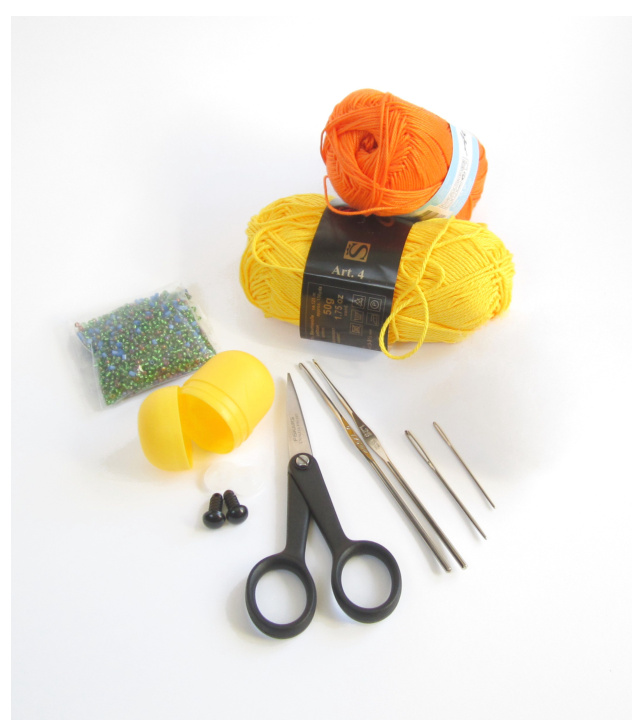
To make this project you will need: - Cotton yarn. For the body use 125m/50g (143y/50g) and for spikes 165m/50g (190y/50g). You will need about 23 g of yarn for the body and 7 g for the spikes. - Steel crochet hooks (thread hooks), 1,75mm (US 4) and 1,50mm (US 7). - Stuffing - poly-fill, wool, wadding etc. - 9 mm (1/3 in) safety toy eyes (or buttons, beads etc.) - Plastic egg (from a Kinder Surprise chocolate egg). - Glass or plastic beads (1.5 - 3 mm). - Black cotton embroidery floss. - Tapestry needle. - Scissors. - Stitch marker. - Ribbon, thread and sewing needle.
Abbreviations
Iuiu - 1ouiu mr, n - crochet n sc into the adjustable loop sc - single crochet stitch (double crochet stitch in the UK) sc 4 - make four single crochet stitches inc - increase, make two sc from the same stitch inc3 - make three sc from the same stitch dec - decrease, use invisible decreasing 5,6 dec - crochet 5th and 6th stitch together using invisible decrease, one sc into every other stitch sl - slip stitch sC 4, inc, repeat [1/3] (36) - repeat the “sc 4, inc" pattern, but make one of the first four single crochet stitches at the beginning and three at the end of the round. In other words - sc, inc, (sc 4, inc) x 5, sc 3. sc 4, inc, repeat [1/3] (36) - number of stitches in a round after finishing said round Do not join rounds. Work in continuous rounds (spiral) and use a stitch marker or a piece of yarn to mark the end or the beginning of each round. Move it up after every round.
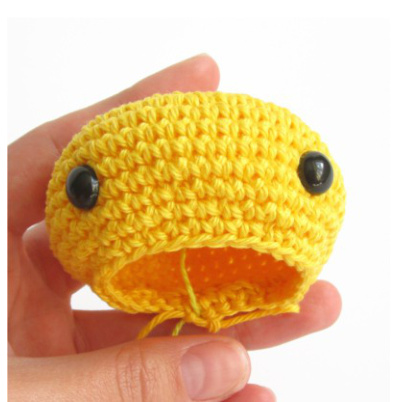
HEAD
Rnd1: mr,6 (6) Rnd2: inc, around (12) Rnd3: sc, inc, repeat (18) Rnd4: sc 2, inc, repeat [1/1] (24) Rnd5: sc 3, inc, repeat (30) Rnd6: sc 4, inc, repeat [1/3] (36) Rnd7: sc 5, inc, repeat (42) Rnd8: sc 6, inc, repeat [3/3] (48) Rnd9-12: sc in each stitch (48) Rnd13: sc 6, dec, repeat [3/3] (42) Rnd14: sc 5, dec, repeat (36) Rnd15: sc 4, dec, repeat [1/3] (30) Rnd16: sc 3, dec, repeat (24) Rnd17: sc 2, dec, repeat [1/1] (18) Rnd18: sc 2, dec, repeat, sc 2 (14) Leave a tail long enough to sew on the body, arms, legs and the tail.
BODY
Rnd1: mr,6 (6) Rnd2: inc, around (12) Rnd3: sc, inc, repeat (18 Rnd4: sc 2, inc, repeat [1/1] (24) Rnd5: sc 5, inc, repeat (28) Rnd6-14: sc in each stitch (28) Insert the plastic egg before decreasing. Rnd15: sc 5, dec, repeat (24) Rnd16: sc 2, dec, repeat [1/1] (18) Rnd17: sc 2, dec, repeat, sc 2 (14 Fasten off and hide the yarn tail
Make the head. Attach safety toy eyes after round 15.
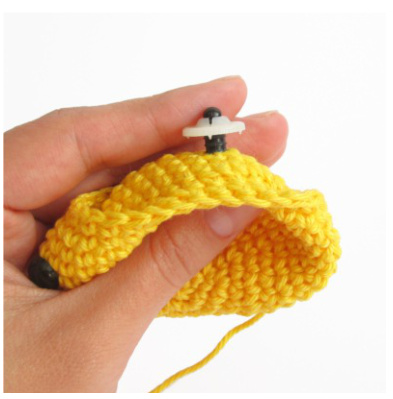
1. Place the eyes between rows 11 and 12, leaving 13 stitches betweenthem. 2. Make sure you are satisfied with the placement of the eyes before pushing the washer to place. Tip! If your gauge is on the looser side, put a thin layer of your stuffing material between the fabric and the washer to keep it from showing through the fabric.
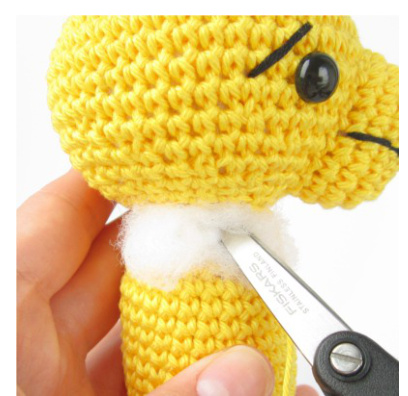
Stuff the head firmly. Start stuffing after round15.
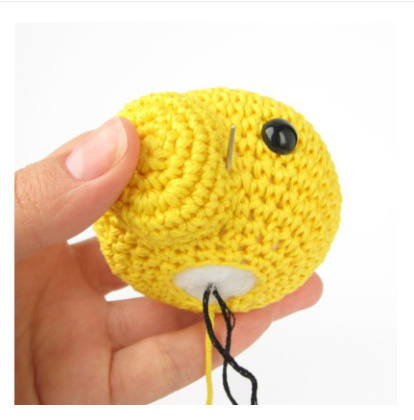
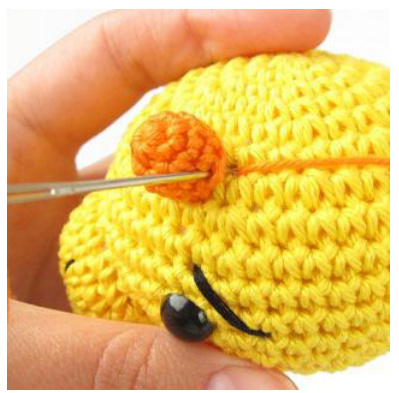
Tip! Loosen the stuffing before inserting it. Add a bit at a time until the piece is firm and holds shape. If using darker yarn stuff more lightly. Sew the snout to the head. Embroider the mouth, nostrils and eyebrows with black cotton embroidery floss.
SNOUT
Rnd1: mr, 6 Rnd2: inc, around Rnd3: sc 3, inc3 x 2, sc 4, inc3 x 2, sc 1 Rnd4-6: sc in each stitch
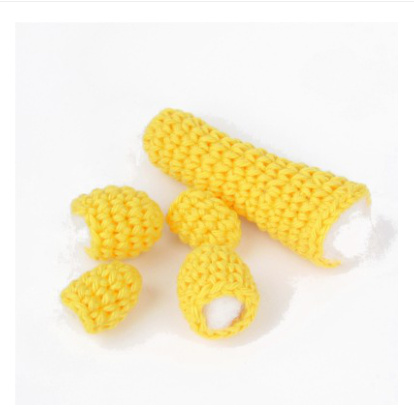
ARMS
Fasten off, hide yarn tail and stuff firmly.
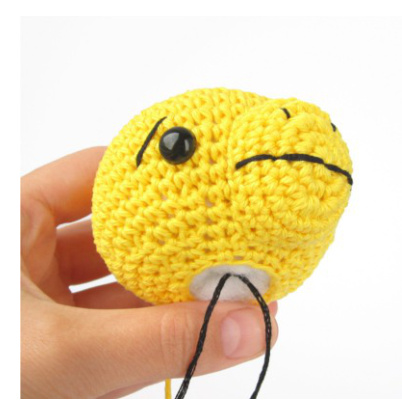
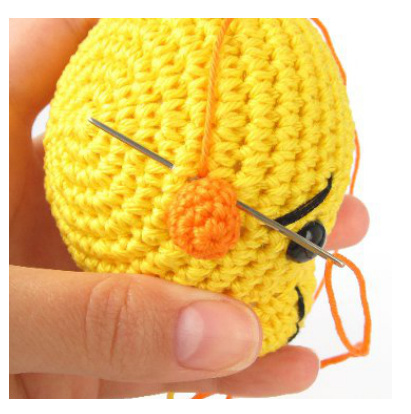
2. Embroider the face. Come back out to the bottom.Fasten with a double knot. 1. Insert the needle from the bottom of the head leaving a tail of about 5 cm or 2 inches.
LEGS
Rnd1: mr,6 (6) Rnd2: inc, around (12) Rnd3-6: sc in each stitch (12) Fasten off, hide yarn tail and stuffirmly.
Make the body. Insert the plastic egg into the body after round 14 before you start decreasing on round 15.
Tip! Insert the plastic egg into the body after round 7 and make sure it is a snug fit. You may need to increase or decrease the number of inc on round 5. Make the same number of dec on round 15.
TAIL
Rnd1: mr,6 (6) Rnd2: inc, around (12) Rnd3-12: sc in each stitch (12) Rnd13: inc, sc 11 (13) Rnd14: sc 7, inc, sc 5 (14) Rnd15: sc 3, inc, sc 10 (15) Rnd16: sc in each stitch (15) Rnd17: inc 5, sc 10 (20) Add a bit of stuffing after every few rows to distribute it more evenly.
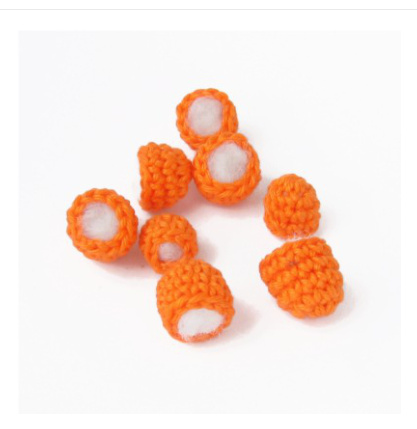
SPIKE 1 - make three
Rnd1: mr,6 (6) Rnd2: sc, inc, repeat (9) Rnd3-4: sc in each stitch (9)
SPIKE 2 - make three
Rnd1: mr,6 (6) Rnd2: inc, around (12) Rnd3-4: sc in each stitch (12)
SPIKE 3 - make three
Rnd1: mr,6 (6) Rnd2: inc, around (12) Rnd3-5: sc in each stitch (12)
SPIKE 4 - make one
Rnd1: mr,6 (6) Rnd2: inc, around (12) Rnd3: sc 2, inc, repeat (16) Rnd4-6: sc in each stitch (16)
SPIKE 5 - make two
Rnd1: mr,6 (6) Rnd2: inc, around (12) Rnd3: sc, inc, repeat (18) Rnd4-8: sc in each stitch (18) Make the spikes,hide yarn tails and stuff them firmly.
Sew the body to the head.
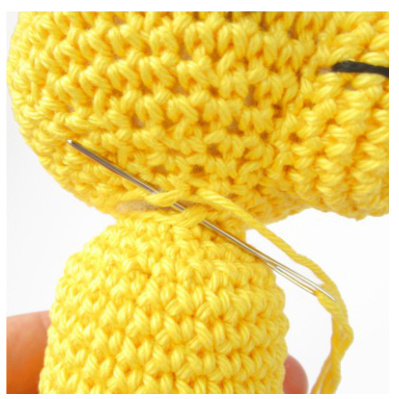
2. Add a bit more stuffing before closing the seam. 1. Use standard whip stitch to attach the body to the head. Tip! In order to have less yarn tails to hide and also make a more durable toy, leave a long tail (about a meter or 3 feet) on the head and use it to sew all the body parts. Do the same with the spikes. Make two arms, two legs, a tail and twelve spikes, hide tails and stuff them firmly. Sew the pieces to the body.
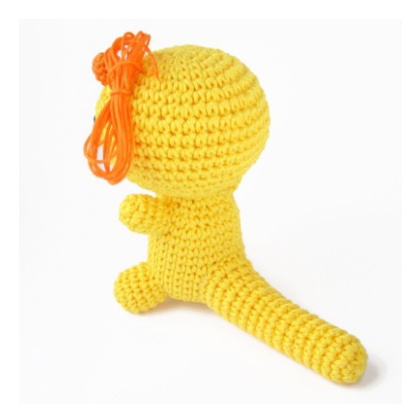
1. Use sewing pins to attach the pieces to the body before sewing. 2. Use the long yarn tail to sew the arms, legs and tail to the body.
3. Sew on the spikes, starting from the nose - 1, 5, 3, 2 (in pairs), 4 (on the back), 3, 2, 1 (on the tail.)
4. Use sewing pins to attach the pieces to the body before sewing to get a symmetrical result.
BASICAMIGURUMI TECHNIQUES.
1. Magic Ring - Starting a piece with adjustable loop:
A magic ring is a way to begin crocheting in the round by crocheting over an adjustable loop and then pulling the loop tight. The advantage of the magic ring method is that, unlike the regular “chain 2, x single crochet in 2nd chain from hook" method, there is no hole left in the middle of your starting round.
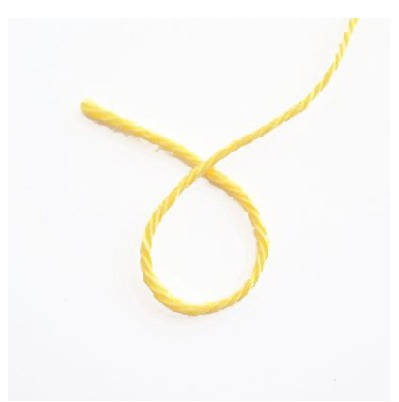
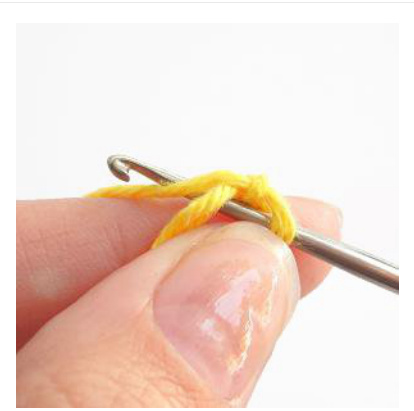
1. Make a loop a few inches from the end of the yarn. Grab the join with your thumb and forefinger.
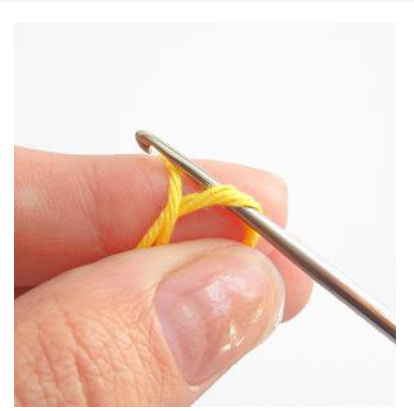
3. Pick up the yarn with the hook and pull through. 2. Insert the hook from front to back and draw up a loop.
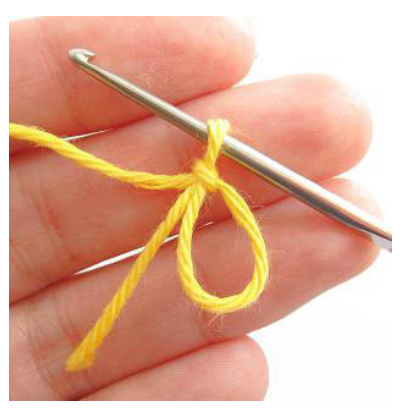
4. Pull tight. This does not count as a single crochet stitch.

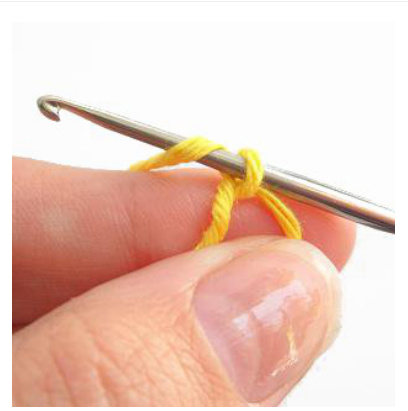
5. Start the first sc. Insert the hook through the loop from front to back. 6. Draw up a loop. Grab the yarn with the hook and pull through.
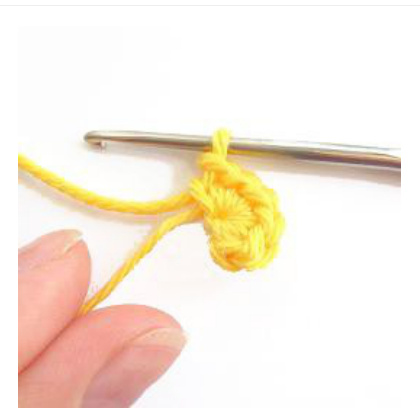
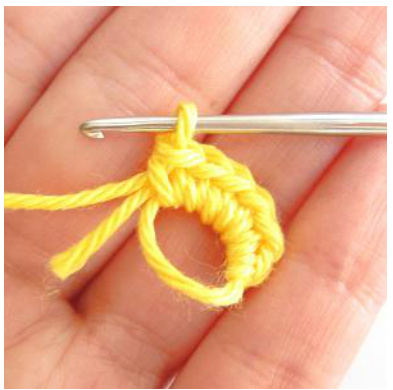
7. Continue to crochet over the loop and the yarn tail until you have the required number of sc for the first round, usually six. 8. Grab hold of the yarn tail and pull until the center is tightly closed. Avoid pulling too hard, because this also tightens the first sc.
2. Finishing an open piece that will be attached to another piece:
This is a way to finish an open piece that willater be sewn to another closed or open piece. It is not a very neat finish, but it is simple and quick. If you need to leave a tail for sewing, stop after step 2.
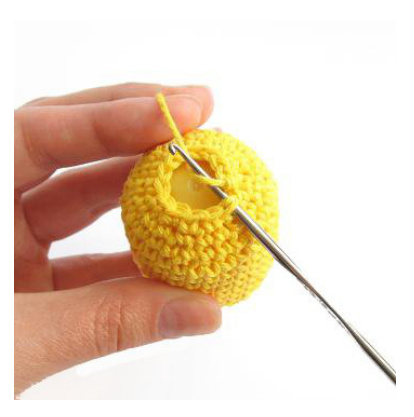
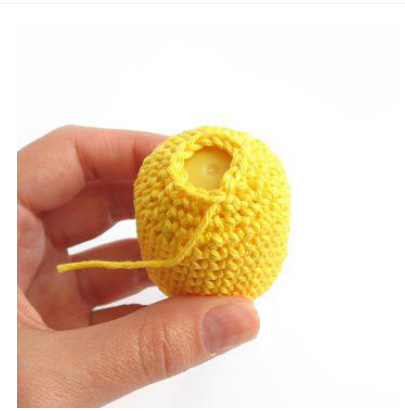
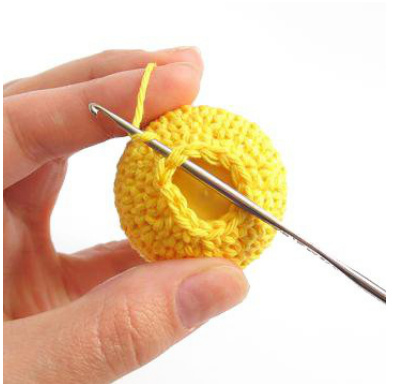
1. Finish the piece with a sl and pull the tail through. Insert the hook to the next st and grab the yarn. 2. Pull the tail through the stitch from back to front. 3. Insert the hook to the next st and grab the yarn with the hook. Pull the tail through from front to back and hide the tail.
3. Stuffing the pieces:
Loosen the stuffing between your hands and add a little bit at a time. Stuffing is what gives your finished piece the shape. Keep adding the stuffing until your piece is firm and holds shape. If you start getting lumps pull out all the stuffing, loosen it and start over. If you can see the stuffing through the fabric you have overstuffed. Then it is best to start over and stuff more lightly. When using dark or very bright colored yarn the pieces should be stuffed more lightly or colored stuffing should be used to get a neat finish.
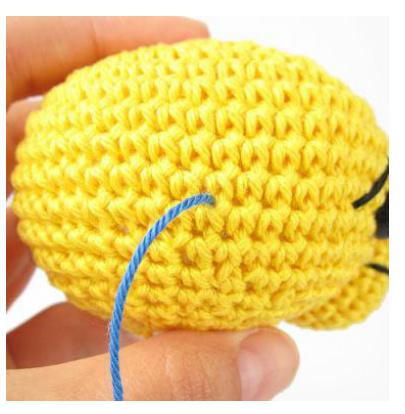
4. Sewing an open-ended piece to a closed piece:
This is a method for sewing an open piece to a closed piece. When pieces are different color, use the yarn you used for the open-ended piece to sew it to the closed piece.
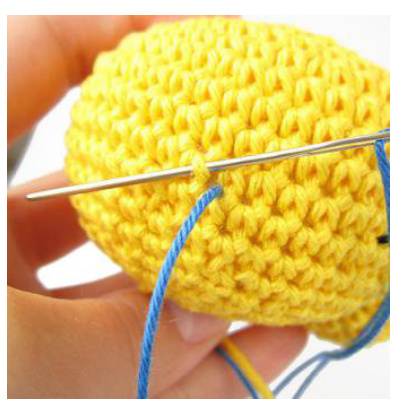
1. Bring the needle up through the fabric under a stitch of the open piece. Go down through both loops of the stitch and into the same hole.
2. Bring the needle back up directly under the next stitch. Pull the yarn tight. This makes the stitch almost invisibly small.
5. Fastening with a knot and hiding the yarn tail:
This tutorial will show how to knot the yarn tail and hide it inside a piece. This method can be used when the yarn tail and the main piece are the same color.
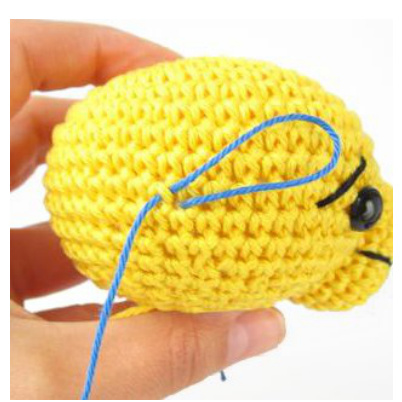
1. Bring the yarn up through the fabric after you have finished sewing. 2. Insert the needle under one loop of a stitch right next to the hole. 3. Pull until you have a small loop.
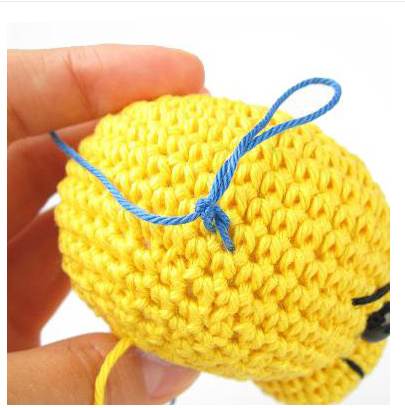
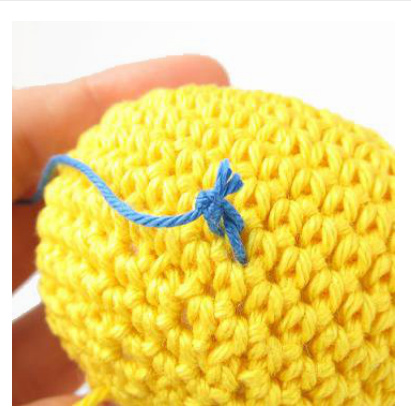
4. Make a double knot. Do not pull the first knot tightly closed. 5. Cut off the loop end with scissors. 6. Insert the needle into the same hole, going through the piece.
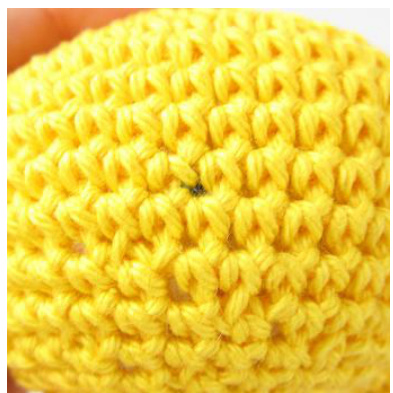
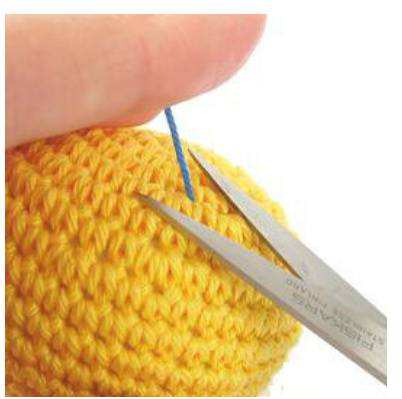
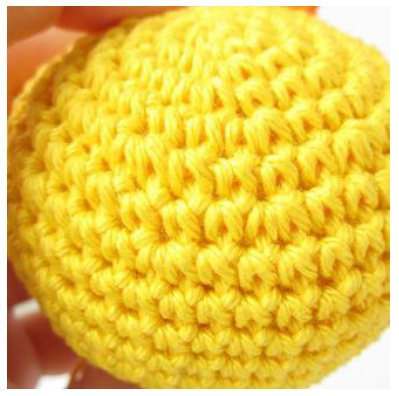
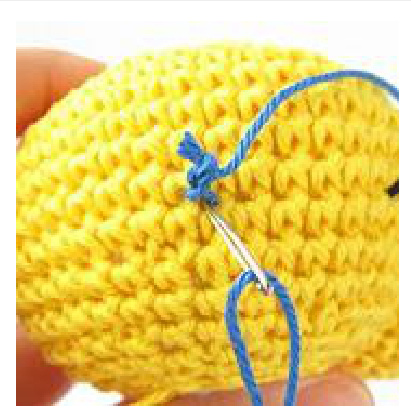
7. Pullightly until the knot disappears into the fabric. 8. Pull lightly on the yarn tail and cut it off close to the fabric. 9. Yarn tail will completely disappear into the fabric.


