Isabella'slittle vest
by Olga Jasnovidova
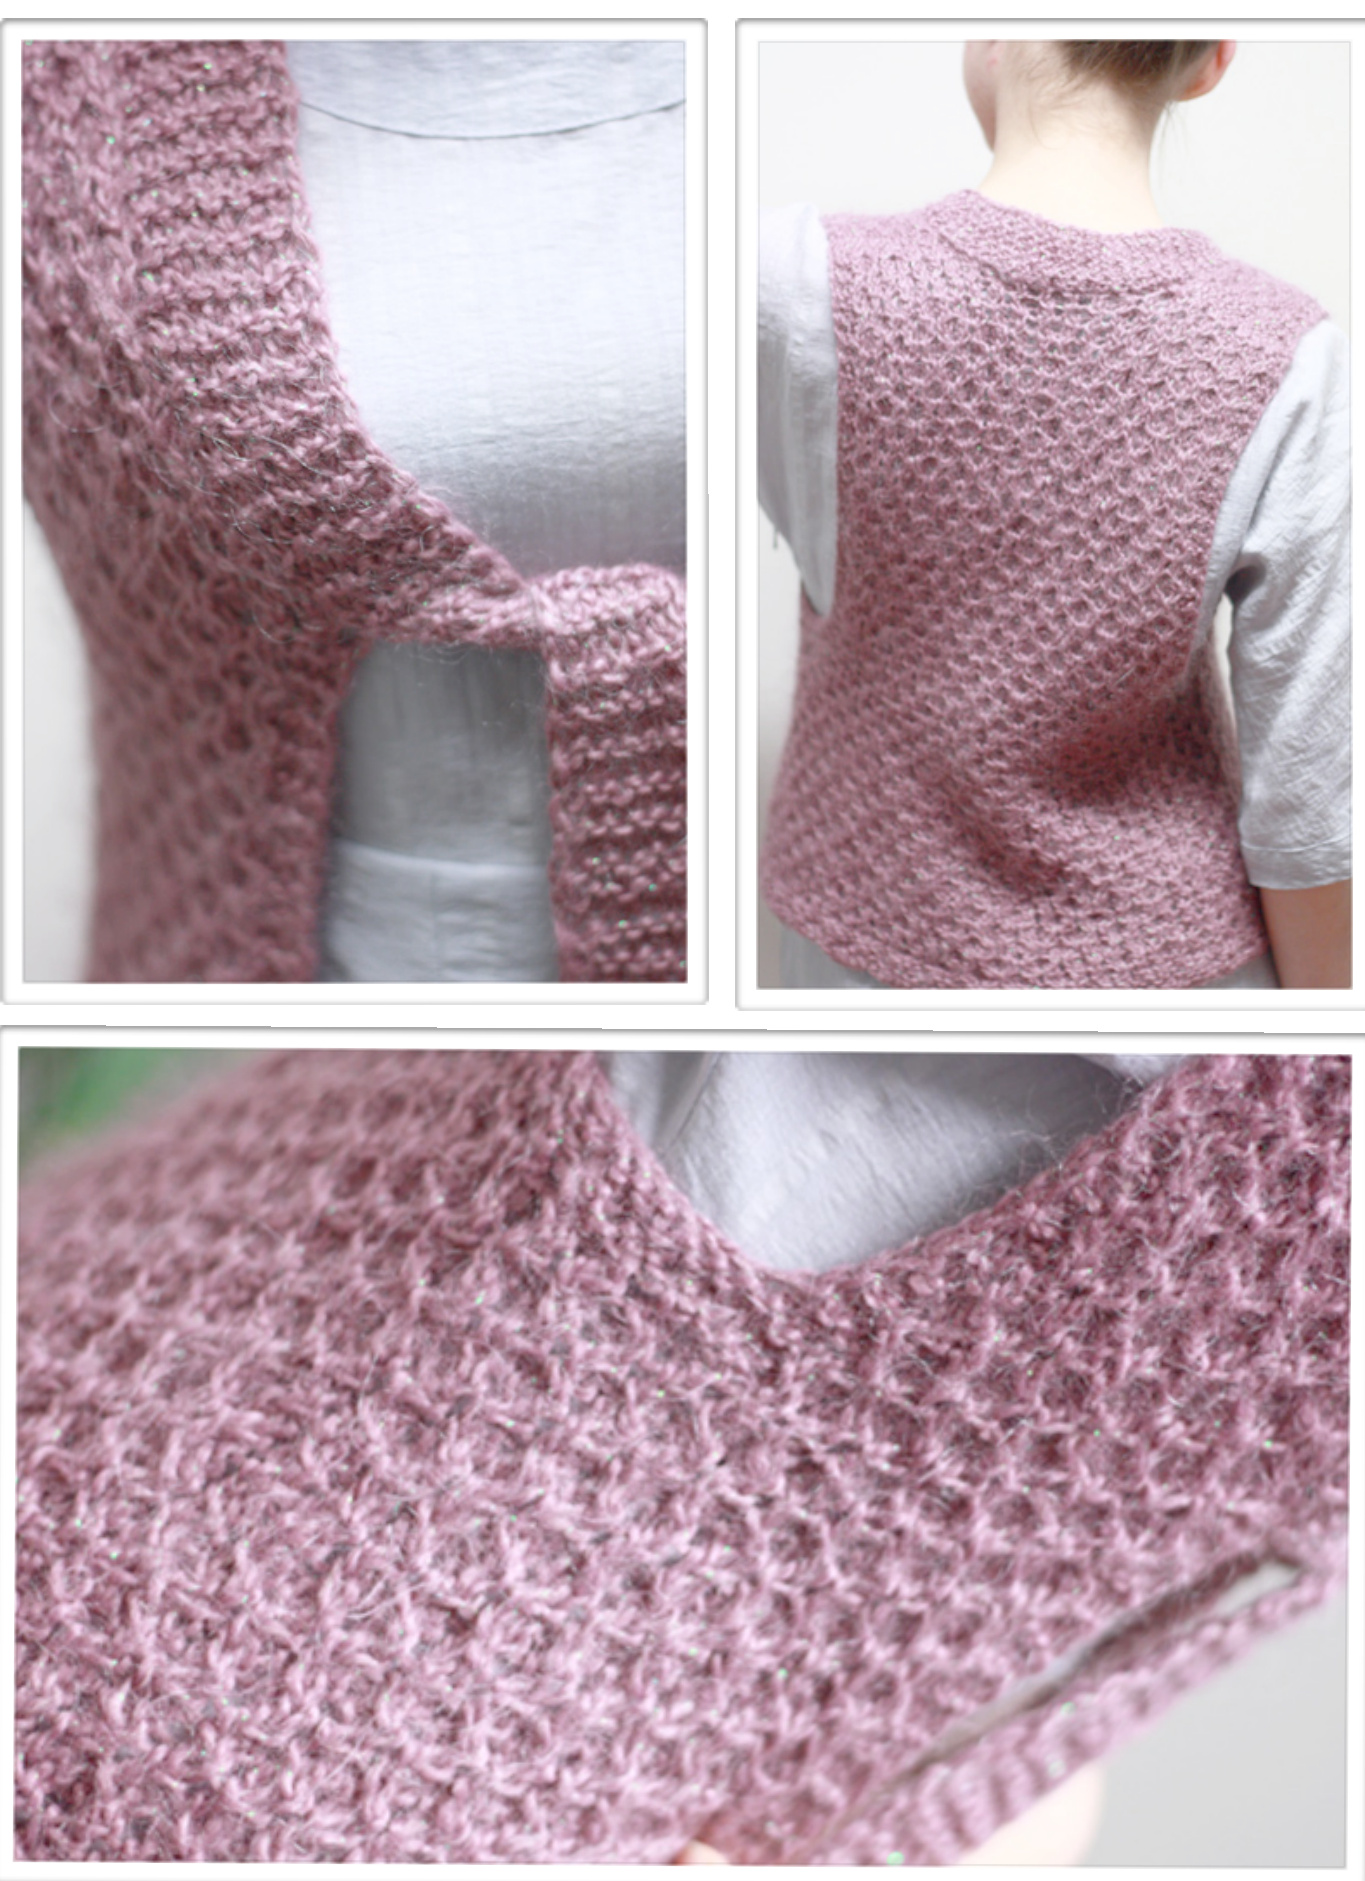
Isabella's little vest
seams. Long strings go over to collar, what makes vest very
Yarn
Bergere de France Eclair 74% acryl 14% mohair 9% worsted wool 3% lurex 50 g = 105 m 150 g
Size
S,M
Needles
1 pair 3 mm needles -for collar and strings (2 short needles) 1 pair 4 mm needles - for vest (long needles) NB! Needles need to have 1 number difference between needle Sizes
Tension
1,6 sts/cm
Used abbreviations
sts - stitch, stitches rev st st - reverse stockinette stitch
Conventional signs
set l sts on a short needle and bring it to the front of work,knit the next sts,then knit sts on the short needle set l sts on a short needle and pull it behind the work, knit the next sts, then knit sts on the short needle perl one 1st edge sts
Description
Preparations
Knit sample piece (e.g. 10xl0 cm) according to chart A (Fig. 1) using bigger needle size. Steam it and measure the tension (sts/cm). NB! If your tension or yarn are very different from given, make your own calculations based Fig. 2 .
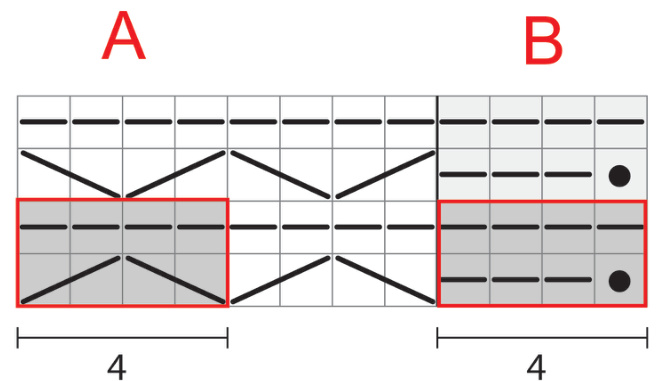
Fig. 1. Charts for knitting:
Pattern
Knit the vest according to Fig.2.The part shown in grey is knitted according tochart A(Fig.l).The partshownin white (edge) is knitted according to chart B(Fig.l).The vertical white
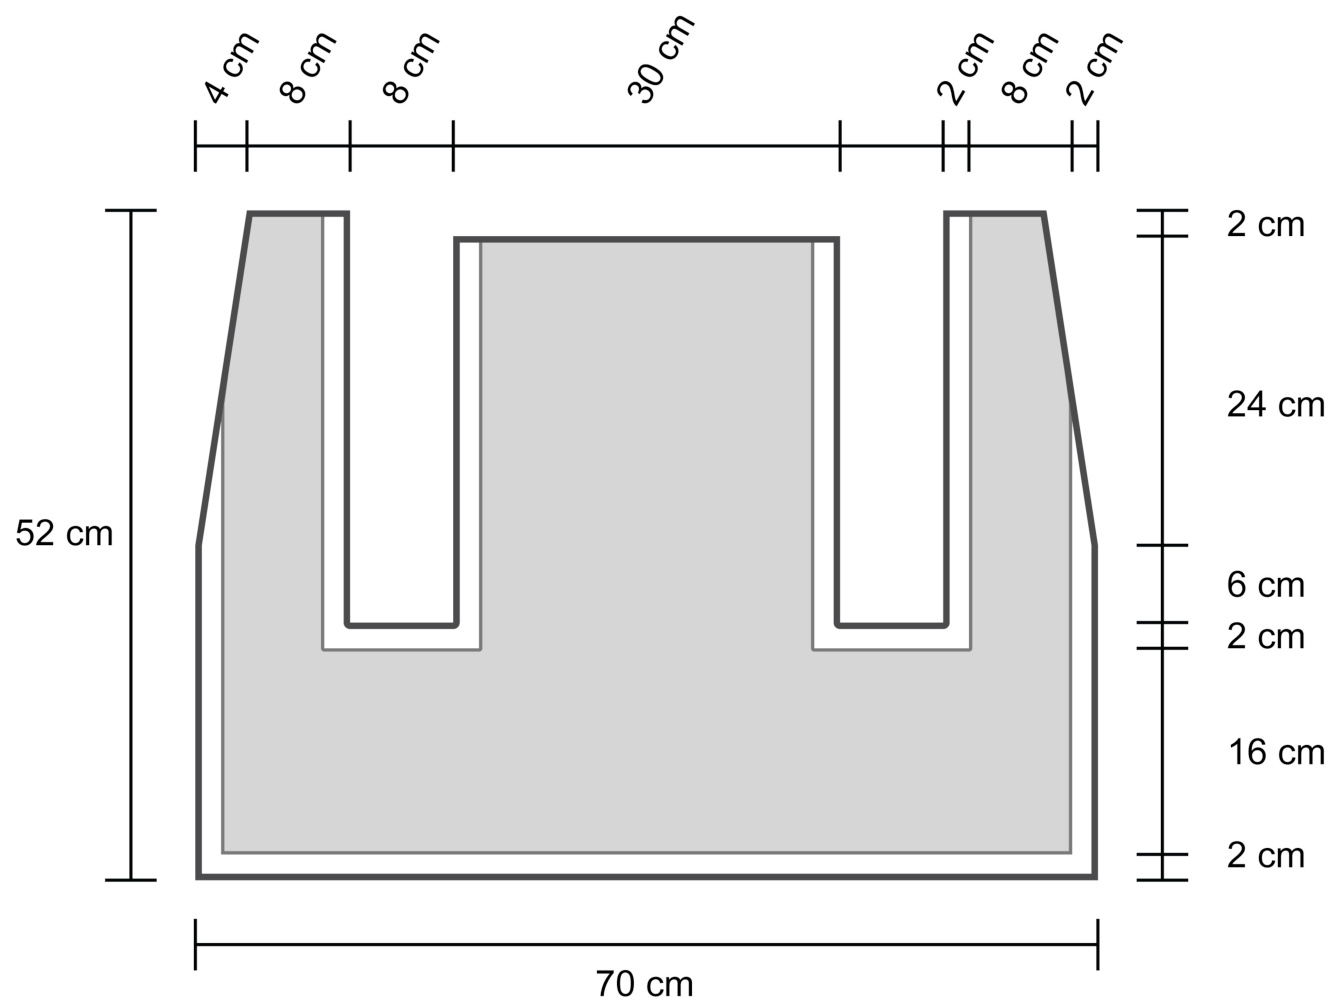
Fig. 2. Pattern for vest. The part shown in grey is knitted according to chart A (Fig.1). The part shown in white (edge) is knitted according to chart B (Fig: 1). edge always consists of 4 sts incl. edge sts. The horizontal white edge always consists of 4 rows in rev st st.
Knitting
Cast on li0 sts. Work 4 rows in rev st st. Further knit first and last 4 stitches according to chart B and middle stitches according to chart A. When your knitting will have 18 cm in height, begin preparations to armholes. Knit 4 sts of right row according to chart B, then 14 stsaccording tochart A,16stsaccording tochartB,42sts accordingtochartA,16stsaccordingtochartB,14sts according to chart A, 4 sts according to chart B. Knit 3 rows in the same way. Then knit 4 sts according to chart B,14 sts according to chart A and 4 sts according to chart B. Cast off next8sts,knit4sts according tochart B,42sts according to chart A, 4 sts according to chart B. Cast off next8sts.Then knit4sts according to chart B,14 sts according to chart A and 4 sts according to chart B. Put loops for back and right side on additional needle or piece of yarn. Thus loops won't interfere while you knit left side.
Left side
Continue to knit left side (4 sts according to chart B, 14 sts according to chart A and 4 sts according to chart B) for another 6 Cm。 Then begin to decrease amount of left side sts. Knit 2 side sts together (after edge sts), knit all sts in the next row. Repeat this for 4 times. 5 sts need to be decreased 5 sts in total. Then knit left side to final height of 52 cm and cast off all sts .
Right side
Return loops for right side back on needles. Join yarn from armhole side. Knit 4 sts according to chart B, 14 sts according to chart A and 4 sts according to chart B. Then knit the same way as the left side.
Back
Return loops for back back on needles. Join yarn so, that you can begin to knit back row. Knit 4 sts according to chart B,42 sts according to chart A,4 sts according to chart B. Knit until final height of 50 cm. Cast off all sts.
Shoulder seams
Align the top of left and right sides and the back. Join shoulder seams.
Collar and strings
Take 3mm needles, cast on 8 sts. Work 40 cm in rev st st. Then you need to join string to vest. For this reason knit another row in rev st st. and knit last sts of the row together with edge sts of right side. Work next row in rev st st. Then again knit row in rev st st. and knit last sts of the row together with the upper edge sts of right side. Work next row in rev st st etc.
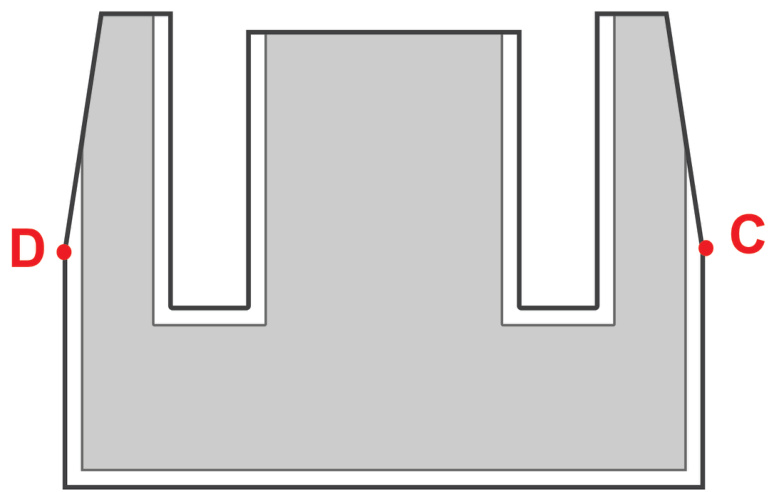
Fig: 3. Points for string joinings NB! You need to join string at 26 cm height of right side at point C(Fig 。 3) NB! Sometimes you need to knit the last sts with the same edge sts, in these way your collar won't be long-drawn. Continue to knit until collar reaches D point (Fig.3) Then stop to knit edge sts together,work another 40 cm in rev Stst 。 Cast off all sts.