CROCHETED CHICK

Materials:
Brown (or black), yellow and red yarn of your choice (thicker yarn will lead to a bigger chick; thinner yarn will lead to a smaller chick) Hook - recommended for the type of the yarn Scissors
Abbreviations:
CH - chain DC - double crochet SC - single crochet CL - cluster stitch of four 12 DCs joined together at the top CLs - clusters SL ST - slip stitch (also connecting stitch)
Step-by-Step Directions:
Head
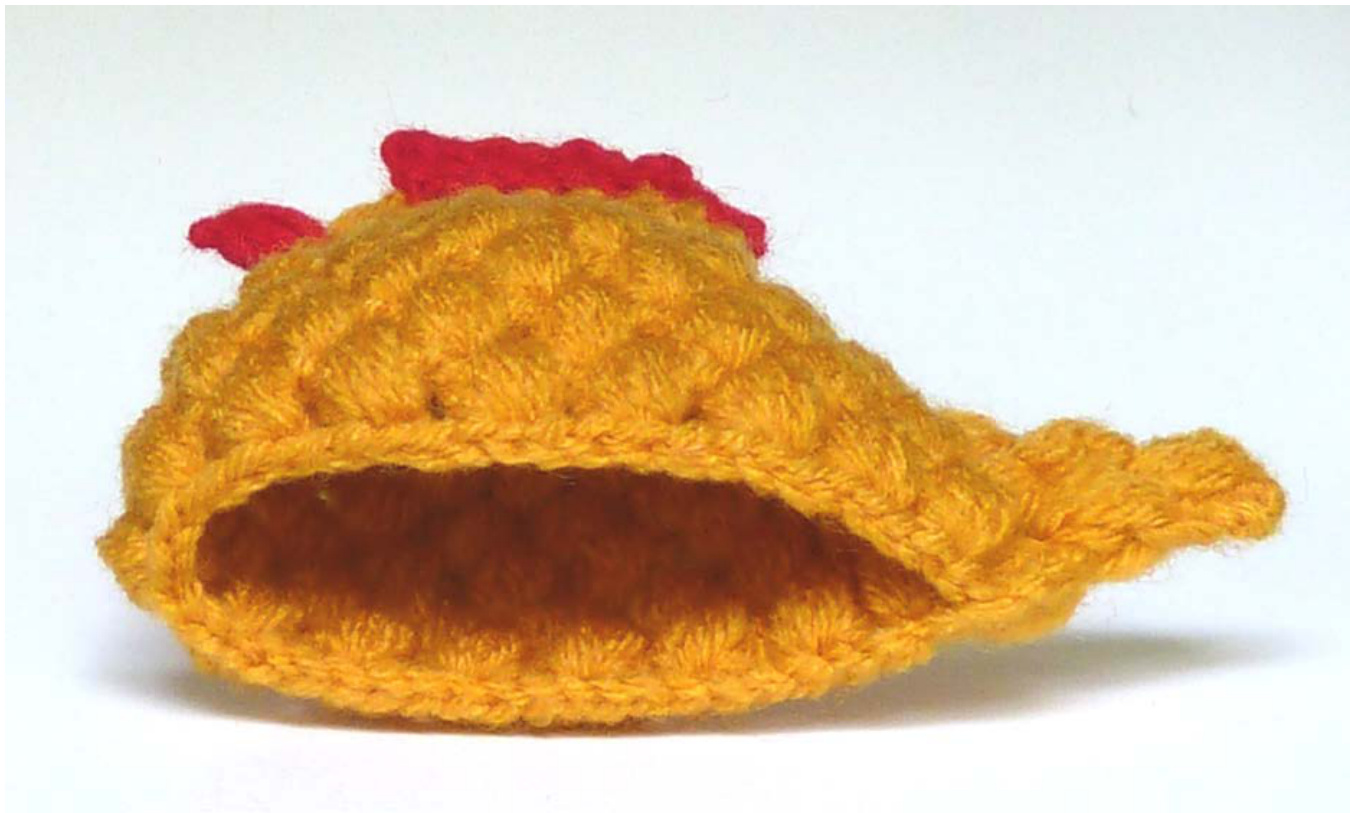
Make two circles - Row1 through Row3 (Note: the image below was taken about year ago when I was creating a different chicken)
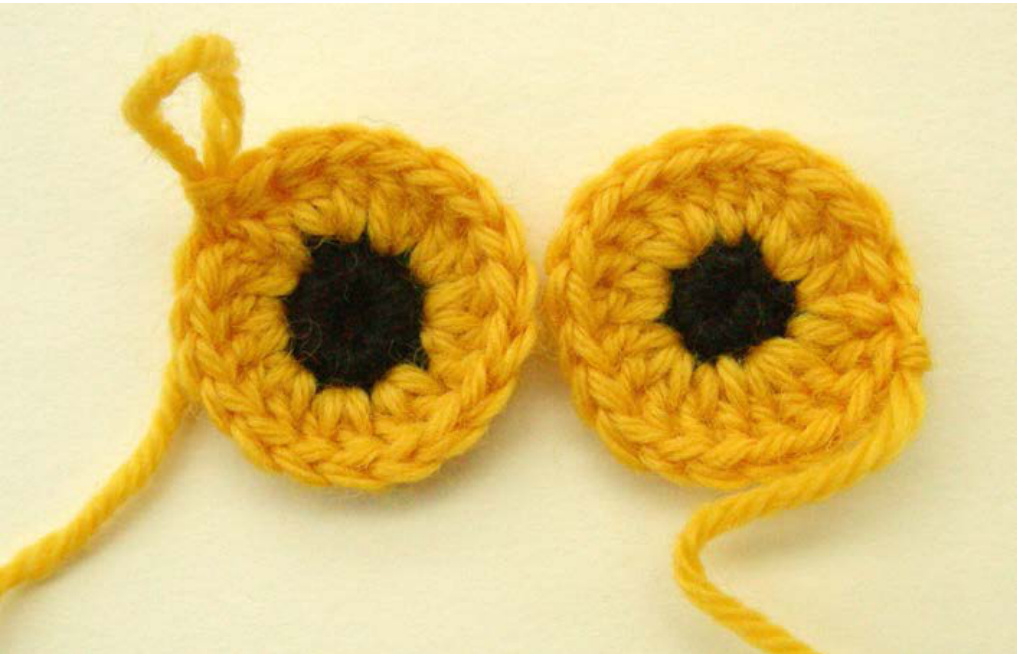
2012 - Bronislava Slagle, “HandMade - Rukodelky”' - all rights reserved. This pattern may not be copied (except for a personal use working copy), distributed, or re-sold except as arranged in writing with Bronislava Slagle. Dark yarn (for the eye) Row 1 CH5, connect into a circle Row 2 CH1, SC9, connect into a circle Yellow yarn (for the head) CH2, DC19 (2 DCs into each SC), connect into a circle Note: Place both circles with wrong side toward each other and keep crocheting on the right side Row4 SC14 both circles together, leaving 6 stiches (= 12 stitches total) from each circle alone - you will crochet a chick's body in that area
Body
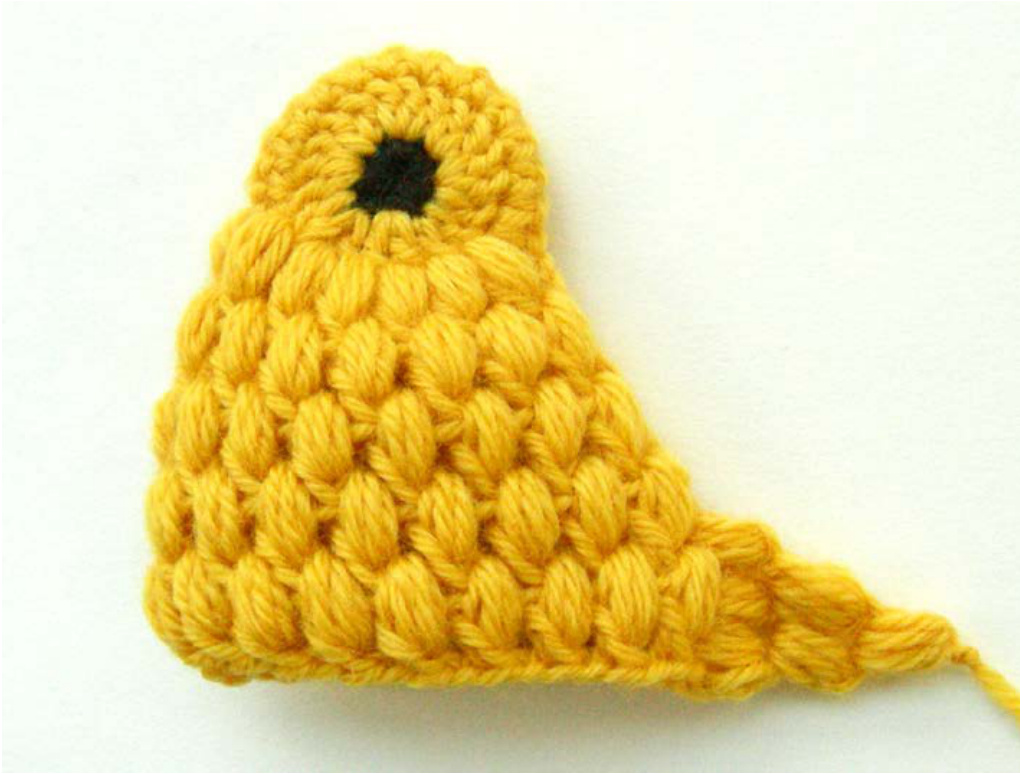
Yellow Yarn (for the body and the tail) Note: You will start body on the 12 stitches from both circles. Each stitch will have a cluster of 4 half double crochet stitches joined together and separated by an extra stitch. You will crochet 5 rows and in 2"d, 3rd, 4"h, and 5h rows you have to add an extra cluster in the beginning after CH3 (so 2"d row of the body will have 13 clusters, 3"d row will have 14 clusters, and so on) Row 5 CH3, \*[CL, CH1] - repeat from \* eleven more times (total 12 CLs), connect into a circle Row 6 CH3, CL between CH3 and first CL from previous row, \*[CL, CH1] - repeat from \* eleven more times (total 13 CLs), connect into a circle Row 7 CH3, CL between CH3 and first CL from previous row, \*[CL, CH1] - repeat from \* twelve more times (total 14 CLs), connect into a circle Row 8 CH3, CL between CH3 and first CL from previous row, \*[CL, CH1] - repeat from \* thirteen more times (total 14 CLs), connect into a circle Row 9 CH3, CL between CH3 and first CL from previous row, \*[CL, CH1] - repeat from \* fourteen more times (total 15 CLs), connect into a circle
Tail
Note: You will continue with a tail along the back, starting at the bottom and crocheting toward the head. The tail consists of 3 rows. First (the 10" row in the step-by-step directions) you will crochet 3 clusters, in the next row 2 clusters and in the last row one cluster. Row10 CH1, CL into first CH3 on the back of the body, CL into second CH3 on the back of the body, CL into third CH3 on the back of the body Row 11 CH 1, CL between two CL in the previous row, CL between two CL in the previousrow Row 12 CH1, CL between two CL in the previous row, CH1 to finish the tail
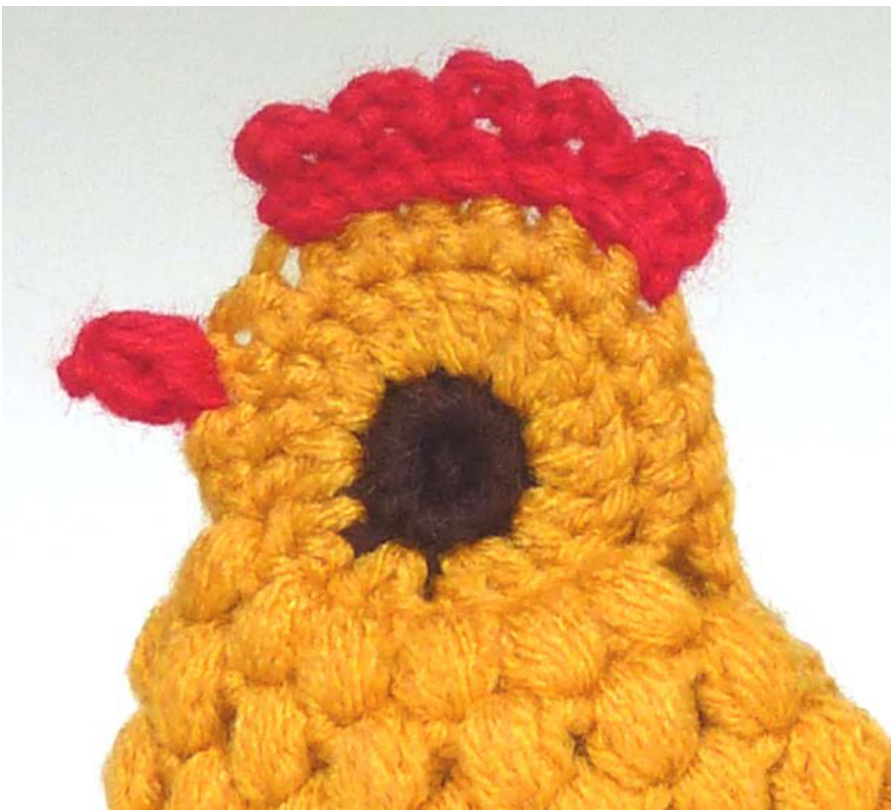
Chick's Comb
Red Yarn (for the comb and the beak) 2012 - Bronislava Slagle, “HandMade - Rukodelky” - all rights reserved. This pattern may not be copied (except for a personal use working copy), distributed, or re-sold except as arranged in writing with Bronislava Slagle. Have your chick in your left hand, tail facing to the left, you looking at the head from the side. Start the chick's comb by placing the hook into the fifth stitch above the body. Row1 CH1,SC6 Row2 \*[CH3, SL ST] - repeat from \* 4 more times (total 5 CH3 picots), finish withSLST
Beak
Note: Have your chick in your left hand, tail facing to the let; you are looking at the side of the chick's head - start the chick's comb by placing the hook into the third stitch above the body - then crochet: CH1, CL, SL ST, finish with an extra stitch.
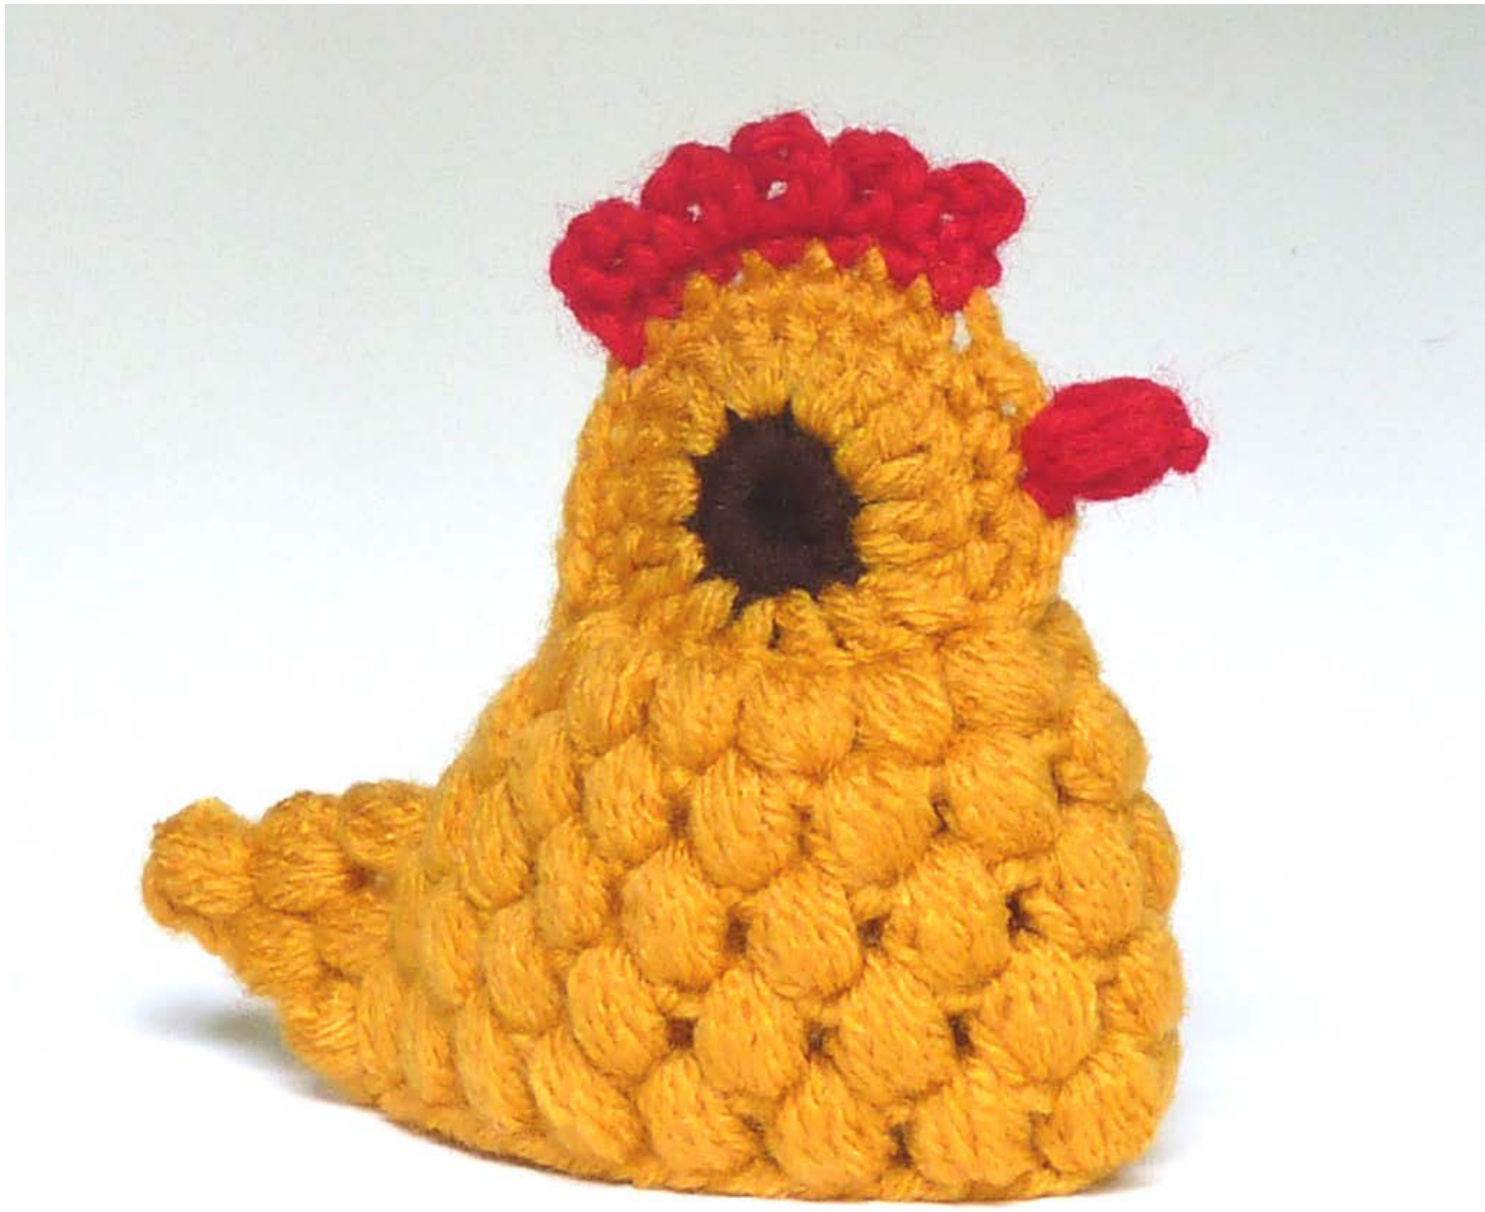
When finished with the chick, clean up all the loose ends. If you need visual help visit my YOUTUBE channel, where I posted a VIDEO of me making the chick.
Do you spend a lot of time on Facebook? Subscribe to my My Hand Made Stuff - Moie Rukodelky Page, which is connected to My Hand Made Stuff - Moie Rukodelky Blog. Should you need my further assistance, you can contact me by filling out a form on my blog (in the menu on the left side) or via ravelry.com (my user name is HandmadeRukodelky) Check out my other patterns (ie. for American Girl Doll, or baby slippers) on my HandMade - Rukodelky blog


