Lovable Plush Uterus
BY ZOELEIGH
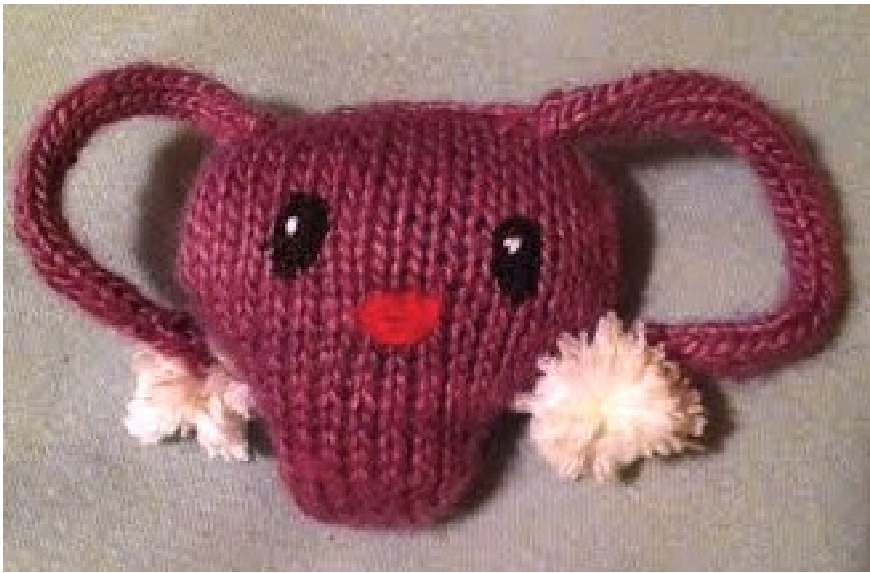
Do you have a uterus that needs to be appreciated? Does someone else have a uterus that needs some appreciation? This charming (though not entirely anatomically correct) uterus is ready to be knit up quickly - I made the whole thing in a few hours - and shared with the less squeamish members of your friends and family... whether or not they already have a uterus of their own!
MATERIALS
YARN:
MC: I used less than half a ball of Malabrigo Silky Merino in Plum Blossom, but any sport-weight yarn in pink would work. CC1: I used Debbie Bliss Cotton DK in White, but any sport- or DK-weight yarn in white would work.
NOTIONS:
Tapestry needle Stuffing Embroidery thread (black, white, red) Sewing needle
NEEDLES:
US 4 / 3.5 mm DPNs ·US 4 / 3.5 mm straight needles\* \* These needles are optional; I knit the entire thing on DPNs, using them as straight needles when necessary.
ABBREVIATIONS
CO: cast on p:purl k: knit st: stitches kfb: knit in front and back []: repeat all in brackets # of times specified RS: right side (of the piece) WS: wrong side (of the piece) k2tog: knit two together p2tog: purl two together BO: bind off
LET'SMAKEA UTERUS!
UTERUS BODY (make 2)
circular needle at least 100 Row 1: p all Row 2: k all Row 3-7: repeat rows 1 & 2 to make stockinette fabric Row 8: k1, kfb, k5, kfb, k1 (11) Row 9: p all Row 10: k1, kfb, k7, kfb, k1 (13) Row 11: p all Row 12: k1, kfb, k9, kfb, k1 (15) 1 stitch marker Row 14: k1, kfb, k11, kfb, k1 (17) Row 15: p all Row 16: k1, kfb, k13, kfb, k1 (19) Doublepointed (40") long and use the "Magic Row 19-21: repeat rows 17 & 18 to make stockinette fabric Row 22: k1, k2t0g, k13, k2t0g, k1 (17) Loop" method. Row 24: k1, k2tog, k11, k2tog, k1 (15) Circular knitting needle 40 cm long Row 26: k1, k2t0g, k9, k2t0g, k1 (13) Row 27: p all Row 28: BO all
FALLOPIAN TUBES (make 2)
Using MC, CO 5 st Work an I-cord until it measures around 3.5 inches. BO, leaving a long tail.
OVARIES (make 2)
Using CC1, make a small pom pom. I wrapped the yarn around the tip of my index finger to make a pom pom of approximately the right size, then trimmed it to a pleasing shape.
ASSEMBLING THEUTERUS
metaphors and poetic meaning. (Chagall By Ingo F. Walther, Rainer Metzger) The March in Paris was just such a chaotic
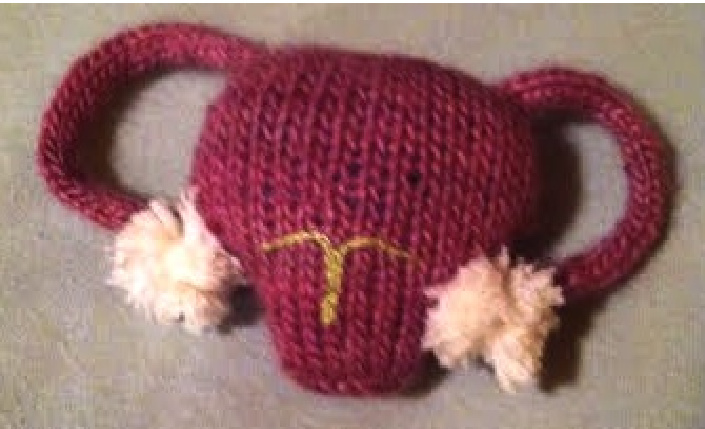
Use the black thread as the main bulk of the eye, the white to add highlights to the eye, and the red as the mouth. I also used green embroidery thread to embroider an intrauterine device (IUD) onto the RS of the other uterus body piece, but this isn't necessary. When you're pleased with your uterus' smiling face, pair the two body pieces WS together and sew together using tapestry needle and MC. Leave an opening through which to stuff the uterus. Stuff and shape to your liking, then sew the body up the rest of the way. Hide tails inside the body. Following placement in the photos, sew the fallopian tubes to the top of the uter dy.Thread the ovaries O proximately through the middle and push it up to the end of the I-co1 nipstitch this tail to uterus body to attach. H


