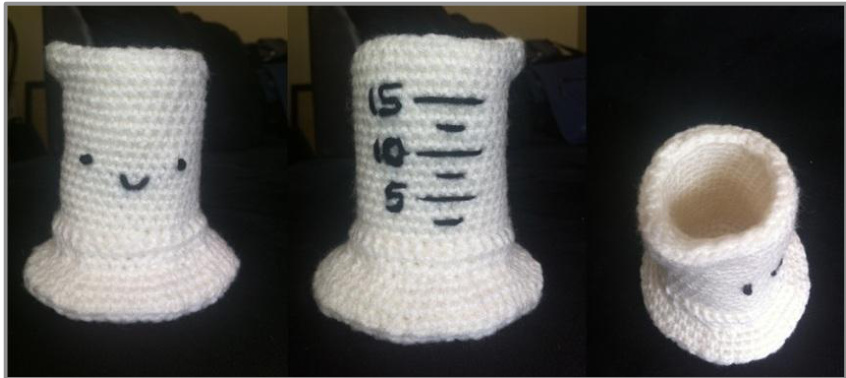
GRACY - THE [INSULATED] GRADUATED CYLINDER (APAERNBY CHOPSTIXMASTUH)
MATERIALS
White worsted weight yarn (or whatever color you want it to be) Black worsted weight yarn (for embroidering) Size E or F hook Tapestry needle Stitch markers (I use safety pins if I don't have any markers around)
NOTES
This pattern is worked in the round without joining. It is also composed of 3 parts that you will be seaming or slip stitching together later. Sorry for all the hand-drawn figures. I didn't have the foresight to take pictures as I was going. And clearly this pattern hasn't been tested. If you have any questions at all please don't hesitate to ask.
PATTERN
INSIDE
1. 6sc in magic ring. (6sc) 2. 2sc in each sc around. (12sc) 3. (2sc in sc, sc in sc) repeat 6 times. (18sc) 4. (sc in sc, 2sc in sc, sc in sc) repeat 6 times. (24sc) 5. (2sc in sc, sc in next 3 sc) repeat 6 times. (30sc) 6-21. sc in each sc around. (30 sc) - if you want a taller cylinder repeat many, many more times. 22. sc in next 6 sc, (sc, hdc) in next sc, dc in next sc, (hdc, sc) in next sc, sc in remaining sc. (32 sts) 23. sc around. (32 sts). Sl st in the next few stitches (2 or 3 sts). 24. FO, leave long tail
OUTSIDE
1. 35 fsc. (35fsc) 2-16. sc around (35sc) 17. sc in next 12 sc, (sc, hdc) in next sc, (hdc, dc) in next sc, (dc, hdc) in next sc, (hdc, sc) in next sc, sc in next 19 sc. (39sts) 18. sc around. (39 sts). Sl st in the next few stitches (2 or 3 sts). FO. working in the second row up from the foundation chain (refer to fig below)
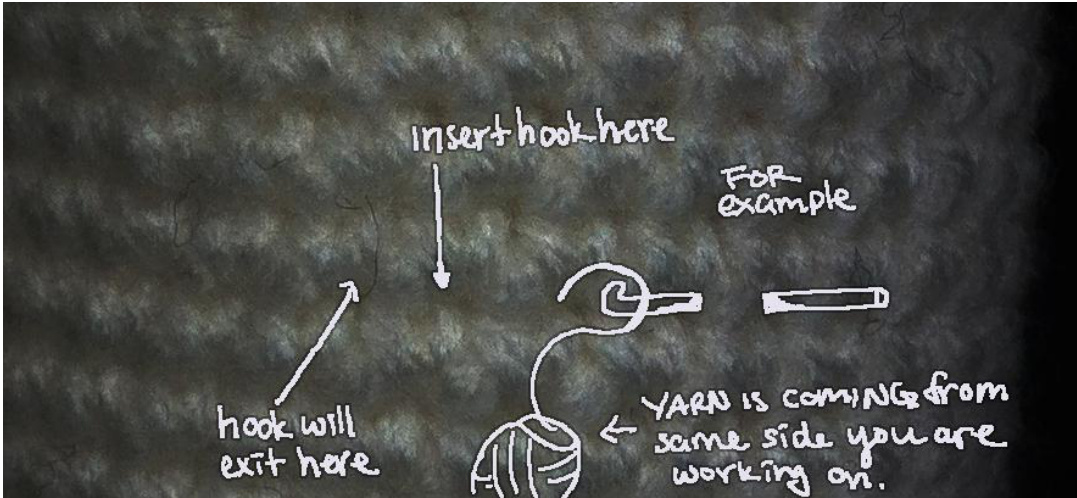
1. sc around in the second row from bottom in the spaces. (35sc) 2. (sc in next 3 sc, 2sc in next sc, sc in next 3 sc) repeat 5 times. (40sc) 3. (sc in next 7 sc, 2sc in next sc) repeat 5 times. (45sc) 4. (sc in next 4 sc, 2sc in next sc, sc in next 4 sc) repeat 5 times. (50sc) 5. (sc in next 9 sc, 2sc in next sc) repeat 5 times. (55sc) 6. (sc in next 5 sc, 2sc in next sc, sc in next 5 sc) repeat 5 times. (60c) 7. (sc in next 11 sc, 2sc in next sc) repeat 5 times. (65sc) Sl st in next few stitches (2 or 3 sts) and FO.
BOTTOM
1. 6sc in magic ring. (6sc) 2. 2sc in each sc around. (12sc) 3. (2sc in sc, sc in sc) repeat 6 times. (18sc) 4. (sc in sc, 2sc in sc, sc in sc) repeat 6 times. (24sc) 5. (2sc in sc, sc in next 3 sc) repeat 6 times. (30sc) 6. (sc in 5 sc, 2sc in sc) repeat 5 times. (35sc) 7. (sc in 3 sc, 2sc in sc, sc in 3 sc) repeat 5 times. (40sc) 8. (sc in 7 sc, 2sc in sc) repeat 5 times. (45sc) 9. (sc in 4 sc, 2sc in sc, sc in 4 sc) repeat 5 times. (50sc) 10. (sc in 9 sc, 2sc in sc) repeat 5 times. (55sc) 11. (sc in 5 sc, 2sc in sc, sc in 5 sc) repeat 5 times. (60sc) 12. (sc in 11 sc, 2sc in sc) repeat 5 times. (65sc). SI st in next few stitches (2 or 3 sts). FO leaving long tail for sewing
PIECING TOGETHER
FIRST Embroider any face or lines or numbers that you want to the outside piece. You should have 3 pieces:

1. Sew together the bottom piece to the outside piece.

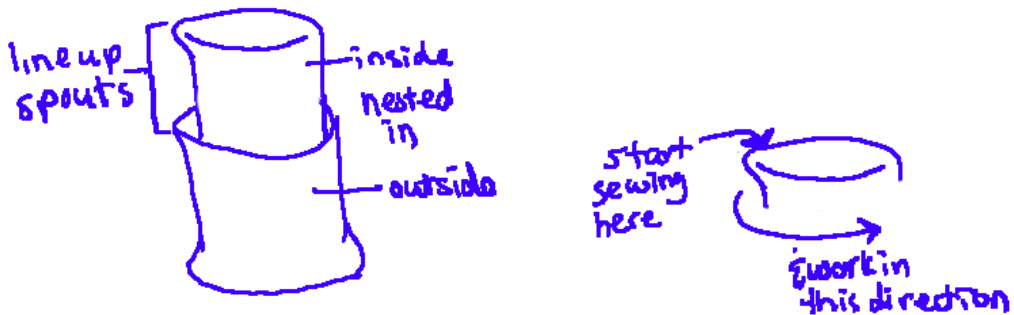
2. Nestle the inside piece into the outside piece and sew along the edges. Note that the number of stitches is not the same, so you will want to skip a few stitches every once in a while on the outside when stitching to make sure it is even. Be sure to not skip any stitches along the pouring part.
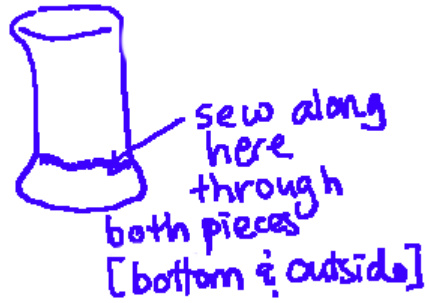
3. Reinforce bottom by sewing the bottom and outside pieces together at the bend.
Note: Please do not sell/repost/claim this pattern as your own. For personal use or charity only. Thanks.


