Philadelphia Flyew Hat
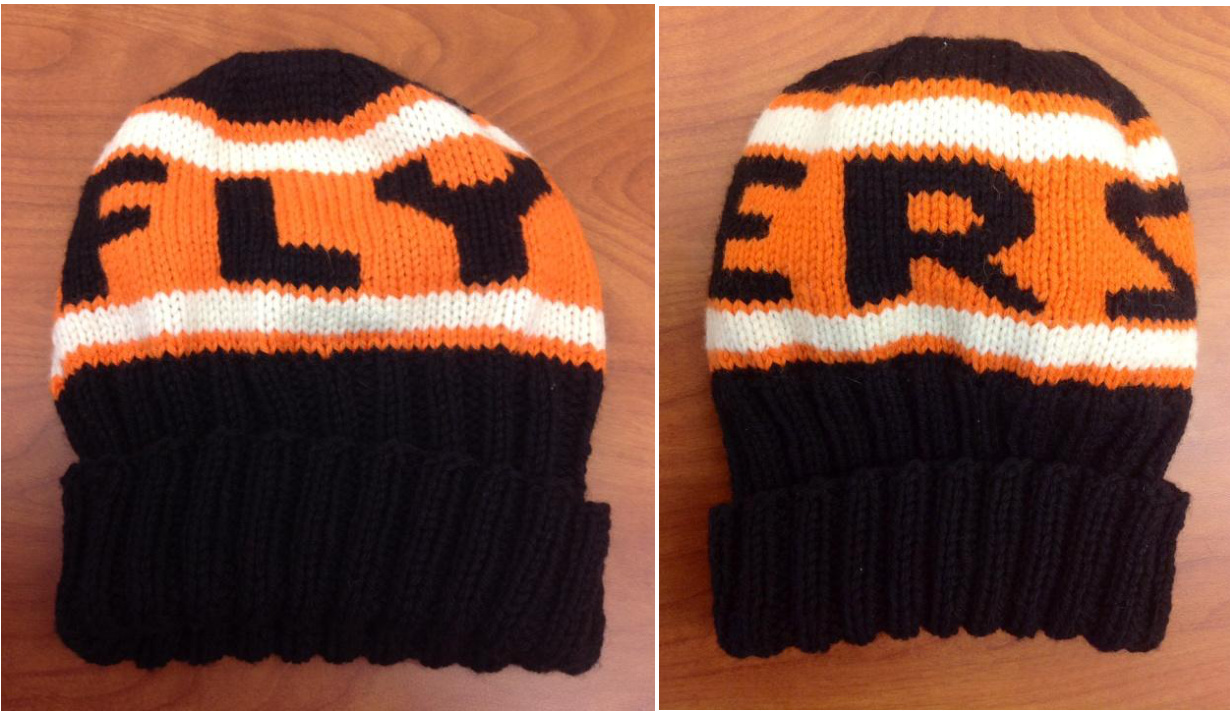
Disclaimer; I am not a Flyers fan. Not one bit. In fact, I greatly dislike the team. I am a die-hard Pittsburgh Penguins fan until the day I die. However, I am also an EXTREMELY WONDERFUL girlfriend who loves her Flyers-loving boyfriend very much so I took it upon myself to make him a hat. To all Flyers fans; I hope you enjoy the pattern, but just know that it will not help you win a Stanley Cup any time soon. Size: Adult Medium
Supplies:
Yarn: About 220 yards black worsted weight yarn, such as Cascade 220 About 1 10 yards orange worsted weight yarn About 28 yards white worsted weight yarn (I used Cascade 220 in black #8555, blaze #9542, and white#8505) Needles: U.S. #7 (4.5mm) circular needles Notions: Yarn needle, stitch marker Gauge: 5sts x 8 rows = 1" in stockinette stitch.
Abbreviations:
CO ~ cast on K ~ knit P ~purl PM \~ place marker M1 \~ make 1 K2Tog \~ knit two together Rnd(s) ~ rounds Rep \~ repeat St(s) \~ stitches Slp \~ Slip
Chart:
\*This chart is modified from the one I used for the hat that is pictured. I found that when knitting the letters, certain changes would have made them more similar in size and shape. The changes are to the letters Y, R, and S and are reflected in the chart above. It should make for a better look for these letters.
Pattern:
CO 88 sts with black yarn. Place marker and join to knit in the round. Rd. 1: Slp 1, K1, continue in P2, K2 ribbing to end of round. \*The slip one at the beginning helps to correct the inevitable gap when joining the rounds. Rd. 2: \*K2, P2, continue from \* to end of round. Continue in K2, P2 ribbing for 6" Increase Round: \*K22, M1. Repeat from \* to end of round (92 sts) Switch to orange. K 2 Rnds Switch to white. K 4 Rnds Switch back to orange and begin chart. Work chart right to left, bottom to top using orange and black as indicated. Switch to white and K 4 Rnds Switch to orange and K 2 Rnds Switch to black and begin decrease.
Decrease:
This decrease is unconventional. I did this in this way because I had a weird number of stitches. The decrease turned out beautifully though!! (When your work becomes too small to continue in the round, use the magic loop method to finish!)
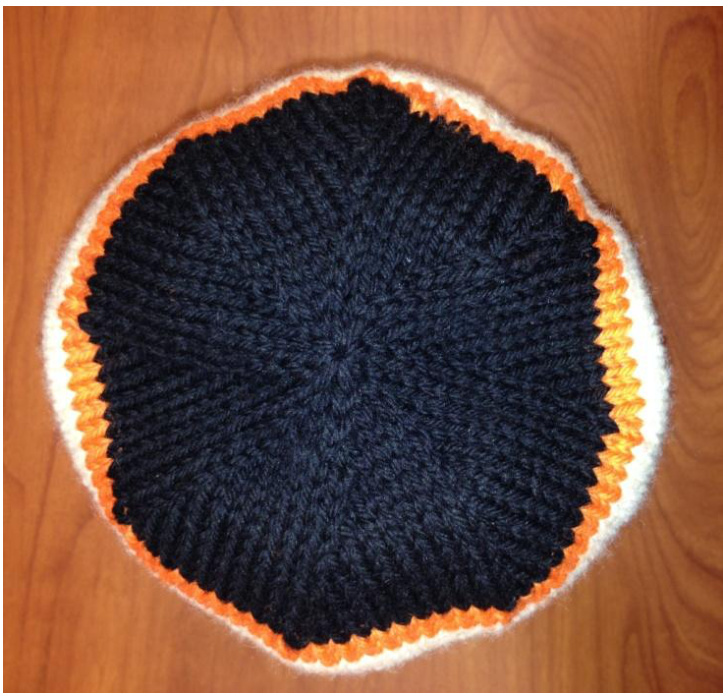
Rnd1: \*K9, K2tog. Rep from \* to last 4 sts, k4. (84 sts) Rnd 2: K to last three stitches, K2tog, K1 (83 sts) Rnd 3: \*K8, K2tog. Rep from \* to last 3 sts, K3 (75 sts) Rnd 4: K to last 3 sts, K2tog, K1 (74 sts) Rnd 5: \*K7, K2tog. Rep from \* to last 2 sts, K2. (66 sts) Rnd 6: K to last 3 sts, K2tog, K1 (65 sts) Rnd 7: \*K6, K2tog. Rep from \* to last st, K1 (57 sts) Rnd 8: K to last three sts, K2Tog, K1 (56 sts) Rnd 9: \*K5, K2tog. Rep from \* to end of round. (48 sts) Rnd 10: K to end of round. Begin rapid decrease: begin a rapid decrease after I have under 50 sts left on my needles Rnd 11: \*K4, K2Tog. Rep from \* to end of round (40 sts) Rnd 12: \*K3, K2Tog. Rep from \* to end of round (32 sts) Rnd 13: \*K2, K2Tog. Rep from \* to end of round (24 sts) Rnd 14: \*K1, K2Tog. Rep from \* to end of round (16 sts) Rnd 15: \*K2Tog. Rep from \* to end of round (8 sts) Cut yarn leaving a 6 inch tail. Thread tail through remaining stitches and pull tightly towards the wrong side of the hat. I like to loop the yarn through the last worked stitch and tie a tight knot before I weave the end in, just to keep the top from loosening over time and wear, which may create a hole. Weave in all other ends and enjoy!! This pattern is for personal use only. Please do not copy and distribute for sale. Thank you!!


