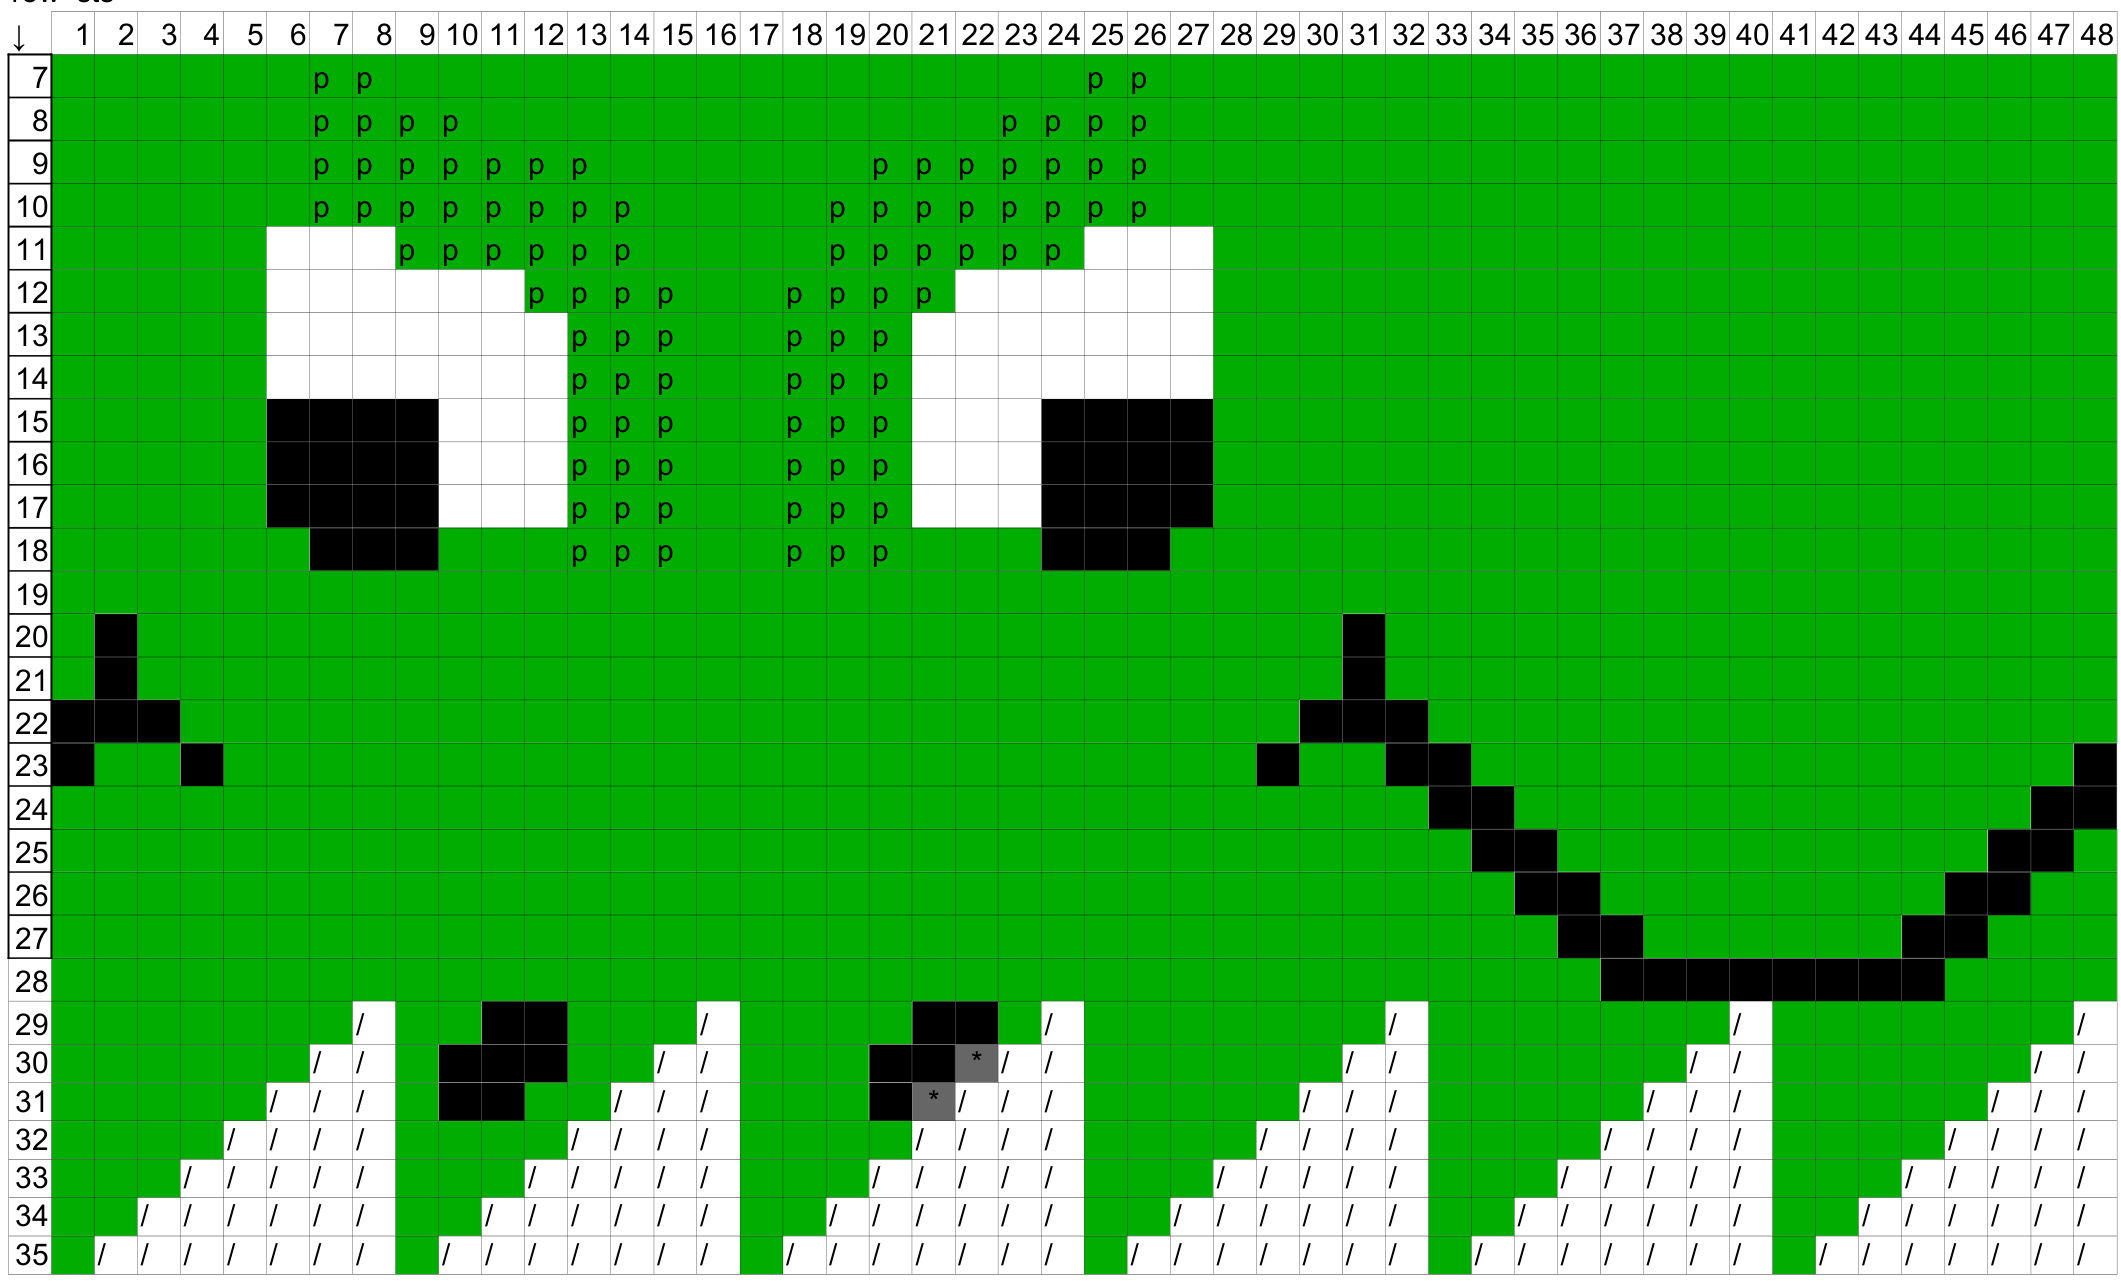
Chart Name: Yoshi
Note: This chart works best with th Easy Drawstring Pouch/ Dice Bag Pattern. Row numbers and sts are for use with Easy Drawstring Pouch/ Dice Bag patterr p=purl these stitches to create the brow k2tog with black /=stitches absorbed by k2tog decrease
Horn Pattern: The horn is made in two halves and sewn together. 1st half: 2nd half: Cast on 1 st with red yarn. Cast on 3 sts with red yarn. Row 1: k1, m1 (2sts) Row 1: k to end Row 2: p to end Row 2: p to end Row 3: k1, m1, k1, m1 (4sts) Row 3: k1, m1, k to end (4sts) Row 4: p to end Row 4: p to end Row 5: k to end Row 5: k1, m1, k to end (5sts) Row 6: p to end Row 6: p to end Row 7: k1, m1, k to end (5sts) Row 7: k1, m1, k to end (6sts) Row 8: p Row 8: k to end Row 9: k1, m1, k to end (6sts) Row 9: k2tog, k to end (5sts) Row 10: p to end Row 10: p to end Row 11: k2tog, k to end (5sts) Row 11: k2tog, k to end (4sts) Row 12: p to end Row 12: p to end Row 13: k2tog, k to end (4sts) Row 13: k to end Row 14: p to end Row 14: p to end Row 15: k2tog, k to end (3sts) Row 15:k2tog, k2tog (2sts) Row 16: p to end Row 16: p Row 17: k3tog (1 st) Row 17: k2tog (1 st) Cut a long tail that is about 3X the perimeter of the horn. Now weave in all ends, except for the long tail. Using the long tail, begin sewing the top of the horns together. When you get back to the flat bottom on the horn, begin sewing it onto the top of Yoshi's head between the eyes. Weave in the tail when you're done. Tug on it to make sure it's secure!


