Rockin’ Rocket Ship Amigurumi:
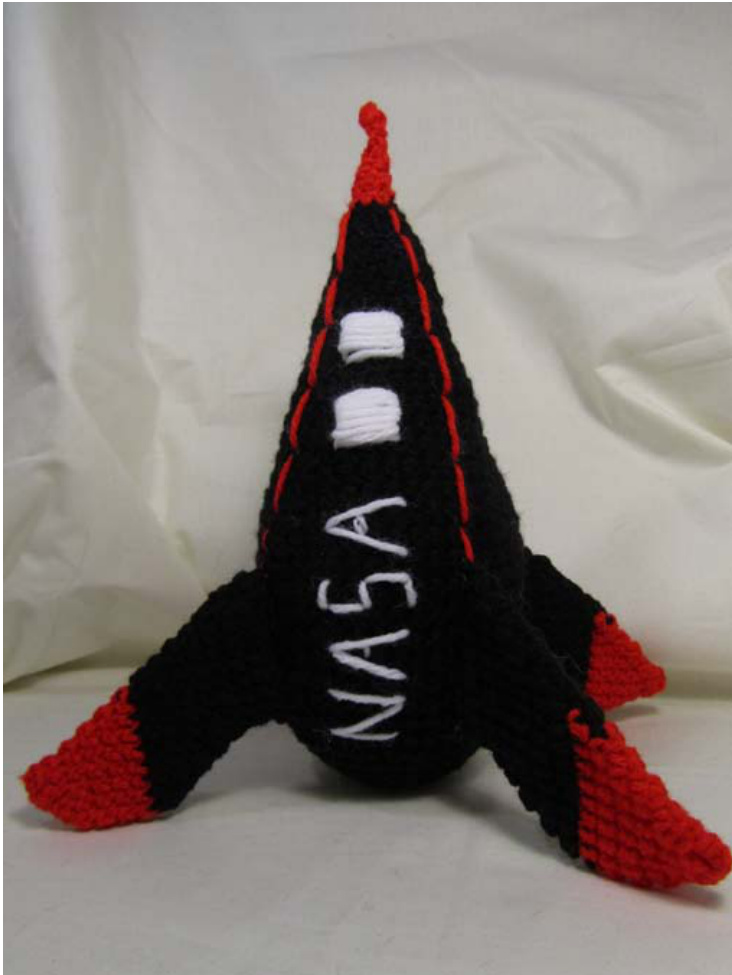
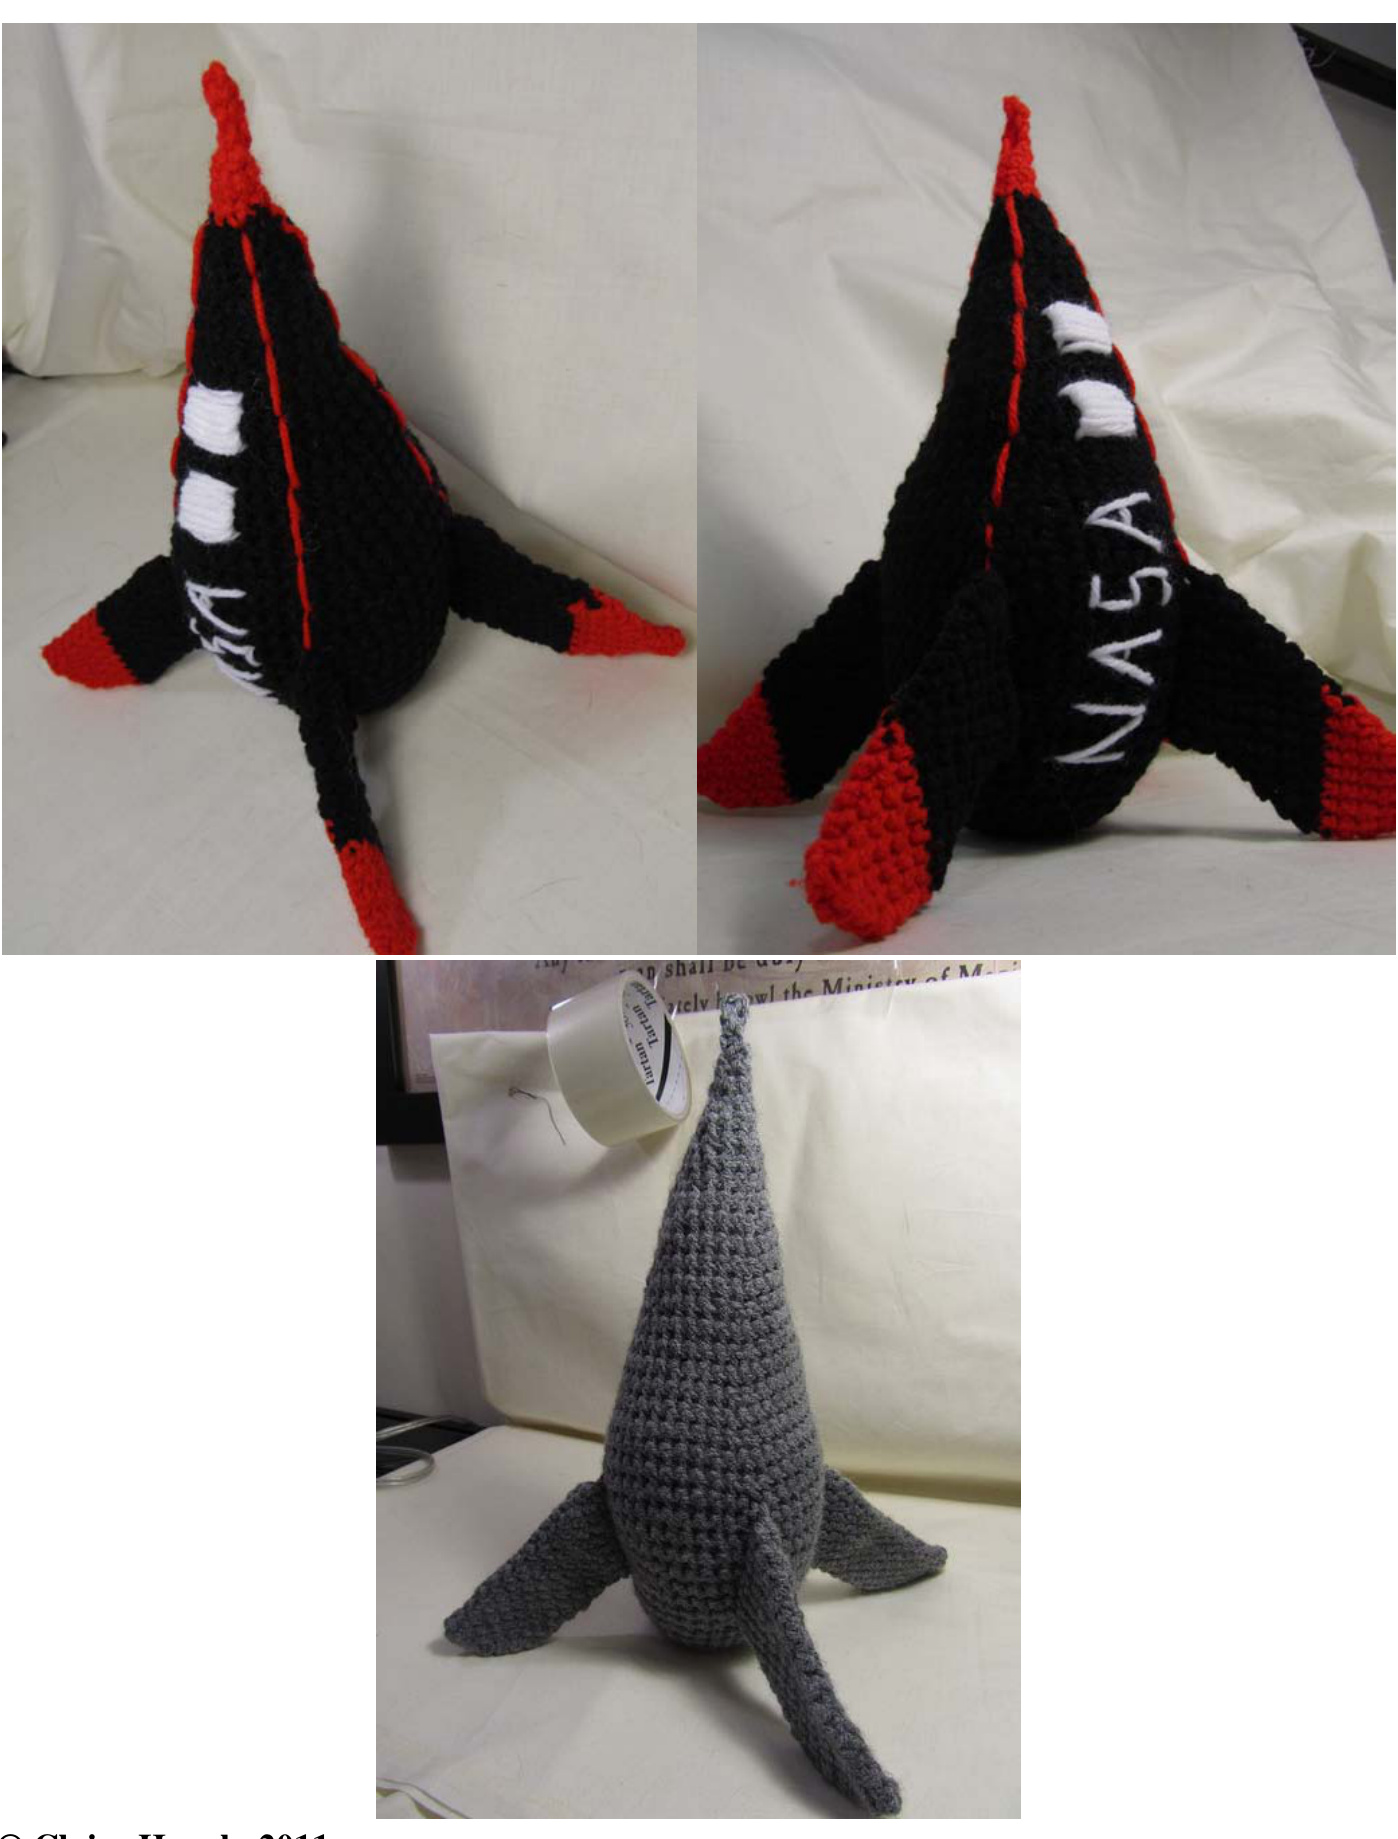
For more pictures, see the end of the PDF. Meet the Rockin’ Rocket Ship Amigurumi! More than 50 years ago, the smartest scientists in the world met in Detroit with a momentous task: design a space ship that would take mankind to the stars! To achieve this goal, the brilliant physicists, engineers, astronomers, chemists, biologists, geologists, podiatrists, and many others discussed every facet of what they knew about outer space and the challenges that would be entailed by inter-stellar travel. In the end, though, it was one of their wives, a slightly frumpy woman named Nora Ann S. Alerton who presented them with their first potential solution, when she showed her husband this prototype. At first, everyone agreed that the solution to all of their problems had been found. After all, wool is sturdy, warm, strong, unaffected by vacuum, and otherwise clearly well suited to the rigors of the vast dark. It was the meteorologists who ended this happy dream, pointing out that the wool spaceship would never survive re-entry. Thus, the project was abandoned, until it was rediscovered and re-created for you! The ship has been labeled NASA in honor of Mrs. Allerton. It may never fly us to the moon, but it's a reminder of the dream for our future in the stars, of exploration beyond our imagination. Finished Size: Height: 10 inches Circumference: 9 inches
Materials:
Worsted Weight Yarn (color of your choice): Approximately 150 yards (75 grams) If you'd like to use a contrast color like in the example, you'll only need about 100 yards of your primary color, plus about 50 yards of the contrast color. Crochet Hook, Size G (4.0 mm) Yarn needle Polyester polyfill Abbreviations: Note that this pattern uses US definitions. Ch - chain Sc - single crochet Ss - slip stitch
Tips:
1. Use a marker to keep track of where each round of stitches ends. Make sure that you move the marker when you finish each round! 2. Unless otherwise specified, this amigurumi will be crocheted in rounds. When working in rounds, do not join with a slip stitch. Instead, each round starts in the first stitch of the previous round. 3. The format for these instructions is as follows: Round #: (instructions to follow): # of Sc in the round if you have done it correctly. 4. When you are crocheting this amigurumi, make sure you keep your tension even and do not work your stitches too tightly or too loosely. 5. I recommend that you use the “invisible decrease” method for this project. In order to do an invisible decrease, you insert the hook through the top loop of the next two sc, draw a loop through book, then draw a loop through both loops on your crochet hook. You can find a helpful tutorial by the wonderful June Gilbank at this link: http://www.planetjune.com/blog/amigurumi-help/invisible-decrease/
"Body' of the Rocket:
Round 1: Ch 2. In second ch from hook, sc 8 times. Place marker. Do not join: 8 sc Round 2: (2 sc in next sc) around: 16 sc Round 3: (2 sc in next sc, sc in next sc) around: 24 sc Round 4: (2 sc in next sc, sc in next 3 sc) around: 30 sc Round 5: Sc around: 30 sc Round 6: (2 sc in next sc, sc in next 4 sc) around: 36 sc Round 7: Sc around: 36 sc Round 8: (2 sc in next sc, sc in next 8 sc) around: 40 sc Round 9: Sc around: 40 sc Round 10: (2 sc in next sc, sc in next 9 sc) around: 44 sc Rounds 11 - 12: Sc around: 44 sc Round 13: (2 sc in next sc, sc in next 10 sc) around: 48 sc Rounds 14 - 15: Sc around: 48 sc Round 16: (Decrease once, sc in next 10 sc) around: 44 sc Round 17: Sc around: 44 sc Round 18: (Decrease once, sc in next 9 sc) around: 40 sc Round 19: Sc around: 40 sc Round 20: (Decrease once, sc in next 8 sc) around: 36 sc Round 21: Sc around: 36 sc Round 22: (Decrease once, sc in next 7 sc) around: 32 sc Round 23: Sc around: 32 sc Round 24: (Decrease once, sc in next 6 sc) around: 28 sc Round 25: Sc around: 28 sc Round 26: (Decrease once, sc in next 5 sc) around: 24 sc Round 27: Sc around: 24 sc Round 28: (Decrease once, sc in next 4 sc) around: 20 sc Round 29: Sc around: 20 sc Round 30: (Decrease once, sc in next 3 sc) around: 16 sc Round 31: Sc around: 16 sc Stuff with fiberfill. If you'd like to use a contrast color, this is where you should switch. Round 32: (Decrease once, sc in next 2 sc) around: 12 sc Round 33: Sc around: 12 sc Round 34: (Decrease once, sc in next sc) around: 8 sc Round 35: Sc around: 8 sc Round 36: Decrease around: 4 sc Ch 4. Starting in second ch from hook, sc in each ch, and then in the next sc of Round 36. Ss in next sc, tighten and finish off. "Fins" of the Rocket Ship: (Make 4) Ch 11. Round 1: Starting in second ch from hook, sc in each of the next 10 ch, then turn your fin around and sc in each ch again. Place marker. Do not join: 20 sc Round 2: Starting in the first sc that you completed in the previous round, sc around: 20 sc Rounds 3 - 7: Decrease once, sc in next 7 sc, 2 sc in next 2 sc, sc in next 7 sc, decrease once: 20 SC If you'd like to use a contrast color, this is where you would switch. Round 8: Decrease once, sc in next 16 sc, decrease once: 18 sc Round 9: Decrease once, sc in next 14 sc, decrease once: 16 sc Round 10: Decrease once, sc in next 12 sc, decrease once: 14 sc Round 11: Decrease once, sc in next 10 sc, decrease once: 12 sc Round 12: Decrease once, sc in next 2 sc, decrease twice, sc in next 2 sc, decrease once: 8 sc Round 13: Decrease around: 4 sc Ss in next sc, tighten and finish off.
Construction:
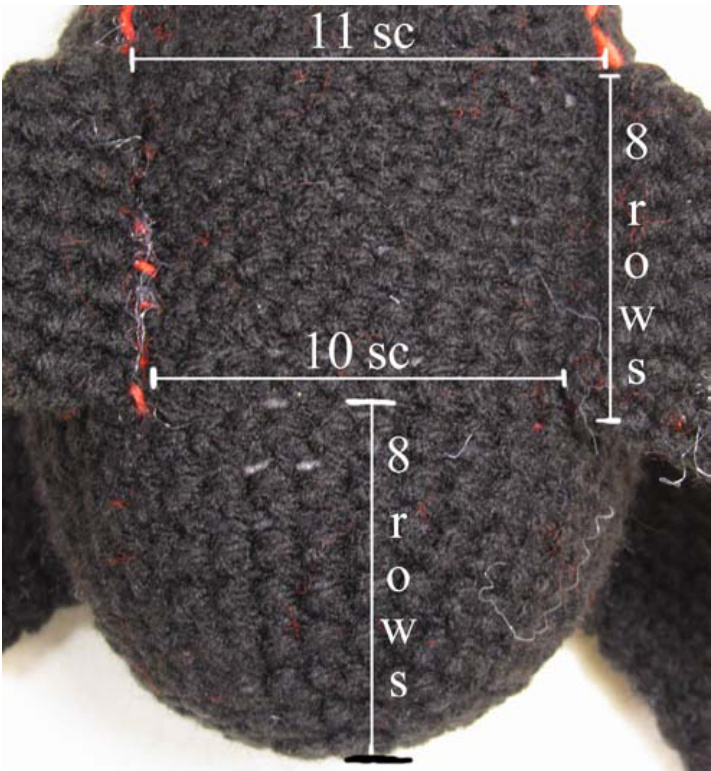
Placement of the fins - description follows. You'll be doing some counting to figure out the correct placement. First, count to the 8"h round from the bottom of the ship. This is the round with 40 sc around. Use this round to determine where to place the fins. You'll be spacing each fin 10 sc apart based on this round, and sewing the bottom of the flat end of the fin to this round, and then sewing it on straight over the next 6 -- 7 rounds. The tops of the fins should hit one of the rows of 44 sc, and you can be sure the spacing is correct by counting 11 sc on the rocket "body” between each fin. Once you've attached the fins, decorate however you'd like. In the pictured version, I first embroidered lines from the top of each fin to the peak, being careful to keep them even, then I backstitched “NASA’ between two of the fins, and finally made windows by first doing two vertical stitches about 2 sc apart, and then wrapping yarn around those two vertical stitches until I had a solid block of white, and finally did two horizontal stitches at the top and bottom of the window. However, the possibilities for adorning your ship are endless! Have fun with it! ... And now you're done!! If you have any comments, questions, advice, stories, or what not, related to my pattern, please feel free to contact me at any time at unforth @yahoo.com!! Check out my etsy shop at http://www.etsy.com/shop/unforth. Visit me on Ravelry at http://www.ravelry.com/projects/unforth. Curiously Crafted Creations, my blog about crafts, can be read at http://unforthccc.blogspot.com/.
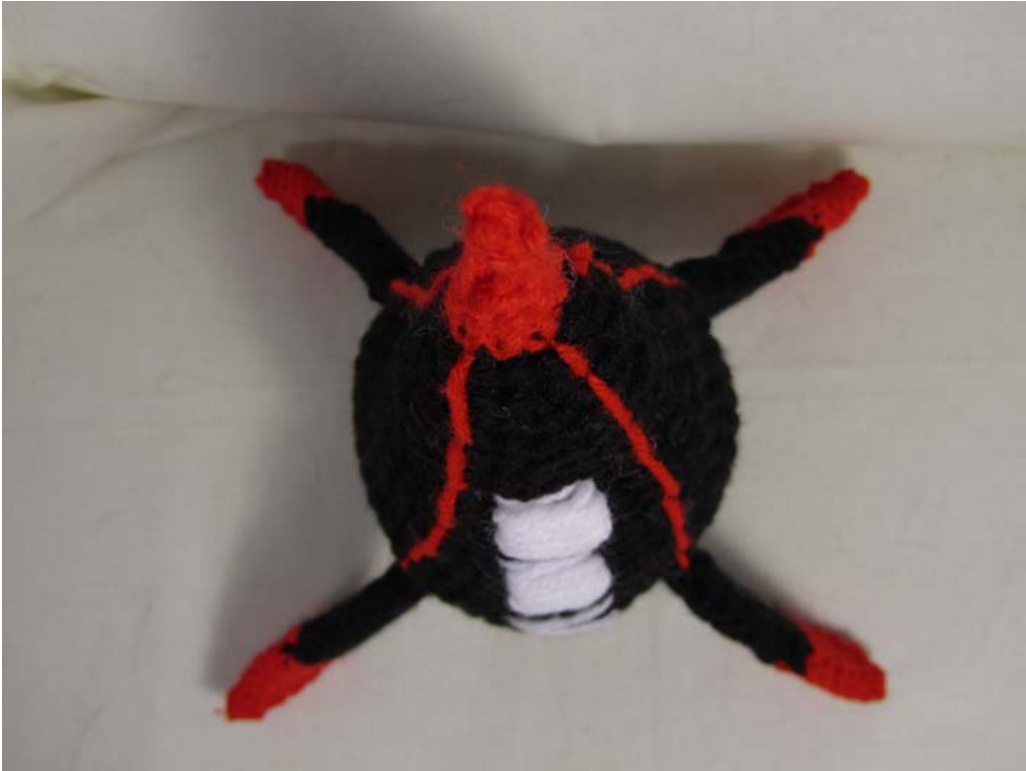
Additional Images: