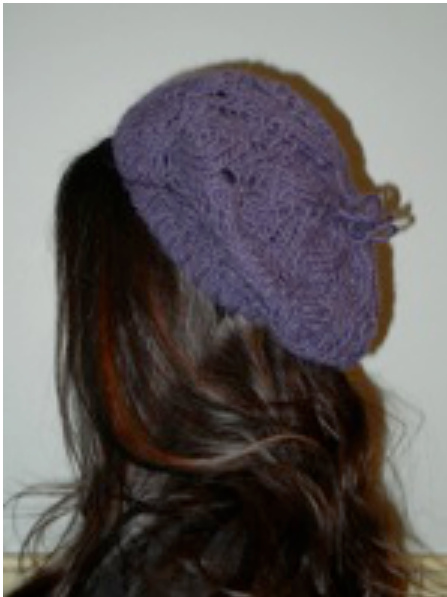
by Lisa copyright 2011
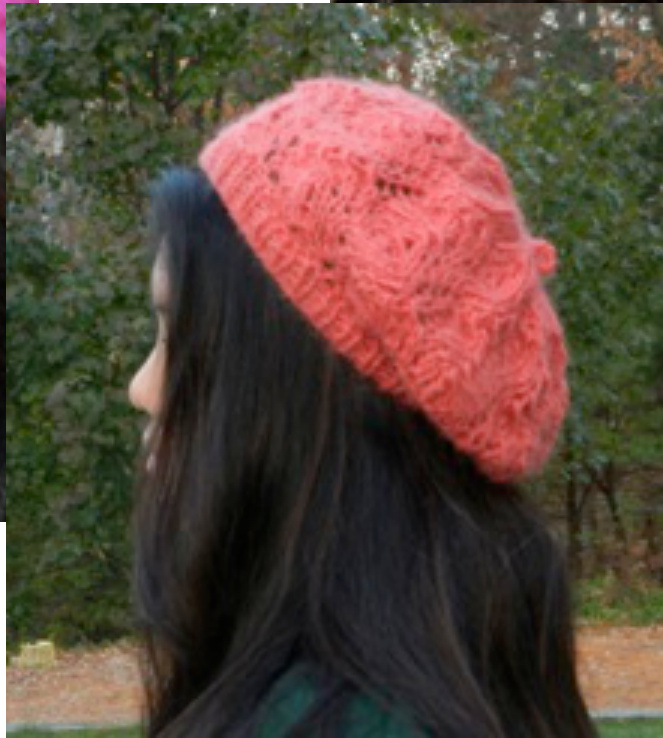
McFetridge "My daughter wanted a lacy beret, as all the girls are wearing them now. I looked for a pattern, but none were quite right. I'm not a regular lace knitter, so I wanted a lace that was pretty, but simple - out came an old stitch book and Fir Cone Lace fit my needs. The beret is pretty, but simple to knit and there are only 3 different rounds to memorize." Three sizes: Toddler (Child, Adult). Finished Measurements: Toddler (Child, Adult) Diameter: 21.5 (23, 25.5) cm/ 8.5 (9, 10) ins after blocking on a plate. YARN: Classic Elite Montera 50% llama, 50% wool 100g/116 m/127yd 100 (110, 120) yds Color - Paisley Plum rsted, Manos Clasica, any slightly heavy, hairy yarn works nicely = 4in using Size 9 US needles, or size required to obtain gauge NOTIONS: Size 9 US, 16 inch circular needle and same size DPN's Darning needle Size 4mm /Size G US Crochet Hook Gauge: 4 sts = 1 in when slightly stretched in Lace Pattern 9 (10, 11) inch Cardboard Circle or Paper Plate for blocking. When knitting lace, it is important to know what round is being worked when setting the work aside. Rather than writing the next round number down (and trying to remember if it's the last one worked, or the next one to be worked) try knitting the same number of stitches into the next round as the number of the round. For example, if Rnd 6 is just finished, then knit the first 7 sts of next lace round. When picking up work, count the sts to the left of the marker on the right needle and that is the round number being worked, in this case, Rnd 7.
Fir Cone Lace Pattern (l6 rounds)
ed to knitting in the round by me, from the “Harmony Book of Knitting") - notes belo Rnd 1: Knit Rnd 2: \*YO, K3, SL 1, K2tog, PSSO, K3, YO, K1\*, rep between \*'s across rnd Rnd 3: Knit Rnd 4: \*YO, K3, SL 1, K2tog, PSSO, K3, YO, K1\*, rep between \*'s across rnd Rnd 5: Knit Rnd 6: \*YO, K3, SL 1, K2tog, PSSO, K3, YO, K1\*, rep between \*'s across rnd. Rnd 7: Knit Rnd 8: \*YO, K3, SL 1, K2tog, PSSO, K3, YO, K1\*, rep between \*'s across rnd. Move row marker 1 stitch to the left after Rnd 8 Rnd 9: Knit Rnd 10: \*K3, YO, K1, YO, K3, SL 1, K2tog, PSSO\* rep between \*'s across rnd. Move row marker one stitch to the right. Rnd 11: Knit Rnd 12: \*K3, YO, K1, YO, K3, SL 1, K2tog, PSSO\* rep between \*'s across rnd. Move row marker one stitch to the right. Rnd 13: Knit Rnd 14: \*K3, YO, K1, YO, K3, SL 1, K2tog, PSSO\* rep between \*'s across rnd. Move row marker one stitch to the right. Rnd 15: Knit Rnd 16: \*K3, YO, K1, YO, K3, SL 1, K2tog, PSSO\* rep between \*'s across rnd. Move row marker one stitch to the right. Hat: Cast on 54 (63, 72) sts using Long Tail Cast On, place marker. Join. Rib: \*K2, P1\* for 6 (7, 8) rounds. Knit l round. Knit next round, increasing 16, (17, 18) sts evenly across next round. 70 (80, 90)sts. Work Rounds 1 - 16 of LACE PATTERN. Repeat these rnds until piece measures 18 (19, 20) cm, 7 (7.5, 8) ins (add 1 in. for slouchier hat) from cast on rnd, ending with a KNiT (odd numbered) rnd. Knit l more rnd. Change to DP needles, if needed, to finish decreases. K2tog across next rnd. 35, (40, 45) sts. :2tog across next rnd, ending with K 1, (0, 1). 18, (20, 23 )st :2tog across next rnd, ending with K 0, (0, 1). 9, ( 10, 12) sts K2tog across next round, ending with K 1, (0, 0). 5,( 5, 6) sts K2tog across next round, ending with K 1, (1, 0). 3, (3, 3 ) sts. Cut yarn leaving 12 inch tail. Thread tail onto darning needle and run through rem sts. Anchor with a stitch. Leave tail on outside of work for Fairy Pull.
Fairy Pull:
Using Size G crochet hook, & using attached tail yarn closest to end of hat, insert hook into tip of hat and use the tail to create a slip stitch. Chain 10 using tail, then slip stitch end of chain back into tip of hat to create a little loop. Thread tail onto darning needle and secure with a stitch then weave into underside of hat and trim.
Finishing:
Weave ends into back of work using darning needle. Thoroughly wet the cap, roll gently in towel and stretch over a 9 (10, 11) inch dinner plate or heavy cardboard circle. If using a cardboard circle, be sure it has no dyes or colours in the paper so it won't stain the hat. Enjoy! Lisa McFetridge Lisagmc@aol.com www.flickr.com/photos/lisamcfetridge See my newest patterns: Quarter Master Hat - Choose from 12 different designs to use in the 4 panels that make up the hat. http: / /www.ravelry.com/designers /lisa-mcfetridge