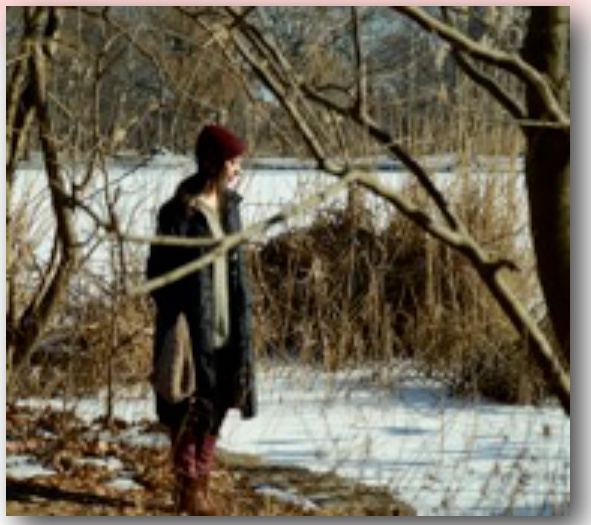
Rosalind Cloche
YARN - 2 skeins Knit Picks Galileo (50% merino wool, 50% bamboo; 131 yards/50 grams), sample shown in “Quartz' NEEDLES - US size 6 circular needles (optional: the headband is worked flat, so straight needles can be used for the headband) NOTIONS - stitch markers, tapestry needle, pin GAUGE - 4 sts and 6 rows per 1" in Stockinette stitch
Pattern Notes
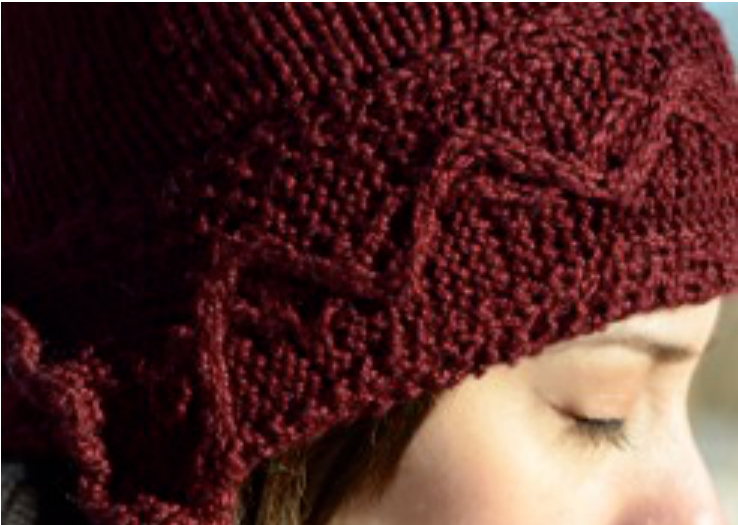
The headband for this cloche is knit flat in rows (back and forth, like a scarf!). After the headband is assembled, stitches on one end of your headband "tube" are picked up and the rest of the piece is knit in the round, decreasing for the crown. This cloche is named for Rosalind Franklin, who made significant contributions to understanding the molecular structure of DNA, RNA, and more. Her work directly led to the discovery of DNA's double helix structure, which is reflected in this design.

M ETHOD
Using U.S. size #6 needles, CO 20 stitches (l use circular needles to knit flat pieces , because it's easier on my hands!). Knit 4 rows in St st. (knit one row, purl one row). Begin to follow the chart (slip the first stitch in each row). α Keep repeating the chart until your flat headband piece reaches all the way around your head. Knit in the cable pattern for another 3" ending with a WS row. Knit in St st for 1"
Create ruffle edge:
? K into the front and back of each stitch. BO loosely. Block your headband. Once your flat headband piece is blocked, it's time to turn it into a circle - creating the headband! Use your own head (or a friend's head!) to measure how big your band will be (or how big the circle will be). Wrap your scarf-like strip around your head, and where it overlaps with itself (make sure the ruffle end is on the outside), place a pin, or mark your strip in some way, so you'll know where to sew the CO edge (or simply pin the end inplace). Sew the CO to the inside of your circle where you placed your mark/pin Using your US size #6 circular needle, and holding two strands of your yarn together (l used 2 separate skeins), pm & pick up and knit each slipped stitch on one edge of the band. When you pick up stitches where the fabric overlaps, pick up two stitches together as one (one stitch from the band, and one from your "tail"). You may want to add a few stitches (use kfb a few times evenly around) to give your head a littlemoreroom. Begin knitting in the round. Continue for \~5", or desired length to crown decrease. To decrease for the crown: Count your total # of stitches, and divide that number by 10. If you have a remainder, divide your remainder stitches into your other stitch groups. If you like, you can mark your groups by placing a stitch marker at the beginning of each (For example, I had 58 stitches, which gave me 5 groups. I split the remainder of 8 stitches among the 5 groups, so I ended up with 3 groups of 12, and 2 groups of 11). Decrease round 1: \*SSK, K to the end of the group; repeat from for each group until the end of the round. Decrease rounds 2 & 4: Knit all stitches. Decrease round 3: \*K to the end of the group, K2tog; repeat from \* for each group until the end of the round. Repeat these 4 rounds until yo have 2 stitches per aroun. bre? Hiavo L otitolloo por group, broar yarr Using a tapestry needle (or your fingers! weave the tail through your final live stitches, pull the end tight and secure. Weave in the ends.
Cable Chart
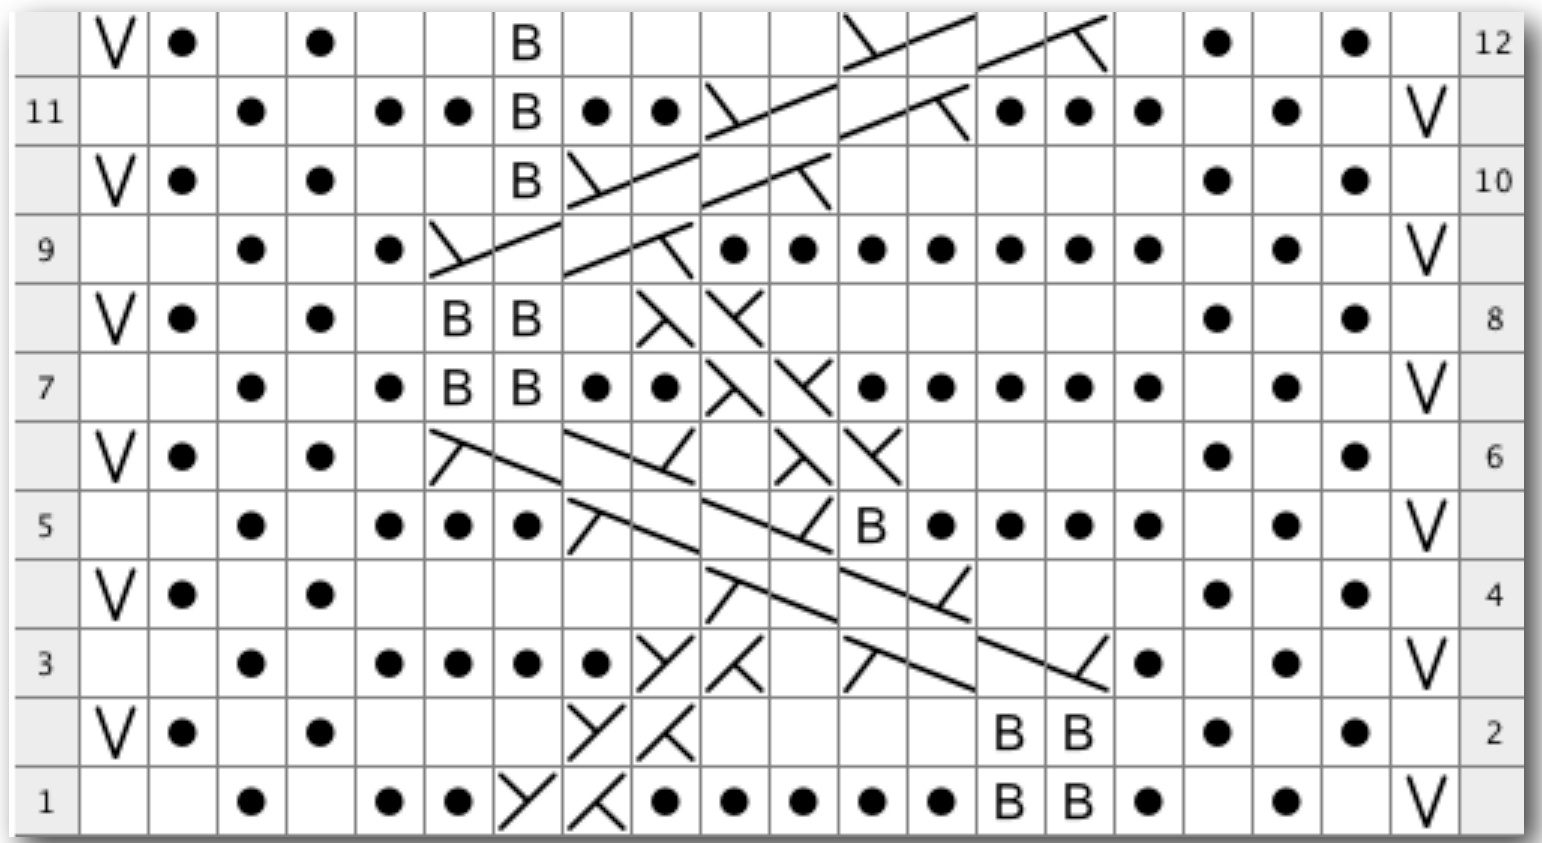
| R12: k1, p1, k1, p1, k1, c2 over 2 right, k4, k tbl, k2, p1, k1, p1, s1 R11: p2, k1, R10: k1, R9: p2, k1, R8:k1, pl, R7: p2, R6:k1, R5: p2, k1, R4: k1, p1, R3: p2, R2: k1, p1, R1 (WS): p2,k1,p1,k2,Left Twist, k5, (p tbl) 2 times,k1,p1,k1, pl, sl wyif RO (RS): k20 ,k1, ,k1, pl, .Pl. .pl. ,k1, p1, k1, (k tbl) 2 times, k4, Right Twist, k3, p1, k1, p1, sl k1, pl, k1, pl. kl. pl, pl, kl, ,k1, c2 over 2 right, k7, p1, k1, p1, sl wyif ,k4, Left Twist, p1, c2 over 2 left, k1, p1, k1, p1, sl wyif pl, kl, p1, k3. pl, k2, pl, , k6, Left Twist, k1, (k tbl) 2 times, k1, p1, k1, p1, sl , (p tbl) 2 times, k2, , k4, Left Twist, k1, c2 over 2 left, k1, p1, k1, p1, s1 c2 over 2 left, p tbl, k4,p1,k1, p1, sl wyif ,k3, c2 over 2 left, k5, p1, k1, p1, s1 p tbl,k2,c2 over 2right,k3, p1, ,k5,c2 over 2 right,k tbl, k2,p1, ,Right Twist,k5, p1, ,k1, k1, , p1, sl wyif ,pl, sl , k1, pl, sl wyif | Pattern: Notes: | Created in KnitVisualizer (www.knitfoundry.com) | WS: none defined RS: sl2 to CN, hold in back. k2, k2 from CN c2over2right | WS: Left Twist RS: sl1 to CN, hold in front. k1, k1 from CN Left Twist | MZMK WS: none defined RS: sl 2 to CN, hold in front. k2, k2 from CN c2 over 2 left | stitch. Slip both sts from needle together. WS: Skip first stitch, and purl the 2nd stitch, then purl the skipped then k first st again, sl both sts off needle. both stitches from needle together OR k2tog leaving sts on LH needlle, RS: Skip the first stitch, knit into 2nd stitch, then knit skipped stitch. Slip | Right Twist WS: Purl stitch through back loop RS: Knit stitch through back loop | 口 knit tbl WS: knit stitch RS: purl stitch | purl WS: Slip stitch as if to purl, holding yarn in front | RS: Slip stitch as if to purl, holding yarn in back slip | Legend: WS: purl stitch RS: knit stitch knit |
Abbreviations
BO -Bind off C-Cable CN - Cable Needle CO-Cast on K -Knit K2tog - Knit 2 stitches together Kfb - Knit through the front and back of the stitch LH - Left-hand P - Purl PM - Place marker RS - Right side SI - Slip SSK - Slip, slip, knit Sts - Stitches St st - Stockinette stitch Tbl - Through back loop WS - Wrong side
About the Designer
Leah Goldstein is a research analyst and independent designer who lives in Brooklyn. You can find her on: ravelry (http:/ /www.ravelry.com/people /BrotherLadies), twitter (@brotherladies), tumblr (http:/ /brotherladies.tumblr.com
Acknowledgements
Chart created in KnitVisualizer (knitfoundry.com) All photos taken by Bill Bishop (fickr.com/WilliamC_Bishop) Sample modeled by:Leah Goldstein