method, described here.
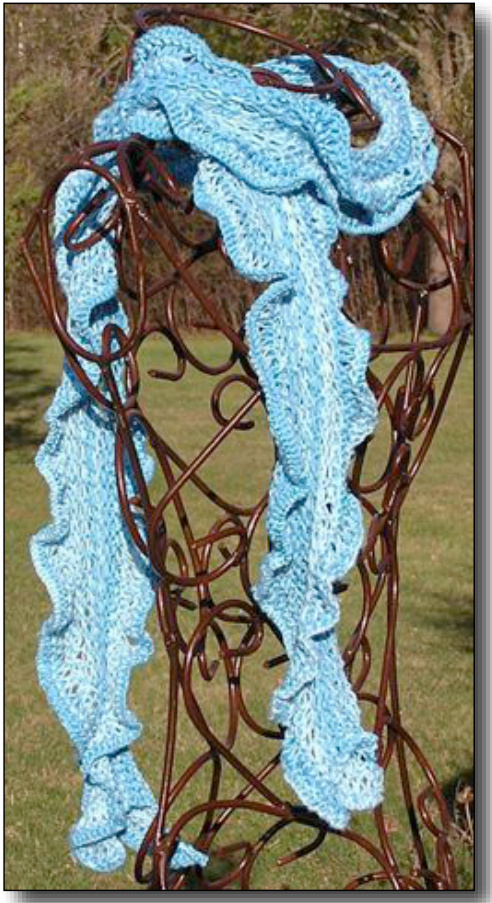
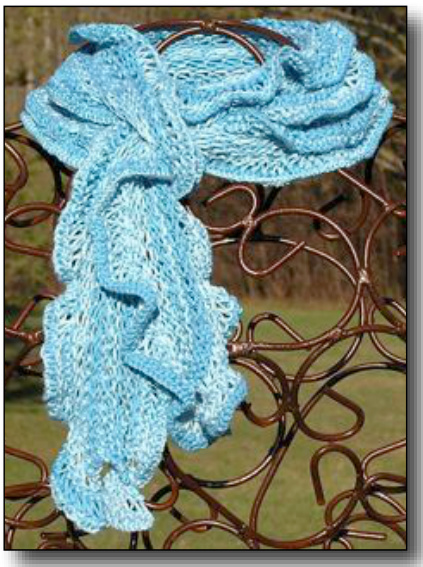
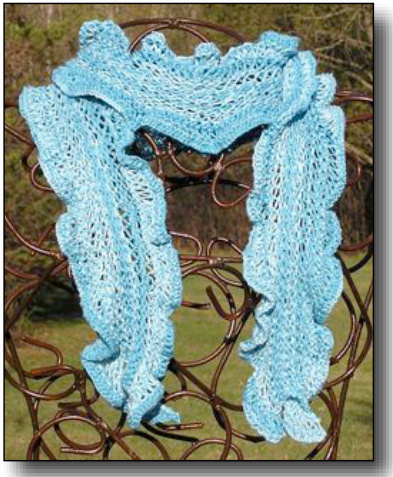
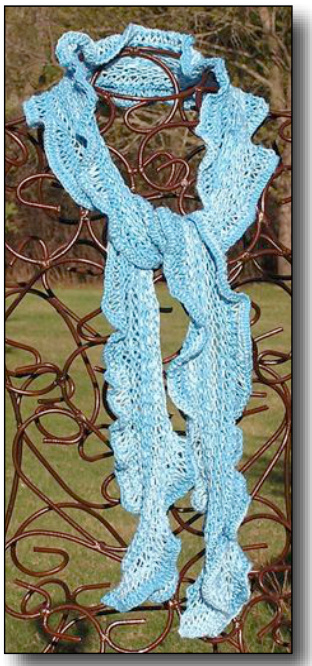
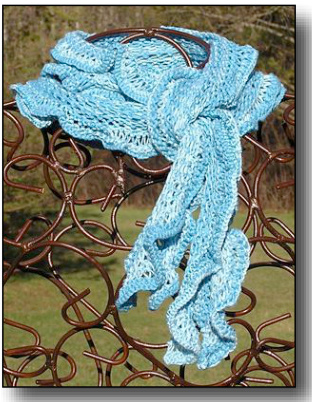
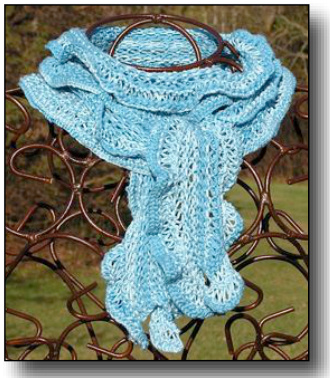
Freshwater Wavex Scarf
Gentle ruffles and waves flow down both sides of this lightweight cotton/viscose scarf. It is easy and satisfying to knit, resulting in a very soft and flowing texture, that may be fashioned it many ways. It is approximately 4" wide x 70"long. The finished scarf reminds me of the approaching warm weather, the beach, summer breezes and our wonderful lakeshereinMinnesota.
Materials:
Two balls of Classic Elite Yarns, Sanibel. The color shown is #1349 Blue, 125 yards per ball. Size 7 circular needles in at least a 40" inch length. (I used a 60" cable because I wanted to see the length of the scarf as I was working on it.) Stitch markers (optional). Yarn needle. Notes: The scarf is knit lengthwise from side to side, beginning with the “knitted cast on" or "knit on cast on" Knitted Cast on: Make a slipknot and tension it on your left needle. Knit the stitch but do not take it off your needle. In other words, just draw a loop through the slipknot as if to knit and place it back on your left needle. Now you have two stitches. Knit the stitch just placed on the left needle but do not take it off the needle. Place the loop back on the left needle. Now you have three stitches. Repeat the process, always knitting into the last stitch placed on the left needle. Keep going until you have cast on the desired number of stitches. You will not turn your work to begin knitting the first row because you will end the cast on with all your stitches on the left needle and your working yarn is in position to start knitting your first row from here.
Directiong:
(It's helpful to make a note every 25 or so stitches (or use a stitch marker), because inevitably the phone will ring, or the cat will scratch at the door and you will forget where you were..) Repeat all instructions between \*\* to the end of the rows. Row 1: Knit across the row. Row 2: Knit 2 TOG (knit two stitches together) across the row. Row 3: \*K1, YO (yarn over)\*, end the row with K1. Row 4: \*K1, Release YO\*, (Yes, just let it go.), end the row with K1. Row 5: Knit across the row. Row 6: Knit 2 TOG across the row. Row 7: \*K1, YO\*, end the row with K1. Row 8: \*K1, Release YO\*, end the row with K1. Row 9: Knit across the row. Row 10: \*Knit 5, K2 T0G\*, end with K5. Row 11: \*K1, Y0\*, end the row with K1. Row 12: \*K1, Release Y0\*, end the row with K1. Row 13: Knit across the row. Begin 5 rows of seed stitch. Row 14: \*K1, P1\* across the row. Row 15: \*P1, K1\* across the row. Row 16: \*K1, P1\* across the row. Row 17: \*P1, K1\* across the row. Row 18: \*K1, P1\* across the row. Row 19: Knit across the row. Row 20: \*K1, Y0\*, end the row with K1. Row 21: \*K1, Release Y0\*, end the row with K1. Row 22: \*K5, KFB (knit into the front and back of the next stitch)\*, end with K5. Row 23: Knit across the row. Row 24: \*K1, Y0\*, end the row with K1. Row 25: \*K1, Release Y0\*, end the row with K1. Row 26: \* KFB (knit into the front and back of EACH stitch)\* across the row. Row 27: Knit across the row. Row 28: \*K1, Y0\*, end the row with K1. Row 29: \*K1, Release Y0\*, end the row with K1. Row 30: \* KFB (knit into the front and back of the EACH stitch)\* across the row. Row 31: Knit across the row. Bind off all stitches in the normal way. Weave in and..
ends
Enjoy!
Thank you for your purchase. Please feel free to contact me with any questions: dianelaugustin@mac.com Designed and knit by Diane L. Augustin Copyright 2012. All Rights Reserved. Yarn Happy \*Bead Happy www.yarnhappybeadhappy.etsy.com http://www.ravelry.com/designers/diane-l-augustin


