Clair de Lune
designed by Alicia Weisberg-Roberts
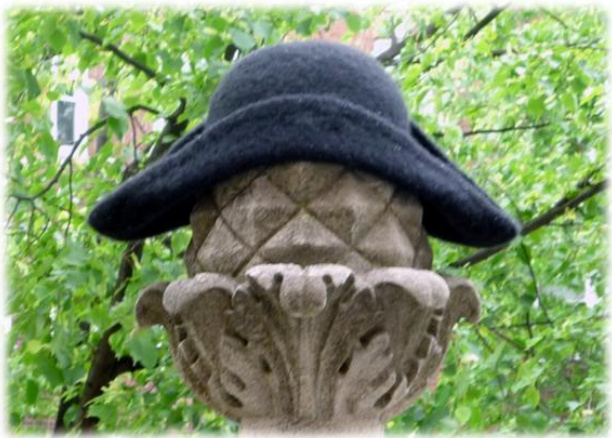
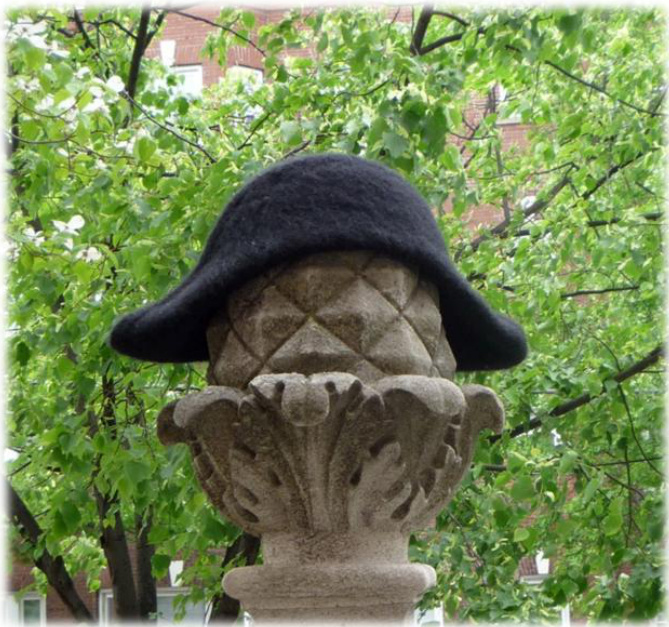
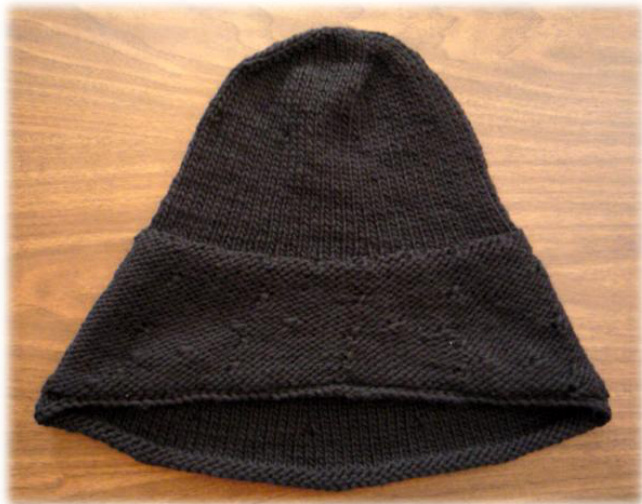
Votre ame est un paysage choisi Que vont charmant masques et bergamasques Jouant du luth et dansant et quasi Tristes sous leurs deguisements fantasques. Paul Verlaine This hat is knitted in the round, from the top of the crown to the edge of the brim and then felted-tofit. It's a fairly fast, one-skein project that provides a chance to explore the expresive potential of felting with the brim turned and/or shaped differently during the drying process this pattern can run the gamut from cocktail-hour Robin Hood to “Kiss me, Hardy! The instructions given here are for a hat that, like Verlaine's poem, is inspired by the ftes galantes of Antoine Watteau. It requires knitting with double pointed needles, short row shaping, three types of increase (KFB, M1B and M1F) and a decrease bind off, sewn bind off or another very loose cast off of your choice. As it is felted in the end, the pattern is very forgiving of less-than-exquisite short row technique. To the make the hat illustrated I have used one skein of Cascade Soft Spun (colourway 2807).
You will need:
A feltable, chunky-weight yarn A set of double-pointed knitting needles $(\#10\;\prime_{2}$ One $29^{\bullet}$ circular needle $(\#10\mathrm{~}\%$ One $40^{\bullet}$ circular needle $(\#10\mathrm{~\textperthousand~}$ Stitch markers A tapestry needle (for finishing)
You may want:
T-Pins, safety pins or a needle and sturdy thread for tacking the brim during the felting process All of the abbreviations I have used can be found on: http://www.knittinghelp.com/videos/knitting-glossary A useful list of flexible bind offs can be found at: http://www.knitty.com/ISSUEsummer06/FEATsum06TT.html
The crown of the hat
CO 4 sts
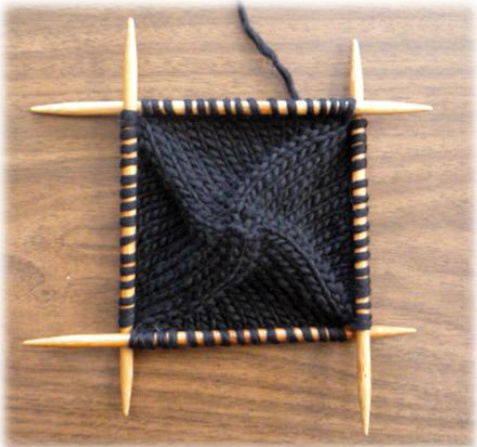
KFB into each st; distribute these 8 sts onto four needles;: join in a round, placing a marker at the beginning of the round. In the rounds which follow, KFB the first st on each needle until you reach 16 sts on each needle (64 sts), then K all sts for 8 rounds. Transfer to $29^{\bullet}$ circular whenever the dpns feel uncomfortable. Rnd 9: \*KFB, K $\boldsymbol{7}^{*}$ all the way around (72 sts). Rnds 10-29: K all sts. Rnd 30: K36, pm, K36.
The brim of the hat
Rnd 31: $\boldsymbol{\ast}\mathbf{P1}$ , M1B, $\mathrm{{\bfP3^{*}}}$ to marker, \*P1, M1F, P3\* to end of rnd. (90 sts) Rnds 32-36: P all sts. Rnd 37: \*P1, M1B, $\mathrm{P8^{*}}$ to marker, $\boldsymbol{\ast}\mathbf{P1}$ , M1F, P8\* to end of rnd. (100 sts) Rnd 38: P all sts. Rnd 39: P 95, w & t. Rnd 40: K 90, w & t. Rnd 4l: P 85, w & t. Rnd 42: K 80, w &t; P to end of rnd, picking up the wraps and purling them with their corresponding stitches. Rnd 43: P all sts, picking up the wraps and purling them with their corresponding stitches. Rnd 44: \*P1, M1B, $\mathrm{P9^{*}}$ to marker, $\bf{\ddot{\tau}}{P1}$ , M1F, $\mathrm{P9^{*}}$ to end of rnd. (110 sts) Rnd 45: P all sts. Rnd 46: P 95, w & t. Rnd 47: K 80, w & t. Rnd 48: P 75, w & t. Rnd 49: K 70, w &t; P to end of rnd, picking up the wraps and purling them with their corresponding stitches. Rnd 50: P all sts, picking up the wraps and purling them with their corresponding stitches.
Rnd 51: \*P1, M1B, $\mathrm{P10^{*}}$ to marker, $\bf{\ddot{\tau}}{P1}$ , M1F, $\mathrm{P10^{*}}$ to end of rnd. (120 sts) Rnd 52: P all sts. Rnd 53: P 95, w & t. Rnd 54: K 70, w & t. Rnd 55: P 65, w & t. Rnd 56: K 60, w &t; P toend of rnd, picking up the wraps and purling them with their coresponding stitches. Rnd 57: P allsts, picking up the wraps and purling them with their corresponding stitches. Rnds 58-60: K all sts. Bind offyvery loosely.
Finishing
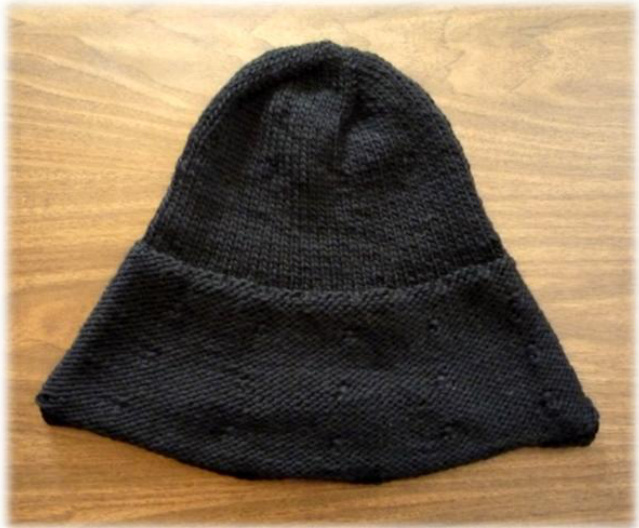
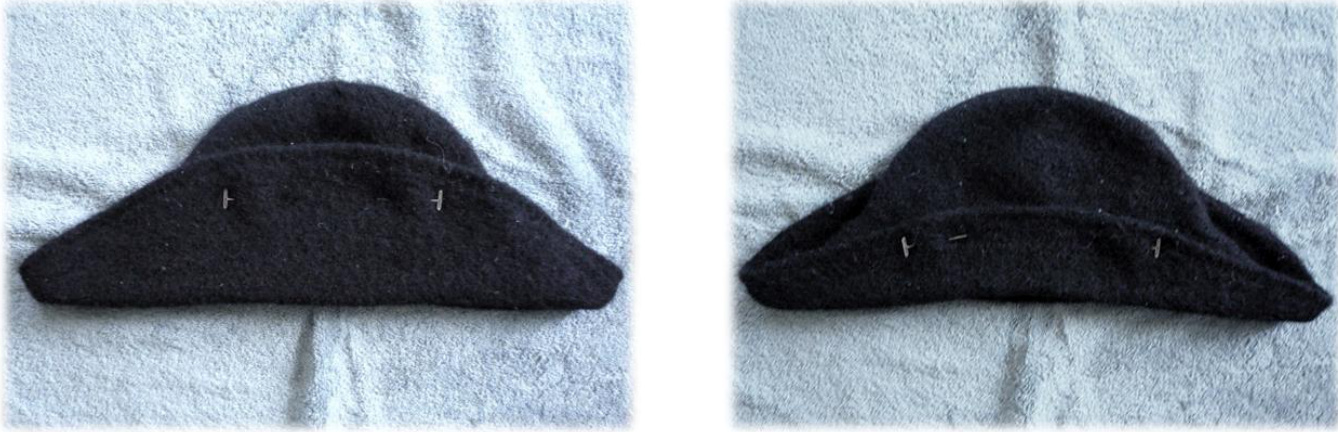
Weave in ends and felt; I felted the hat shown here in a washing machine on the hot cycle for around 15 minutes, then by hand for a further 15. Pin or whipstitch the brim as shown above, then dry over a suitably sized bowl. Once the shape of the crown has been established, I would recommend ironing the edges of the hat while folded and continuing to dry the hat upside-down, both of which help to create crisp and jaunty points. Naturally, if the brim is fixed differently as it dries it will have a different curvature pick one that you find piquant. When the hat is very nearly dry remove the pins and brush its surface with a clothes brush in a counter-clockwise direction. Wear it a vous volonte.