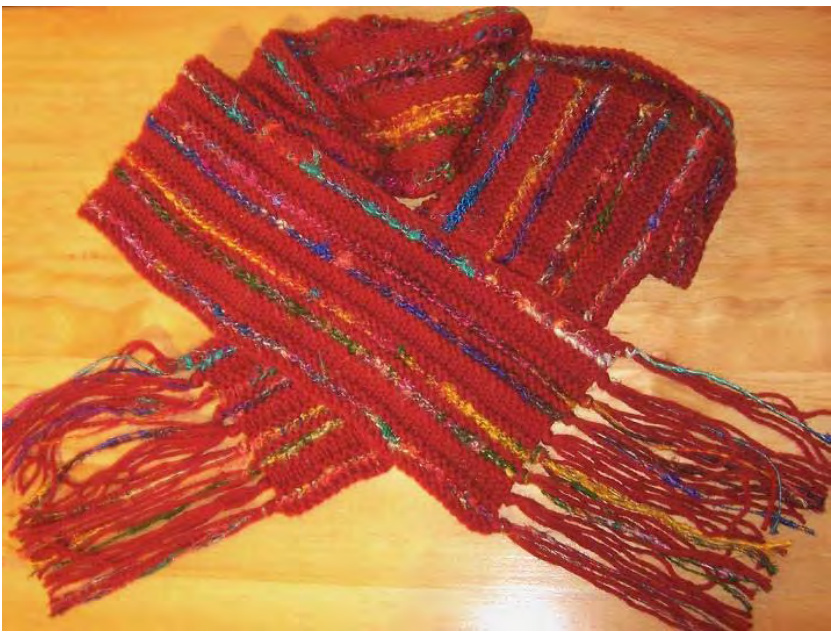
Scarf Around
A simple and quick steeked scarf knit lengthwise in the round. Two yarns are used. One is a sari silk yarn; the other is worsted weight wool. Cutting through the steek and knotting the ends makes the fringe. There are no ends to weave in! This scarf would be a great way to play with steeking for the first time. Cutting open a scarf steek isn't nearly as scary as cutting a Fair Isle sweater. This scarf was designed for the Red Scarf Project, which sends scarves at Valentine's Day to college students who have aged out of the foster care system. These young men and women have no support network; a gift can be just the boost they need to keep going.
See http://nownormaknits2.typepad.com/red_scarf_project_2007/ and http://www.orphan.org/carepackages.xhtml for more information on the Red Scarf Project.
Materials:
Cascade 220, 1- 100 gram skein in color #2413 (a blue-blood red),220 yards. This will be the Main Color (MC). Sari silk yarn, 75-90 grams (sari silk yarn can be quite variable). This wil be the contrast Color (CC). US size 9 needles
Gauge:
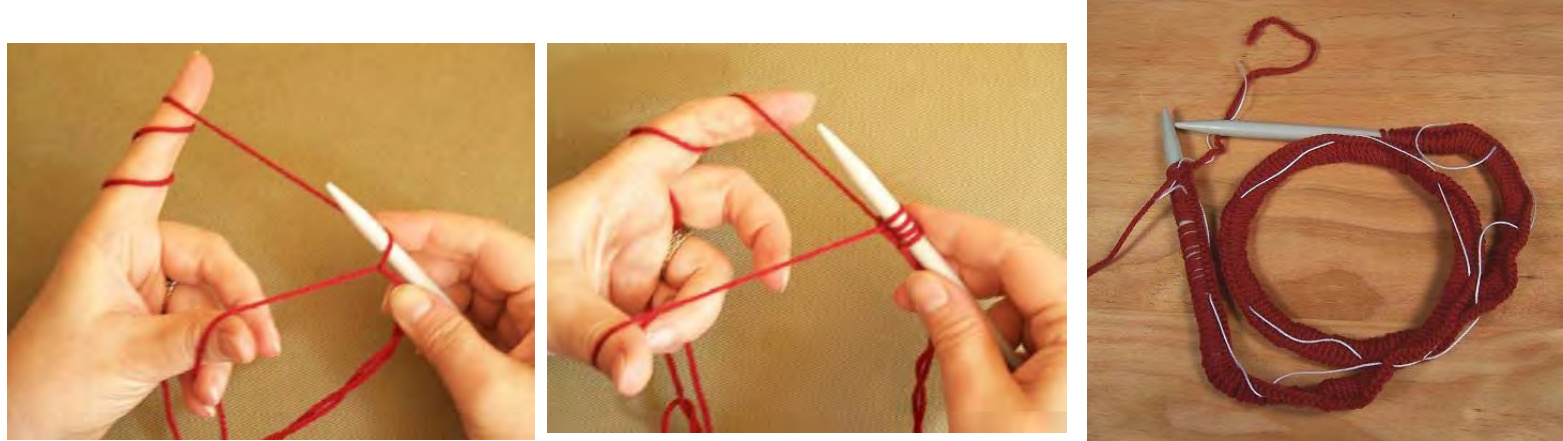
16 sts x 23 rows over 4 inches x 4 inches ( $10\textsf{c m}\times10\textsf{c m}$ in pattern for the specified yarns. Youcanasilyadap thispaeforthewightsof yarneniingneelesized tgt areasnalegain your chosen yarns. See the notes on the second page for tips and customizing ideas. Cast on 274 stitches (252 scarf stitches and 22 fringe stitches). Make a slip knot leaving a loop 9 inches long; it willbecome part of the fringe. Hold the slip knot as shown below and cast on using the long tai cast on. This seems weird, but it ensures that there is fringe at the cast-on edge. I like to use stitch markers or a piece of thread to mark the stitches in groups of 20 (see below). I recount each group before placing the marker and then I can count the groups. It really helps me cast on the right number of stitches.
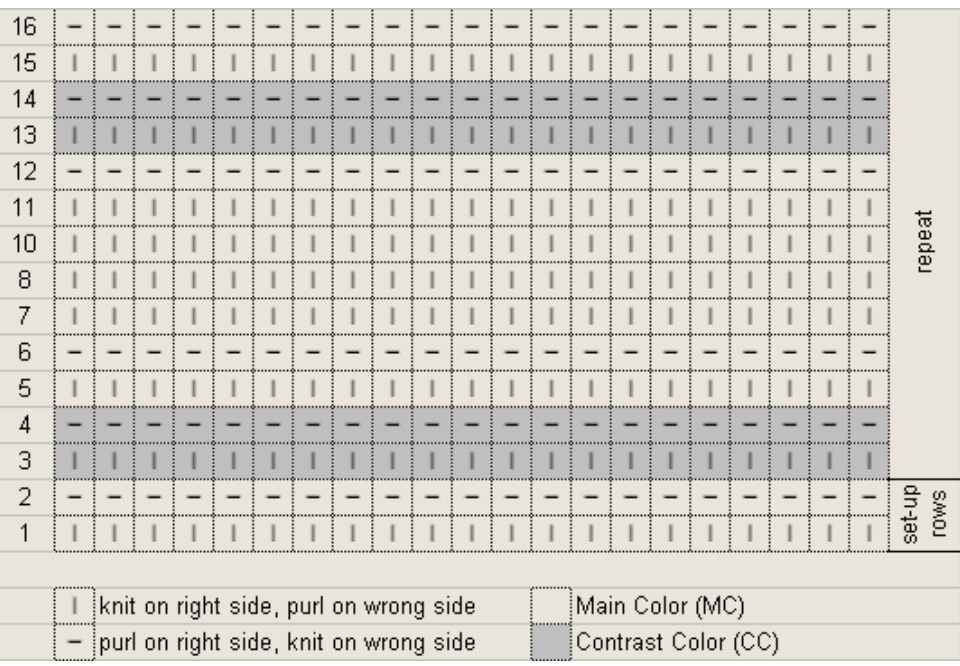
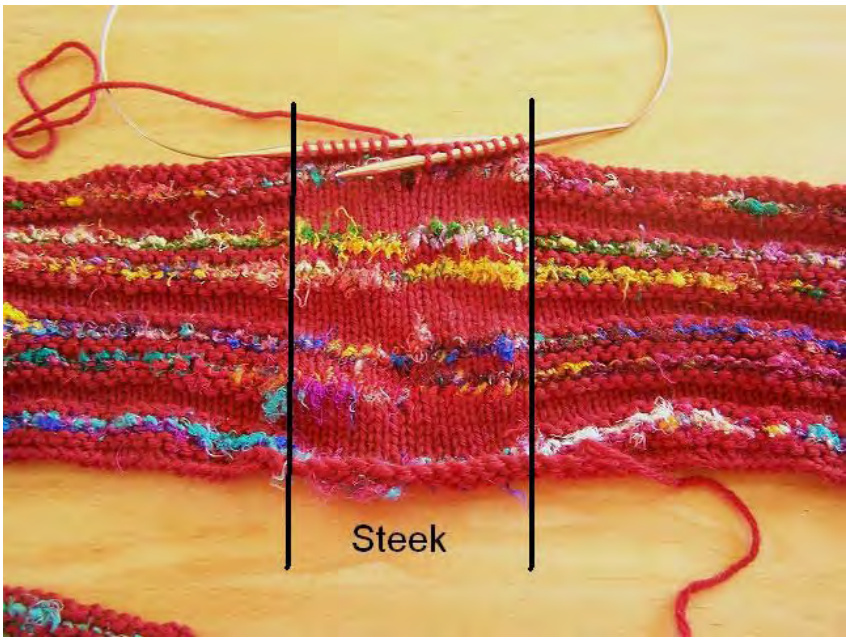
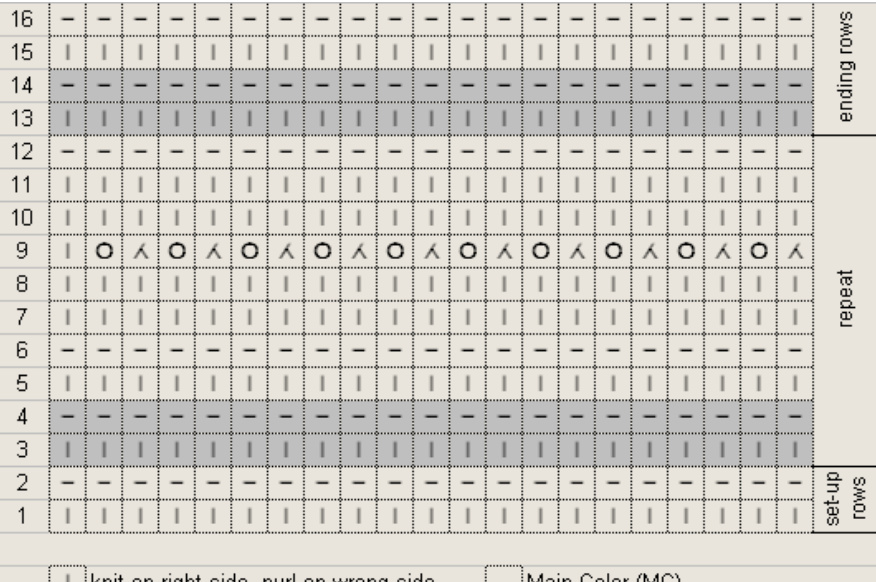
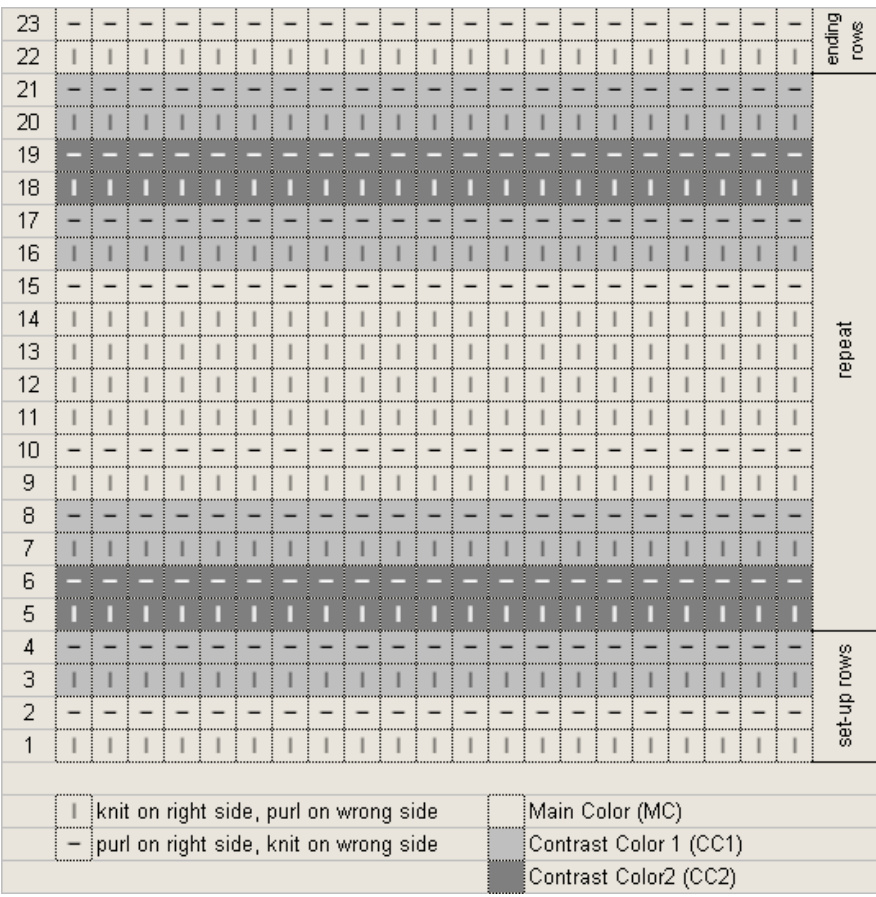
Round 1: in MC join to knit in the round, place marker, knit 22 fringe sts, place marker, knit remaining sts in round. Round 2: in MC purl Round 3: in CC knit Round 4: in CC purl Round 5: in MC knit Round 6: in MC purl Rounds 7 - 11: in MC knit Round 12: in MC purl Round 13: in CC knit Round 14: in CC purl Round 15: in MC knit Round 16: in MC purl Repeat rows 3 - 16 twice. Follow the chart if you prefer. Always change colors in the center of the steek. This will ensure that the fringe is the correct length on both ends of the scarf.
Cast off row:
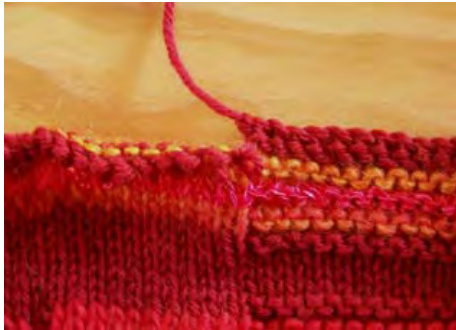
Knit across steek stitches. Cast off scarf stitches loosely. End by pulling the yarn through the last loop of the scarf stitches as shown to the left. Trim the tail to about 9 inches.
Finishing:
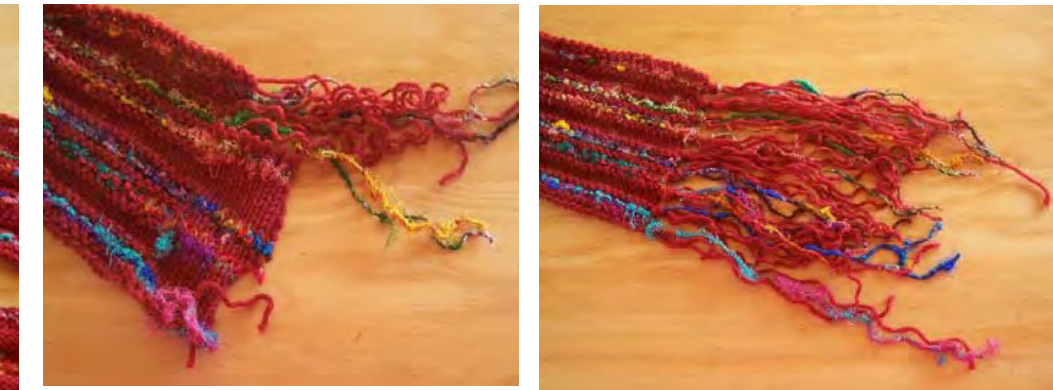
Cut the steek between the center two steek stitches (where new yarns were joined & colors changed). Unravel fringe and knot i in groups of 4-5 strands. Hand wash gently and lay out flat, block to desired shape, allow to air dry. The kinks in the fringe will disappear after the yarn gets wet. Trim fringe to a uniform length (should be at least 7 inches).
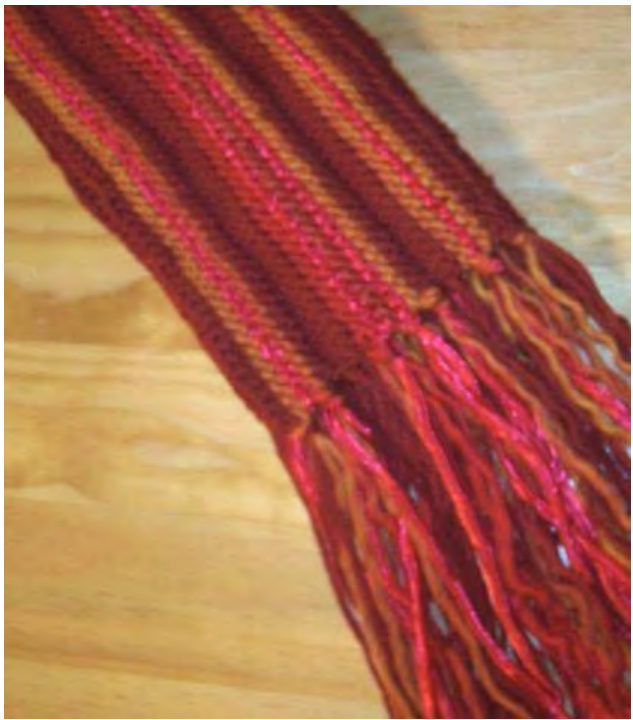
Finished Dimensions: 5.25 inches wide $\times\,60$ inches long
Tips:
· It doesn't matter if the join is twisted since it will be cut open, but it is easier if it isn't twisted. · Knit all steek stitches; it helps you to clearly see where the steek begins and ends. I use a stitch marker at the beginning and at the end of the steek.
Ideas for Customizing:
· Vary the rows or colors used. · Work in seed or moss stitch. · Add a row of \*k2tog, yo\* ending k1 (requires an odd number of stitches in the scarf area (see the chart at right). · Make a scarf using bits and pieces of left over yarn. The pieces can be as short as the length needed for one row.

Pattern doesn't make sense? You found an error? Have a question? Contact me at miss_maia@hotmail.com. Larger pictures along with corrections and questions regarding this pattern will be answered at http://maiaspins.typepad.com/maiaspins/2006/09/scarf_around.htmi. $\circledcirc$ 2006 Maia Discoe, Dea Terra You may use this patrn for prsonal use, gifts, orfor charitable donations. Copies of this pate maybe made as long as th pattern is unchanged and contains all copyright and contact information. This pattern may not be sold, given away by yarn stores, or used to create items for profit without my written consent.


