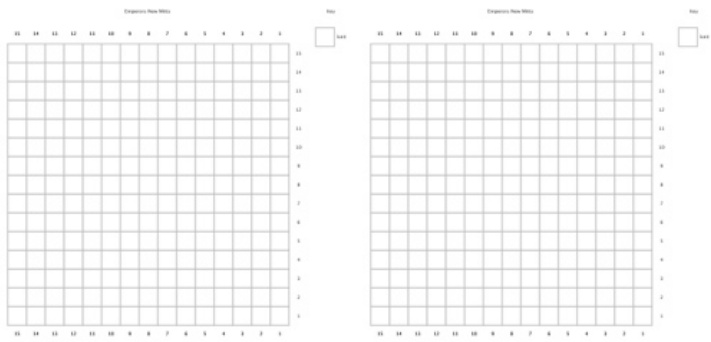
The Emperor's New Mitts
designed by Louise Zass-Bangham, !st April 2012 These Mitts were designed in response to a challenge on the Fingerless Gloves Fanatics Forum for the April 2012KAL. This spectacular pattern for the Emperor involves all possible knitting techniques known to man or woman. It includes cables, bobbles, stripes, entrelac, intarsia, mock cables, twisted stitches, nupps, beading, log cabin, buttons and embroidery. You will need to be confident atreadingchartsforlace and fairisle.You will need to be adept at knitting in the round at a very finegauge.
Size
Four sizes are given to fit Baby, Child, Woman, Man
Materials
·Rumplestiltskin 100% pure spun gold, 10,000m per 25g skein. 1 skein. ·Rumplestiltskin 100% pure spun white gold, small amount for stripes & colourwork ·Unicorn 100% gold rainbow yarn, small amount ·Jason's gold fun fur/eyelash yarn, small amount ·3,000 gold beads ·Set 0.5mm/US 8/0 double pointed needles ·Stitch markers, cable needle, crochet hook for placingbeads
Yarn Alternatives: If the pure spun gold is out of your budget, substitute straw instead, also available from Miller's Daughter Enterprises.
Tension
100 sts x 136 rows to 10cm/4" square over st st
Tips You may find a magnifying glass useful.

To make
About the designer
Louise loves designing pieces that are fun to knit and look great. She has a passion for colour, form and fit. Read her blog at inspirationknits.wordpress.com or find more of her work on www.ravelry.com designer list as Louise Zass-Bangham.
Thank you so much for downloading the pattern.
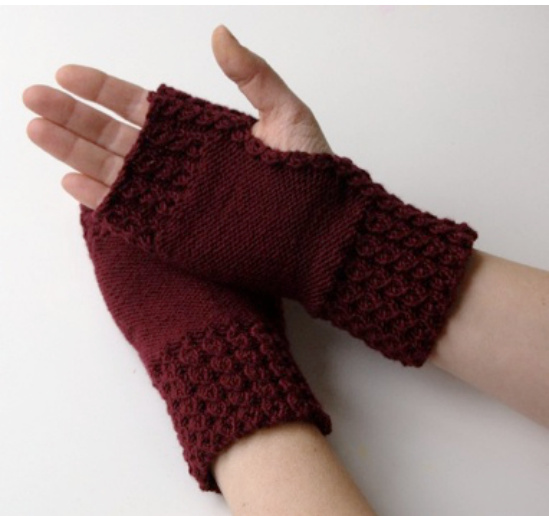
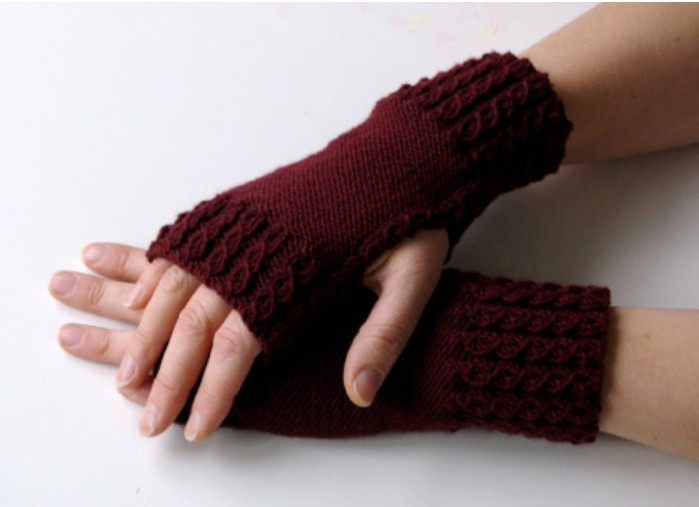
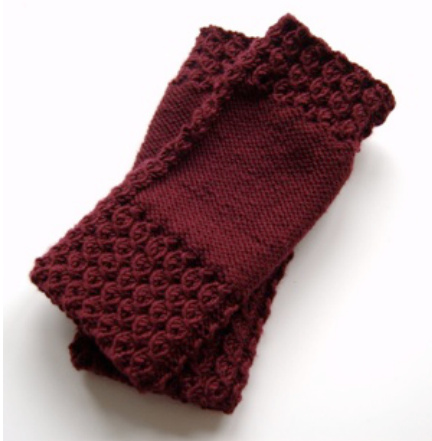
I was threatened with having this pattern pulled by Ravelry if it didn't have an actual pattern inside, so I am against the clock here - it's gone midnight in the UK and I am typing as fast as I can. I totally understand their point that it isn't a pattern without, well, a pattern, so here are some lovely Mitts you can really knit. Ideal for milder weather, these lovely mitts make a great gift. Worked in eyelet-rib and reverse stocking stitch, they are much simpler and quicker towork than mini-cables but lookjust as complex. The mitts are worked flat with the seam cleverly hidden in a furrow of rib. A decorative line of eyelet-rib borders the thumbhole opening.
Size
Measure around widest part of your hand: S/M to fit 18cm/7" S/M will fit an average woman's hand. L to fit 21cm/ 812" L will fit a large woman's hand or average man. In the pattern, instructions for the smallest size are given first, followed by the larger size in brackets, for example 18 (21). Circle your chosen size before you start.
Materials
·MillaMia Naturally Soft Merino 125m/50g, 2 balls Claret or colour of yourchoice ·3mm/US 2&3.25mm/US 3needles ·Darning needle to sew seam
Tension
rows to 10cm/4" square over reverse stocking stitch using 3.25mm/Us 3 needles or size required tc Ssion.
Tips
The stitch count changes during the pattern repeat. If you want to count the stitches you have, be sure to check how many stitches you should have at the end of that row. If you are a novice, you can avoid the two most difficult stitches in the pattern by substituting easier alternatives which you will barely notice when finished. You can avoid “purl 2 together through back of loop" and “purling front and back stitch to make 2 sts from 1" by substituting the following simplified rows: Row 32: p2tog, p2, k to last 5 sts, p2, p2tog. 39 (47) sts. Row 50: cast on 2 sts, k the 2 sts just cast on, p1, yrn, p1, kto last 2 sts, p1, yrn, p1 Row 51: cast on 2 sts, p the 2 sts just cast on, k3, p to last 5 sts, k3, p2 Row 57: p2, sl1 kwise, k2, psso, yrn, p1, (k2, p2) to last 5 sts, sl1 kwise, k2, psso, p2. 42 (50) sts. If you plan to do this, circle the rows on the pattern overleaf before you start so that you don't miss them!
Abbreviations
kknit kwise knitwise (as if to knit) ppurl p2tog purl next 2 stitches together pfb purl into the front and then the back of st before dropping it off the left needle, making 2 sts from 1 psso pass slipped st over sts just worked rep repeat RS right side sl slip stitch st stitch sts stitches tbl through back loop(s) of stitch(es) WS wrong side yrn yarn round needle
To make
Cuff: Using smaller needles, cast on 54 (62) sts using cable or other stretchy cast on. row 1 (RS): (p2, k2) repeat to last 2 sts, p2. row 2: (k2, p1, yrn, p1) rep to last 2 sts, k2. 67 (77) sts. row 3: (p2, k3) rep to last 2 sts, p2. row 4: (k2, p3) rep to last 2 sts, k2. row 5: (p2, sl1 knitwise, k2, psso) rep to last 2 sts, p2. 54 (62) sts. row 6: (k2, p1, yrn, p1) rep to last 2 sts, k2. 67 (77) sts. row 7: (p2, k3) rep to last 2 sts, p2. row 8: (k2, p3) rep to last 2 sts, k2. 67 (77) sts. rows 9-20: work rows 5-8 another 3 times ending with RS facing for next row. Your cuff has 5 eyelets up each rib.
Lower hand: row 21 (RS): (p2, sl1 knitwise, k2, psso) rep to last 2 sts, p2. 54 (62) sts. row 22: k2, p1, yrn, p1, (k2, p2tog) rep to last 4 sts, p1, yrn, p1, k2. 45 (51) sts. Change to larger needles. row 23: p2, k3, ptog 1(0) times, p to last 7 (5) sts, p2tog 1(0) times, k3, p2. 43 (51) sts. row 24: k2, p3, k to last 5 sts, p3,k2. row 25: p2, sl1 kwise, k2, psso, p to last 5 sts, sl1 kwise, k2, psso, p2. 41 (49) sts. row 26: k2, p1, yrn, p1, k to last 4 sts, p1, yrn, p1, k2. 43 (51) sts. row 27: p2, k3, p to last 5 sts, k3, p2. row 28: k2, p3, k to last 5 sts, p3, k2. row 29: p2, sl1 kwise, k2, psso, p to last 5 sts, sl1 kwise, k2, psso, p2. 41 (49) sts. row 30: k2, p1, yrn, p1, k to last 4 sts, p1, yrn, p1, k2. 43 (51) sts. row 31: p2tog, k3, p to last 5 sts, k3, p2tog. 41 (49) sts. row 32: p2tog tbl, p2, k to last 4 sts, p2, p2tog. 39 (47) sts. Around thumbhole: Attach marker at both ends of row to mark start of thumbhole. row 33 (RS): sl1 kwise, k2, psso, p to last 3 sts, sl1 kwise, k2, psso. 37 (45) sts. row 34: p1, yrn, p1, kto last 2 sts, p1, yrn, p1. 39 (47) sts. row 35: k3, p to last 3 sts, k3. row 36: p3, k to last 3 sts, p3. rows 37-48: work rows 33-36 another 3 times (4 times total) ending with RS facing for next row. Top: row 49 (RS): sl1 kwise, k2, pss0, p to last 3 sts, sl1 kwise, k2, psso. 37 (45) sts. Topofmitt: Attachmarkeratbothendsofrowtomarkendofthumbhole. row 50: pfb, yrn, p1, k to last 2 sts, p1, yrn, pfb. 41 (49) sts. row 51: pfb, k3, p to last 4 sts, k3, pfb. 43 (51) sts. row 52: k2, p3, k to last 5 sts, p3, k2. row 53: p2, sl1 kwise, k2, pss0, p to last 5 sts, sl1 kwise, k2, psso, p2. 41 (49) sts. row 54: k2, p1, yrn, p1, k to last 4 sts, p1, yrn, p1, k2. 43 (51) sts. row 55: p2, k3, p to last 5 sts, k3, p2. row 56: k2, p3, k to last 5 sts, p3, k2. Change to smaller needles. row 57: p2, sl1 kwise, k2, psso, pfb, (k2, p2) to last 5 sts, sl1 kwise, k2, psso, p2. 42 (50) sts. row 58: (k2, p1, yrn, p1) rep to last 2 sts, k2. 52 (62) sts. row 59: (p2, k3) rep to last 2 sts, p2. row 60: (k2, p3) rep to last 2 sts, k2. row 61: (p2, sl1 kwise, k2, psso) rep to last 2 sts, p2. 42 (50) sts. row 62: (k2, p1, yrn, p1) rep to last 2 sts, k2. 52 (62) sts. row 63: (p2, k3) rep to last 2 sts, p2. row 64: (k2, p3) rep to last 2 sts, k2. rows 65-68: work rows 61-64 once more ending with RS facing for next row. The top has 3 eyelets up each rib. Row 69: (p2, sl1 kwise, k2, psso) rep to last 2 sts, p2. 42 (50) sts. Cast off loosely on WS in rib, working sts as they lie. Cut yarn. 3am using mattress or back stitch, remembering to leave the thumbhole open between the markers. Weave-in yarn ends on wrong side. Wear with pr


