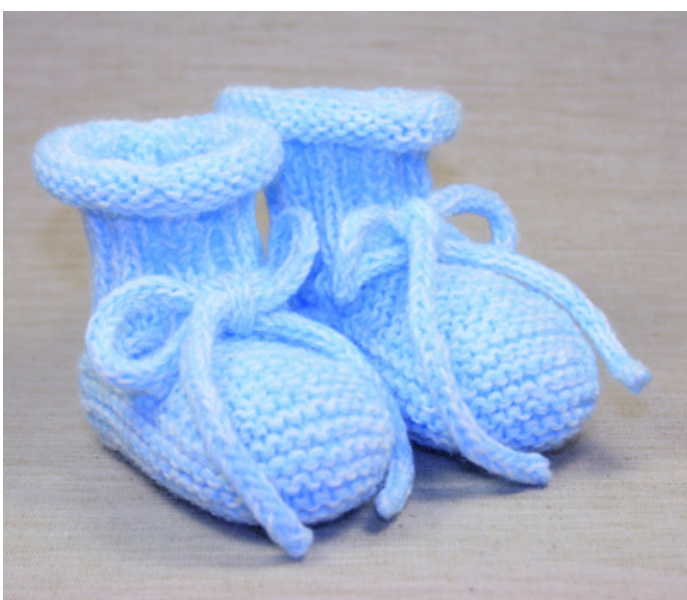
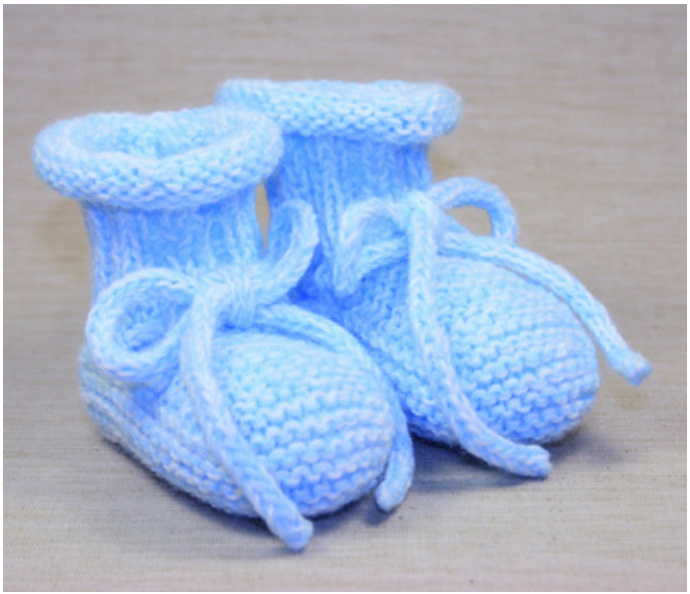
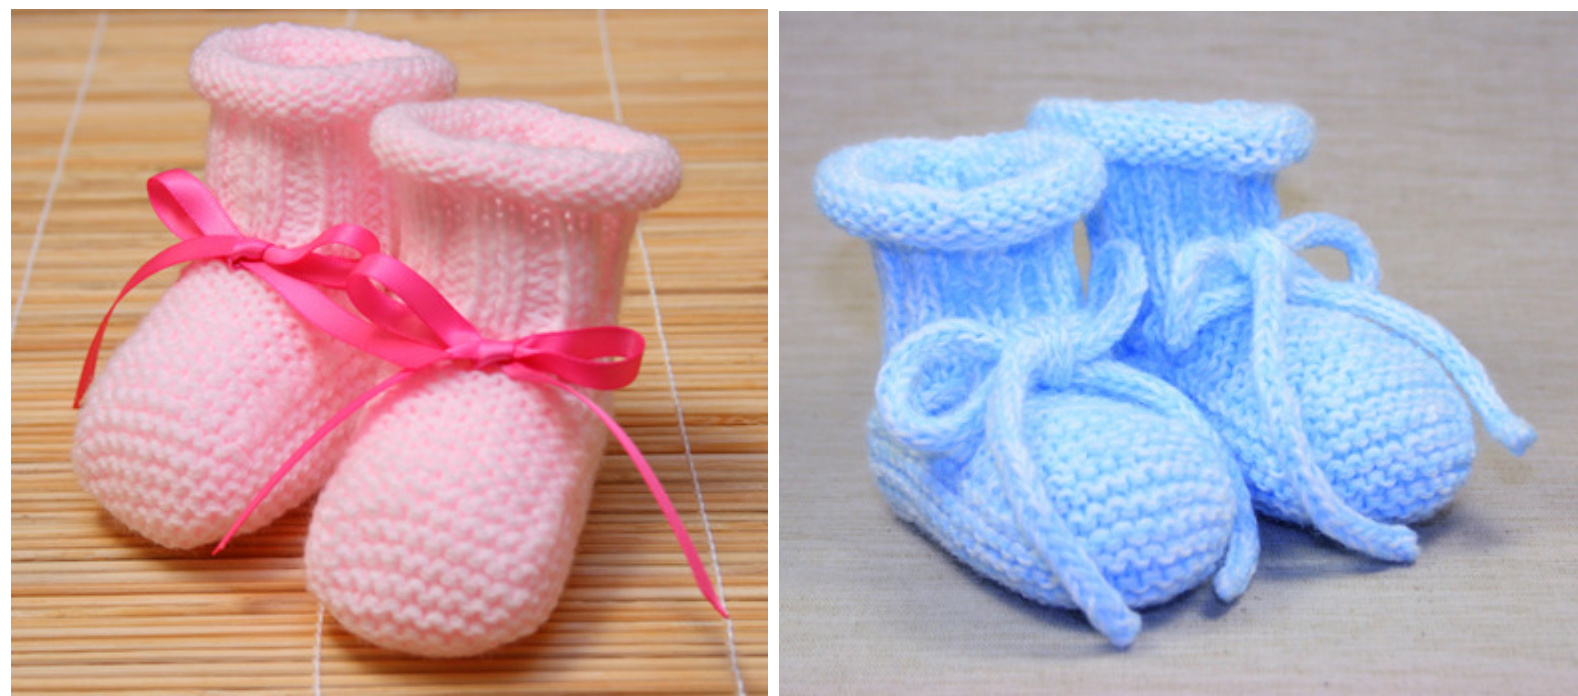
"Nube" variegated baby booties
ENGLISH-STANDARDAMERICANTERMS (see spanish version below - ver la version en espanol mas abajo)
MATERIALS
Super fine fingering baby yarn in two colors. The sample booties are knit out of "Nene" yarn, from Ovillos.com.
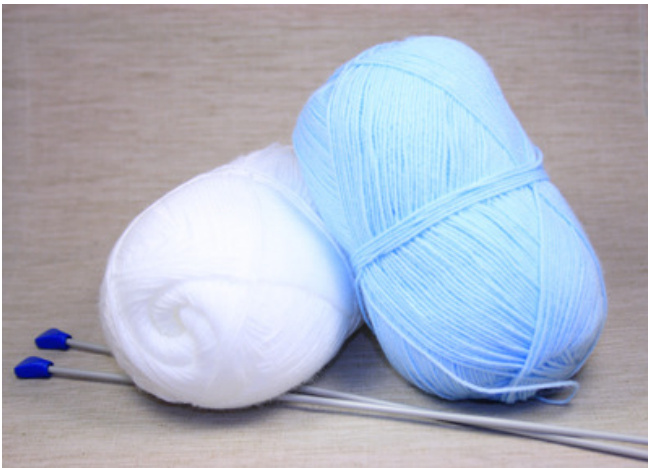
SIZE 0-3 months Knitting needles in size needed to obtain gauge Two double pointed needles of same or similar size Tapestry needle
GAUGE
4X $4^{\mathfrak{s}}$ $^{10\mathrm{~x~}10\mathrm{~cm}.}$ )in stockinette stitch: 26 stitches x 35 rows Sole is 3,74" $(9,5\;\mathrm{cm})$ long, approx.
STITCHES USED
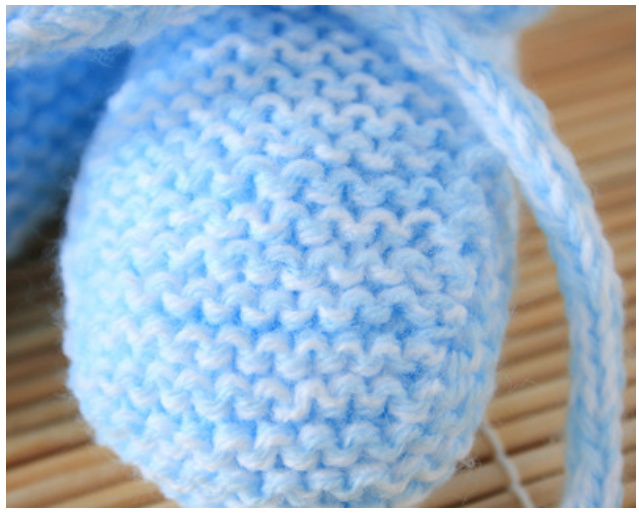
Garter stitch (knit all rows) Stockinette stitch (knit one row, purl one row) 2/2 ribbing (knit 2 stitches, purl 2 stitches)
ABBREVIATIONS
k: knit p: purl k2tog: knit two together m1: make 1 yo: yarn over kfb: knit front and back of a stitch. Video demo: http: / /www.youtube.com/user/Helenasweetknits#p/u/8/Z0JYOrYIDj4 You can watch short video demos of all this stitches on my YouTube channel http: / /www.youtube.com/user/Helenasweetknits
PATTERN
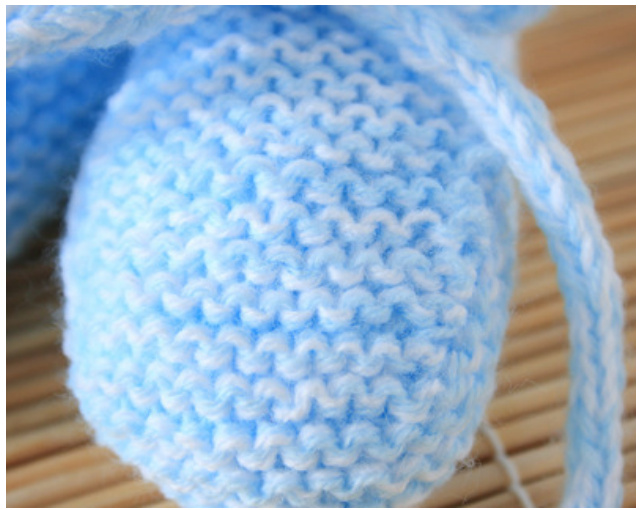
This booties are made with two strands of yarn knit together, resulting in an interesting variegated pattern.
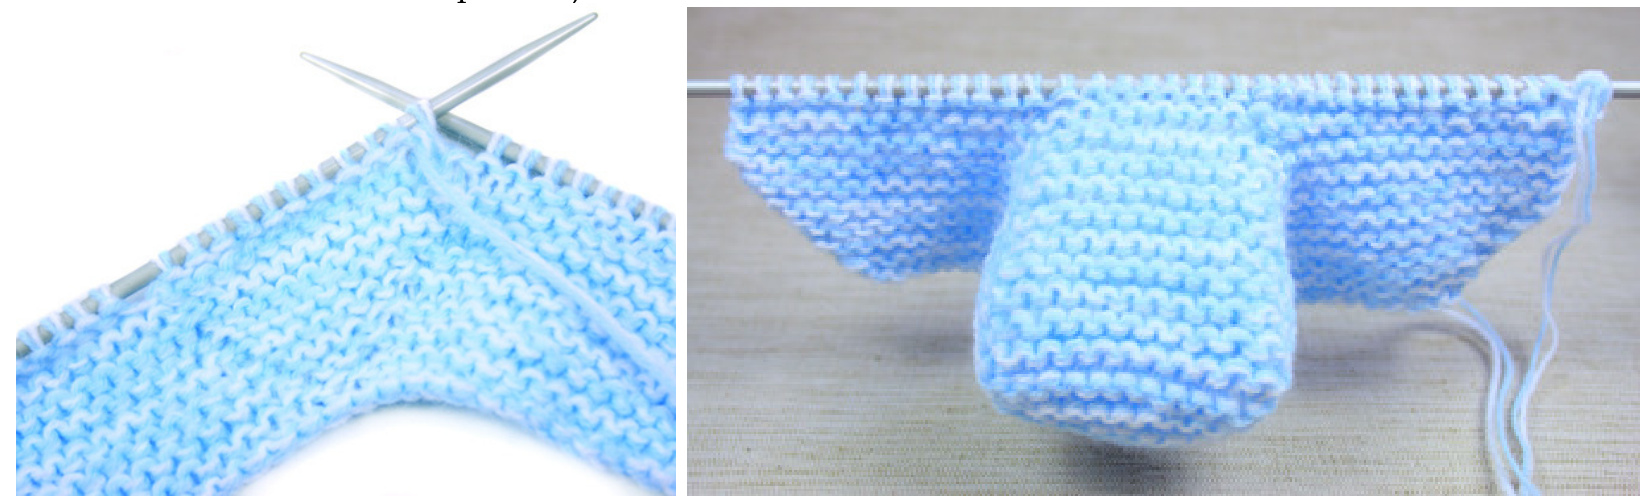
SOLE
Cast on 37 stitches. ROW 1 : knit ROW 2 : knit ROW 3 :kfb, k17, m1, k1, m1, k17, kfb ROW 4 : knit ROW 5 : kfb, k18, m1, k3, m1, k18, kfb ROW 6 : knit ROW 7 : kfb, k19, m1, k5, m1, k19, kfb ROW 8 : knit ROW 9 : kfb, k20, m1,k7, m1, k20, kfb ROW 10 :knit ROW 11 : kfb, k21, m1, k9,m1, k21, kfb ROW 12 :knit Now you have 57 stitches.

Knit 4 more rows.
INSTEP
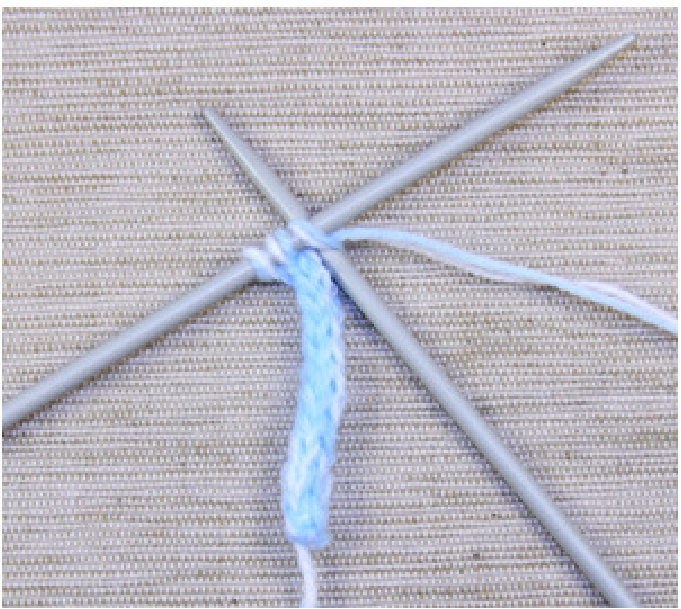
Instep is worked with short rows, so you need to turn your work before the end of the row.
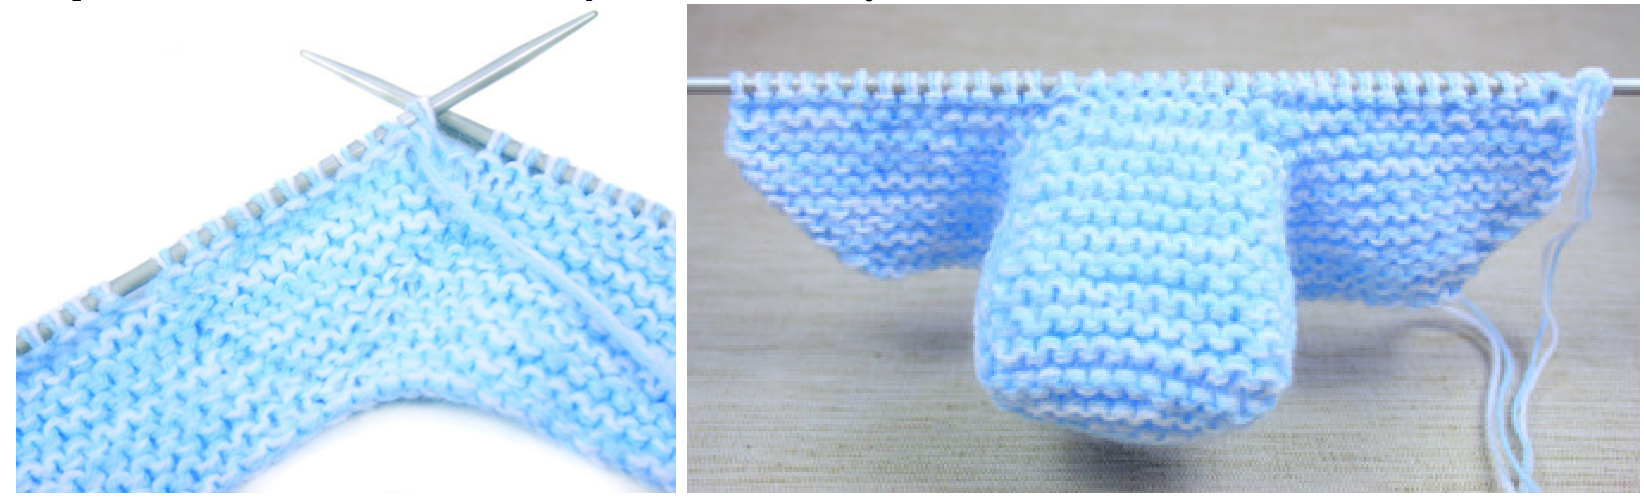
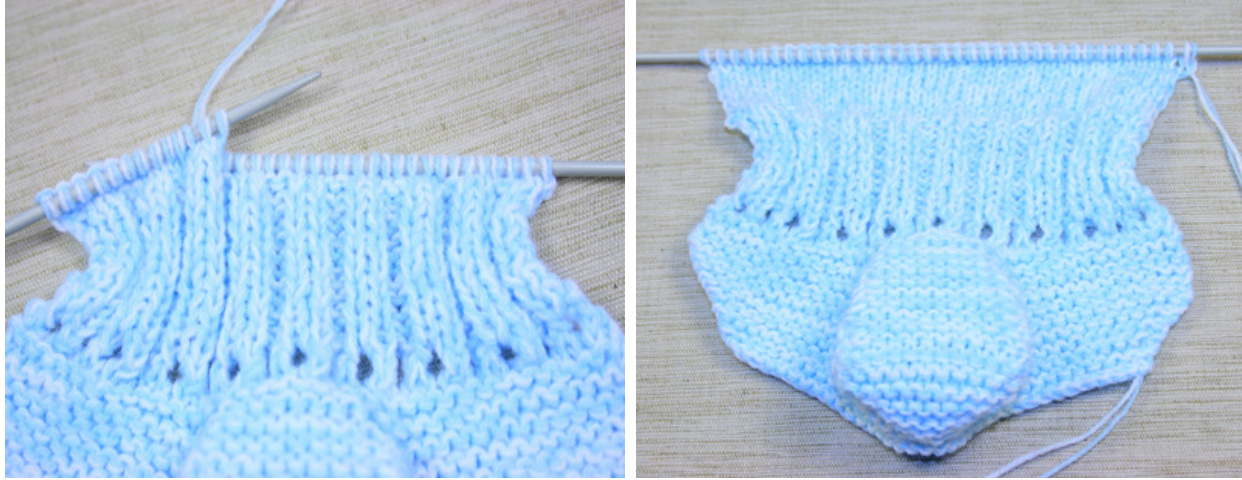
ROW 1: k33, k2tog, turn your work ROW 2: k10, k2tog, turn ROWS 3 a 19: k10, k2tog, turn ROW 20: k10, k2tog, k13 ROW 21: k23, k2tog, k12 ROW 22: knit 36 stitches remaining.
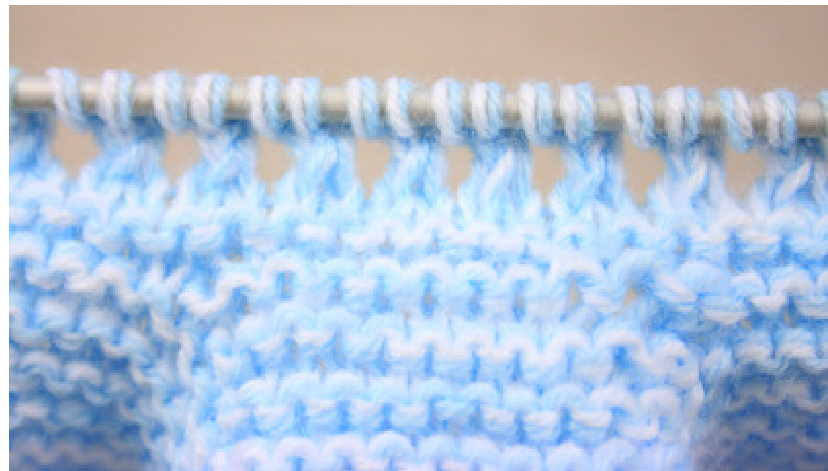
EYELET ROWS
ROW 1: knit ROW 2: purl ROW 3: \*k2tog, yo\* repeat from \* to \* until end of row ROW 4: purl Check that you still have 36 stitches.
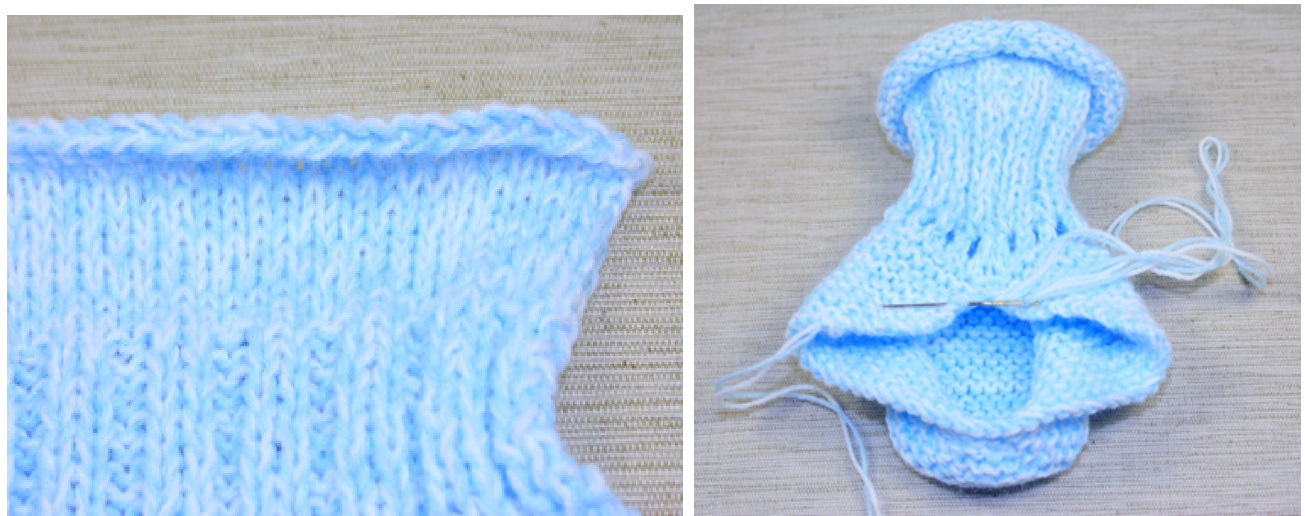
LEG
Continue in 2/2 ribbing for 12 rows, and in stockinette stitch for 10 more rows.
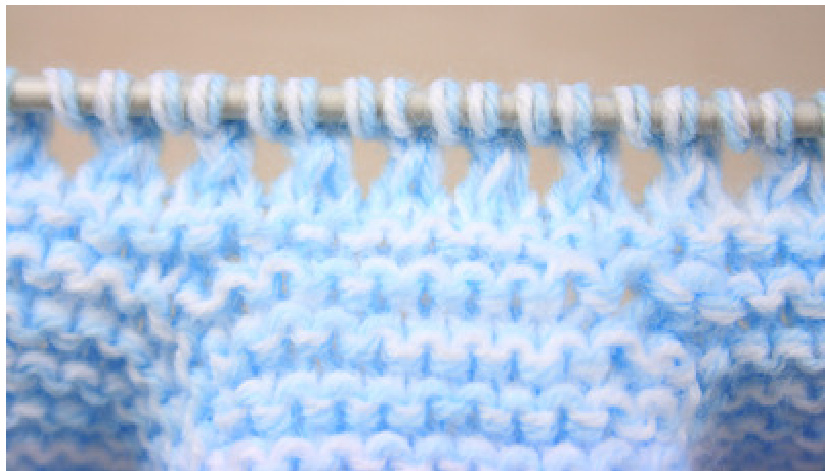
Cast off using elastic bind-off. (watch video) http: / /www.youtube.com/user/Helenasweetknits#p/u/0/oqG5kjOs0b8
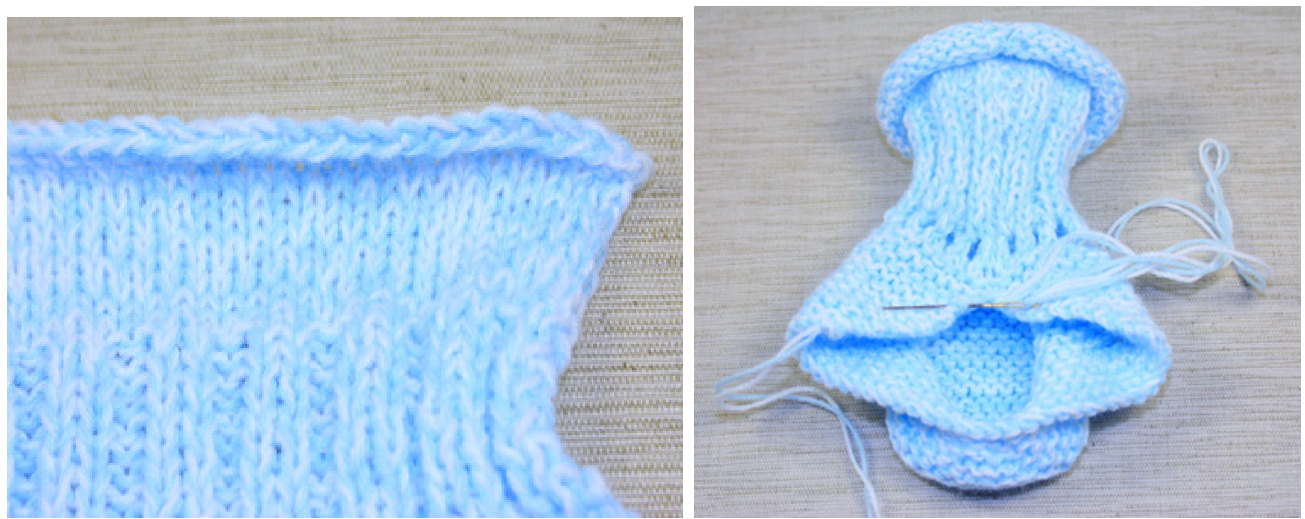
Sew and weave in ends.


Using two double pointed needles, work 2 I-cords of approximately $20^{\circ}$ $50\;\mathrm{cm}.$ )as follows: Cast on 3 stitches. \*Knit all 3 stitches, slide those stitches to the other end of needle ready to work the next row\*. Repeat from \* to \* until desired length. Watch video demo: http: / /www.youtube.com/user/Helenasweetknits#p/u/1/zY9ybYROPlA Thread I-cords through eyelets row. Make second bootie equal This booties are really cute too with satin ribbons instead of I-cords.

CONGRATULATIONS!!!YOU'RE DONE!!! \*\*\*\*\*\*\*\*\*\*\*\*\*\*\*\*\*\*\*\*\*\*\*\*\*\*\*\*\*\*\*\*\*\*\*\*\*\*\*\*\*\*\*\*\*\*\*\*\* This is a free pattern from www.HelenaSweetKnits.blogspot.com . Please, do not duplicate or distribute in any way. However, you may sell items made from this pattern. Please kindly include an acknowledgement that it is made from a HelenaSweetKnits pattern. If you find any mistakes or have a question, please contact me at sweetknitsblog@yahoo.es Come visit my Etsy shop: www.HelenaSweetKnits.etsy.com . Thank you very much.
Patucos “Nube"jaspeados eu dos colores
ESPANOL
MATERIALES
Lana de bebe de la mas finita en dos colores. El ejemplo esta realizado con lana Nene, de Ovillos.com. Agujas de hacer punto del numero adecuado para obtener los puntos de la muestra Dos agujas de doble punta del mismo numero o similar

Aguja de coser lana sin punta
MUESTRA
$10\mathrm{~x~}10\ \mathrm{cm}$ . en punto de jersey: 26 puntos x 35 pasadas TALLA 0-3 meses
MEDIDAS DE LA PRENDA TERMINADA
$^{9,5}\,\mathrm{cm}$ . de largo de suela aproximadamente
PUNTOS USADOS
Punto de musgo (todas las pasadas del derecho) Punto jersey (una pasada del derecho y una del revés) Elastico 2/2 (dos puntos del derecho, dos puntos del reves)
ABREVIATURAS
PAS: Pasada der: punto del derecho rev: punto del revés aum: aumento (aumentar cogiendo la hebra de la pasada anterior) 2pjun: hacer dos puntos juntos heb: aumentar echando una hebra tdd: tejer el punto por delante y por detras (ver video) httn· / /wvww voiitihe com /nrofile?ol $\equiv$ IS&.11ser $:=$ Helenasweetknits#n/ tecnica para hacer un aumento al principio y al final de una pasada, porque me resulta mas comodo, pero se puede sustituir por un aumento normal cogiendo una hebra de la pasada anterior, despues del primer punto y antes del ultimo) Puedes ver videos detallados de la realizacion de estos puntos y técnicas en mi canal de YouTube http: / /www.youtube.com/user/Helenasweetknits
REALIZACION
Los patucos se tejen con dos hebras de lana, una de cada color, juntas, lo que resulta en un efecto jaspeado.
SUELA
Montar 37 puntos. PAS 1: der PAS 2 : der PAS 3 :tdd, 17 der, 1 aum, 1 der, 1 aum, 17 der, tdd PAS 4: der PAS 5 : tdd, 18 der, 1 aum, 3 der, 1 aum, 18 der, tdd PAS 6 : der PAS 7 : tdd, 19 der, 1 aum, 5 der, 1 aum, 19 der, tdd PAS 8 : der PAS 9 : tdd, 20 der, 1 aum, 7 der, 1 aum, 20 der, tdd PAS 10 : der PAS 11 :tdd, 21 der, 1 aum, 9 der, 1 aum, 21 der, tdd PAS 12:der Tenemos 57 puntos.

Hacer 4 pasadas mas a punto de musgo.
EMPEINE
(el empeine se trabaja con pasadas acortadas, cuando se indica "girar", dar la vuelta a la labor, como si ya hubiéramos terminado la pasada)
PAS 1: 33 der, 2pjun, girar PAS 2: 10 der, 2pjun, girar PAS 3 a 19: 10 der, 2pjun, girar PAS 20: 10 der, 2pjun, 13 der PAS 21: 23 der, 2pjun, 12 der PAS 22: der Tenemos 36 puntos.
PASACINTAS
PAS 1: der PAS 2:rev PAS 3: \*2pjun, heb\* repetir de \* a \* hasta el final PAS 4: rev Comprobar que seguimos teniendo 36 puntos
PIERNA
Continuar en elastico 2/2 durante 12 pasadas y en punto de jersey durante 10 pasadas mas.

Cerrar todos los puntos utilizando un cierre elastico (ver video) http: / /www.youtube.com/user/Helenasweetknits#p/u/0/oqG5kjOs0b8
Coser y esconder las hebras

Usando las dos agujas de doble punta, trabajar 2 cordones tejido (I-cord) de aproximadamente $50\ \mathrm{cm}.$ , de la siguiente manera: Montar 3 puntos. \*Tejer los 3 puntos del derecho, deslizarlos hasta el otro extremo de la aguja y hacer la siguiente vuelta\* (la hebra quedara en el lado contrario al normal) Repetir de \* a \* hasta tener la longitud deseada. Ver envideo: http:/ /www.youtube.com/user/Helenasweetknits#p/u/1/zY9ybYROPlA Pasar los cordones por los pasacintas. Hacer el otro patuco igual. Estos patucos quedan muy bien también con una cinta de raso en lugar del cordon.
FELICIDADES. YA HAS TERMINADO!!! \*\*\*\*\*\*\*\*\*\*\*\*\*\*\*\*\*\*\*\*\*\*\*\*\*\*\*\*\*\*\*\*\*\*\*\*\*\*\*\*\*\*\*\*\*\*\*\*\* Este es un patron gratuito de www.HelenaSweetKnits.blogspot.com , por favor no lo dupliques, redistribuyas ni vendas; sin embargo, si lo deseas, puedes usarlo para hacer prendas para vender, tanto en tiendas como online. Si tienes cualquier duda o encuentras un error, puedes contactar conmigo en sweetknitsblog@yahoo.es Si te ha gustado puedes ayudarme visitando mi tienda en Etsy www.HelenaSweetKnits.etsy.com , y recomendandola a tus familiares y amigos. Muchas gracias.


