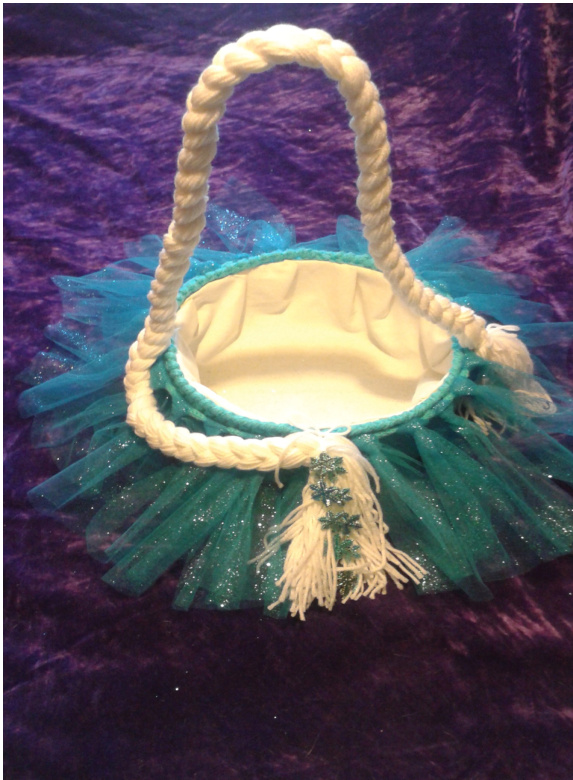
Double Duty Frozen Inspired Easter Basket/Dress Up By Loretta Elmore

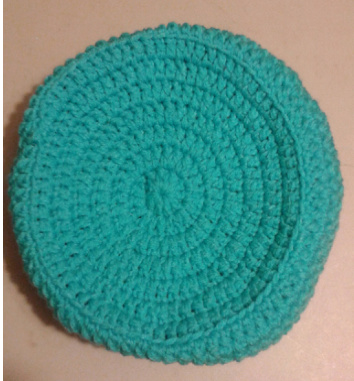
Tutu and Braid Removes to be used for dress up play late Yarn-Red Heart SS Hook - sz I Gauge isn't really too important Basket Measure's 10" diameter x 5" tall, you can make yours what size you like. Stitches used are Double Crochet and the Crab Stitch also known as backward SC. Supplies Needed Yarn- I used turquoise color and white Hair Barrette, if you want the handle to be removable for dress up hair Fabric for the liner sure does make the basket nice. Something sturdy for the inside to support the basket, I used upholstery Skirt board, but you could use a cookie tin or plastic canvas, pretty much anything that will stay stiff and make a circle. If using a cookie tin make your basket the size to fit it tight. Tulle, I bought the glitter tulle at Walmart 6'x 15 yards Crochet stretchy headband or Ribbon to tie the tulle to, to make the removable tutu. Some kind of Snow Flake Bling , I had some snowflake christmas garland from Hobby lobby. Basket Directions With 2 strands of Aqua Bottom: Is worked in the round no joining of rows Round 1. Ch 3, dc in 3rd ch from hook and in each stitch around Round 2. 2 dc in each dc around Round 3.( 2dc in first st 1dc in next st.) around Round 4.( 2 dc , 1dc, 1dc) around Round 5.( 2 dc, 1 dc, 1dc, 1dc ) around Round 6. ( 2 dc, 1dc,1dc,1dc,1dc) around Round 7. (2dc , 1dc,! dc, 1dc, 1dc, 1dc) around. hdc in next st. sc in back loop of next st.
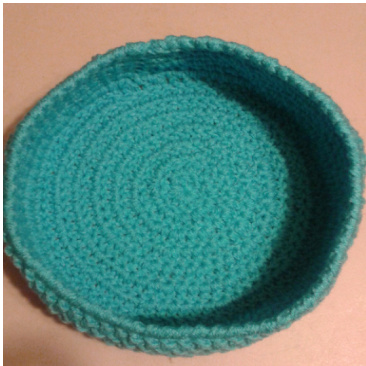
Basket side:
Round 1.Ch 2, Dc in back loops only in each st. around, slip st to top of first ch 2 Round 2-6. slip stitch into space between the 1"t and 2"d dc,( ch 2, double crochet in each space around) Round 7. Crab Stitch or AKA: Backward sc around the top edge.
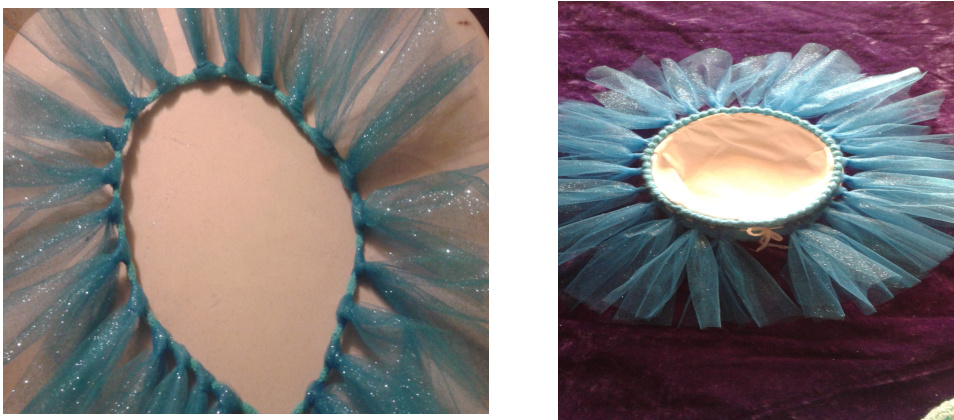
Skirt Board or tin can: If what ever you use for the inside sides make sure it fits tight to give the basket strength. I used skirt board and sewed the ends together to form a circle, I made it a little bigger than the basket so the basket would stretch tight on it. Liner: Cut a circle big enough to lay in your basket the Diameter plus the height of the basket it doesn't hurt to add an inch extra you will be hemming the edge over and blind stitching it to the edge of the basket. I hand blind stitched mine you can use your machine to stitch it making pleats as you go around, its a good Idea to pin your liner in how you want it before you start sewing it. Now you should have a pretty lined Basket.

TuTu: Take the Tulle and cut it into pieces however long you want the tutu to be doubled. You will be folding it in half , so half of what you cut will be your finished length. Now you will attach the tulle to either a piece of ribbon or you can use the stretchy crochet headband stuff that you can get at your local craft store. Or elastic, what ever will make a nice stretchy tutu that will fit around the basket and the child's waist. If you have never made a tutu, just google Diy Tutu and you will get all kinds of great directions. Once you have your tutu made you can put it around your basket. If using Ribbon you might thread the ribbon through a stitch or 2 on the basket before tying it closed to help secure it to the basket and leaving it so it is removable. Now you should have a pretty basket with a tutu.
Braid: Cut long lengths of the White Yarn, I cut mine about 8 ft, I have a big fabric spool that I wrap mine around from end to end, to keep it the same length, it makes cutting it easier. You will want a thick braid so it will stand up, big enough to be thick, but not uncomfortable to hold, and enough length to add extra to swing around the front to look pretty. Its better to cut your yarn a little long than too short you can always cut off the extra later. Hold all cut yarn ends together take a piece of yarn and tie around the yarns about 4-5" up. Be sure to tie it tight so it can't come undone. Now you need to make a long braid, when it is long enough tie it off with a piece of yarn just like at the beginning leaving 4 or 5" for fringe. Cut off any extra.
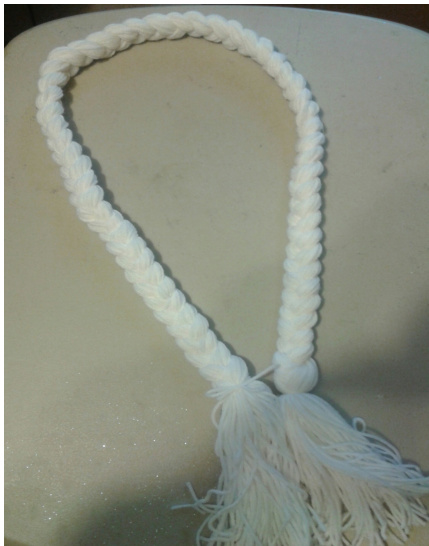
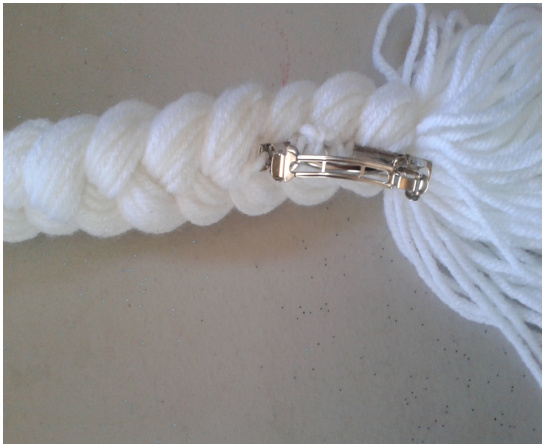
Attaching braided Handle
I used a metal Barrette, the kind that they use on hair bow's, I attached it with yarn on the inside of the end of the braid, this will attach to the left side of the basket, stitch it securely to the braid making sure to stitch under the hump on the barrettes so you don't obstruct it from closing properly. Attach it to the basket by sliding the barrette into the stitches grabbing as many stitches as you can so it will have a secure hold on the basket, after all this is the handle as well. Then hold the braid up like you would like it to stand with the tail wrapped to the front. Take a piece of yarn and string through the backside of the braid stitch it through the basket and back around to the front of the braid twice so it holds secure and tie a really tight bow, we want this to be super secure to hold the handle on. Then take the rest of the braided tail and lay it around front of the basket and tie it with a piece of yarn to the top edge of the basket just above the fringe on the braid. The object is to make the braid strong enough for a handle and removable to be used for dress up. You may find a better way. Now you should have a beautiful Easter basket that also serves for dress up later after Easter Holiday is over. Please do not sell my pattern. Do what you want with the baskets you make with my pattern.