Mommy's Varn Atte olls and p
Bye Deepa Thomson-MepardLottie Doll basic body
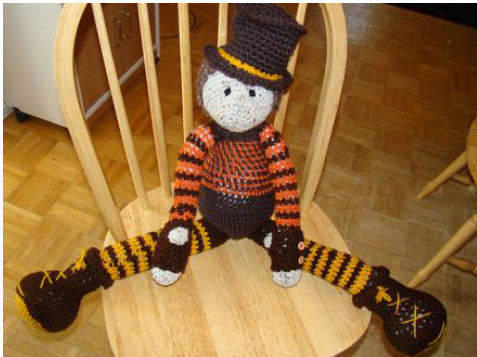
Copyright 2012 Deena Thomson-Menard I have been asked many times how to make my dolls and is there a pattern. Each doll is unique and special but over the course of finding the right look for my dolls, I have compiled notes to the basic body of a Lottie Doll, for my doll group on Raverly "We Make Dolls". These notes are for the body only. With this body you can make any doll your imagination can come up with. Clothing can be made searching Raverly database for doll clothes. BE CREATIVE!MakeyourLottieSHINE!
Materials:
-Any yarn of your choice, one colour for skin, and as many colours as you chose for legs, arms and torso (I like chunky yarn and mill end yarn has many interesting textures perfect for dolls) yes... I said Mill end yarn. Awesome for dolls. - Bernat Soft Bouclé- colour of your choice for hair (you can use any yarn for hair but is recommended it be a textured yarn)- ; H8/5.o0mm hook- (or hook of your choice but hook size will determine doll size - tapestry needle to sew parts together - stuffing of your choice (I use polyester Stuffing) -1 stitch markers for beginning of round Abbreviations: magic loop- Make a loop, pick up yarn and pull through first loop, chain one and now sc into the round circle the amount of sc required. Pull end of yarn to pull tight and not form a hole Sc- insert hook in the second chain stitch through the center of the V and under the back bump-bring yarn over the hook from back to front, and hook yarn-pull yarn through the chain stitch - You now have two loops on the hook-bring yarn over the hook from back to front, hook it and draw it through both loops on the hook Sc2tog- Insert hook in next stitch, yarn over and pull up loop, insert hook in next stitch, yarn over and pull up loop (3 loops on hook), yarn over and draw through all 3 loops on hook.
Crochet head
Row 1-magic loop 6 sc Row 2- (sc1, 2 sc) Row 3 (sc in next 2, 2 sc) Row 4 (sc in next 3, 2sc) Row 5, (sc in next 4, 2sc) Row 6 (sc in next 5, 2 sc) Row 7, (sc in next 6, 2 sc) Row 8 (sc in next 7, 2 sc) Row 9 sc entire round Row 10 sc entire round Row 11 sc entire round Row 12 sc entire round Row 13 (sc u next 8, 2sc) --(this is going to seem HUGE but trust me-- just means you are on right track) Row 14 (sc 7, sc 2tog) Row 15 (sc 6, sc 2tog) Row 16 (sc 5,sc 2tog) Row 17 (sc 4, sc 2tog) Row 18 (sc3, sc 2tog) Row 19 (sc2, sc 2tog) This is a good time to stuff head and add eyes. Remember the open top of the head is the TOP of your dolls head. I place eyes low and shape my face by scrunching it. You should have a slight peak at the bottom I like to use that as a chin. Don't be afraid shape that head and give it personality poke your fingers where you think you want eyes. Bend that head and squish that chin forward. (the chin is where you started with the magic loop)
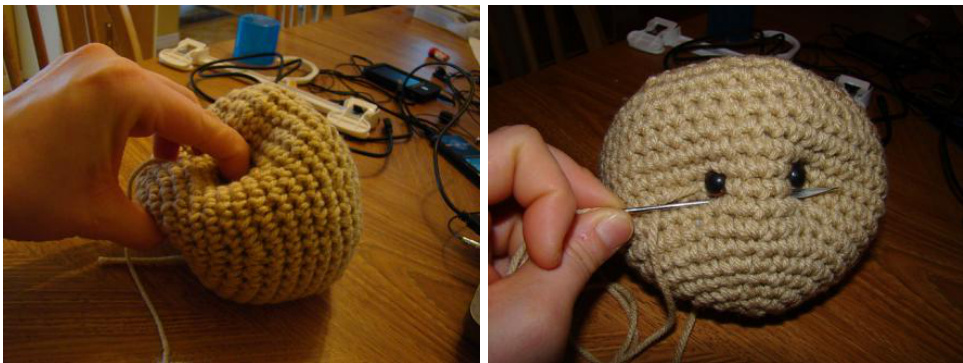
Row 20 (1 sc sc 2tog) Row 21 (sc 2tog) . Cut yarn sew up hole and weave in ends If you need to use some yarn to keep the eyes indented. Do it. Tie the loose yarn in the back it will be covered later anyways. I take the yarn that I sewed up hole and pull it down towards eyes weave out near one eye then through the other and pull (yarn is hidden underneath eyes. This gives a more indented look. Take your needle and fluff his head up to shape it better also. Don't be afraid to shape his head the way you want, remember he is going to have a skullcap covering most of his head that will be used as the bases of his hair. Skull capRow 1-magic loop 6 sc Row2-(2sc in each sc) Row 3- (sc1, 2 sc) Row 4 (sc in next 2, 2 sc) Row 5 (sc in next 3, 2sc) Row 6, (sc in next 4, 2sc) Row 7 (sc in next 5, 2 sc) If skullcap does not cover entire crown repeat one more row of increase until cap covers entirecrown - Sc every row till cap covers entire back Sew cap to head.
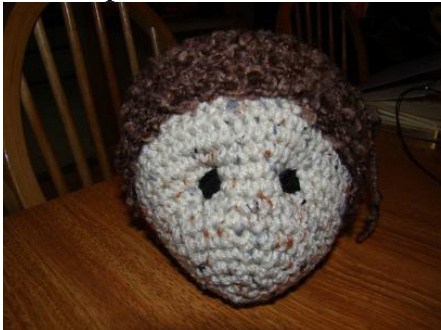
We are going to stop here until doll body is complete. I have discovered that adding the hair AFTER the body is complete keeps it from getting frizzy. So we will do the hair section later. For now our little orphan has a skullcap for hair. As you can see the head is pretty much a basic kind of ROUND ball, just slightly altered so it can be shaped like a head and the beginning can be used as a chin.
Crochet Torso
WARNING you may have extra sc at end of row, just sc them and continue with pattern
1. magic loop 6sc 2. (2sc), slipstitch to beginning of round, chain one--- the 2sc means 2 sc in one Sc PLACE MARKER AND MOVE UP EVERY ROUND 3. sc one round, slip stitching beginning of round, Chain one 4. (sc in next sc, 2sc) slip stitching beginning of round, Chain one 5. sc round -slip stitching beginning of round, Chain one 6. (sc in next 2,2sc) slip stitching beginning of round, Chain one 7. sc round -slip stitching beginning of round, Chain one 8. (sc in next 3,2sc) slip stitching beginning of round, Chain one 9. sc round -slip stitching beginning of round, Chain one 10. (sc in next 4,2sc) slip stitching beginning of round, Chain one 11. sc round -slip stitching beginning of round, Chain one 12. (sc in next 5,2sc) slip stitching beginning of round, Chain one 13-17. sc round -slip stitching beginning of round, Chain one 14. (Sc in next 5,sc2tog) slip stitch beginning of round, Chain one 15-16. sc round -slip stitching beginning of round, Chain one 17. (Sc in next 4,sc2tog) slip stitch beginning of round, Chain one 18-21 sc round -slip stitching beginning of round, Chain one 22. (Sc in next 3,sc2tog) slip stitch beginning of round, Chain one 23-24 sc round -slip stitching beginning of round, Chain one 25-(Sc in next 2,sc2tog) slip stitch beginning of round, Chain one 26-27 sc round -slip stitching beginning of round stuff firm and sew to head. Neck stabilizer chain 6, sc in each chain until it is long enough to wrap around neck, DO NOT MAKE IT SUPER LONG, just enough to wrap around neck FIRM, then sew around neck between Head and torso. This will make head more stable and not so wobbly.
CROCHET ARMS
WARNING you may have extra sc at end of row, just sc them and continue with pattern
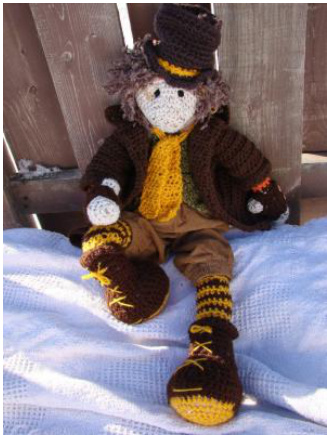
MAKE 2 USE skin colour here Magic loop -sc 6 1.2sc in each sc 2. (sc,2sc) 3-sc row 4-(sc,sc2tog) 5-6- sc row 7. 2sc,4sc,,sc rest of round 8. sc next 3 sc, 2sc in next 5sc, sc rest of round 9. sc next 3sc, sc2tog next 10sc, sc rest of round 10. sc2tog,sc4tog,sc2tog,sc2tog, sc remaining sc 12.sc,2sctog x3, sc rest of row 13-33 sc row- alternate shirt colours every other row or every second row stuff hand and arm (I would stuff it as you crochet it so it isn't hard to do when arm is done) Sew to neck stabilizer nice and secure (the top will be open sew to body and add a little stuffing as you sew it together for added firmness) Fingerless gloves Chain 6 Sc in second chain from hook- sc 5 Sc 15rows Slip stitch to beginning of row to form a round circle Sc in circle now- sc5, chain 5,skip 5 sc, sc remaining row, slip stitch fistsc Chain 1,sc around, slip stitch beginning sc, bind off, cut long tail and sew glove on hole is where thumb goes, sew up seam place button on side Legs WARNING you may have extra sc at end of row, just sc them and continue with pattern Make 2 Magic loop 6sc 1. 2sc in each sc 2, 1sc,2sc 3, sc,sc,2sc 4, sC,sC,sC, 2sc 5, sc,sc,sc,sc, 2sc-change colour after this row 6.sC,SC,SC,SC,SC, 2sC 7. sc round 8.sc in 5sc,sc2tog 9. sc in 4 sc, sc2tog 10. sc in 3sc,2sctog 11. sc in 2sc 2sctog 12. sc in 1sc, 2sctog 13. sc2tog,sc2tog, sc rest of round Sc 27 Rows -ON 7th round- sc in BACK LOOP for 7th round ONLY change colour to striped leg colour continue with sc next 20 rowsWhen leg is done go back to top of boot (the 7th row you sc in back loop) and sc 2, in each back loop, slip stitch to beginning. Sc 2 rounds. Bind off. Take contrasting colour and weave in laces for boots. JHsAIRB- cut strands and rug hook into skull cap, don't go over board because hair can easily over take the doll but do it random and sit your doll back and look at it to see if the hair is doing what you want. Now you have your own basic Lottie Doll. Get creative and dress him/her in fun, funky clothes!
Copyright 2012 Deena Thomson-Menard dthomsonmenard@yahoo.com


